本文主要是介绍ERROR: Could not find a version that satisfies the requirement tensorflow (from versions: none),希望对大家解决编程问题提供一定的参考价值,需要的开发者们随着小编来一起学习吧!
安装tensorflow报这个错,因为未指定tensorflow的版本。
解决方案:
pip install tensorflow==1.9为了下载的快一点可以加上国内镜像的链接,加在上面这句命令后面。
-i http://pypi.douban.com/simple/ --trusted-host pypi.douban.com最后成功安装

解决下述代码的keras找不到报错的问题:
from tensorflow import keras
注意:因为tensorflow版本不一样,所以这句话有好多写法,如1.9的:
from tensorflow.keras.layers import Dense1.3的:
from tensorflow.contrib import keras # This works on tensorflow 1.3总之找到好多都没用,还是要换版本哇,不要用pycharm里面太低的版本,我跟着网上的教程装了Anaconda也不太管用,而且也挺坑的。


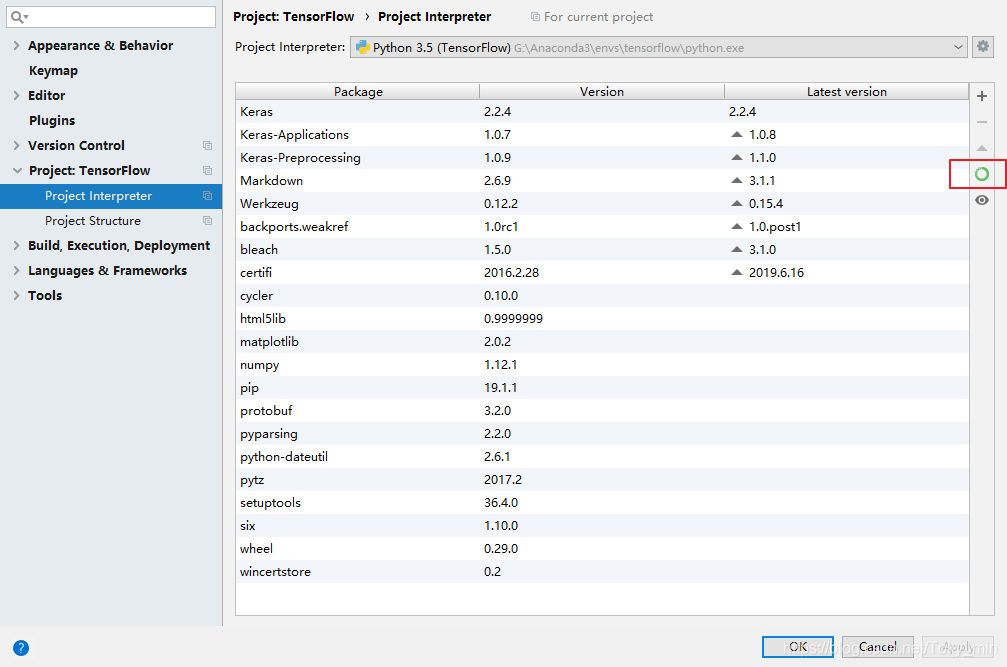
如果你也用的是Anaconda,那在terminal里直接pip install是默认下载到如我这里的最后一个路径,但是如果自己又用的虚拟环境那就有点尴尬了。所以也要注意一下。

来一段我跑成功的代码:(下载数据集可能需要点时间)
import tensorflow as tf
from tensorflow import keras
import numpy as npfrom matplotlib import pyplot as plt# print(tf.__version__)
#class name
class_names = ['T-shirt/top', 'Trouser', 'Pullover', 'Dress', 'Coat','Sandal', 'Shirt', 'Sneaker', 'Bag', 'Ankle boot']
#get data
fashion_mnist = keras.datasets.fashion_mnist
(train_images, train_labels), (test_images, test_labels) = fashion_mnist.load_data()
#First processing
#show src pic
# plt.figure()
# # plt.imshow(train_images[0])
# # plt.colorbar()
# # plt.grid(False)
# # plt.show()
#processing
train_images = train_images / 255.0
test_images = test_images / 255.0#training 25 pic
plt.figure(figsize=(10,10))
for i in range(25):plt.subplot(5,5,i+1)plt.xticks([])plt.yticks([])plt.grid(False)plt.imshow(train_images[i], cmap=plt.cm.binary)plt.xlabel(class_names[train_labels[i]])
#neural model
model = keras.Sequential([keras.layers.Flatten(input_shape=(28, 28)),keras.layers.Dense(128, activation=tf.nn.relu),keras.layers.Dense(10, activation=tf.nn.softmax)
])model.compile(optimizer=tf.train.AdamOptimizer(),loss='sparse_categorical_crossentropy',metrics=['accuracy'])
#model fit
model.fit(train_images, train_labels, epochs=5)#test accuracy
# test_loss, test_acc = model.evaluate(test_images, test_labels)
# print('Test accuracy:', test_acc)#predict model
predictions = model.predict(test_images)
def plot_image(i, predictions_array, true_label, img):predictions_array, true_label, img = predictions_array[i], true_label[i], img[i]plt.grid(False)plt.xticks([])plt.yticks([])plt.imshow(img, cmap=plt.cm.binary)predicted_label = np.argmax(predictions_array)if predicted_label == true_label:color = 'blue'else:color = 'red'plt.xlabel("{} {:2.0f}% ({})".format(class_names[predicted_label],100*np.max(predictions_array),class_names[true_label]),color=color)def plot_value_array(i, predictions_array, true_label):predictions_array, true_label = predictions_array[i], true_label[i]plt.grid(False)plt.xticks([])plt.yticks([])thisplot = plt.bar(range(10), predictions_array, color="#777777")plt.ylim([0, 1])predicted_label = np.argmax(predictions_array)thisplot[predicted_label].set_color('red')thisplot[true_label].set_color('blue')#predict data
i = 0
plt.figure(figsize=(6,3))
plt.subplot(1,2,1)
plot_image(i, predictions, test_labels, test_images)
plt.subplot(1,2,2)
plot_value_array(i, predictions,  test_labels)
plt.show()i = 12
plt.figure(figsize=(6,3))
plt.subplot(1,2,1)
plot_image(i, predictions, test_labels, test_images)
plt.subplot(1,2,2)
plot_value_array(i, predictions,  test_labels)
plt.show()
这篇关于ERROR: Could not find a version that satisfies the requirement tensorflow (from versions: none)的文章就介绍到这儿,希望我们推荐的文章对编程师们有所帮助!


