本文主要是介绍Linux|centos7-postgresql数据库|yum安装数据库和配置repmgr高可用集群以及repmgr的日常管理工作,希望对大家解决编程问题提供一定的参考价值,需要的开发者们随着小编来一起学习吧!
一、
前言
postgresql 的yum部署其实还是有点东西的,本文就做一个小小的记录,高可用方面repmgr插件还是非常不错的,但如何部署以及部署后如何使用也是一个难点,因此,也在本文里做一个记录
环境介绍:
第一台服务器:操作系统是centos7,内核版本是3.10,IP地址是192.168.123.17 VMware虚拟机,内存4G,cpu4核,计划在此服务器上安装postgresql12.4版本以及repmgr高可用插件。该服务器是主节点
第二台服务器:操作系统是centos7,内核版本是3.10,IP地址是192.168.123.20 VMware虚拟机,内存4G,cpu4核,计划在此服务器上安装postgresql12.4版本以及repmgr高可用插件。该服务器是从节点
二、
详细的yum安装postgreslq数据库
1,配置yum源
yum安装postgresql比较简单,源配置官方源就可用了,命令如下(2台服务器都执行):
yum install -y https://download.postgresql.org/pub/repos/yum/reporpms/EL-7-x86_64/pgdg-redhat-repo-latest.noarch.rpm为了防止某些库安装的时候提示缺少依赖,增加阿里云的库和阿里云的epel库
wget -O /etc/yum.repos.d/epel.repo https://mirrors.aliyun.com/repo/epel-7.repo
wget -O /etc/yum.repos.d/CentOS-Base.repo https://mirrors.aliyun.com/repo/Centos-7.repo
增加不常用的rpm包依赖仓库:
[centos-sclo-sclo]
name=CentOS-7 - SCLo sclo
baseurl=https://mirrors.tuna.tsinghua.edu.cn/centos/7/sclo/$basearch/sclo/
gpgcheck=0
enabled=1
gpgkey=file:///etc/pki/rpm-gpg/RPM-GPG-KEY-CentOS-SIG-SCLo[centos-sclo-rh]
name=CentOS-7 - SCLo rh
baseurl=https://mirrors.tuna.tsinghua.edu.cn/centos/7/sclo/$basearch/rh/
gpgcheck=0
enabled=1
gpgkey=file:///etc/pki/rpm-gpg/RPM-GPG-KEY-CentOS-SIG-SCLo
2,
安装postgresql的组件和postgresql的server服务(2台服务器都执行)
组件比较多,主要是lib库(postgresql运行的依赖库),插件扩展库(postgresql的插件库),开发库(一些postgresql的特殊组件需要使用的库),连接库(开发微服务使用的库)
后面的几个看自己的需求安装不,比如postgresql12-plperl
版本号根据自己需求来,我这里是12.4, 不想安这个低版本的,修改12.4就可以了,比如全部的12.4修改为12.8
yum install postgresql12-server-12.4 postgresql12-libs-12.4 postgresql12-devel-12.4 postgresql12-contrib-12.4 postgresql12-tcl postgresql12-odbc postgresql12-12.4 postgresql12-plperl-12.4 postgresql12-pltcl-12.4 postgresql12-plpython-12.4 postgresql12-plpython3-12.4 postgresql12-llvmjit-12.4 postgresql12-devel-12.4 -y3,
postgresql的环境变量定义和一些特殊处理(两台服务器都执行)
在/etc/profile 文件末尾添加如下变量,计划postgresql安装在/data/pgsql/data目录下
PGDATA=/data/pgsql/data
export PGDATA
PGHOME=/data/pgsql
export PGHOME
PATH=$PATH:$PGHOME/bin:$PGDATA:/usr/pgsql-12/bin/
export PATH  PGHOME PGDATA
写入完成后,激活变量:
source /etc/profile切换用户到普通用户postgres,将该用户的环境变量文件全部注释掉,结果如下:
-bash-4.2$ whoami
postgres
-bash-4.2$ cat ~/.bash_profile
#[ -f /etc/profile ] && source /etc/profile
#PGDATA=/var/lib/pgsql/12/data
#export PGDATA
# If you want to customize your settings,
# Use the file below. This is not overridden
# by the RPMS.
#[ -f /var/lib/pgsql/.pgsql_profile ] && source /var/lib/pgsql/.pgsql_profile
注释的原因是我们不希望使用默认的/var/lib/12目录存放数据库的数据文件,注销普通用户再次su - postgres 重新激活变量后,在普通用户下,可以看到postgresql数据库相关变量已经固定了:
[root@centos10 media]# su - postgres
Last login: Sat Mar 30 05:19:48 CST 2024 on pts/0
-bash-4.2$ echo $PGDATA
/data/pgsql/data
4,创建相关目录并赋予普通用户的权限,准备初始化工作(root用户执行,两台服务器都执行):
mkdir -p /data/pgsql/
chown -Rf postgres. /data/pgsql
5,执行数据库初始化(仍然是切换到普通用户postgres):
由于前面的准备工作比较充分,环境变量已经完全配置好了,因此,执行initdb就可以完成初始化了,/data/pgsql/data/目录以及其下的文件将在初始化的时候创建好
初始化日志如下:
[root@centos7 media]# su - postgres
Last login: Sat Mar 30 05:25:23 CST 2024 on pts/0
-bash-4.2$ initdb
The files belonging to this database system will be owned by user "postgres".
This user must also own the server process.The database cluster will be initialized with locale "en_US.UTF-8".
The default database encoding has accordingly been set to "UTF8".
The default text search configuration will be set to "english".Data page checksums are disabled.creating directory /data/pgsql/data ... ok
creating subdirectories ... ok
selecting dynamic shared memory implementation ... posix
selecting default max_connections ... 100
selecting default shared_buffers ... 128MB
selecting default time zone ... Asia/Shanghai
creating configuration files ... ok
running bootstrap script ... ok
performing post-bootstrap initialization ... ok
syncing data to disk ... okinitdb: warning: enabling "trust" authentication for local connections
You can change this by editing pg_hba.conf or using the option -A, or
--auth-local and --auth-host, the next time you run initdb.Success. You can now start the database server using:pg_ctl -D /data/pgsql/data -l logfile start
6,
在root用户下管理postgresql的启停
由于是yum安装的,因此,启停脚本是已经写好的,可以直接用,但我们数据库的数据文件存放路径修改了,因此,需要先修改一下启停脚本:
/usr/lib/systemd/system/postgresql-12.service
Environment=PGDATA=/var/lib/pgsql/12/data/
修改为
Environment=PGDATA=/data/pgsql/data/
这个启停脚本名字太长了,修改一下名字 就叫pg12吧:
mv /usr/lib/systemd/system/postgresql-12.service /usr/lib/systemd/system/pg12.service启动postgresql数据库并查看进行确认是否启动成功:
systemctl enable pg12 && systemctl start pg12查看postgreslq的进程:
[root@centos7 media]# ps aux |grep postgre
postgres 16161  0.2  0.4 397292 17424 ?        Ss   05:51   0:00 /usr/pgsql-12/bin/postmaster -D /data/pgsql/data/
postgres 16164  0.0  0.0 251676  2008 ?        Ss   05:51   0:00 postgres: logger
postgres 16166  0.0  0.0 397292  2060 ?        Ss   05:51   0:00 postgres: checkpointer
postgres 16167  0.0  0.0 397292  2288 ?        Ss   05:51   0:00 postgres: background writer
postgres 16168  0.0  0.0 397292  2064 ?        Ss   05:51   0:00 postgres: walwriter
postgres 16169  0.0  0.0 397844  3212 ?        Ss   05:51   0:00 postgres: autovacuum launcher
postgres 16170  0.0  0.0 251672  2120 ?        Ss   05:51   0:00 postgres: stats collector
postgres 16171  0.0  0.0 397844  2808 ?        Ss   05:51   0:00 postgres: logical replication launcher
root     16173  0.0  0.0 112712   964 pts/0    S+   05:51   0:00 grep --color=auto postgre
7,
远程连接和postgres用户密码设置
修改主配置文件 /data/pgsql/data/postgresql.conf
listen_addresses = '*'
port = 15433
max_connections = 1000
wal_level = logical
这里是设置数据库连接端口是15433
修改安全连接文件pg_hba.conf:
末尾添加如下两行,这两行的意思是复制用户replication可以随意连接,但其它用户远程连接的时候需要密码,本地登录的时候不校验密码
host    replication     all             0.0.0.0/0                 trust
host    all             all             0.0.0.0/0           md5
8,
本地登录数据库设置密码
su - postgres -c "psql -p15433"alter user postgres with password '123456';此时,数据库算是完全安装完毕,连接端口15433,连接密码123456 后面就不在重复这些信息了
随意安装一个插件,看看lib库什么的是否正常:
[root@centos10 ~]# su - postgres -c "psql -p15433"
psql (12.4)
Type "help" for help.postgres=# create extension
adminpack           btree_gin           dblink              file_fdw            hstore_plperlu      insert_username     jsonb_plperl        jsonb_plpythonu     ltree_plpython3u    pg_buffercache      pgrowlocks          pg_visibility       plpython3u          postgres_fdw        tablefunc           unaccent
amcheck             btree_gist          dict_int            fuzzystrmatch       hstore_plpython2u   intagg              jsonb_plperlu       lo                  ltree_plpythonu     pgcrypto            pg_stat_statements  plperl              plpythonu           refint              tcn                 "uuid-ossp"
autoinc             citext              dict_xsyn           hstore              hstore_plpython3u   intarray            jsonb_plpython2u    ltree               moddatetime         pg_freespacemap     pgstattuple         plperlu             pltcl               seg                 tsm_system_rows     xml2
bloom               cube                earthdistance       hstore_plperl       hstore_plpythonu    isn                 jsonb_plpython3u    ltree_plpython2u    pageinspect         pg_prewarm          pg_trgm             plpython2u          pltclu              sslinfo             tsm_system_time
postgres=# create extension pg_trgm ;
CREATE EXTENSION
二,
repmgr的基本安装部署和配置
repmgr的介绍:
Repmgr是2ndQuadrant(第二象限公司)开发的一款复制的开源工具套件,用于管理PostgreSQL服务器集群中的复制和故障转移。
最初,它主要是为了简化流副本的管理,后来发展成为一个完整的故障转移管理套件。它通过设置备用服务器,监视复制以及执行管理任务(如故障转移或手动切换操作)的工具,增强了PostgreSQL内置的热备份功能。
其中各组件功能如下:
No.1 Repmgrd 守护进程
它主动监视复制集群中的服务器并执行以下任务:
1)监控和记录集群复制性能;
2)通过检测主服务器故障并提升最合适的备用服务器来执行故障转移;
3)将有关群集中事件的通知提供给用户定义的脚本,该脚本可以执行诸如通过电子邮件发送警报等任务;
4)repmgrd 根据本地数据库角色不同,其功能也不同:
-
主库:repmgrd仅监控本地数据库,负责自动恢复、同异步切换;
-
备库:repmgrd监控本地数据库和主数据库,负责自动切换、复制槽删除。
No.2 Repmgr命令管理
用于执行管理任务的命令行工具,主要有以下方面作用:
1)设置备用服务器;
2)将备用服务器升级为主服务器;
3)切换主服务器和备用服务器;
4)显示复制群集中的服务器状态。
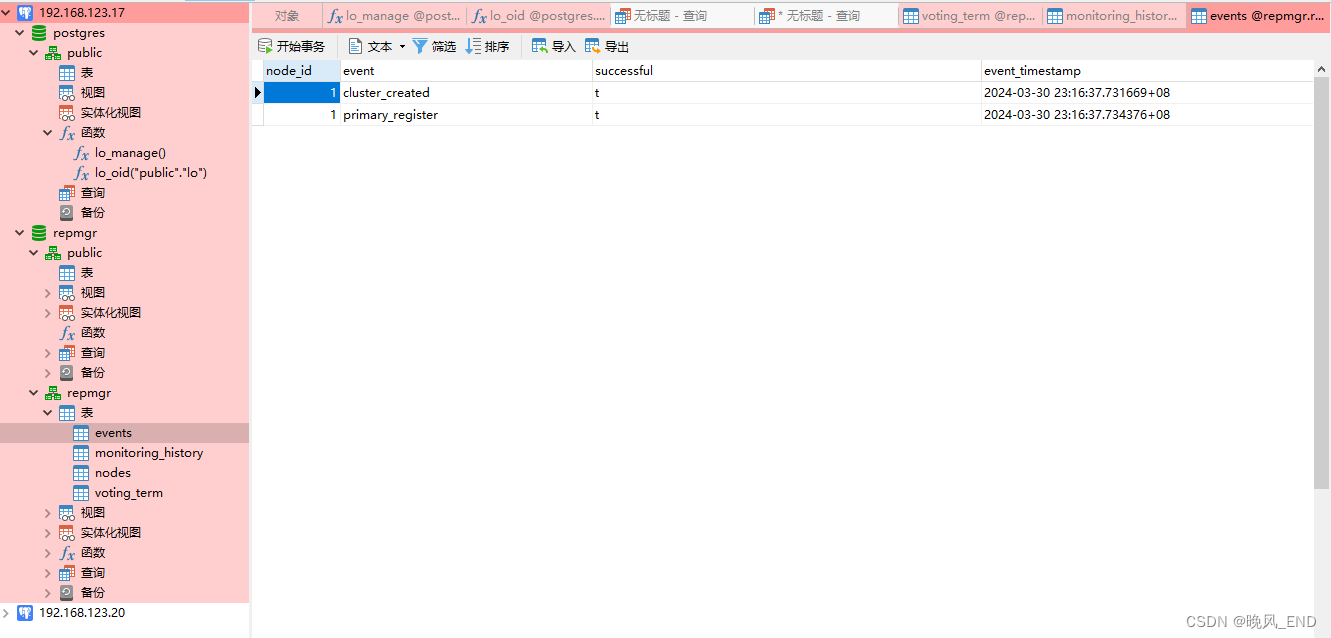
No.3 用户和元数据 为了有效地管理复制集群,repmgr提供专用数据库存储和管理有关repmgr集群服务的相关信息。
此模式在 部署repmgr服务时,由repmgr扩展自动创建,该扩展在初始化repmgr -administered集群(repmgr主寄存器) 的第一步中安装,包含以下对象:
-
表:
repmgr.events:记录感兴趣的事件;
repmgr.nodes:复制群集中每个服务器的连接和状态信息 ;
repmgr.monitoring_history:repmgrd写入的历史备用监视信息。
-
视图
repmgr.show_nodes:基于表repmgr.nodes,另外显示服务器上游节点的名称。
repmgr.replication_status:启用repmgrd的监视时,显示每个备用数据库的当前监视状态。
repmgr元数据模式可以存储在现有的数据库或在自己的专用数据库。
请注意,repmgr元数据模式不能驻留在不属于repmgr管理的复制集群的数据库服务器上。数据库用户必须可供repmgr访问此数据库并执行必要的更改。此用户不需要是超级用户,但是某些操作(如初始安装repmgr扩展)将需要超级用户连接(可以使用命令 行选项--superuser在需要时指定 )。
1、
计划repmgr安装方式为yum,安装命令如下:
yum install repmgr_12-5.4.1 repmgr_12-devel-5.4.1 repmgr_12-llvmjit-5.4.1 -y2、
主数据库装载repmgr插件
修改主数据库17的主配置文件,data/pgsql/data/postgresql.conf,修改完毕后重启服务器
主要是定义数据库的端口,以及归档命令
listen_addresses = '*'
port = 15433
max_connections = 1000
shared_buffers = 128MB
dynamic_shared_memory_type = posix
wal_level = logical
max_wal_size = 1GB
min_wal_size = 80MB
archive_mode = on
archive_command = 'test ! -f /data/pgsql/arclog/%f && cp %p /data/pgsql/arclog/%f'		#
log_destination = 'stderr'
logging_collector = on
log_directory = 'log'
log_filename = 'postgresql-%a.log'
log_truncate_on_rotation = on
log_rotation_age = 1d
log_rotation_size = 0
log_line_prefix = '%m [%p] '
log_timezone = 'Asia/Shanghai'
datestyle = 'iso, mdy'
timezone = 'Asia/Shanghai'
lc_messages = 'en_US.UTF-8'
lc_monetary = 'en_US.UTF-8'
lc_numeric = 'en_US.UTF-8'
lc_time = 'en_US.UTF-8'
default_text_search_config = 'pg_catalog.english'
shared_preload_libraries = 'repmgr'
wal_log_hints = on
DETAIL: pg_rewind requires "wal_log_hints" to be enabled
根据以上配置,创建目录/data/pgsql/arclog并赋予postgres这个用户权限,最后重启服务器
mkdir -p /data/pgsql/arclog
chown -Rf postgres. /data/pgsql/arclog/
systemctl restart pg12
ntpdate ntp.aliyun.com
3、
主节点17repmgr的配置文件 /etc/repmgr/12/repmgr.conf 增加如下内容:
node_id=1
node_name='pg1'
conninfo='host=192.168.123.17 port=15433 user=repmgr dbname=repmgr password=123456'
data_directory='/data/pgsql/data'
replication_user='repmgr'
replication_type='physical'
#location='pg1'
use_replication_slots=true
witness_sync_interval=15
log_level='DEBUG'
log_facility='STDERR'
log_file='/var/log/repmgr/pg2.log'
pg_bindir='/usr/pgsql-12/bin/'
ssh_options='-q -o ConnectTimeout=10'
promote_check_timeout=60
promote_check_interval=1
node_rejoin_timeout=60
failover='automatic'
#priority=100
connection_check_type=ping
promote_command='/usr/pgsql-12/bin/repmgr standby promote -f /etc/repmgr/12/repmgr.conf --log-to-file'
follow_command='/usr/pgsql-12/bin/repmgr standby follow -f /etc/repmgr/12/repmgr.conf --log-to-file --upstream-node-id=%n'
monitoring_history=yes
service_start_command = '/usr/bin/systemctl start pg12'
service_stop_command = '/usr/bin/systemctl stop pg12'
service_restart_command = '/usr/bin/systemctl restart pg12'
service_reload_command = '/usr/bin/systemctl reload pg12'
service_promote_command = '/usr/pgsql-12/bin/pg_ctl promote -D /data/pgsql/data'
repmgrd_service_start_command = '/usr/pgsql-12/bin/repmgrd -f /etc/repmgr/12/repmgr.conf -p /run/repmgr/repmgrd-12.pid -d --verbose'
repmgrd_service_stop_command = '/usr/bin/kill `cat /run/repmgr/repmgrd-12.pid`'
4、
根据以上配置文件,数据库添加repmgr用户
[root@centos7 ~]# su - postgres -c 'psql -p15433'
psql (12.4)
Type "help" for help.postgres=# create user repmgr with password '123456';
CREATE ROLE
postgres=# create database repmgr;
CREATE DATABASEALTER USER repmgr WITH REPLICATION;
5、
切换普通用户,利用repmgr注册主节点
[root@centos7 ~]# su - postgres
Last login: Sat Mar 30 23:08:48 CST 2024 on pts/0
-bash-4.2$ repmgr primary register
INFO: connecting to primary database...
DEBUG: connecting to: "user=repmgr dbname=repmgr host=192.168.123.17 port=15433 connect_timeout=2 fallback_application_name=repmgr options=-csearch_path="
ERROR: connection to database failed
DETAIL:
fe_sendauth: no password suppliedDETAIL: attempted to connect using:user=repmgr dbname=repmgr host=192.168.123.17 port=15433 connect_timeout=2 fallback_application_name=repmgr options=-csearch_path=
失败了,原因是没有传递密码变量,执行变量命令,并重新注册,注册的时候临时给repmgr用户超级权限,注册成功
export PGPASSWORD="123456"-bash-4.2$ repmgr primary register -S postgres
WARNING: following problems with command line parameters detected:--superuser ignored when executing PRIMARY REGISTER
INFO: connecting to primary database...
DEBUG: connecting to: "user=repmgr dbname=repmgr host=192.168.123.17 port=15433 connect_timeout=2 fallback_application_name=repmgr options=-csearch_path="
NOTICE: attempting to install extension "repmgr"
DEBUG: established superuser connection as "postgres"
NOTICE: "repmgr" extension successfully installed
NOTICE: primary node record (ID: 1) registered
可以看到,扩展插件repmgr启用了,具体路径为repmgr数据库下的名为repmgr的schema下
命令行也可以佐证确实是安装了插件repmgr:
repmgr=# set search_path to repmgr ;
SET
repmgr=# \dxList of installed extensionsName   | Version |   Schema   |            Description
---------+---------+------------+------------------------------------plpgsql | 1.0     | pg_catalog | PL/pgSQL procedural languagerepmgr  | 5.4     | repmgr     | Replication manager for PostgreSQL
(2 rows)
如果觉得注册的不对,可以重新注册,重新注册命令如下:
-bash-4.2$ repmgr primary unregister -S postgres --force
WARNING: following problems with command line parameters detected:--superuser ignored when executing PRIMARY UNREGISTER
DEBUG: connecting to: "user=repmgr dbname=repmgr host=192.168.123.17 port=15433 connect_timeout=2 fallback_application_name=repmgr options=-csearch_path="
DEBUG: connecting to: "user=repmgr dbname=repmgr host=192.168.123.17 port=15433 connect_timeout=2 fallback_application_name=repmgr options=-csearch_path="
DEBUG: connecting to: "user=repmgr dbname=repmgr host=192.168.123.17 port=15433 connect_timeout=2 fallback_application_name=repmgr options=-csearch_path="
INFO: node "pg1" (ID: 1) was successfully unregistered
看到 successfully后,再次执行注册就可以,查看repmgr集群的状态:
-bash-4.2$ repmgr cluster show
DEBUG: connecting to: "user=repmgr dbname=repmgr host=192.168.123.17 port=15433 connect_timeout=2 fallback_application_name=repmgr options=-csearch_path="
DEBUG: connecting to: "user=repmgr dbname=repmgr host=192.168.123.17 port=15433 connect_timeout=2 fallback_application_name=repmgr options=-csearch_path="ID | Name | Role    | Status    | Upstream | Location | Priority | Timeline | Connection string
----+------+---------+-----------+----------+----------+----------+----------+----------------------------------------------------------1  | pg1  | primary | * running |          | pg1      | 100      | 1        | host=192.168.123.17 port=15433 user=repmgr dbname=repmgr
6、
从节点20的repmgr的配置文件
node_id=2
node_name='pg2'
conninfo='host=192.168.123.20 port=15433 user=repmgr dbname=repmgr password=123456'
data_directory='/data/pgsql/data'
replication_user='repmgr'
replication_type='physical'
#location='pg2'
use_replication_slots=true
witness_sync_interval=15
log_level='DEBUG'
log_facility='STDERR'
log_file='/var/log/repmgr/pg2.log'
pg_bindir='/usr/pgsql-12/bin/'
ssh_options='-q -o ConnectTimeout=10'
promote_check_timeout=60
promote_check_interval=1
node_rejoin_timeout=60
failover='automatic'
#priority=120
connection_check_type=ping
promote_command='/usr/pgsql-12/bin/repmgr standby promote -f /etc/repmgr/12/repmgr.conf --log-to-file'
follow_command='/usr/pgsql-12/bin/repmgr standby follow -f /etc/repmgr/12/repmgr.conf --log-to-file --upstream-node-id=%n'
monitoring_history=yes
service_start_command = '/usr/bin/systemctl start pg12'
service_stop_command = '/usr/bin/systemctl stop pg12'
service_restart_command = '/usr/bin/systemctl restart pg12'
service_reload_command = '/usr/bin/systemctl reload pg12'
service_promote_command = '/usr/pgsql-12/bin/pg_ctl promote -D /data/pgsql/data'
repmgrd_service_start_command = '/usr/pgsql-12/bin/repmgrd -f /etc/repmgr/12/repmgr.conf -p /run/repmgr/repmgrd-12.pid -d --verbose'
repmgrd_service_stop_command = '/usr/bin/kill `cat /run/repmgr/repmgrd-12.pid`'
7、
从节点利用流复制搭建主从集群,通过repmgr命令来执行(postgres这个普通用户执行)
repmgr standby clone -h 192.168.123.17 -p15433 -d repmgr --force -U repmgr -cHINT: this may take some time; consider using the -c/--fast-checkpoint option
日志如下:
NOTICE: destination directory "/data/pgsql/data" provided
INFO: connecting to source node
DETAIL: connection string is: host=192.168.123.17 port=15433 user=repmgr dbname=repmgr
DETAIL: current installation size is 32 MB
DEBUG: 1 node records returned by source node
DEBUG: connecting to: "user=repmgr dbname=repmgr host=192.168.123.17 port=15433 connect_timeout=2 fallback_application_name=repmgr options=-csearch_path="
DEBUG: upstream_node_id determined as 1
NOTICE: checking for available walsenders on the source node (2 required)
NOTICE: checking replication connections can be made to the source server (2 required)
WARNING: directory "/data/pgsql/data" exists but is not empty
NOTICE: -F/--force provided - deleting existing data directory "/data/pgsql/data"
DEBUG: replication slot "repmgr_slot_2" exists but is inactive; reusing
NOTICE: starting backup (using pg_basebackup)...
INFO: executing:/usr/pgsql-12/bin/pg_basebackup -l "repmgr base backup"  -D /data/pgsql/data -h 192.168.123.17 -p 15433 -U repmgr -c fast -X stream -S repmgr_slot_2
shell-init: error retrieving current directory: getcwd: cannot access parent directories: No such file or directory
could not identify current directory: No such file or directory
DEBUG: connecting to: "user=repmgr dbname=repmgr host=192.168.123.17 port=15433 connect_timeout=2 fallback_application_name=repmgr options=-csearch_path="
NOTICE: standby clone (using pg_basebackup) complete
NOTICE: you can now start your PostgreSQL server
HINT: for example: /usr/bin/systemctl start pg12
HINT: after starting the server, you need to register this standby with "repmgr standby register"
命令执行完成后,就可以启动从节点了:
systemctl start pg12查看进程可以看到从节点正常复制了:
[root@centos10 ~]# ps aux |grep postgre
root      1637  0.0  0.0 191784  2336 pts/0    S    Mar30   0:00 su - postgres
postgres  1638  0.0  0.0 115444  2064 pts/0    S+   Mar30   0:00 -bash
postgres  1744  0.3  1.1 450504 46412 ?        Ss   00:05   0:00 /usr/pgsql-12/bin/postmaster -D /data/pgsql/data/
postgres  1745  0.0  0.0 260664  2084 ?        Ss   00:05   0:00 postgres: logger
postgres  1746  0.0  0.0 450708  3100 ?        Ss   00:05   0:00 postgres: startup   recovering 000000010000000000000013
postgres  1747  0.0  0.0 450504  2112 ?        Ss   00:05   0:00 postgres: checkpointer
postgres  1748  0.0  0.0 450504  2120 ?        Ss   00:05   0:00 postgres: background writer
postgres  1749  0.0  0.0 262784  2008 ?        Ss   00:05   0:00 postgres: stats collector
postgres  1750  0.4  0.1 457520  4700 ?        Ss   00:05   0:00 postgres: walreceiver   streaming 0/130007C8
root      1752  0.0  0.0 112712   964 pts/1    S+   00:05   0:00 grep --color=auto postgre
主节点正常发送wal日志了:
[root@centos7 ~]# ps aux |grep postgres
postgres  2205  0.0  1.1 450504 46464 ?        Ss   00:01   0:00 /usr/pgsql-12/bin/postmaster -D /data/pgsql/data/
postgres  2207  0.0  0.0 260664  2084 ?        Ss   00:01   0:00 postgres: logger
postgres  2209  0.0  0.1 450908  4180 ?        Ss   00:01   0:00 postgres: checkpointer
postgres  2210  0.0  0.0 450764  3916 ?        Ss   00:01   0:00 postgres: background writer
postgres  2211  0.0  0.1 450504  6296 ?        Ss   00:01   0:00 postgres: walwriter
postgres  2212  0.0  0.0 451784  3352 ?        Ss   00:01   0:00 postgres: autovacuum launcher
postgres  2213  0.0  0.0 262784  2196 ?        Ss   00:01   0:00 postgres: archiver   last was 000000010000000000000012.00000028.backup
postgres  2214  0.0  0.0 262940  2352 ?        Ss   00:01   0:00 postgres: stats collector
postgres  2215  0.0  0.0 451624  2856 ?        Ss   00:01   0:00 postgres: logical replication launcher
root      2216  0.0  0.0 191784  2336 pts/0    S    00:01   0:00 su - postgres
postgres  2217  0.0  0.0 115444  2004 pts/0    S+   00:01   0:00 -bash
postgres  2260  0.0  0.0 451812  3848 ?        Ss   00:05   0:00 postgres: walsender repmgr 192.168.123.20(38408) streaming 0/130008B0
postgres  2265  0.0  0.1 452464  7044 ?        Ss   00:07   0:00 postgres: postgres postgres 192.168.123.1(56048) idle
root      2294  0.0  0.0 112712   960 pts/1    S+   00:10   0:00 grep --color=auto postgres
8、
注册从节点
-bash-4.2$ repmgr standby register
INFO: connecting to local node "pg2" (ID: 2)
DEBUG: connecting to: "user=repmgr dbname=repmgr host=192.168.123.20 port=15433 connect_timeout=2 fallback_application_name=repmgr options=-csearch_path="
INFO: connecting to primary database
DEBUG: connecting to: "user=repmgr dbname=repmgr host=192.168.123.17 port=15433 connect_timeout=2 fallback_application_name=repmgr options=-csearch_path="
WARNING: --upstream-node-id not supplied, assuming upstream node is primary (node ID: 1)
INFO: standby registration complete
NOTICE: standby node "pg2" (ID: 2) successfully registered
9、
查看集群状态
-bash-4.2$ repmgr cluster show
DEBUG: connecting to: "user=repmgr password=123456 dbname=repmgr host=192.168.123.17 port=15433 connect_timeout=2 fallback_application_name=repmgr options=-csearch_path="
DEBUG: connecting to: "user=repmgr password=123456 dbname=repmgr host=192.168.123.17 port=15433 connect_timeout=2 fallback_application_name=repmgr options=-csearch_path="
DEBUG: connecting to: "user=repmgr password=123456 dbname=repmgr host=192.168.123.20 port=15433 connect_timeout=2 fallback_application_name=repmgr options=-csearch_path="
DEBUG: connecting to: "user=repmgr password=123456 dbname=repmgr host=192.168.123.17 port=15433 connect_timeout=2 fallback_application_name=repmgr options=-csearch_path="ID | Name | Role    | Status    | Upstream | Location | Priority | Timeline | Connection string
----+------+---------+-----------+----------+----------+----------+----------+------------------------------------------------------------------------------1  | pg1  | primary | * running |          | default  | 100      | 1        | host=192.168.123.17 port=15433 user=repmgr dbname=repmgr password=1234562  | pg2  | standby |   running | pg1      | default  | 100      | 1        | host=192.168.123.20 port=15433 user=repmgr dbname=repmgr password=123456
三、
自动故障转移和测试
如果需要启用自动故障转移,那么,我们需要开启repmgrd服务,每个节点都开启
开启比较简单,一条命令就可以了
systemctl start repmgr-12服务启动完毕后,可以查看进程是否正确:
[root@centos7 ~]# ps aux |grep repm
postgres  5915  0.2  0.2 453488  9716 ?        Ss   09:28   0:00 postgres: repmgr repmgr 192.168.123.17(35544) idle
postgres  5917  0.0  0.0  84276  2160 ?        S    09:28   0:00 /usr/pgsql-12/bin/repmgrd -f /etc/repmgr/12/repmgr.conf -p /run/repmgr/repmgrd-12.pid -d --verbose
root      5925  0.0  0.0 112712   960 pts/3    S+   09:29   0:00 grep --color=auto repm
注意,这里问题来了,该服务是依赖于postgresql数据库的进程的,数据库必须是在线的才可以启停repmgrd服务
那么,很多人会疑惑,这个服务有什么用?其实很简单,就是故障转移用的,这些是关键配置,在发生宕机的情况下,这些命令会自动的启停数据库,例如,主节点宕机,那么,从节点的该服务将会在规定时间内检查主节点,如果一直找不到主,将会把自己提升为主,先执行这个命令:
promote_command='/usr/pgsql-12/bin/repmgr standby promote -f /etc/repmgr/12/repmgr.conf --log-to-file'
然后执行这个命令:
service_promote_command = '/usr/pgsql-12/bin/pg_ctl promote -D /data/pgsql/data'
特别注意:这些命令全部需要绝对路径,否则会报找不到命令,配置文件修改后,重启repmgrd服务就可以生效
promote_command='/usr/pgsql-12/bin/repmgr standby promote -f /etc/repmgr/12/repmgr.conf --log-to-file'
follow_command='/usr/pgsql-12/bin/repmgr standby follow -f /etc/repmgr/12/repmgr.conf --log-to-file --upstream-node-id=%n'
monitoring_history=yes
service_start_command = '/usr/bin/systemctl start pg12'
service_stop_command = '/usr/bin/systemctl stop pg12'
service_restart_command = '/usr/bin/systemctl restart pg12'
service_reload_command = '/usr/bin/systemctl reload pg12'
service_promote_command = '/usr/pgsql-12/bin/pg_ctl promote -D /data/pgsql/data'
repmgrd_service_start_command = '/usr/pgsql-12/bin/repmgrd -f /etc/repmgr/12/repmgr.conf -p /run/repmgr/repmgrd-12.pid -d --verbose'
repmgrd_service_stop_command = '/usr/bin/kill `cat /run/repmgr/repmgrd-12.pid`'
下面是将主节点数据库服务关闭后,从节点的repmgrd服务打印的日志/var/log/repmgr/pg2.log
[2024-03-31 09:13:29] [INFO] 2 total nodes registered
[2024-03-31 09:13:29] [INFO] primary node  "pg1" (ID: 1) and this node have the same location ("default")
[2024-03-31 09:13:29] [INFO] no other sibling nodes - we win by default
[2024-03-31 09:13:29] [DEBUG] election result: WON
[2024-03-31 09:13:29] [NOTICE] this node is the only available candidate and will now promote itself
[2024-03-31 09:13:29] [DEBUG] get_node_record():SELECT n.node_id, n.type, n.upstream_node_id, n.node_name,  n.conninfo, n.repluser, n.slot_name, n.location, n.priority, n.active, n.config_file, '' AS upstream_node_name, NULL AS attached   FROM repmgr.nodes n  WHERE n.node_id = 1
[2024-03-31 09:13:29] [INFO] promote_command is:"/usr/pgsql-12/bin/repmgr standby promote -f /etc/repmgr/12/repmgr.conf --log-to-file"
[2024-03-31 09:13:29] [NOTICE] redirecting logging output to "/var/log/repmgr/pg2.log"[2024-03-31 09:13:29] [DEBUG] connecting to: "user=repmgr password=123456 dbname=repmgr host=192.168.123.20 port=15433 connect_timeout=2 fallback_application_name=repmgr options=-csearch_path="
[2024-03-31 09:13:29] [DEBUG] connecting to: "user=repmgr password=123456 dbname=repmgr host=192.168.123.17 port=15433 connect_timeout=2 fallback_application_name=repmgr options=-csearch_path="
[2024-03-31 09:13:29] [DEBUG] connecting to: "user=repmgr password=123456 dbname=repmgr host=192.168.123.20 port=15433 connect_timeout=2 fallback_application_name=repmgr options=-csearch_path="
[2024-03-31 09:13:29] [NOTICE] promoting standby to primary
[2024-03-31 09:13:29] [DETAIL] promoting server "pg2" (ID: 2) using "/usr/pgsql-12/bin/pg_ctl promote -D /data/pgsql/data"
[2024-03-31 09:13:29] [NOTICE] waiting up to 60 seconds (parameter "promote_check_timeout") for promotion to complete
[2024-03-31 09:13:29] [DEBUG] setting node 2 as primary and marking existing primary as failed
[2024-03-31 09:13:29] [NOTICE] STANDBY PROMOTE successful
[2024-03-31 09:13:29] [DETAIL] server "pg2" (ID: 2) was successfully promoted to primary
[2024-03-31 09:13:29] [DEBUG] result of promote_command: 0
[2024-03-31 09:13:29] [INFO] checking state of node 2, 1 of 6 attempts
再次启动原主节点的postgresql数据库,在主节点查看集群状态,可以发现脑裂了:
-bash-4.2$ repmgr cluster show
DEBUG: connecting to: "user=repmgr password=123456 dbname=repmgr host=192.168.123.17 port=15433 connect_timeout=2 fallback_application_name=repmgr options=-csearch_path="
DEBUG: connecting to: "user=repmgr password=123456 dbname=repmgr host=192.168.123.17 port=15433 connect_timeout=2 fallback_application_name=repmgr options=-csearch_path="
DEBUG: connecting to: "user=repmgr password=123456 dbname=repmgr host=192.168.123.20 port=15433 connect_timeout=2 fallback_application_name=repmgr options=-csearch_path="ID | Name | Role    | Status               | Upstream | Location | Priority | Timeline | Connection string
----+------+---------+----------------------+----------+----------+----------+----------+------------------------------------------------------------------------------1  | pg1  | primary | * running            |          | default  | 100      | 1        | host=192.168.123.17 port=15433 user=repmgr dbname=repmgr password=1234562  | pg2  | standby | ! running as primary |          | default  | 100      | 2        | host=192.168.123.20 port=15433 user=repmgr dbname=repmgr password=123456WARNING: following issues were detected- node "pg2" (ID: 2) is registered as standby but running as primary
在从节点,可以看到显示的不一样,不过仍然是脑裂:
-bash-4.2$ repmgr cluster show
DEBUG: connecting to: "user=repmgr password=123456 dbname=repmgr host=192.168.123.20 port=15433 connect_timeout=2 fallback_application_name=repmgr options=-csearch_path="
DEBUG: connecting to: "user=repmgr password=123456 dbname=repmgr host=192.168.123.17 port=15433 connect_timeout=2 fallback_application_name=repmgr options=-csearch_path="
DEBUG: connecting to: "user=repmgr password=123456 dbname=repmgr host=192.168.123.20 port=15433 connect_timeout=2 fallback_application_name=repmgr options=-csearch_path="ID | Name | Role    | Status    | Upstream | Location | Priority | Timeline | Connection string
----+------+---------+-----------+----------+----------+----------+----------+------------------------------------------------------------------------------1  | pg1  | primary | - failed  | ?        | default  | 100      |          | host=192.168.123.17 port=15433 user=repmgr dbname=repmgr password=1234562  | pg2  | primary | * running |          | default  | 100      | 2        | host=192.168.123.20 port=15433 user=repmgr dbname=repmgr password=123456WARNING: following issues were detected- unable to connect to node "pg1" (ID: 1)
解决方案:
首先,在从节点强制踢掉自己,数据库服务不能关闭,命令如下:
repmgr primary unregister --force然后关闭从节点的数据库服务,重新从现主17服务器拉取:
repmgr standby clone -h 192.168.123.17 -p15433 -d repmgr --force -U repmgr -c同步拉取完毕后,在重新强制注册为standby节点,就恢复正常了:
-bash-4.2$ repmgr standby register --force
INFO: connecting to local node "pg2" (ID: 2)
DEBUG: connecting to: "user=repmgr password=123456 dbname=repmgr host=192.168.123.20 port=15433 connect_timeout=2 fallback_application_name=repmgr options=-csearch_path="
INFO: connecting to primary database
DEBUG: connecting to: "user=repmgr password=1234562 dbname=repmgr host=192.168.123.17 port=15433 connect_timeout=2 fallback_application_name=repmgr options=-csearch_path="
INFO: standby registration complete
NOTICE: standby node "pg2" (ID: 2) successfully registered
再次查看集群状态,发现恢复正常了:
-bash-4.2$ repmgr cluster show
DEBUG: connecting to: "user=repmgr password=123456 dbname=repmgr host=192.168.123.20 port=15433 connect_timeout=2 fallback_application_name=repmgr options=-csearch_path="
DEBUG: connecting to: "user=repmgr password=123456 dbname=repmgr host=192.168.123.17 port=15433 connect_timeout=2 fallback_application_name=repmgr options=-csearch_path="
DEBUG: connecting to: "user=repmgr password=123456 dbname=repmgr host=192.168.123.20 port=15433 connect_timeout=2 fallback_application_name=repmgr options=-csearch_path="
DEBUG: connecting to: "user=repmgr password=123456 dbname=repmgr host=192.168.123.17 port=15433 connect_timeout=2 fallback_application_name=repmgr options=-csearch_path="ID | Name | Role    | Status    | Upstream | Location | Priority | Timeline | Connection string
----+------+---------+-----------+----------+----------+----------+----------+------------------------------------------------------------------------------1  | pg1  | primary | * running |          | default  | 100      | 1        | host=192.168.123.17 port=15433 user=repmgr dbname=repmgr password=1234562  | pg2  | standby |   running | pg1      | default  | 100      | 1        | host=192.168.123.20 port=15433 user=repmgr dbname=repmgr password=123456
总结:
脑裂的处理步骤是,首先,将异常的节点也就是 running as primary的节点踢掉,这个节点在哪,就在哪个节点踢掉,踢节点也就是unregister,踢完后standby clone,重新克隆的时候需要停止异常节点数据库服务,也就是原从节点的数据库服务,完事后在重新注册并再次启动原从节点的数据库就可以了;而脑裂产生的原因是原主节点数据库挂掉后,又重新启动数据库服务了,重新启动数据库后,原主认为自己是主节点,而原从节点已经提升为主节点,它也认为自己是主节点,造成集群内有两个主节点的信息了,那么,此时集群的主从复制就是混乱状态
如果脑裂很快发现按上述步骤没什么问题,但如果时间很长才发现,那么,需要根据pg_controlldata命令确定哪个是主,哪个是从,Latest checkpoint's oldestXID高的为主,反之为从,在从节点按上述操作即可
-bash-4.2$ pg_controldata
pg_control version number:            1201
Catalog version number:               201909212
Database system identifier:           7351900556498275811
Database cluster state:               in production
pg_control last modified:             Sun 31 Mar 2024 11:41:05 AM CST
Latest checkpoint location:           0/2F001528
Latest checkpoint's REDO location:    0/2F0014F0
Latest checkpoint's REDO WAL file:    00000001000000000000002F
Latest checkpoint's TimeLineID:       1
Latest checkpoint's PrevTimeLineID:   1
Latest checkpoint's full_page_writes: on
Latest checkpoint's NextXID:          0:3382
Latest checkpoint's NextOID:          16454
Latest checkpoint's NextMultiXactId:  1
Latest checkpoint's NextMultiOffset:  0
Latest checkpoint's oldestXID:        479
Latest checkpoint's oldestXID's DB:   1
Latest checkpoint's oldestActiveXID:  3382
Latest checkpoint's oldestMultiXid:   1
Latest checkpoint's oldestMulti's DB: 1
Latest checkpoint's oldestCommitTsXid:0
Latest checkpoint's newestCommitTsXid:0
Time of latest checkpoint:            Sun 31 Mar 2024 11:41:05 AM CST
Fake LSN counter for unlogged rels:   0/3E8
Minimum recovery ending location:     0/0
Min recovery ending loc's timeline:   0
Backup start location:                0/0
Backup end location:                  0/0
End-of-backup record required:        no
wal_level setting:                    logical
wal_log_hints setting:                on
max_connections setting:              1000
max_worker_processes setting:         8
max_wal_senders setting:              10
max_prepared_xacts setting:           0
max_locks_per_xact setting:           64
track_commit_timestamp setting:       off
Maximum data alignment:               8
Database block size:                  8192
Blocks per segment of large relation: 131072
WAL block size:                       8192
Bytes per WAL segment:                16777216
Maximum length of identifiers:        64
Maximum columns in an index:          32
Maximum size of a TOAST chunk:        1996
Size of a large-object chunk:         2048
Date/time type storage:               64-bit integers
Float4 argument passing:              by value
Float8 argument passing:              by value
Data page checksum version:           0
Mock authentication nonce:            e76af00554364729517eece5fa0fcf6f7f0662da3a154cabb730c2ab24edd267
重新加入节点:
repmgr node rejoin -h 192.168.123.20 -p 15433 -Upostgres -d repmgr --force-rewind四,
主备手动切换
repmgr standby switchover --force -S postgres这个命令比较方便,在从节点执行,不过需要配置免密,并且需要standby从库有上级,比如下面的,Upstream这一栏里,表明pg1的上级是pg2,pg2是主节点,pg1是从节点,
-bash-4.2$ repmgr cluster show
DEBUG: connecting to: "user=repmgr password=123456 dbname=repmgr host=192.168.123.20 port=15433 connect_timeout=2 fallback_application_name=repmgr options=-csearch_path="
DEBUG: connecting to: "user=repmgr password=123456 dbname=repmgr host=192.168.123.17 port=15433 connect_timeout=2 fallback_application_name=repmgr options=-csearch_path="
DEBUG: connecting to: "user=repmgr password=123456 dbname=repmgr host=192.168.123.20 port=15433 connect_timeout=2 fallback_application_name=repmgr options=-csearch_path="
DEBUG: connecting to: "user=repmgr password=123456 dbname=repmgr host=192.168.123.20 port=15433 connect_timeout=2 fallback_application_name=repmgr options=-csearch_path="ID | Name | Role    | Status    | Upstream | Location | Priority | Timeline | Connection string
----+------+---------+-----------+----------+----------+----------+----------+------------------------------------------------------------------------------1  | pg1  | standby |   running | pg2      | default  | 100      | 2        | host=192.168.123.17 port=15433 user=repmgr dbname=repmgr password=1234562  | pg2  | primary | * running |          | default  | 100      | 3        | host=192.168.123.20 port=15433 user=repmgr dbname=repmgr password=123456
那么,想快速的把这两个节点调换一个位置就是上面的switchover命令了,非常的方便,比如,现在我又想把pg2切换到从,pg1切换到主,那么,应该是在pg1上执行switchover命令
在切换期间,pg2的数据库需要重启一次,重启完毕后,看pg1的日志如下:
EBUG: minimum of 1 free slots (0 for siblings) required; 10 available
NOTICE: attempting to pause repmgrd on 2 nodes
DEBUG: connecting to: "user=repmgr password=123456 dbname=repmgr host=192.168.123.17 port=15433 connect_timeout=2 fallback_application_name=repmgr options=-csearch_path="
DEBUG: connecting to: "user=repmgr password=123456 dbname=repmgr host=192.168.123.20 port=15433 connect_timeout=2 fallback_application_name=repmgr options=-csearch_path="
DEBUG: pausing repmgrd on node "pg1" (ID: 1)
DEBUG: pausing repmgrd on node "pg2" (ID: 2)
NOTICE: local node "pg1" (ID: 1) will be promoted to primary; current primary "pg2" (ID: 2) will be demoted to standby
NOTICE: stopping current primary node "pg2" (ID: 2)
DEBUG: remote_command():ssh -o Batchmode=yes -q -o ConnectTimeout=10 192.168.123.20 /usr/pgsql-12/bin/repmgr -f /etc/repmgr/12/repmgr.conf node service --action=stop --checkpoint --superuser=postgres
NOTICE: issuing CHECKPOINT on node "pg2" (ID: 2)
DETAIL: executing server command "/usr/bin/systemctl stop pg12"
INFO: checking for primary shutdown; 1 of 60 attempts ("shutdown_check_timeout")
DEBUG: ping status is: PQPING_OK
DEBUG: sleeping 1 second until next check
INFO: checking for primary shutdown; 2 of 60 attempts ("shutdown_check_timeout")
DEBUG: ping status is: PQPING_OK
DEBUG: sleeping 1 second until next check
INFO: checking for primary shutdown; 3 of 60 attempts ("shutdown_check_timeout")
DEBUG: ping status is: PQPING_OK
DEBUG: sleeping 1 second until next check
INFO: checking for primary shutdown; 4 of 60 attempts ("shutdown_check_timeout")
DEBUG: ping status is: PQPING_OK
DEBUG: sleeping 1 second until next check
INFO: checking for primary shutdown; 5 of 60 attempts ("shutdown_check_timeout")
DEBUG: ping status is: PQPING_OK
DEBUG: sleeping 1 second until next check
INFO: checking for primary shutdown; 6 of 60 attempts ("shutdown_check_timeout")
DEBUG: ping status is: PQPING_OK
DEBUG: sleeping 1 second until next check
INFO: checking for primary shutdown; 7 of 60 attempts ("shutdown_check_timeout")
DEBUG: ping status is: PQPING_OK
DEBUG: sleeping 1 second until next check
INFO: checking for primary shutdown; 8 of 60 attempts ("shutdown_check_timeout")
DEBUG: ping status is: PQPING_OK
DEBUG: sleeping 1 second until next check
INFO: checking for primary shutdown; 9 of 60 attempts ("shutdown_check_timeout")
DEBUG: ping status is: PQPING_OK
DEBUG: sleeping 1 second until next check
INFO: checking for primary shutdown; 10 of 60 attempts ("shutdown_check_timeout")
DEBUG: ping status is: PQPING_OK
DEBUG: sleeping 1 second until next check
INFO: checking for primary shutdown; 11 of 60 attempts ("shutdown_check_timeout")
DEBUG: ping status is: PQPING_OK
DEBUG: sleeping 1 second until next check
INFO: checking for primary shutdown; 12 of 60 attempts ("shutdown_check_timeout")
DEBUG: ping status is: PQPING_OK
DEBUG: sleeping 1 second until next check
INFO: checking for primary shutdown; 13 of 60 attempts ("shutdown_check_timeout")
DEBUG: ping status is: PQPING_OK
DEBUG: sleeping 1 second until next check
INFO: checking for primary shutdown; 14 of 60 attempts ("shutdown_check_timeout")
DEBUG: ping status is: PQPING_OK
DEBUG: sleeping 1 second until next check
INFO: checking for primary shutdown; 15 of 60 attempts ("shutdown_check_timeout")
DEBUG: ping status is: PQPING_OK
DEBUG: sleeping 1 second until next check
INFO: checking for primary shutdown; 16 of 60 attempts ("shutdown_check_timeout")
DEBUG: ping status is: PQPING_OK
DEBUG: sleeping 1 second until next check
INFO: checking for primary shutdown; 17 of 60 attempts ("shutdown_check_timeout")
DEBUG: ping status is: PQPING_NO_RESPONSE
DEBUG: remote_command():ssh -o Batchmode=yes -q -o ConnectTimeout=10 192.168.123.20 /usr/pgsql-12/bin/repmgr -f /etc/repmgr/12/repmgr.conf node status --is-shutdown-cleanly
NOTICE: current primary has been cleanly shut down at location 0/3C000028
DEBUG: local node last receive LSN is 0/3C0000A0, primary shutdown checkpoint LSN is 0/3C000028
NOTICE: promoting standby to primary
DETAIL: promoting server "pg1" (ID: 1) using "/usr/pgsql-12/bin/pg_ctl promote -D /data/pgsql/data"
waiting for server to promote.... done
server promoted
NOTICE: waiting up to 60 seconds (parameter "promote_check_timeout") for promotion to complete
DEBUG: setting node 1 as primary and marking existing primary as failed
NOTICE: STANDBY PROMOTE successful
DETAIL: server "pg1" (ID: 1) was successfully promoted to primary
DEBUG: executing:/usr/pgsql-12/bin/repmgr -f /etc/repmgr/12/repmgr.conf  --no-wait -d \'user=repmgr password=123456 dbname=repmgr host=192.168.123.17 port=15433\' node rejoin > /tmp/node-rejoin.1711860263.log 2>&1 && echo "1" || echo "0"
DEBUG: remote_command():ssh -o Batchmode=yes -q -o ConnectTimeout=10 192.168.123.20 /usr/pgsql-12/bin/repmgr -f /etc/repmgr/12/repmgr.conf  --no-wait -d \'user=repmgr password=123456 dbname=repmgr host=192.168.123.17 port=15433\' node rejoin > /tmp/node-rejoin.1711860263.log 2>&1 && echo "1" || echo "0"
DEBUG: connecting to: "user=repmgr password=123456 dbname=repmgr host=192.168.123.20 port=15433 connect_timeout=2 fallback_application_name=repmgr options=-csearch_path="
ERROR: connection to database failed
DETAIL:
could not connect to server: Connection refusedIs the server running on host "192.168.123.20" and acceptingTCP/IP connections on port 15433?DETAIL: attempted to connect using:user=repmgr password=123456 dbname=repmgr host=192.168.123.20 port=15433 connect_timeout=2 fallback_application_name=repmgr options=-csearch_path=
ERROR: execution of "repmgr node rejoin" on demotion candidate "pg2" (ID: 2) failed
DETAIL: check log file "/tmp/node-rejoin.1711860263.log" on "pg2" for details
DEBUG: connecting to: "user=repmgr password=123456 dbname=repmgr host=192.168.123.20 port=15433 connect_timeout=2 fallback_application_name=repmgr options=-csearch_path="
ERROR: connection to database failed
DETAIL:
could not connect to server: Connection refusedIs the server running on host "192.168.123.20" and acceptingTCP/IP connections on port 15433?DETAIL: attempted to connect using:user=repmgr password=123456 dbname=repmgr host=192.168.123.20 port=15433 connect_timeout=2 fallback_application_name=repmgr options=-csearch_path=
INFO: sleeping 1 second; 1 of 60 attempts ("standby_reconnect_timeout") to reconnect to demoted primary
DEBUG: connecting to: "user=repmgr password=123456 dbname=repmgr host=192.168.123.20 port=15433 connect_timeout=2 fallback_application_name=repmgr options=-csearch_path="
NOTICE: replication slot "repmgr_slot_1" deleted on node 2
NOTICE: switchover was successful
DETAIL: node "pg1" is now primary and node "pg2" is attached as standby
DEBUG: unpausing repmgrd on node "pg1" (ID: 1)
DEBUG: connecting to: "user=repmgr password=123456 dbname=repmgr host=192.168.123.17 port=15433 connect_timeout=2 fallback_application_name=repmgr options=-csearch_path="
DEBUG: unpausing repmgrd on node "pg2" (ID: 2)
DEBUG: connecting to: "user=repmgr password=123456 dbname=repmgr host=192.168.123.20 port=15433 connect_timeout=2 fallback_application_name=repmgr options=-csearch_path="
NOTICE: STANDBY SWITCHOVER has completed successfully
在强调一次,需要配置免密才可以使用此功能,因为从切换到主的时候,需要ssh到主做一点事情,切换完毕后,原主也就是新从需要在注册一下,到pg2执行:
-bash-4.2$ repmgr standby register -F
INFO: connecting to local node "pg2" (ID: 2)
DEBUG: connecting to: "user=repmgr password=123456 dbname=repmgr host=192.168.123.20 port=15433 connect_timeout=2 fallback_application_name=repmgr options=-csearch_path="
INFO: connecting to primary database
DEBUG: connecting to: "user=repmgr password=123456 dbname=repmgr host=192.168.123.17 port=15433 connect_timeout=2 fallback_application_name=repmgr options=-csearch_path="
INFO: standby registration complete
NOTICE: standby node "pg2" (ID: 2) successfully registered
再看集群状态就十分正常了:
-bash-4.2$ repmgr service status
DEBUG: connecting to: "user=repmgr password=123456 dbname=repmgr host=192.168.123.20 port=15433 connect_timeout=2 fallback_application_name=repmgr options=-csearch_path="
DEBUG: connecting to: "user=repmgr password=123456 dbname=repmgr host=192.168.123.17 port=15433 connect_timeout=2 fallback_application_name=repmgr options=-csearch_path="
DEBUG: connecting to: "user=repmgr password=123456 dbname=repmgr host=192.168.123.20 port=15433 connect_timeout=2 fallback_application_name=repmgr options=-csearch_path="
DEBUG: connecting to: "user=repmgr password=123456 dbname=repmgr host=192.168.123.17 port=15433 connect_timeout=2 fallback_application_name=repmgr options=-csearch_path="ID | Name | Role    | Status    | Upstream | repmgrd | PID  | Paused? | Upstream last seen
----+------+---------+-----------+----------+---------+------+---------+--------------------1  | pg1  | primary | * running |          | running | 7631 | no      | n/a                2  | pg2  | standby |   running | pg1      | running | 5511 | no      | 0 second(s) ago
这篇关于Linux|centos7-postgresql数据库|yum安装数据库和配置repmgr高可用集群以及repmgr的日常管理工作的文章就介绍到这儿,希望我们推荐的文章对编程师们有所帮助!


