本文主要是介绍【安装】Ubuntu上下 Intel Real Sence D455 的安装,希望对大家解决编程问题提供一定的参考价值,需要的开发者们随着小编来一起学习吧!
Ubuntu上下 Intel Real Sence D455 的安装
1. Download SDK
- 下载源码,第一步先将librealsense的github下载下来:
$ git clone https://github.com/IntelRealSense/librealsense.git
单独下载比git快,可能需要翻墙,否则很慢
- 安装依赖环境
$ sudo apt-get install libusb-1.0-0-dev libglfw3-dev libgtk-3-dev
$ sudo apt-get install libudev-dev      (不装make时会报错找不到libudev.h)
libusb是一个USB设备访问接口库;
gtk是一个图形工具包;
glfw是一个OpenGL应用框架;
2. Installing the packages (SDK Platform)
在下载下来的librealsense-master中的readme.md中有安装教程:
-
Register the server’s public key:
sudo apt-key adv --keyserver keyserver.ubuntu.com --recv-key F6E65AC044F831AC80A06380C8B3A55A6F3EFCDE || sudo apt-key adv --keyserver hkp://keyserver.ubuntu.com:80 --recv-key F6E65AC044F831AC80A06380C8B3A55A6F3EFCDEIn case the public key still cannot be retrieved, check and specify proxy settings:export http_proxy="http://<proxy>:<port>"
, and rerun the command. See additional methods in the following link. -
Add the server to the list of repositories:
sudo add-apt-repository "deb https://librealsense.intel.com/Debian/apt-repo $(lsb_release -cs) main" -u -
Install the libraries (see section below if upgrading packages):
sudo apt-get install librealsense2-dkms
sudo apt-get install librealsense2-utils
The above two lines will deploy librealsense2 udev rules, build and activate kernel modules, runtime library and executable demos and tools. -
Optionally install the developer and debug packages:
sudo apt-get install librealsense2-dev
sudo apt-get install librealsense2-dbgWith
devpackage installed, you can compile an application with librealsense usingg++ -std=c++11 filename.cpp -lrealsense2or an IDE of your choice.
Reconnect the Intel RealSense depth camera and run: realsense-viewer to verify the installation.
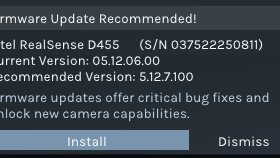
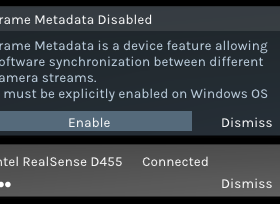
使用內附的Type-C線接上電腦,Viewer會自動抓到並且詢問是否安裝


都安裝完之後就可以開始操作了
Verify that the kernel is updated : modinfo uvcvideo | grep "version:" should include realsense string

补充:RealSense Viewer
开箱测评参考链接:https://blog.cavedu.com/2020/09/28/intel-realsense-d455/
先将所有的模块都打开来看,分别是深度模块 (Stereo Module)、RGB摄影机 (RGB Camera)、动作感测模块 (Motion Module),右上角有3D、 2D两种模式可以选择,这边我转换成2D的模式,最后可以看到总共有4个画面出来,左上是深度摄影机的信息、左下是RGB、右上右下分别是陀螺仪及加速度计。
这篇关于【安装】Ubuntu上下 Intel Real Sence D455 的安装的文章就介绍到这儿,希望我们推荐的文章对编程师们有所帮助!


