本文主要是介绍仿微信头像放大图,希望对大家解决编程问题提供一定的参考价值,需要的开发者们随着小编来一起学习吧!
原文移步至:http://www.cnblogs.com/Jaylong/archive/2012/09/27/androidUI.html?spm=5176.100239.blogcont13507.3.FALAVf
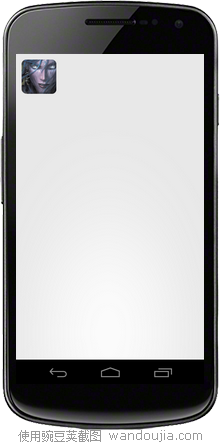
用过微信的朋友朋友都见过微信中点击对方头像显示会加载大图,先贴两张图片说明下:


这种UI效果对用户的体验不错,今天突然有了灵感,试着去实现,结果就出来了。。
下面说说我的思路:
1.点击图片时跳转到另一个activity,然后显示加载的效果,即progressbar
2.显示图片的之前先弹出自定义dialog,然后模拟加载一段时间后,显示整张大图片,要全屏显示,并且有类似微信中左上角滑出的动画效果
下面说说我的实现过程:
1.新建一个布局文件main.xml,其中只是放一个图片,布局
其中的android:onClick="show_click"是声名一个点击方法,然后再代码中实现,类似c#中
xmlns:tools ="http://schemas.android.com/tools"
android:layout_width ="match_parent"
android:layout_height ="match_parent"
android:padding ="10dp"
>
< ImageView
android:layout_width ="wrap_content"
android:layout_height ="wrap_content"
android:layout_alignParentLeft ="true"
android:src ="@drawable/xiaohei"
android:onClick ="show_click"
tools:context =".MianActivit y" />
</ RelativeLayout >
2.新建加载效果的布局文件dialog_imageloading.xml,设置整体布局为linearlayout,并且设置居中熟悉gravity和背景为透明,然后放一个progressbar
< LinearLayout xmlns:android ="http://schemas.android.com/apk/res/android"
android:layout_width ="fill_parent"
android:layout_height ="fill_parent"
android:background ="@android:color/transparent"
android:gravity ="center"
android:orientation ="vertical" >
< ProgressBar
android:id ="@+id/progressBar1"
style ="?android:attr/progressBarStyleLarge"
android:layout_width ="wrap_content"
android:layout_height ="wrap_content"
android:layout_gravity ="center"
android:background ="@android:color/transpar ent" />
</ LinearLayout >
3.然后新建一个显示大图片的布局imageshower.xml,其中只是放了一张图片,设置整体背景为黑色
< LinearLayout xmlns:android ="http://schemas.android.com/apk/res/android"
android:layout_width ="fill_parent"
android:layout_height ="fill_parent"
android:background ="#000"
android:gravity ="center" >
< ImageView
android:layout_width ="fill_parent"
android:layout_height ="wrap_content"
android:src ="@drawable/xiaohei_big" />
</ LinearLayout >
4.MainActivity中的代码只是实现了show_click方法
public void show_click(View v){
startActivity(new Intent(this,ImageShower.class));
}
5.ImageShower中的代码:

import android.app.Activity;
import android.os.Bundle;
import android.os.Handler;
import android.view.MotionEvent;
/**
* @package:com.example.imageshowerdemo
* @author :Allen
* @email:jaylong1302@163.com
* @data:2012-9-27 上午10:58:13
* @description:The class is for...
*/
public class ImageShower extends Activity {
@Override
protected void onCreate(Bundle savedInstanceState) {
// TODO Auto-generated method stub
super.onCreate(savedInstanceState);
setContentView(R.layout.imageshower);
final ImageLoadingDialog dialog = new ImageLoadingDialog( this);
dialog.show();
// 两秒后关闭后dialog
new Handler().postDelayed( new Runnable() {
@Override
public void run() {
dialog.dismiss();
}
}, 1000 * 2);
}
@Override
public boolean onTouchEvent(MotionEvent event) {
// TODO Auto-generated method stub
finish();
return true;
}
}
其中定义了一个handler过两秒后去关闭dialog,重写了父类的onTouchEvent方法,关闭当前activity
6.ImageLoadingDialog中是自定义对话框,继承自Dialog,必须实现onCreate方法和至少一个构造函数

import android.app.Dialog;
import android.content.Context;
import android.os.Bundle;
/**
* @package:com.huaheng.client.activity.view
* @author :Allen
* @email:jaylong1302@163.com
* @data:2012-9-27 上午8:59:40
* @description:The class is for...
*/
public class ImageLoadingDialog extends Dialog {
public ImageLoadingDialog(Context context) {
super(context, R.style.ImageloadingDialogStyle);
// setOwnerActivity((Activity) context); // 设置dialog全屏显示
}
private ImageLoadingDialog(Context context, int theme) {
super(context, theme);
}
@Override
protected void onCreate(Bundle savedInstanceState) {
// TODO Auto-generated method stub
super.onCreate(savedInstanceState);
setContentView(R.layout.dialog_imageloading);
}
}
其中ImageloadingDialogStyle为样式文件,统一写在res/values/styles/
< item name ="android:windowBackground" >@android:color/transparent </ item >
< item name ="android:windowFrame" >@null </ item ><!--无边框-->
< item name ="android:windowNoTitle" >true </ item ><!--没有标题-->
< item name ="android:windowIsFloating" >true </ item ><!--是否浮在activity之上-->
< item name ="android:windowIsTranslucent" >true </ item ><!--背景是否半透明-->
< item name ="android:windowContentOverlay" >@null </ item > <!-- 对话框是否有遮盖 -->
< item name ="android:windowAnimationStyle" >@android:style/Animation.Dialog </ item ><!--动画样式-->
< item name ="android:backgroundDimEnabled" >true </ item ><!--背景是否模糊-->
</ style >
7.最后是ImageShower的样式
< item name ="android:windowAnimationStyle" >@style/AnimHead </ item >
< item name ="android:windowNoTitle" >true </ item >
<!-- 无标题 -->
< item name ="android:windowFullscreen" >true </ item >
<!-- 设置全屏显示 -->
< item name ="android:windowFrame" >@null </ item >
<!-- 边框 -->
< item name ="android:windowIsFloating" >false </ item >
<!-- 是否浮现在activity之上 -->
< item name ="android:windowIsTranslucent" >true </ item >
<!-- 半透明 -->
< item name ="android:windowBackground" >@android:color/black </ item >
< item name ="android:backgroundDimEnabled" >false </ item >
<!-- 模糊 -->
</ style >
其中的AnimHead也是样式
< item name ="android:windowEnterAnimation" >@anim/head_in </ item >
< item name ="android:windowExitAnimation" >@anim/head_out </ item >
</ style >
head_in和head_out是定义在res/anim中
head_in:
<!-- 左上角扩大 -->
< scale xmlns:android ="http://schemas.android.com/apk/res/android"
android:interpolator ="@android:anim/accelerate_decelerate_interpolator"
android:fromXScale ="0.001"
android:toXScale ="1.0"
android:fromYScale ="0.001"
android:toYScale ="1.0"
android:pivotX ="15%"
android:pivotY ="25%"
android:duration ="200" />
head_out:
<!-- 左上角缩小 -->
< scale xmlns:android ="http://schemas.android.com/apk/res/android"
android:interpolator ="@android:anim/accelerate_decelerate_interpolator"
android:fromXScale ="1.0"
android:toXScale ="0.001"
android:fromYScale ="1.0"
android:toYScale ="0.001"
android:pivotX ="15%"
android:pivotY ="25%"
android:duration ="200" />
这篇关于仿微信头像放大图的文章就介绍到这儿,希望我们推荐的文章对编程师们有所帮助!


