本文主要是介绍C# Onnx yolov8-obb 旋转目标检测,希望对大家解决编程问题提供一定的参考价值,需要的开发者们随着小编来一起学习吧!
目录
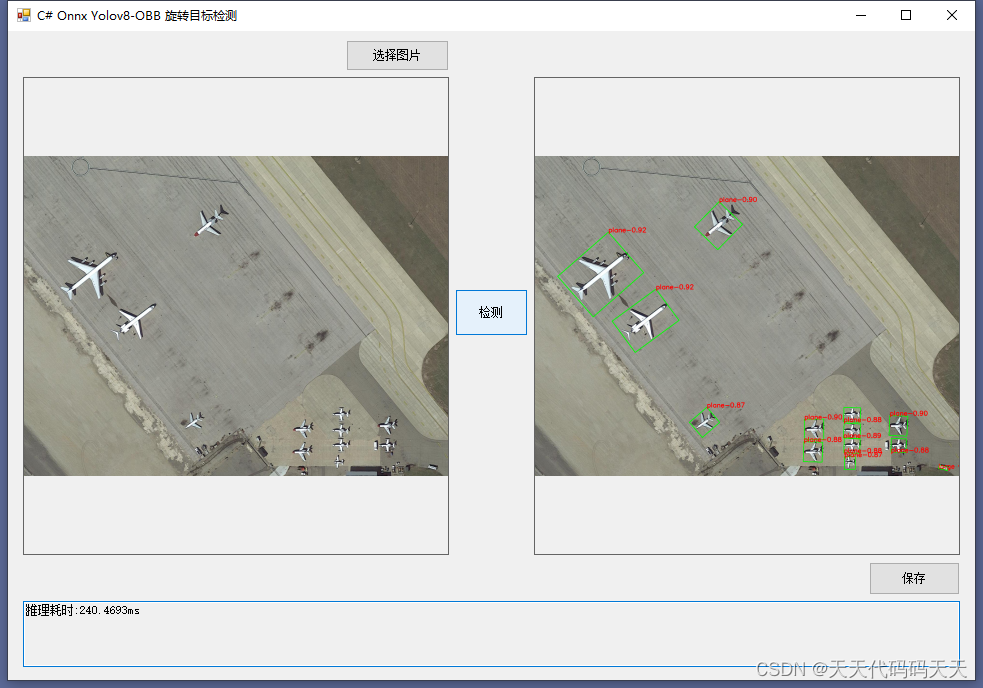
效果
模型信息
项目
代码
下载
C# Onnx Yolov8-OBB 旋转目标检测
效果
模型信息
Model Properties
-------------------------
date:2024-02-26T08:38:44.171849
description:Ultralytics YOLOv8s-obb model trained on runs/DOTAv1.0-ms.yaml
author:Ultralytics
task:obb
license:AGPL-3.0 https://ultralytics.com/license
version:8.1.18
stride:32
batch:1
imgsz:[640, 640]
names:{0: 'plane', 1: 'ship', 2: 'storage tank', 3: 'baseball diamond', 4: 'tennis court', 5: 'basketball court', 6: 'ground track field', 7: 'harbor', 8: 'bridge', 9: 'large vehicle', 10: 'small vehicle', 11: 'helicopter', 12: 'roundabout', 13: 'soccer ball field', 14: 'swimming pool'}
---------------------------------------------------------------
Inputs
-------------------------
name:images
tensor:Float[1, 3, 640, 640]
---------------------------------------------------------------
Outputs
-------------------------
name:output0
tensor:Float[1, 20, 8400]
---------------------------------------------------------------
项目
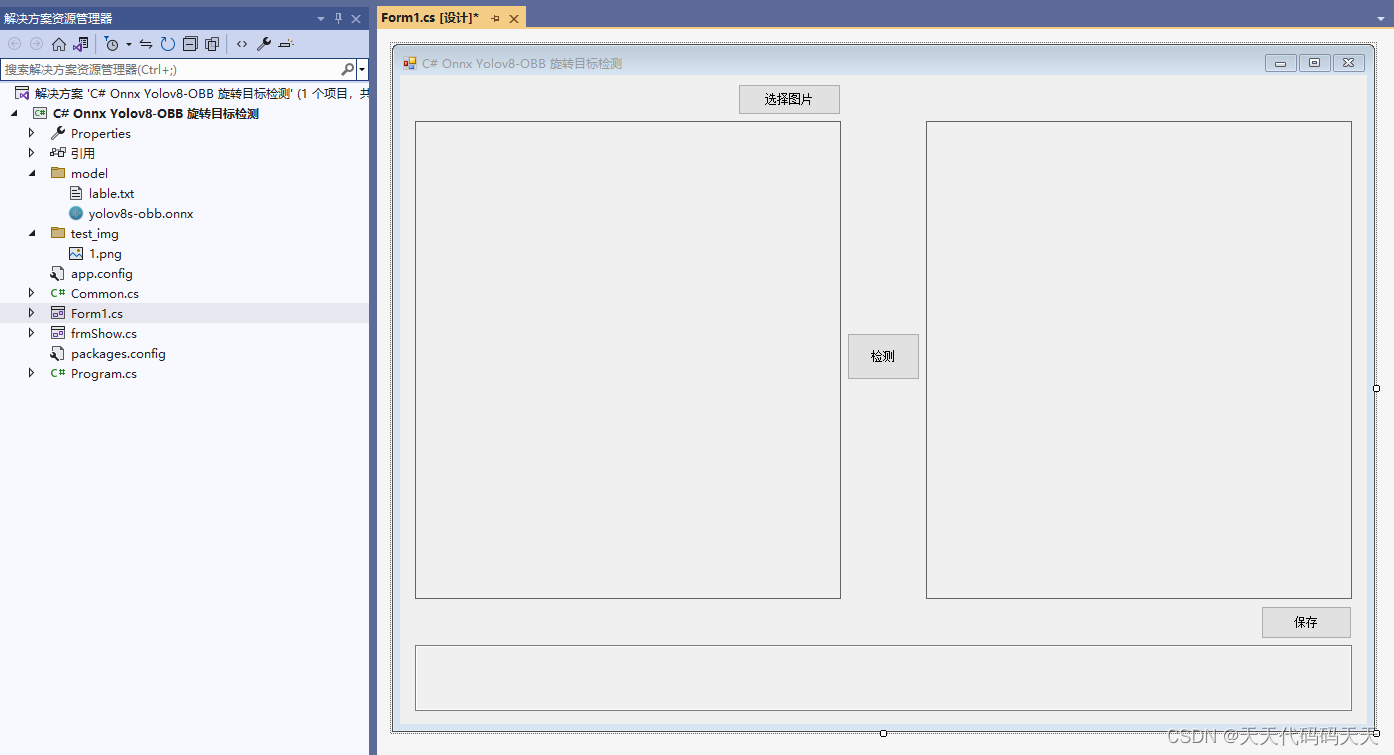
代码
using Microsoft.ML.OnnxRuntime;
using Microsoft.ML.OnnxRuntime.Tensors;
using OpenCvSharp;
using OpenCvSharp.Dnn;
using System;
using System.Collections.Generic;
using System.Drawing;
using System.Drawing.Imaging;
using System.IO;
using System.Linq;
using System.Numerics;
using System.Windows.Forms;namespace Onnx_Yolov8_Demo
{public partial class Form1 : Form{public Form1(){InitializeComponent();}string fileFilter = "*.*|*.bmp;*.jpg;*.jpeg;*.tiff;*.tiff;*.png";string image_path = "";string classer_path;DateTime dt1 = DateTime.Now;DateTime dt2 = DateTime.Now;string model_path;Mat image;Mat result_image;public string[] class_lables;SessionOptions options;InferenceSession onnx_session;Tensor<float> input_tensor;List<NamedOnnxValue> input_container;IDisposableReadOnlyCollection<DisposableNamedOnnxValue> result_infer;DisposableNamedOnnxValue[] results_onnxvalue;Tensor<float> result_tensors;private void button1_Click(object sender, EventArgs e){OpenFileDialog ofd = new OpenFileDialog();ofd.Filter = fileFilter;if (ofd.ShowDialog() != DialogResult.OK) return;pictureBox1.Image = null;image_path = ofd.FileName;pictureBox1.Image = new Bitmap(image_path);textBox1.Text = "";image = new Mat(image_path);pictureBox2.Image = null;}private void button2_Click(object sender, EventArgs e){if (image_path == ""){return;}button2.Enabled = false;pictureBox2.Image = null;textBox1.Text = "";Application.DoEvents();//图片缩放image = new Mat(image_path);int max_image_length = image.Cols > image.Rows ? image.Cols : image.Rows;Mat max_image = Mat.Zeros(new OpenCvSharp.Size(max_image_length, max_image_length), MatType.CV_8UC3);Rect roi = new Rect(0, 0, image.Cols, image.Rows);image.CopyTo(new Mat(max_image, roi));float[] result_array;float factor = (float)(max_image_length / 640.0);// 将图片转为RGB通道Mat image_rgb = new Mat();Cv2.CvtColor(max_image, image_rgb, ColorConversionCodes.BGR2RGB);Mat resize_image = new Mat();Cv2.Resize(image_rgb, resize_image, new OpenCvSharp.Size(640, 640));// 输入Tensorfor (int y = 0; y < resize_image.Height; y++){for (int x = 0; x < resize_image.Width; x++){input_tensor[0, 0, y, x] = resize_image.At<Vec3b>(y, x)[0] / 255f;input_tensor[0, 1, y, x] = resize_image.At<Vec3b>(y, x)[1] / 255f;input_tensor[0, 2, y, x] = resize_image.At<Vec3b>(y, x)[2] / 255f;}}//将 input_tensor 放入一个输入参数的容器,并指定名称input_container.Add(NamedOnnxValue.CreateFromTensor("images", input_tensor));dt1 = DateTime.Now;//运行 Inference 并获取结果result_infer = onnx_session.Run(input_container);dt2 = DateTime.Now;// 将输出结果转为DisposableNamedOnnxValue数组results_onnxvalue = result_infer.ToArray();// 读取第一个节点输出并转为Tensor数据result_tensors = results_onnxvalue[0].AsTensor<float>();result_array = result_tensors.ToArray();Mat result_data = new Mat(20, 8400, MatType.CV_32F, result_array);result_data = result_data.T();List<Rect2d> position_boxes = new List<Rect2d>();List<int> class_ids = new List<int>();List<float> confidences = new List<float>();List<float> rotations = new List<float>();// Preprocessing output resultsfor (int i = 0; i < result_data.Rows; i++){Mat classes_scores = new Mat(result_data, new Rect(4, i, 15, 1));OpenCvSharp.Point max_classId_point, min_classId_point;double max_score, min_score;// Obtain the maximum value and its position in a set of dataCv2.MinMaxLoc(classes_scores, out min_score, out max_score,out min_classId_point, out max_classId_point);// Confidence level between 0 ~ 1// Obtain identification box informationif (max_score > 0.25){float cx = result_data.At<float>(i, 0);float cy = result_data.At<float>(i, 1);float ow = result_data.At<float>(i, 2);float oh = result_data.At<float>(i, 3);double x = (cx - 0.5 * ow) * factor;double y = (cy - 0.5 * oh) * factor;double width = ow * factor;double height = oh * factor;Rect2d box = new Rect2d();box.X = x;box.Y = y;box.Width = width;box.Height = height;position_boxes.Add(box);class_ids.Add(max_classId_point.X);confidences.Add((float)max_score);rotations.Add(result_data.At<float>(i, 19));}}// NMS int[] indexes = new int[position_boxes.Count];CvDnn.NMSBoxes(position_boxes, confidences, 0.25f, 0.7f, out indexes);List<RotatedRect> rotated_rects = new List<RotatedRect>();for (int i = 0; i < indexes.Length; i++){int index = indexes[i];float w = (float)position_boxes[index].Width;float h = (float)position_boxes[index].Height;float x = (float)position_boxes[index].X + w / 2;float y = (float)position_boxes[index].Y + h / 2;float r = rotations[index];float w_ = w > h ? w : h;float h_ = w > h ? h : w;r = (float)((w > h ? r : (float)(r + Math.PI / 2)) % Math.PI);RotatedRect rotate = new RotatedRect(new Point2f(x, y), new Size2f(w_, h_), (float)(r * 180.0 / Math.PI));rotated_rects.Add(rotate);}result_image = image.Clone();for (int i = 0; i < indexes.Length; i++){int index = indexes[i];Point2f[] points = rotated_rects[i].Points();for (int j = 0; j < 4; j++){Cv2.Line(result_image, (OpenCvSharp.Point)points[j], (OpenCvSharp.Point)points[(j + 1) % 4], new Scalar(0, 255, 0), 2);}Cv2.PutText(result_image, class_lables[class_ids[index]] + "-" + confidences[index].ToString("0.00"),(OpenCvSharp.Point)points[0], HersheyFonts.HersheySimplex, 0.8, new Scalar(0, 0, 255), 2);}pictureBox2.Image = new Bitmap(result_image.ToMemoryStream());textBox1.Text = "推理耗时:" + (dt2 - dt1).TotalMilliseconds + "ms";button2.Enabled = true;}private void Form1_Load(object sender, EventArgs e){model_path = "model/yolov8s-obb.onnx";classer_path = "model/lable.txt";// 创建输出会话,用于输出模型读取信息options = new SessionOptions();options.LogSeverityLevel = OrtLoggingLevel.ORT_LOGGING_LEVEL_INFO;options.AppendExecutionProvider_CPU(0);// 设置为CPU上运行// 创建推理模型类,读取本地模型文件onnx_session = new InferenceSession(model_path, options);//model_path 为onnx模型文件的路径// 输入Tensorinput_tensor = new DenseTensor<float>(new[] { 1, 3, 640, 640 });// 创建输入容器input_container = new List<NamedOnnxValue>();List<string> str = new List<string>();StreamReader sr = new StreamReader(classer_path);string line;while ((line = sr.ReadLine()) != null){str.Add(line);}class_lables = str.ToArray();image_path = "test_img/1.png";pictureBox1.Image = new Bitmap(image_path);image = new Mat(image_path);}private void pictureBox1_DoubleClick(object sender, EventArgs e){Common.ShowNormalImg(pictureBox1.Image);}private void pictureBox2_DoubleClick(object sender, EventArgs e){Common.ShowNormalImg(pictureBox2.Image);}SaveFileDialog sdf = new SaveFileDialog();private void button3_Click(object sender, EventArgs e){if (pictureBox2.Image == null){return;}Bitmap output = new Bitmap(pictureBox2.Image);sdf.Title = "保存";sdf.Filter = "Images (*.jpg)|*.jpg|Images (*.png)|*.png|Images (*.bmp)|*.bmp|Images (*.emf)|*.emf|Images (*.exif)|*.exif|Images (*.gif)|*.gif|Images (*.ico)|*.ico|Images (*.tiff)|*.tiff|Images (*.wmf)|*.wmf";if (sdf.ShowDialog() == DialogResult.OK){switch (sdf.FilterIndex){case 1:{output.Save(sdf.FileName, ImageFormat.Jpeg);break;}case 2:{output.Save(sdf.FileName, ImageFormat.Png);break;}case 3:{output.Save(sdf.FileName, ImageFormat.Bmp);break;}case 4:{output.Save(sdf.FileName, ImageFormat.Emf);break;}case 5:{output.Save(sdf.FileName, ImageFormat.Exif);break;}case 6:{output.Save(sdf.FileName, ImageFormat.Gif);break;}case 7:{output.Save(sdf.FileName, ImageFormat.Icon);break;}case 8:{output.Save(sdf.FileName, ImageFormat.Tiff);break;}case 9:{output.Save(sdf.FileName, ImageFormat.Wmf);break;}}MessageBox.Show("保存成功,位置:" + sdf.FileName);}}}
}
下载
源码下载
这篇关于C# Onnx yolov8-obb 旋转目标检测的文章就介绍到这儿,希望我们推荐的文章对编程师们有所帮助!


