本文主要是介绍uniapp+uview封装上传图片组件(单张/多张),希望对大家解决编程问题提供一定的参考价值,需要的开发者们随着小编来一起学习吧!
uniapp+uview封装上传图片组件(单张/多张)
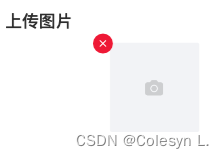
先看效果

1.uploadImg.vue
<template><view class="uploadImg flex-d flex-wrap"><!-- 多张图片上传 --><view class="imgList imgArr flex-d flex-wrap" v-for="(item,index) in fileList" :key="index" v-if="maxCount>1 && fileList.length"><image class="imgListArr" :src="item" @click="clickImg(item)"></image><view class="iconClose" @click.stope="closeImgOne(index)"><u-icon name="close-circle-fill" color="rgba(234, 30, 55, 1)" size="24"></u-icon></view></view><!-- 单张图片上传 --><view class="imgList imgArr" v-if="oneImgurl && maxCount==1"><image :src="oneImgurl" @click="clickImg(oneImgurl)"></image><view class="iconClose" @click.stope="closeImg"><u-icon name="close-circle-fill" color="rgba(234, 30, 55, 1)" size="24"></u-icon></view></view><u-upload @afterRead="uploadImgFile" @delete="deletePic" name="3" :previewFullImage="true" :maxCount="maxCount" :width="width" :height="height" :multiple="multiple" maxSize="50242880" :deletable="deletable" v-if="!imgUrl && maxCount<2 && !multiple"></u-upload><u-upload @afterRead="uploadImgFile" @delete="deletePic" name="3" :previewFullImage="true" :maxCount="maxCount" :width="width" :height="height" :multiple="multiple" maxSize="50242880" :deletable="deletable" v-if="multiple && (fileList.length<maxCount)"></u-upload></view>
</template><script>const app = getApp()export default {props: {maxCount: { //多张图片上传个数type: String,default: '1'},width: { //多张图片的宽度type: Number | String,default: 104},height: { //多张图片的高度type: Number | String,default: 104},file: { //多张图片返回的数组type: Array,value: []},imgUrl: { //单张图片返回的地址type: String,default: ''},multiple: { // 当设置 multiple 为 true 时, file 为数组格式,否则为对象格式type: Boolean,default: false},scene: { //参数type: String,default: ''},field: { //返回的字段名称type: String,default: ''}},watch: {file: {handler(oldValue) {this.fileList = oldValue}},imgUrl: {handler(newval) {this.oneImgurl = newval}}},data() {return {fileList: this.file,show: false,img: {},oneImgurl: this.imgUrl,deletable: false,clipperWidth: app.globalData.screenWidth}},methods: {// 删除图片deletePic(event) {this.fileList.splice(event.index, 1)this.$emit('getImgList', this.fileList)},// 上传图片uploadImgFile(event) {this.afterRead(event)},// 新增图片async afterRead(event) {// 当设置 mutiple 为 true 时, file 为数组格式,否则为对象格式let lists = event.fileif (this.maxCount < 2) {const result = await this.uploadFilePromise(event.file)this.$emit('getImg', {url: result.data.original,field: this.field})} else {for (let i = 0; i < lists.length; i++) {const result = await this.uploadFilePromise(lists[i])this.fileList.push(result.data.original)this.$emit('getImg', {list: this.fileList,field: this.field})}}},uploadFilePromise(item) {var formData = {};return new Promise((resolve, reject) => {formData.scene = this.scenelet a = uni.uploadFile({url: app.globalData.reqUrl + '/****/****/***',filePath: item.url,name: 'image',formData: formData,success: (res) => {let datas = JSON.parse(res.data)resolve(datas)},fail: (err) => {uni.showToast({title: '上传失败',icon: 'none'})}});})},// 数组图片删除单个closeImgOne(idx) {this.fileList.splice(idx, 1)this.$emit('getImg', {list: this.fileList,field: this.field})},// 单个图片上传closeImg() {this.oneImgurl = ''this.$emit('getImg', {url: this.oneImgurl,field: this.field})},// 图片放大查看clickImg(url) {let _this = this;let imgsArray = [];imgsArray[0] = urluni.previewImage({current: 0,urls: imgsArray});}}}
</script><style lang="scss" scope>.imgList {image {width: 168rpx;height: 168rpx;border-radius: 16rpx;margin: 0 28rpx 20rpx 0}}.imgListArr {width: 168rpx;height: 168rpx;border-radius: 16rpx;margin: 0 30rpx 30rpx 0}.imgArr {position: relative;}.iconClose {position: absolute;top: -20rpx;right: -10rpx;}
</style>
使用方式test.vue
// 多张
<uploadImg :file="imgList" maxCount='5' field="imgListItem" @getImg="getImg" :multiple="true" width="168rpx" height="168rpx" scene="err_image" need_thumbnail="1">
</uploadImg>// 单张
<!-- <uploadImg :imgUrl="img" maxCount='1' @getImg="getImg" field="img">
</uploadImg> -->// js// 获取图片
getImg(val) {console.log(val)
},
这篇关于uniapp+uview封装上传图片组件(单张/多张)的文章就介绍到这儿,希望我们推荐的文章对编程师们有所帮助!


