本文主要是介绍vue3使用vue-masonry插件实现瀑布流,希望对大家解决编程问题提供一定的参考价值,需要的开发者们随着小编来一起学习吧!
《Vue插件》瀑布流插件vue-masonry的使用与踩坑记录
参数:
item-selector
transition-duration
column-width
origin-left
origin-top
gutter
前言:
之前其实有分享过一篇纯CSS实现瀑布流的方法: https://oliver.blog.csdn.net/article/details/126450691,但纯CSS实现的方案都不是比较好的方案,总归有一些各式各样的局限性,因此,有了本文,记录分享一下vue中比较好用的一个瀑布流插件——vue-masonry,GitHub上将近600个star,个人推荐~
注意:以下vue-masonry相关分享与踩坑解决的问题版本为0.16.0;
官网
官网地址:https://masonry.desandro.com/,但文本的主要的信息来源来自于GitHub的README,地址如下:https://github.com/shershen08/vue-masonry#readme
有兴趣的小伙伴可以自行浏览~当然插件本身可以适用于很多平台,Vue仅仅是其中之一;
安装与使用
由于是集成在Vue中的,绝大多数Vue都是基于Vue-Cli搭建的项目,script标签这种…应该很少见吧,因此就不过多涉及了,以vue-cli为主,
// 安装
npm install vue-masonry -S
注意的是,vue-masonry没有对应的@types/vue-masonry
这也就代表vue-masonry 没有对应的类型描述,当然,也不需要,即使你的项目是Vue3+TypeScript也不需要安装类型描述文件,以Vue3+Ts的项目为例,当安装完成后,直接在main.ts文件中引入即可,引入代码如下:
import { VueMasonryPlugin } from 'vue-masonry';app.use(VueMasonryPlugin);
常规,简单的引入,即可正常使用;
基本使用
vue-masonry的使用核心在于自定义指令:v-masonry 和 v-masonry-tile,这个是整个瀑布流插件的使用核心,
<div v-masonry><div v-masonry-tile v-for="(item, index) in blocks"><!-- block item markup --></div>
</div>
v-masonry: 绑定在父级容器上;
v-masonry-tile: 绑定在子级容器上;
示例:
直接看个例子吧
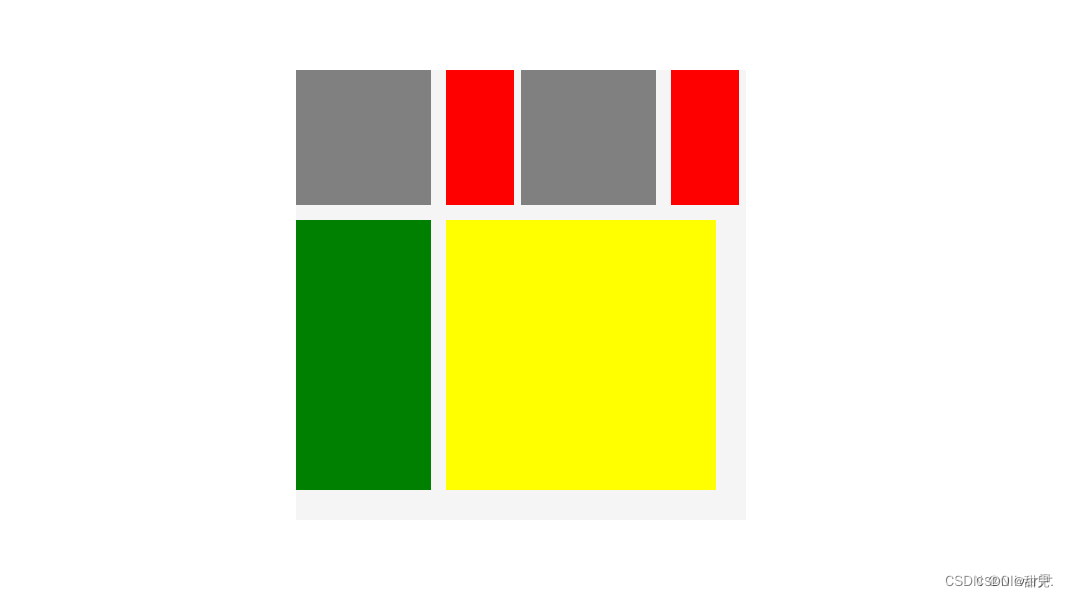
<div v-masonry class="container"><divv-masonry-tilev-for="(item, index) in demoList":class="`demo-${item}`":key="index"><div></div></div>
</div>
效果图如下:

参数
item-selector
接收一个字符串作为参数,官方原文解释:list element DOM item selector,作用是选择哪些列作为瀑布流的列,比如:
<div v-masonry item-selector=".demo-2" class="container"><divv-masonry-tilev-for="(item, index) in demoList":class="`demo-${item}`":key="index"><div></div></div>
</div><script lang="ts" setup>
import { Ref, ref } from "vue";const demoList: Ref<number[]> = ref([1, 2, 1, 3, 4]);
</script>
示例中item-selector的值是".demo-2",代表只有类名中包含.demo2的DOM,都会被拉入瀑布流的布局,如果不包含,那么依旧会按原来的规则进行布局;
transition-duration
接收一个字符串作为参数,官方原文解释:duration of transitions,作用是设定动画改变的持续时间,比如:
<div v-masonry transition-duration="0.2s" class="container"><divv-masonry-tilev-for="(item, index) in demoList":class="`demo-${item}`":key="index"><div></div></div>
</div>
这个属性是动画持续时间,比如,当父级容器的宽度尺寸发生变化了,理所当然的里面的瀑布流布局也会随之发生变化,所有基于瀑布流的DOM将要重新排布,这个排布的过程是动画化的,这个动画持续时间即这里设定的时间~ 在项目中我设置为0 这样的话他就不会出现数据从上而下的状态
column-width
接收一个字符串作为参数,官方原文解释:element selector for column width. Can be a selector string or a number,简单的说就是设定一个基准列宽,大致用法如下:
<div v-masonry column-width=".demo-1" class="container"><divv-masonry-tilev-for="(item, index) in demoList":class="`demo-${item}`":key="index"><div></div></div>
</div>
默认情况下vue-masonry会以第一个元素的宽度作为默认排序,也就是说如果第一个元素的非最小单位的基准元素,那么整个瀑布流的布局都会乱,因此需要通过column-width修改;
举个例子吧,看一段代码
<div v-masonry class="container"><div v-masonry-tile class="demo-2"></div><div v-masonry-tile class="demo-1"></div><div v-masonry-tile class="demo-1"></div>
</div>
整个瀑布流布局的列宽会以demo-2的列宽为标准,因此,即使demo-1的宽度比demo-2的小

因此,这种情况下,我们就需要使用column-width指定基准列宽,将column-width的值设定为demo-1
<div v-masonry column-width=".demo-1" class="container"><div v-masonry-tile class="demo-2"></div><div v-masonry-tile class="demo-1"></div><div v-masonry-tile class="demo-1"></div>
</div>
结果如下:

origin-left
官方原文解释:set to group elements to the right instead of left by default,设置X轴的排序方式,默认从左往右排序,设定后可从右向左排序
<template><div v-masonry origin-left="false" class="container"><divv-masonry-tilev-for="(item, index) in demoList":class="`demo-${item}`":key="index"><div></div></div></div>
</template>
效果图如下:

origin-top
官方原文解释:set to group elements to the bottom instead of top by default,设置Y轴的排序方式,默认从上往下排序,设定后可从下向上排序
<template><div v-masonry origin-top="false" class="container"><divv-masonry-tilev-for="(item, index) in demoList":class="`demo-${item}`":key="index"><div></div></div></div>
</template>
效果图如下:
gutter
官方原文解释:specifies [horizontal space between item elements]. Can be a selector string or a number. (https://masonry.desandro.com/options.html#gutter). Set gutter to an Element or Selector String to use the outer width of the element,简单的说,就是用来设置列宽,
具体效果可以看原文中的这个链接,说明的已经非常详细了:https://masonry.desandro.com/options.html#gutter,当然由于这是在Vue中使用,因此还是要通过属性的方式注入,比如
<template><div v-masonry gutter="10" class="container"><divv-masonry-tilev-for="(item, index) in demoList":class="`demo-${item}`":key="index"><div></div></div></div>
</template>
小结
还有一些属性,感觉不是太重要,因此有兴趣的小伙伴可以自行尝试,问题不大,接着,对比下来不难发现,纯CSS用法还是非常捡漏的,如果真的是实用与项目中,除非是极其简单的应用,可以考虑用纯CSS实现,否则还是建议使用一些功能已经相对完善的第三方插件来帮助我们实现功能~
这篇关于vue3使用vue-masonry插件实现瀑布流的文章就介绍到这儿,希望我们推荐的文章对编程师们有所帮助!


