本文主要是介绍山东大学暑期实训第四次记载(第二周第一次),希望对大家解决编程问题提供一定的参考价值,需要的开发者们随着小编来一起学习吧!
7月5号-6号,根据分配好的任务分工,我进行着查找验证有关图像处理以及骨干分割代码的工作。暂时筛选出5种图像分割的方法:
一.图像分割:
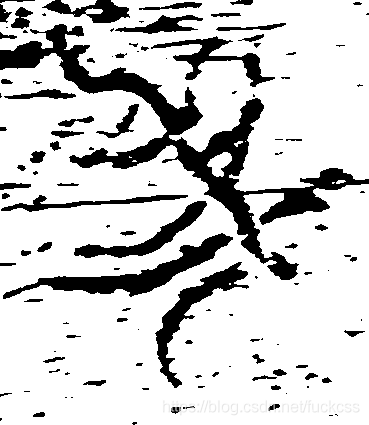
1.Entropy Method图像分割方法
计算前景和背景的信息熵,求最大熵。含义是经过阈值分割后图像的平均信息量越大愈好。
所使用的代码:
import cv2
import numpy as np
import matplotlib.pyplot as plt
import math
import osdef Entropy(gray):p = []  # 灰度概率H_last = 0  # 上一个H总熵best_k = 0  # 最佳阈值hist = cv2.calcHist([gray], [0], None, [256], [0, 256])  # 255*1的灰度直方图的数组for i in range(256):p.insert(i, hist[i][0] / gray.size)for k in range(256):H_b = 0  # black的熵,前景的平均信息量H_w = 0  # white的熵,背景的平均信息量for i in range(k):if p[i] != 0:H_b = H_b - p[i] * math.log(2, p[i])for i in range(k, 256):if p[i] != 0:H_w = H_w - p[i] * math.log(2, p[i])H = H_b + H_wif H > H_last:H_last = Hbest_k = kreturn H, best_kdef operateImages_path(file_pathname):#遍历处理该目录下的所有图片for filename in os.listdir(file_pathname):print(filename)img = cv2.imread(r""+file_pathname+"/"+filename)  # 读取图像(BGR)gray = cv2.cvtColor(img, cv2.COLOR_BGR2GRAY)  # 转灰度图像H, best_k = Entropy(gray)ret, thresh1 = cv2.threshold(gray, best_k, 255, cv2.THRESH_BINARY)plt.imsave("D:/AllPycharmProjects/ImageRes/EM"+"/"+filename, thresh1, cmap="gray")  # 保存图片if __name__ == "__main__":operateImages_path("./ImageOps")
图像结果:
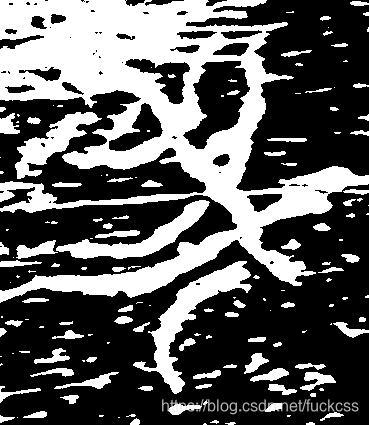
2.FCM
所使用的代码:
import cv2
import numpy as np
import os
C = 2
M = 2
EPSILON = 0.001def get_init_fuzzy_mat(pixel_count):global Cfuzzy_mat = np.zeros((C, pixel_count))for col in range(pixel_count):temp_sum = 0randoms = np.random.rand(C - 1, 1)for row in range(C - 1):fuzzy_mat[row, col] = randoms[row, 0] * (1 - temp_sum)temp_sum += fuzzy_mat[row, col]fuzzy_mat[-1, col] = 1 - temp_sumreturn fuzzy_matdef get_centroids(data_array, fuzzy_mat):global Mclass_num, pixel_count = fuzzy_mat.shape[:2]centroids = np.zeros((class_num, 1))for i in range(class_num):fenzi = 0.fenmu = 0.for pixel in range(pixel_count):fenzi += np.power(fuzzy_mat[i, pixel], M) * data_array[0, pixel]fenmu += np.power(fuzzy_mat[i, pixel], M)centroids[i, 0] = fenzi / fenmureturn centroidsdef eculidDistance(vectA, vectB):return np.sqrt(np.sum(np.power(vectA - vectB, 2)))def eculid_distance(pixel_1, pixel_2):return np.power(pixel_1 - pixel_2, 2)def cal_fcm_function(fuzzy_mat, centroids, data_array):global Mclass_num, pixel_count = fuzzy_mat.shape[:2]target_value = 0.0for c in range(class_num):for p in range(pixel_count):target_value += eculid_distance(data_array[0, p], centroids[c, 0]) * np.power(fuzzy_mat[c, p], M)return target_valuedef get_label(fuzzy_mat, data_array):pixel_count = data_array.shape[1]label = np.zeros((1, pixel_count))for i in range(pixel_count):if fuzzy_mat[0, i] > fuzzy_mat[1, i]:label[0, i] = 0else:label[0, i] = 255return labeldef cal_fuzzy_mat(data_array, centroids):global Mpixel_count = data_array.shape[1]class_num = centroids.shape[0]new_fuzzy_mat = np.zeros((class_num, pixel_count))for p in range(pixel_count):for c in range(class_num):temp_sum = 0.Dik = eculid_distance(data_array[0, p], centroids[c, 0])for i in range(class_num):temp_sum += np.power(Dik / (eculid_distance(data_array[0, p], centroids[i, 0])), (1 / (M - 1)))new_fuzzy_mat[c, p] = 1 / temp_sumreturn new_fuzzy_matdef fcm(init_fuzzy_mat, init_centroids, data_array):global EPSILONlast_target_function = cal_fcm_function(init_fuzzy_mat, init_centroids, data_array)print("迭代次数 = 1, 目标函数值 = {}".format(last_target_function))fuzzy_mat = cal_fuzzy_mat(data_array, init_centroids)centroids = get_centroids(data_array, fuzzy_mat)target_function = cal_fcm_function(fuzzy_mat, centroids, data_array)print("迭代次数 = 2, 目标函数值 = {}".format(target_function))count = 3while count < 100:if abs(target_function - last_target_function) <= EPSILON:breakelse:last_target_function = target_functionfuzzy_mat = cal_fuzzy_mat(data_array, centroids)centroids = get_centroids(data_array, fuzzy_mat)target_function = cal_fcm_function(fuzzy_mat, centroids, data_array)print("迭代次数 = {}, 目标函数值 = {}".format(count, target_function))count += 1return fuzzy_mat, centroids, target_functiondef operateImages_path(file_pathname):#遍历处理该目录下的所有图片for filename in os.listdir(file_pathname):print(filename)image = cv2.imread(r""+file_pathname+"/"+filename, cv2.IMREAD_GRAYSCALE)rows, cols = image.shape[:2]pixel_count = rows * colsimage_array = image.reshape(1, pixel_count)# print(image_array[1])# 初始模糊矩阵init_fuzzy_mat = get_init_fuzzy_mat(pixel_count)# 初始聚类中心init_centroids = get_centroids(image_array, init_fuzzy_mat)fuzzy_mat, centroids, target_function = fcm(init_fuzzy_mat, init_centroids, image_array)label = get_label(fuzzy_mat, image_array)new_image = label.reshape(rows, cols)# 黑白反转# r_new_image = 255 - new_image#cv2.imshow("result", new_image)cv2.imwrite("D:/AllPycharmProjects/ImageRes/FCM"+"/"+filename, new_image)  # 保存图像# cv2.waitKey(0)  #表示程序会无限制的等待用户的按键事件# cv2.destroyAllWindows()operateImages_path("./ImageOps")
处理结果:
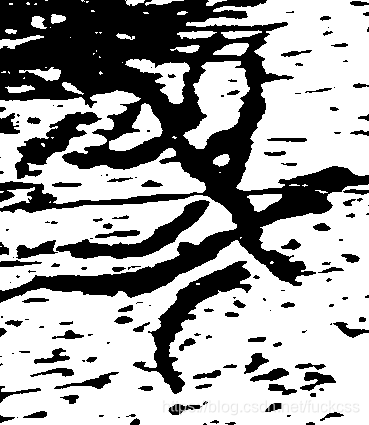
3.K-means方法
所使用的代码:
import cv2
import math
import numpy as np
import os
import matplotlib.pyplot as pltdef operateImages_path(file_pathname):#遍历处理该目录下的所有图片for filename in os.listdir(file_pathname):print(filename)img = cv2.imread(r""+file_pathname+"/"+filename, cv2.IMREAD_GRAYSCALE)# plt.subplot(221), plt.imshow(img, 'gray'), plt.title('original')# plt.xticks([]), plt.yticks([])# 改变图像的维度img1 = img.reshape((img.shape[0] * img.shape[1], 1))img1 = np.float32(img1)# 设定一个criteria,criteria = (cv2.TERM_CRITERIA_EPS + cv2.TERM_CRITERIA_MAX_ITER, 10, 1.0)# 设定一个初始类中心flagsflags = cv2.KMEANS_RANDOM_CENTERS# 应用K-meanscompactness, labels, centers = cv2.kmeans(img1, 2, None, criteria, 5, flags)img2 = labels.reshape((img.shape[0], img.shape[1]))# plt.subplot(222), plt.imshow(img2, 'gray'), plt.title('kmeans_attempts_5')# plt.xticks([]), plt.yticks([])plt.imsave("D:/AllPycharmProjects/ImageRes/KM"+"/"+filename, img2, cmap="gray")  # 保存图片# plt.savefig("kmeans_attempts.png")# plt.show()operateImages_path("./ImageOps")
处理结果:
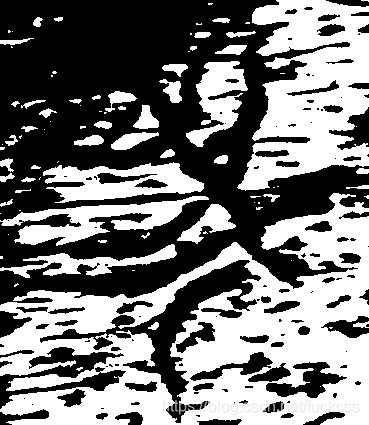
4.熵算法
所使用的代码:
import cv2
import math
import numpy as np
import osdef caleGrayHist(image):# 灰度图像的高、宽rows, cols = image.shape# 存储灰度直方图grayHist = np.zeros([256], np.uint64)  # 图像的灰度级范围是0~255for r in range(rows):for c in range(cols):grayHist[image[r][c]] += 1return grayHistdef threshEntropy(image):rows, cols = image.shape# 求灰度直方图grayHist = caleGrayHist(image)# 归一化灰度直方图,即概率直方图normGrayHist = grayHist / float(rows * cols)# 第一步:计算累加直方图,也成为零阶累矩阵zeroCumuMoment = np.zeros([256], np.float32)for k in range(256):if k == 0:zeroCumuMoment[k] = normGrayHist[k]else:zeroCumuMoment[k] = zeroCumuMoment[k - 1] + normGrayHist[k]# 第二步:计算各个灰度级的熵entropy = np.zeros([256], np.float32)for k in range(256):if k == 0:if normGrayHist[k] == 0:entropy[k] = 0else:entropy[k] = - normGrayHist[k] * math.log10(normGrayHist[k])else:if normGrayHist[k] == 0:entropy[k] = entropy[k - 1]else:entropy[k] = entropy[k - 1] - normGrayHist[k] * math.log10(normGrayHist[k])# 第三步:找阈值fT = np.zeros([256], np.float32)ft1, ft2 = 0.0, 0.0totalEntropy = entropy[255]for k in range(255):# 找最大值maxFront = np.max(normGrayHist[0:k + 1])maxBack = np.max(normGrayHist[k + 1:256])if maxFront == 0 or zeroCumuMoment[k] == 0 or maxFront == 1 or zeroCumuMoment[k] == 1 or totalEntropy == 0:ft1 = 0else:ft1 = entropy[k] / totalEntropy * (math.log10(zeroCumuMoment[k]) / math.log10(maxFront))if maxBack == 0 or 1 - zeroCumuMoment[k] == 0 or maxBack == 1 or 1 - zeroCumuMoment[k] == 1:ft2 = 0else:if totalEntropy == 0:ft2 = (math.log10(1 - zeroCumuMoment[k]) / math.log10(maxBack))else:ft2 = (1 - entropy[k] / totalEntropy) * (math.log10(1 - zeroCumuMoment[k]) / math.log10(maxBack))fT[k] = ft1 + ft2# 找到最大值索引threshLoc = np.where(fT == np.max(fT))thresh = threshLoc[0][0]# 阈值处理threshold = np.copy(image)threshold[threshold > thresh] = 255threshold[threshold <= thresh] = 0return (thresh, threshold)def operateImages_path(file_pathname):#遍历处理该目录下的所有图片for filename in os.listdir(file_pathname):print(filename)img = cv2.imread(r""+file_pathname+"/"+filename, cv2.IMREAD_GRAYSCALE)the, dst = threshEntropy(img)# the1 = 0# maxval = 255# the1, dst1 = cv2.threshold(img, the1, maxval, cv2.THRESH_TRIANGLE + cv2.THRESH_BINARY_INV)#print('The thresh is :', the)# print('The thresh1 is :', the1)# 黑白反转# r_dst = 255 - dst#cv2.imshow("image", img)#cv2.imshow('shang_thresh_out', dst)# cv2.imshow('thresh_out1', dst1)cv2.imwrite("D:/AllPycharmProjects/ImageRes/SHANG" + "/" + filename, dst)  # 保存图像# cv2.waitKey(0)# cv2.destroyAllWindows()operateImages_path("./ImageOps")
处理结果:
5.直方图法
所使用的代码:
import cv2
import numpy as np
import osdef caleGrayHist(image):# 灰度图像的高、宽rows, cols = image.shape# 存储灰度直方图grayHist = np.zeros([256], np.uint64)  # 图像的灰度级范围是0~255for r in range(rows):for c in range(cols):grayHist[image[r][c]] += 1return grayHistdef threshTwoPeaks(image):# 计算灰度直方图histogram = caleGrayHist(image)# 找到灰度直方图的最大峰值对应得灰度值maxLoc = np.where(histogram == np.max(histogram))firstPeak = maxLoc[0][0]  # 取第一个最大的灰度值# 寻找灰度直方图的第二个峰值对应得灰度值measureDists = np.zeros([256], np.float32)for k in range(256):measureDists[k] = pow(k - firstPeak, 2) * histogram[k]maxLoc2 = np.where(measureDists == np.max(measureDists))secondPeak = maxLoc2[0][0]# 找到两个峰值之间的最小值对应的灰度值,作为阈值thresh = 0if firstPeak > secondPeak:  # 第一个峰值在第二个峰值右侧temp = histogram[int(secondPeak):int(firstPeak)]minLoc = np.where(temp == np.min(temp))thresh = secondPeak + minLoc[0][0] + 1  # 有多个波谷取左侧的波谷else:temp = histogram[int(firstPeak):int(secondPeak)]minLoc = np.where(temp == np.min(temp))thresh = firstPeak + minLoc[0][0] + 1# 找到阈值后进行阈值处理,得到二值图threshImage_out = image.copy()threshImage_out[threshImage_out > thresh] = 255threshImage_out[threshImage_out <= thresh] = 0return (thresh, threshImage_out)# THRESH_TRIANGLE与直方图技术法类似(效果更好)def operateImages_path(file_pathname):#遍历处理该目录下的所有图片for filename in os.listdir(file_pathname):print(filename)img = cv2.imread(r""+file_pathname+"/"+filename, cv2.IMREAD_GRAYSCALE)the, dst = threshTwoPeaks(img)# the1 = 0# maxval = 255# the1, dst1 = cv2.threshold(img, the1, maxval, cv2.THRESH_TRIANGLE + cv2.THRESH_BINARY_INV)#print('The thresh is :', the)# print('The thresh1 is :', the1)# 黑白反转# r_dst = 255 - dst# 进行膨胀和腐蚀#kernel = cv2.getStructuringElement(cv2.MORPH_RECT, (5, 5))#dst_dilated = cv2.dilate(dst, kernel)#dst_eroded = cv2.erode(dst, kernel)# kernel1 = cv2.getStructuringElement(cv2.MORPH_RECT, (1, 1))# dst_dilated = cv2.dilate(dst, kernel1)# kernel2 = cv2.getStructuringElement(cv2.MORPH_RECT, (10, 10))# dst_eroded = cv2.erode(dst_dilated, kernel2)#cv2.imshow("image", img)#cv2.imshow('thresh_out', dst)# cv2.imshow('thresh_out_de', dst_eroded)# cv2.imshow('thresh_out_eroded', dst)# cv2.imshow('thresh_out_dilated', dst_dilated)# cv2.imshow('thresh_out1', dst1)cv2.imwrite("D:/AllPycharmProjects/ImageRes/ZHI" + "/" + filename, dst)#cv2.waitKey(0)#cv2.destroyAllWindows()operateImages_path("./ImageOps")
处理结果:

总结:已有的这几个算法对图像的处理效果与我们的预期有些差距,还需要继续改进!
二.骨干提取
骨架提取,也叫二值图像细化。这种算法能将一个连通区域细化成一个像素的宽度,用于特征提取和目标拓扑表示。morphology子模块提供了两个函数用于骨架提取,分别是Skeletonize()函数和medial_axis()函数。
from skimage import morphology,data,color
import matplotlib.pyplot as plt
import cv2#读入图片
image = cv2.imread('z7777.png',0)
#转为2值图
_,img = cv2.threshold(image,127,255,0)
img[img==255]=1
#实施骨架算法
skeleton =morphology.skeletonize(img)#显示结果
fig, (ax1, ax2) = plt.subplots(nrows=1, ncols=2, figsize=(8, 4))ax1.imshow(image, cmap=plt.cm.gray)
ax1.axis('off')
ax1.set_title('original', fontsize=20)ax2.imshow(skeleton, cmap=plt.cm.gray)
ax2.axis('off')
ax2.set_title('skeleton', fontsize=20)fig.tight_layout()
plt.show()
运行结果:

这篇关于山东大学暑期实训第四次记载(第二周第一次)的文章就介绍到这儿,希望我们推荐的文章对编程师们有所帮助!