本文主要是介绍【InternLM】Lagent智能体工具调用实践浦语·灵笔(InternLM-XComposer)图文理解创作Demo练习,希望对大家解决编程问题提供一定的参考价值,需要的开发者们随着小编来一起学习吧!
目录
- 前言
- 一、Lagent智能体工具
- 1-1、什么是智能体?
- 1-2、Lagent智能体
- 二、InternLM-XComposer(图文理解创作模型介绍)
- 三、Lagent调用实践
- 3-0、环境搭建
- 3-1、创建虚拟环境
- 3-2、导入所需要的包
- 3-3、模型下载
- 3-4、Lagent安装
- 3-5、demo运行
- 四、InternLM-XComposer本地部署实践
- 4-0、环境搭建
- 4-1、创建虚拟环境
- 4-2、导入所需要的包
- 4-3、模型下载
- 4.4 代码准备
- 4.5 Demo 运行
- 附录:
- 1、模型下载(Hugging Face)
- 总结
前言
AI Agent(人工智能代理)是一种能够感知环境、进行决策和执行动作的智能实体。一、Lagent智能体工具
1-1、什么是智能体?
背景介绍:随着技术的发展,大语言模型的规模也在不断扩大,也涌现出了上下文学习能力、推理能力、思维链等类似人类思考方式的多种能力,但是,大语言模型仍然存在着大量问题,例如幻觉、上下文限制等等,为了解决这些问题,Ai Agent应用而生,通过让大模型借助一个或者多个Agent的能力,构建成为具备自主思考、决策并且执行的智能体。
智能体(AI Agent):基于大模型,让人们以自然语言为交互方式,是一种能够通过对话感知任务、进行决策并且执行动作的智能实体。简言之:AI Agent 具备通过独立思考、调用工具去逐步完成给定目标的能力。诸如西部世界小镇(25个AI智能体在游戏世界上班、闲聊、social、交友,甚至还能谈恋爱,而且每个Agent都有自己的个性和背景故事)、AutoGPT等火爆的Agent项目。
如下图为西部世界小镇游戏截图:

西部世界小镇新闻链接:《西部世界》真来了!斯坦福爆火「小镇」开源,25个AI智能体恋爱交友|附保姆级教程
项目地址:https://github.com/joonspk-research/generative_agents
与大模型的区别:大模型与人类之间的交互是基于 prompt 实现的,用户 prompt 是否清晰明确会影响大模型回答的效果。而 AI Agent 的工作仅需给定一个目标,它就能够针对目标独立思考并做出行动。
1-2、Lagent智能体
官方GitHub链接:https://github.com/InternLM/lagent?tab=readme-ov-file

Lagent:Lagent是一个轻量级的开源框架,允许用户高效地构建基于大型语言模型(LLM)的代理。它还提供了一些典型的工具来增强 LLM。框架概述如下所示:

二、InternLM-XComposer(图文理解创作模型介绍)
官方GitHub链接:https://github.com/InternLM/InternLM-XComposer

介绍:InternLM-XComposer 是一个基于 InternLM 的视觉语言大模型 (VLLM),用于高级文本图像理解和合成。
该模型具有以下特点:
丰富的多语言知识理解:通过对广泛的多模态多语言概念的训练和精心设计的策略,增强文本图像理解的能力,从而对视觉内容有深刻的理解
图文合成:InternLM-XComposer 可以毫不费力地生成连贯且上下文相关的文章,无缝集成图像,提供更具吸引力和身临其境的阅读体验。文本-图像合成通过以下步骤实现:
- 文本生成:它根据人工提供的说明制作长格式文本。
- 图像发现:它精确定位图像放置的最佳位置并提供图像描述。
- 图像检索和选择:它选择候选图像并识别与内容最佳补充的图像。
三、Lagent调用实践
3-0、环境搭建
环境:租用autoDL,环境选torch1.11.0,ubuntu20.04,python版本为3.8,cuda版本为11.3,使用v100来进行实验。


3-1、创建虚拟环境
bash # 请每次使用 jupyter lab 打开终端时务必先执行 bash 命令进入 bash 中# 创建虚拟环境
conda create -n internlm# 激活虚拟环境
conda activate internlm
3-2、导入所需要的包
# 升级pip
python -m pip install --upgrade pip# 下载速度慢可以考虑一下更换镜像源。
# pip config set global.index-url https://mirrors.cernet.edu.cn/pypi/web/simplepip install modelscope==1.9.5
pip install transformers==4.35.2
pip install streamlit==1.24.0
pip install sentencepiece==0.1.99
pip install accelerate==0.24.1
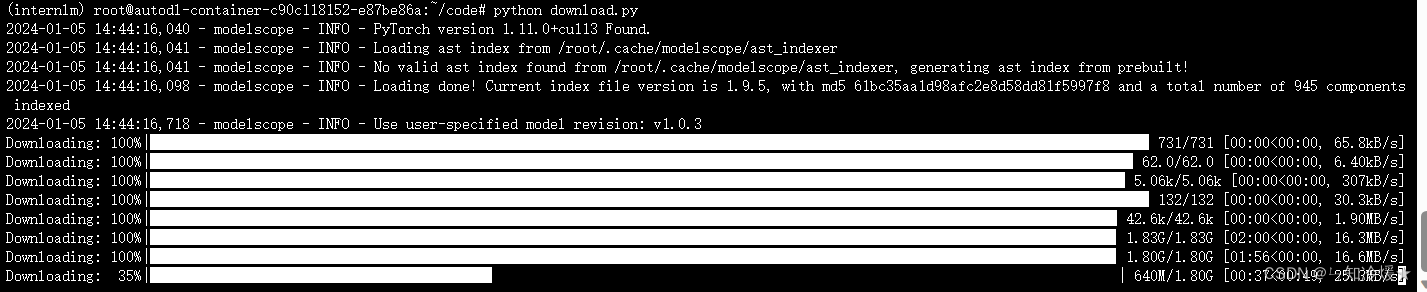
3-3、模型下载
概述:使用魔搭社区下载模型,使用到了snapshot_download函数,第一个参数为模型名称,参数 cache_dir 为模型的下载路径(我这里的路径在/root/model下),将下列代码写入到一个py文件中,使用命令:python 文件名 来执行下载。
import torch
from modelscope import snapshot_download, AutoModel, AutoTokenizer
import os
model_dir = snapshot_download('Shanghai_AI_Laboratory/internlm-chat-7b', cache_dir='/root/model', revision='v1.0.3')
下载图片如下:需要预留大约20G的空间。
3-4、Lagent安装
# 创建目录
cd /root/code
git clone https://gitee.com/internlm/lagent.git
cd /root/code/lagent
git checkout 511b03889010c4811b1701abb153e02b8e94fb5e # 尽量保证和教程commit版本一致
pip install -e . # 源码安装代码修改::将 /root/code/lagent/examples/react_web_demo.py 内容替换为以下代码
import copy
import osimport streamlit as st
from streamlit.logger import get_loggerfrom lagent.actions import ActionExecutor, GoogleSearch, PythonInterpreter
from lagent.agents.react import ReAct
from lagent.llms import GPTAPI
from lagent.llms.huggingface import HFTransformerCasualLMclass SessionState:def init_state(self):"""Initialize session state variables."""st.session_state['assistant'] = []st.session_state['user'] = []#action_list = [PythonInterpreter(), GoogleSearch()]action_list = [PythonInterpreter()]st.session_state['plugin_map'] = {action.name: actionfor action in action_list}st.session_state['model_map'] = {}st.session_state['model_selected'] = Nonest.session_state['plugin_actions'] = set()def clear_state(self):"""Clear the existing session state."""st.session_state['assistant'] = []st.session_state['user'] = []st.session_state['model_selected'] = Noneif 'chatbot' in st.session_state:st.session_state['chatbot']._session_history = []class StreamlitUI:def __init__(self, session_state: SessionState):self.init_streamlit()self.session_state = session_statedef init_streamlit(self):"""Initialize Streamlit's UI settings."""st.set_page_config(layout='wide',page_title='lagent-web',page_icon='./docs/imgs/lagent_icon.png')# st.header(':robot_face: :blue[Lagent] Web Demo ', divider='rainbow')st.sidebar.title('模型控制')def setup_sidebar(self):"""Setup the sidebar for model and plugin selection."""model_name = st.sidebar.selectbox('模型选择:', options=['gpt-3.5-turbo','internlm'])if model_name != st.session_state['model_selected']:model = self.init_model(model_name)self.session_state.clear_state()st.session_state['model_selected'] = model_nameif 'chatbot' in st.session_state:del st.session_state['chatbot']else:model = st.session_state['model_map'][model_name]plugin_name = st.sidebar.multiselect('插件选择',options=list(st.session_state['plugin_map'].keys()),default=[list(st.session_state['plugin_map'].keys())[0]],)plugin_action = [st.session_state['plugin_map'][name] for name in plugin_name]if 'chatbot' in st.session_state:st.session_state['chatbot']._action_executor = ActionExecutor(actions=plugin_action)if st.sidebar.button('清空对话', key='clear'):self.session_state.clear_state()uploaded_file = st.sidebar.file_uploader('上传文件', type=['png', 'jpg', 'jpeg', 'mp4', 'mp3', 'wav'])return model_name, model, plugin_action, uploaded_filedef init_model(self, option):"""Initialize the model based on the selected option."""if option not in st.session_state['model_map']:if option.startswith('gpt'):st.session_state['model_map'][option] = GPTAPI(model_type=option)else:st.session_state['model_map'][option] = HFTransformerCasualLM('/root/model/Shanghai_AI_Laboratory/internlm-chat-7b')return st.session_state['model_map'][option]def initialize_chatbot(self, model, plugin_action):"""Initialize the chatbot with the given model and plugin actions."""return ReAct(llm=model, action_executor=ActionExecutor(actions=plugin_action))def render_user(self, prompt: str):with st.chat_message('user'):st.markdown(prompt)def render_assistant(self, agent_return):with st.chat_message('assistant'):for action in agent_return.actions:if (action):self.render_action(action)st.markdown(agent_return.response)def render_action(self, action):with st.expander(action.type, expanded=True):st.markdown("<p style='text-align: left;display:flex;'> <span style='font-size:14px;font-weight:600;width:70px;text-align-last: justify;'>插    件</span><span style='width:14px;text-align:left;display:block;'>:</span><span style='flex:1;'>"  # noqa E501+ action.type + '</span></p>',unsafe_allow_html=True)st.markdown("<p style='text-align: left;display:flex;'> <span style='font-size:14px;font-weight:600;width:70px;text-align-last: justify;'>思考步骤</span><span style='width:14px;text-align:left;display:block;'>:</span><span style='flex:1;'>"  # noqa E501+ action.thought + '</span></p>',unsafe_allow_html=True)if (isinstance(action.args, dict) and 'text' in action.args):st.markdown("<p style='text-align: left;display:flex;'><span style='font-size:14px;font-weight:600;width:70px;text-align-last: justify;'> 执行内容</span><span style='width:14px;text-align:left;display:block;'>:</span></p>",  # noqa E501unsafe_allow_html=True)st.markdown(action.args['text'])self.render_action_results(action)def render_action_results(self, action):"""Render the results of action, including text, images, videos, andaudios."""if (isinstance(action.result, dict)):st.markdown("<p style='text-align: left;display:flex;'><span style='font-size:14px;font-weight:600;width:70px;text-align-last: justify;'> 执行结果</span><span style='width:14px;text-align:left;display:block;'>:</span></p>",  # noqa E501unsafe_allow_html=True)if 'text' in action.result:st.markdown("<p style='text-align: left;'>" + action.result['text'] +'</p>',unsafe_allow_html=True)if 'image' in action.result:image_path = action.result['image']image_data = open(image_path, 'rb').read()st.image(image_data, caption='Generated Image')if 'video' in action.result:video_data = action.result['video']video_data = open(video_data, 'rb').read()st.video(video_data)if 'audio' in action.result:audio_data = action.result['audio']audio_data = open(audio_data, 'rb').read()st.audio(audio_data)def main():logger = get_logger(__name__)# Initialize Streamlit UI and setup sidebarif 'ui' not in st.session_state:session_state = SessionState()session_state.init_state()st.session_state['ui'] = StreamlitUI(session_state)else:st.set_page_config(layout='wide',page_title='lagent-web',page_icon='./docs/imgs/lagent_icon.png')# st.header(':robot_face: :blue[Lagent] Web Demo ', divider='rainbow')model_name, model, plugin_action, uploaded_file = st.session_state['ui'].setup_sidebar()# Initialize chatbot if it is not already initialized# or if the model has changedif 'chatbot' not in st.session_state or model != st.session_state['chatbot']._llm:st.session_state['chatbot'] = st.session_state['ui'].initialize_chatbot(model, plugin_action)for prompt, agent_return in zip(st.session_state['user'],st.session_state['assistant']):st.session_state['ui'].render_user(prompt)st.session_state['ui'].render_assistant(agent_return)# User input form at the bottom (this part will be at the bottom)# with st.form(key='my_form', clear_on_submit=True):if user_input := st.chat_input(''):st.session_state['ui'].render_user(user_input)st.session_state['user'].append(user_input)# Add file uploader to sidebarif uploaded_file:file_bytes = uploaded_file.read()file_type = uploaded_file.typeif 'image' in file_type:st.image(file_bytes, caption='Uploaded Image')elif 'video' in file_type:st.video(file_bytes, caption='Uploaded Video')elif 'audio' in file_type:st.audio(file_bytes, caption='Uploaded Audio')# Save the file to a temporary location and get the pathfile_path = os.path.join(root_dir, uploaded_file.name)with open(file_path, 'wb') as tmpfile:tmpfile.write(file_bytes)st.write(f'File saved at: {file_path}')user_input = '我上传了一个图像,路径为: {file_path}. {user_input}'.format(file_path=file_path, user_input=user_input)agent_return = st.session_state['chatbot'].chat(user_input)st.session_state['assistant'].append(copy.deepcopy(agent_return))logger.info(agent_return.inner_steps)st.session_state['ui'].render_assistant(agent_return)if __name__ == '__main__':root_dir = os.path.dirname(os.path.dirname(os.path.abspath(__file__)))root_dir = os.path.join(root_dir, 'tmp_dir')os.makedirs(root_dir, exist_ok=True)main()
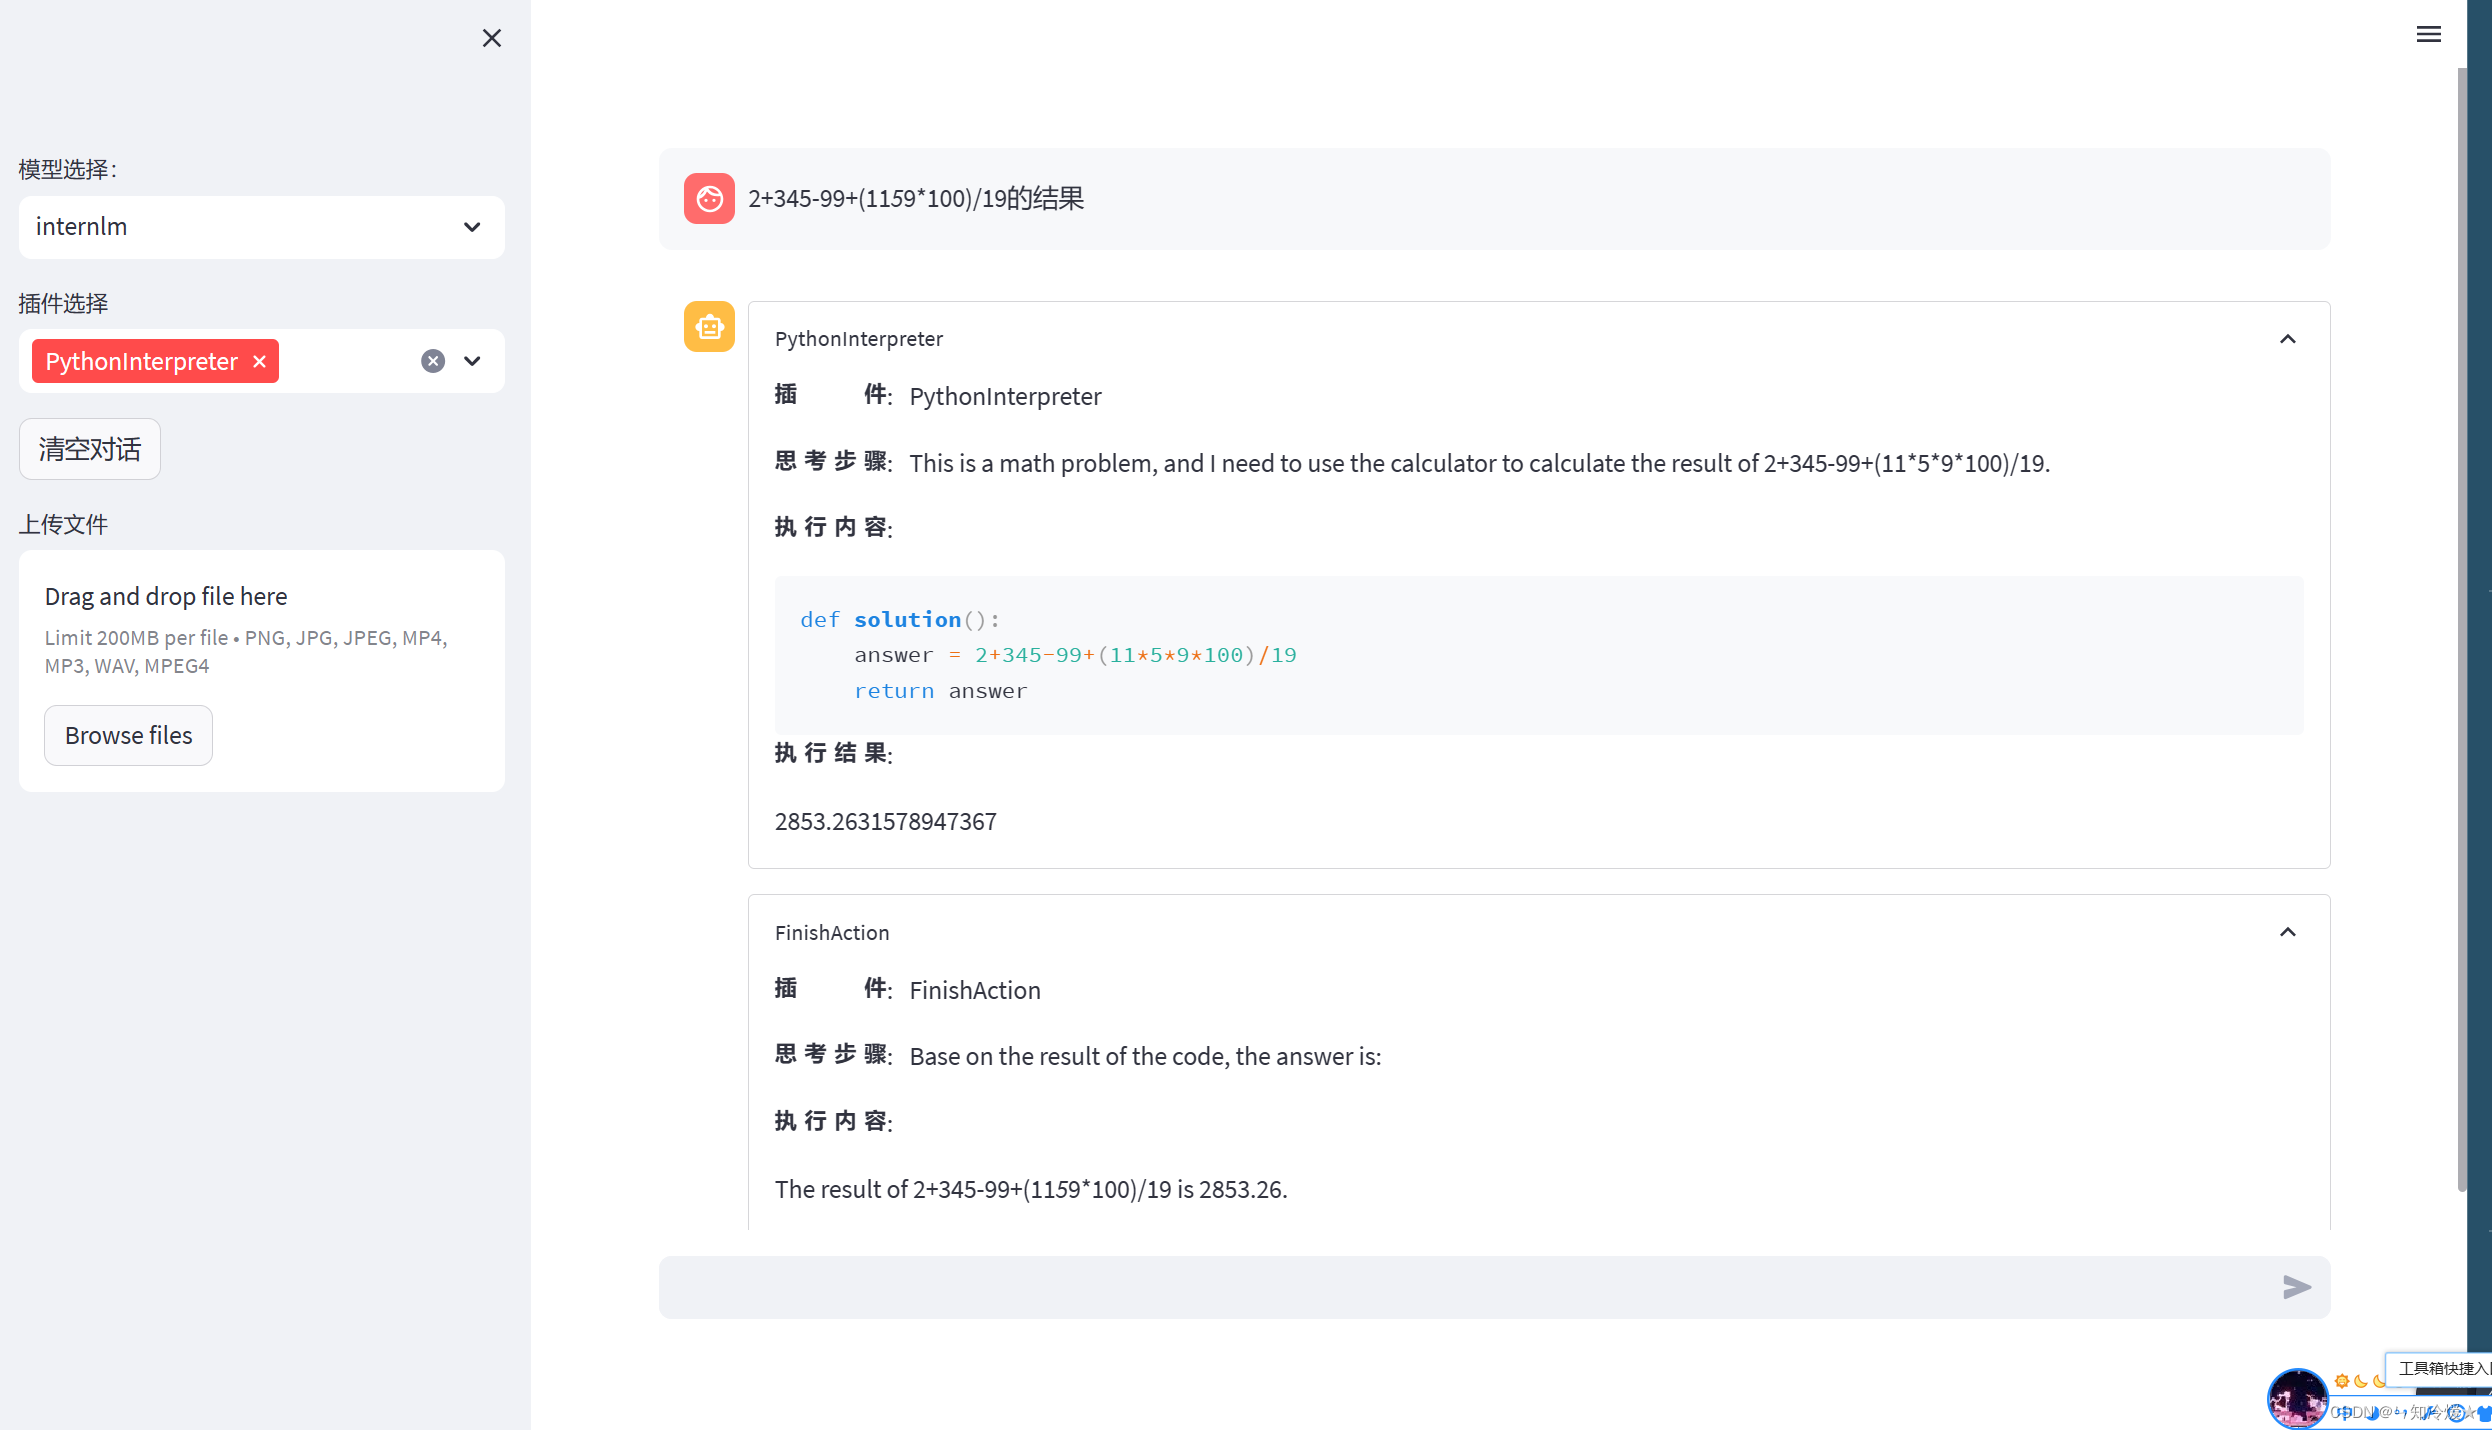
3-5、demo运行
streamlit run /root/code/lagent/examples/react_web_demo.py --server.address 127.0.0.1 --server.port 6006
结果如图所示:
四、InternLM-XComposer本地部署实践
4-0、环境搭建
环境:租用autoDL,环境选torch1.11.0,ubuntu20.04,python版本为3.8,cuda版本为11.3,使用v100来进行实验。
4-1、创建虚拟环境
bash # 请每次使用 jupyter lab 打开终端时务必先执行 bash 命令进入 bash 中# 创建虚拟环境
conda create -n internlm# 激活虚拟环境
conda activate internlm
4-2、导入所需要的包
# 升级pip
python -m pip install --upgrade pip# 下载速度慢可以考虑一下更换镜像源。
# pip config set global.index-url https://mirrors.cernet.edu.cn/pypi/web/simple# 将以下依赖包放置在txt文件中并使用命令:pip install -r requirements.txt 来进行安装。
Notice: 详细依赖版本点赞收藏关注我后私信获取,以下为部分展示
accelerate==0.25.0
aiofiles==23.2.1
altair==5.2.0
annotated-types==0.6.0
anyio==4.2.0
attrs==23.2.0
Brotli @ file:///tmp/abs_ecyw11_7ze/croots/recipe/brotli-split_1659616059936/work
certifi @ file:///croot/certifi_1700501669400/work/certifi
cffi @ file:///croot/cffi_1700254295673/work
charset-normalizer @ file:///tmp/build/80754af9/charset-normalizer_1630003229654/work
click==8.1.7
contourpy==1.2.0
cryptography @ file:///croot/cryptography_1694444244250/work
cycler==0.12.1
einops==0.7.0
exceptiongroup==1.2.0
fastapi==0.108.0
ffmpy==0.3.1
filelock @ file:///croot/filelock_1700591183607/work
fonttools==4.47.0
fsspec==2023.12.2
gmpy2 @ file:///tmp/build/80754af9/gmpy2_1645455533097/work
gradio==3.44.4
gradio_client==0.5.1
h11==0.14.0
httpcore==1.0.2
httpx==0.26.0
huggingface-hub==0.20.2
idna @ file:///croot/idna_1666125576474/work
importlib-resources==6.1.1
Jinja2 @ file:///croot/jinja2_1666908132255/work
jsonschema==4.20.0
jsonschema-specifications==2023.12.1
kiwisolver==1.4.5
markdown2==2.4.10
MarkupSafe @ file:///opt/conda/conda-bld/markupsafe_1654597864307/work
matplotlib==3.8.2
mkl-fft @ file:///croot/mkl_fft_1695058164594/work
mkl-random @ file:///croot/mkl_random_1695059800811/work
mkl-service==2.4.0
mpmath @ file:///croot/mpmath_1690848262763/work
networkx @ file:///croot/networkx_1690561992265/work
numpy @ file:///croot/numpy_and_numpy_base_1701295038894/work/dist/numpy-1.26.2-cp310-cp310-linux_x86_64.whl#sha256=2ab675fa590076aa37cc29d18231416c01ea433c0e93be0da3cfd734170cfc6f
orjson==3.9.10
packaging==23.2
pandas==2.1.4
Pillow @ file:///croot/pillow_1696580024257/work
psutil==5.9.7
pycparser @ file:///tmp/build/80754af9/pycparser_1636541352034/work
pydantic==2.5.3
pydantic_core==2.14.6
pydub==0.25.1
pyOpenSSL @ file:///croot/pyopenssl_1690223430423/work
pyparsing==3.1.1
PySocks @ file:///home/builder/ci_310/pysocks_1640793678128/work
python-dateutil==2.8.2
python-multipart==0.0.6
pytz==2023.3.post1
PyYAML==6.0.1
referencing==0.32.1
regex==2023.12.25
requests @ file:///croot/requests_1690400202158/work
rpds-py==0.16.2
safetensors==0.4.1
semantic-version==2.10.0
sentencepiece==0.1.99
six==1.16.0
sniffio==1.3.0
starlette==0.32.0.post1
sympy @ file:///croot/sympy_1668202399572/work
timm==0.4.12
tokenizers==0.13.3
toolz==0.12.0
torch==2.0.1
torchaudio==2.0.2
torchvision==0.15.2
tqdm==4.66.1
transformers==4.33.1
triton==2.0.0
typing_extensions==4.9.0
tzdata==2023.4
urllib3 @ file:///croot/urllib3_1698257533958/work
uvicorn==0.25.0
websockets==11.0.3
XlsxWriter==3.1.2
4-3、模型下载
概述:在 /root/model 路径下新建 download.py 文件并在其中输入以下内容,并运行 python /root/model/download.py 执行下载
import torch
from modelscope import snapshot_download, AutoModel, AutoTokenizer
import os
model_dir = snapshot_download('Shanghai_AI_Laboratory/internlm-xcomposer-7b', cache_dir='/root/model', revision='master')
4.4 代码准备
概述:在 /root/code git clone InternLM-XComposer 仓库的代码
cd /root/code
git clone https://gitee.com/internlm/InternLM-XComposer.git
cd /root/code/InternLM-XComposer
git checkout 3e8c79051a1356b9c388a6447867355c0634932d  # 最好保证和教程的 commit 版本一致
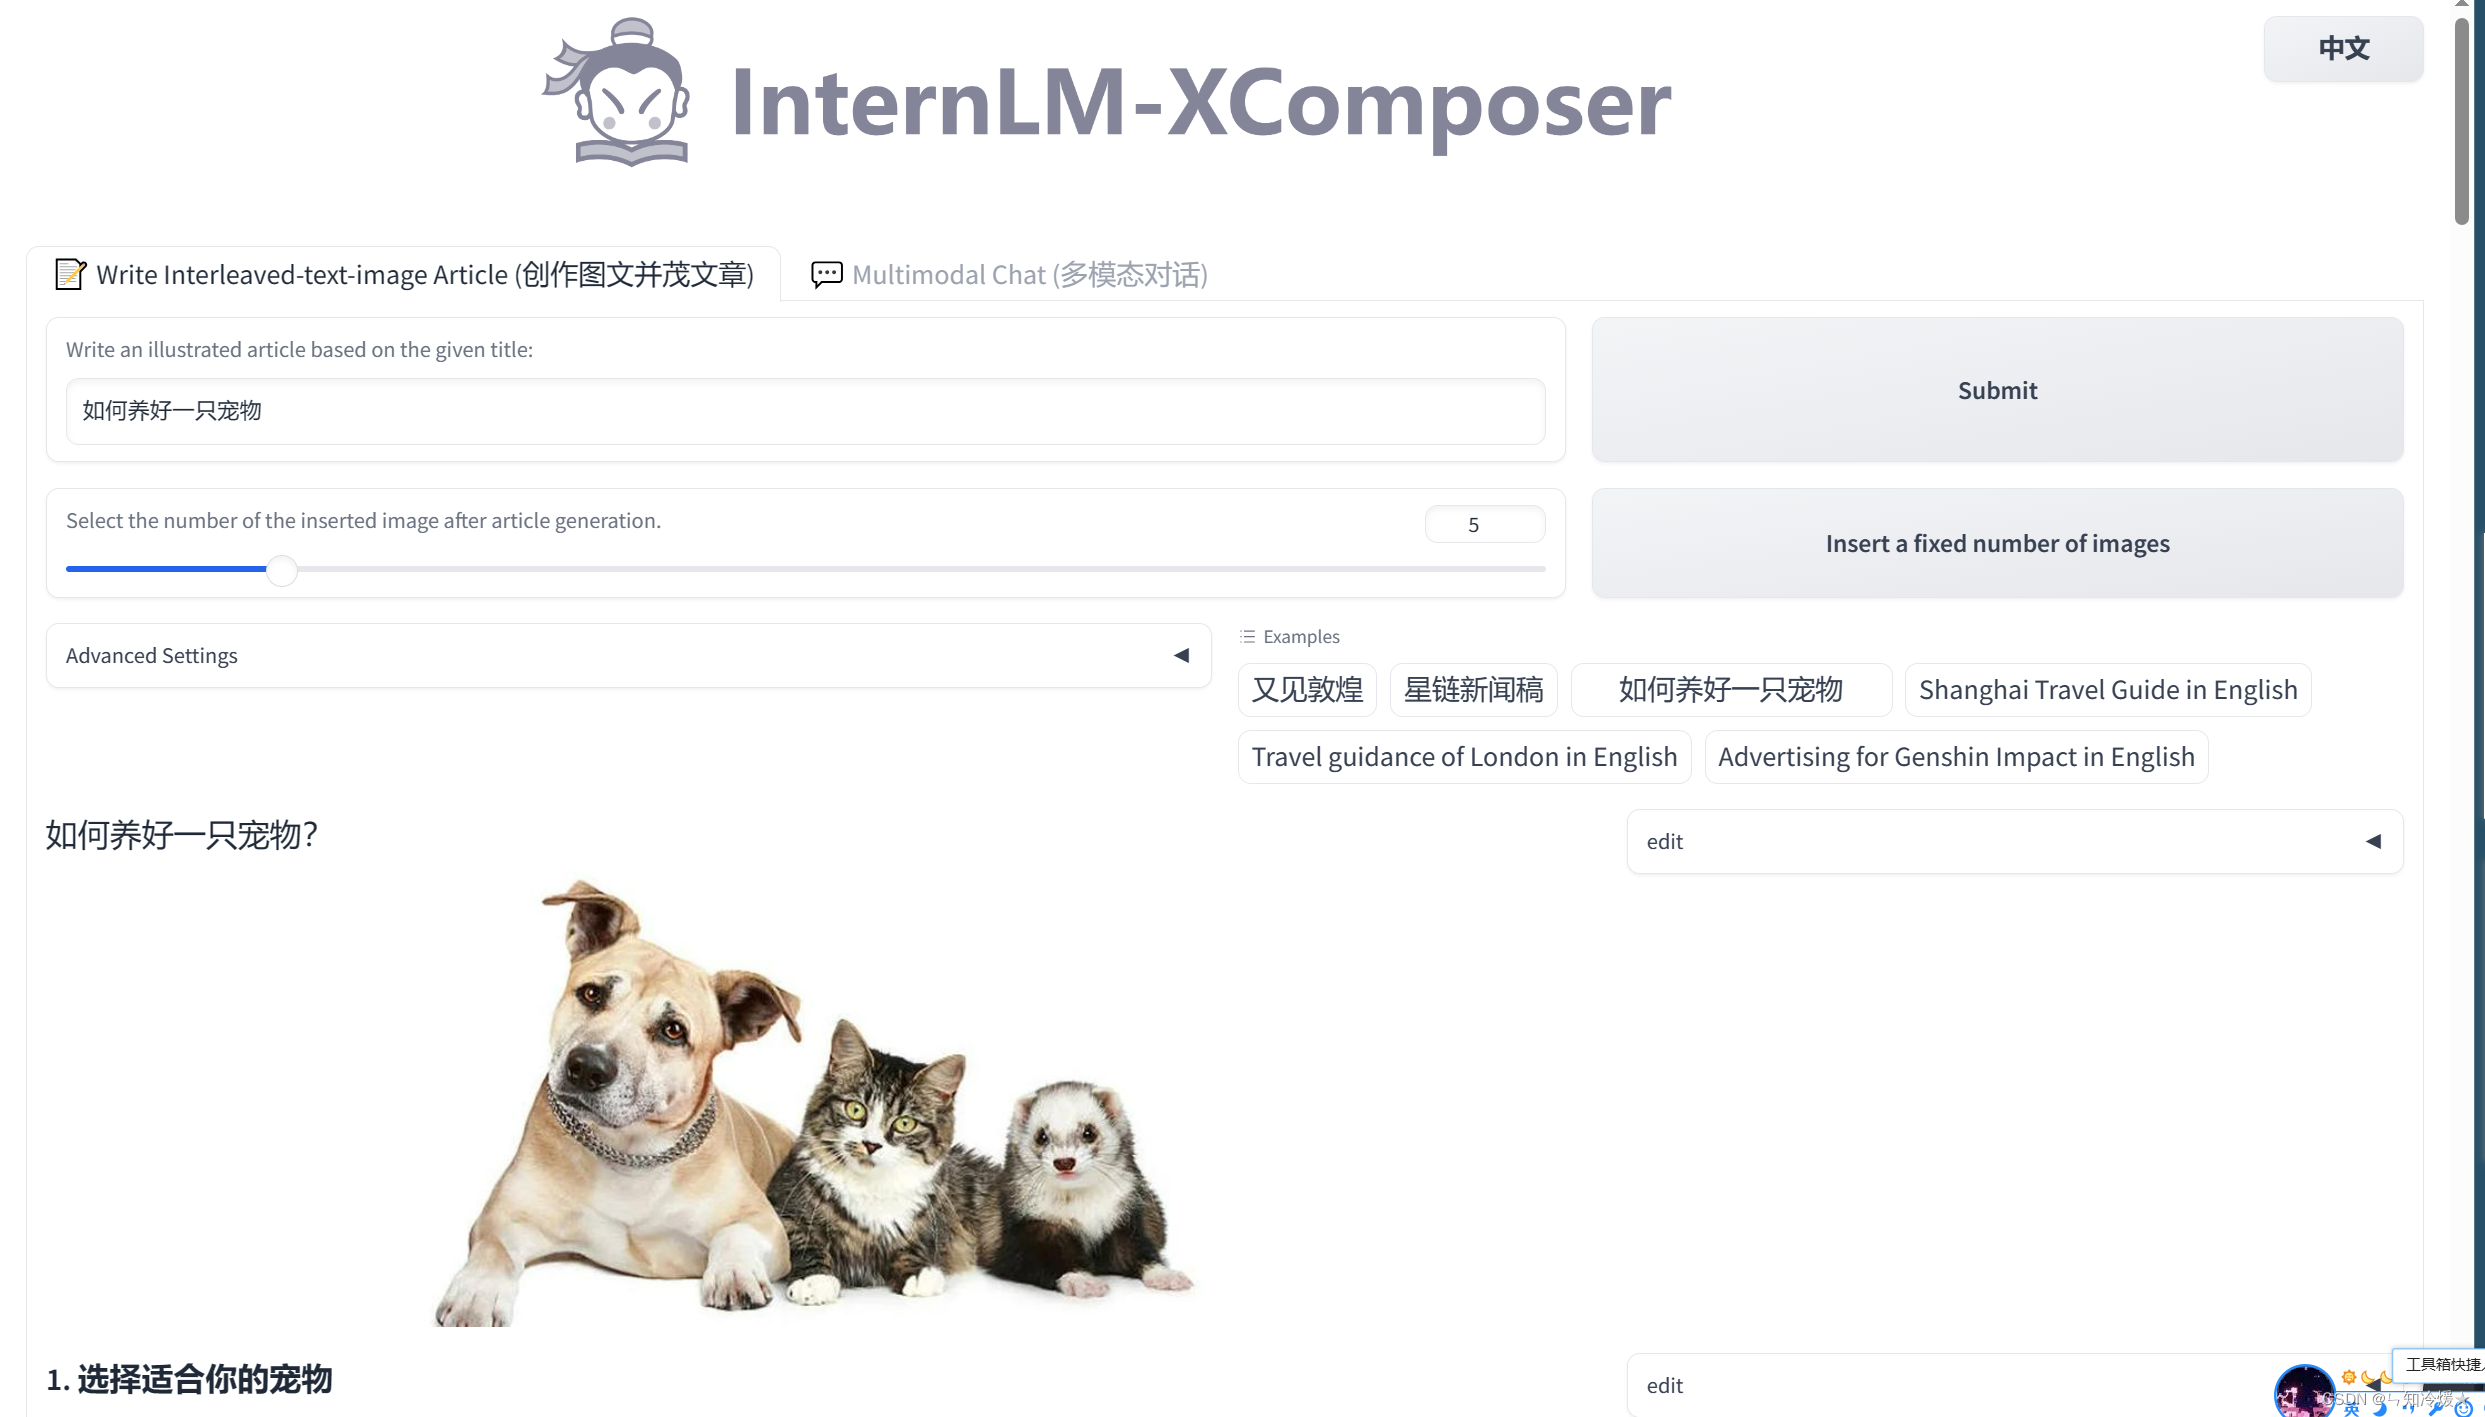
4.5 Demo 运行
在终端运行以下代码:
cd /root/code/InternLM-XComposer
python examples/web_demo.py  \--folder /root/model/Shanghai_AI_Laboratory/internlm-xcomposer-7b \--num_gpus 1 \--port 6006
详情页如下所示:
附录:
1、模型下载(Hugging Face)
使用huggingface-cli命令行工具安装:
pip install -U huggingface_hub
然后新建文件,填入以下代码即可:
import os
# 下载模型
# 将名为HF_ENDPOINT的环境变量设置为https://hf-mirror.com。即访问Hugging Face的镜像站点,而不是需要代理去访问Huggingface的官网。
# os.environ['HF_ENDPOINT'] = 'https://hf-mirror.com'# resume-download:断点续下
# local-dir:本地存储路径。(linux 环境下需要填写绝对路径)
os.system('huggingface-cli download --resume-download internlm/internlm-chat-7b --local-dir your_path')
具体下载过程如下图所示:
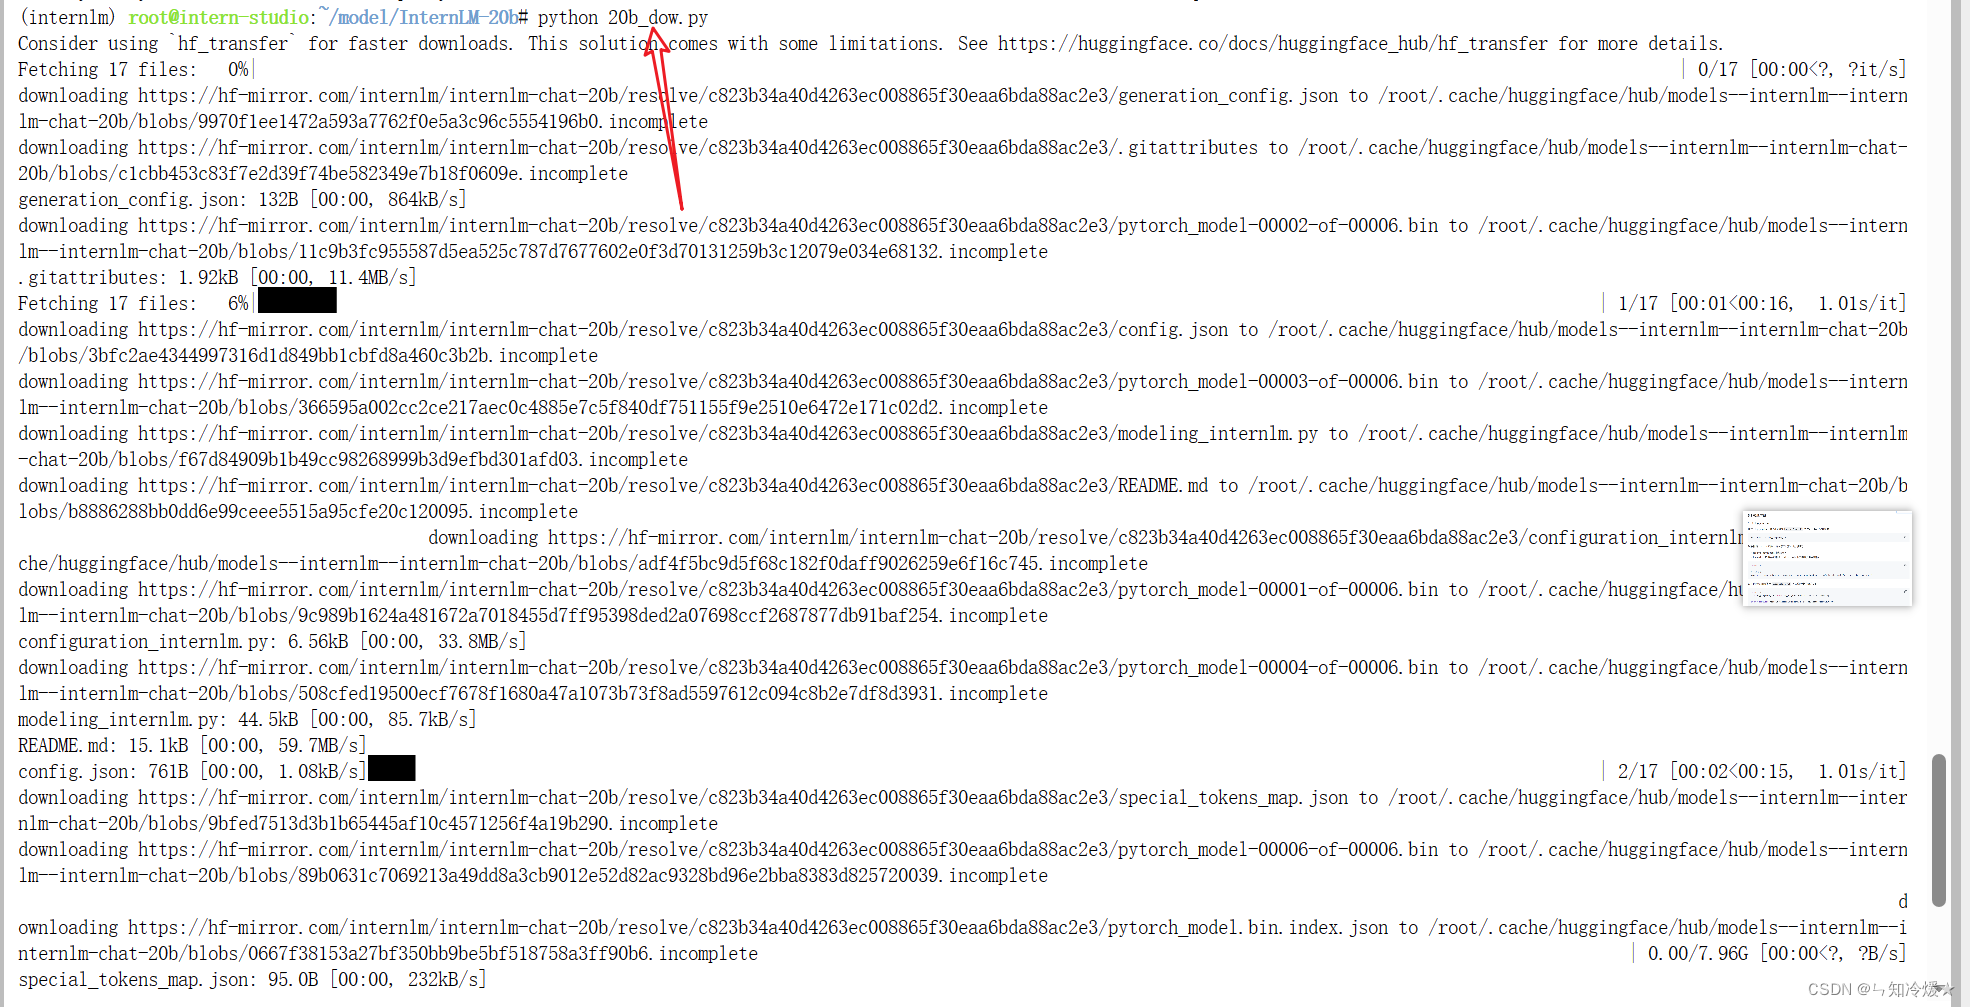
使用huggingface_hub来下载模型中的部分文件:
import os
# 将名为HF_ENDPOINT的环境变量设置为https://hf-mirror.com。即访问Hugging Face的镜像站点,而不是需要代理去访问Huggingface的官网。
# os.environ['HF_ENDPOINT'] = 'https://hf-mirror.com'from huggingface_hub import hf_hub_download  # Load model directly
hf_hub_download(repo_id="internlm/internlm-20b", filename="config.json")
Notice: 如果发生报错requests.exceptions.ProxyError,这个错误通常是由于代理服务器无法连接或超时引起的。把代码中的注释打开即可。下载成功截图如下所示:

参考文章:
读懂AI Agent:基于大模型的人工智能代理(转自知乎).
InternLM官方仓库
总结
代码比人更有温度。
这篇关于【InternLM】Lagent智能体工具调用实践浦语·灵笔(InternLM-XComposer)图文理解创作Demo练习的文章就介绍到这儿,希望我们推荐的文章对编程师们有所帮助!


