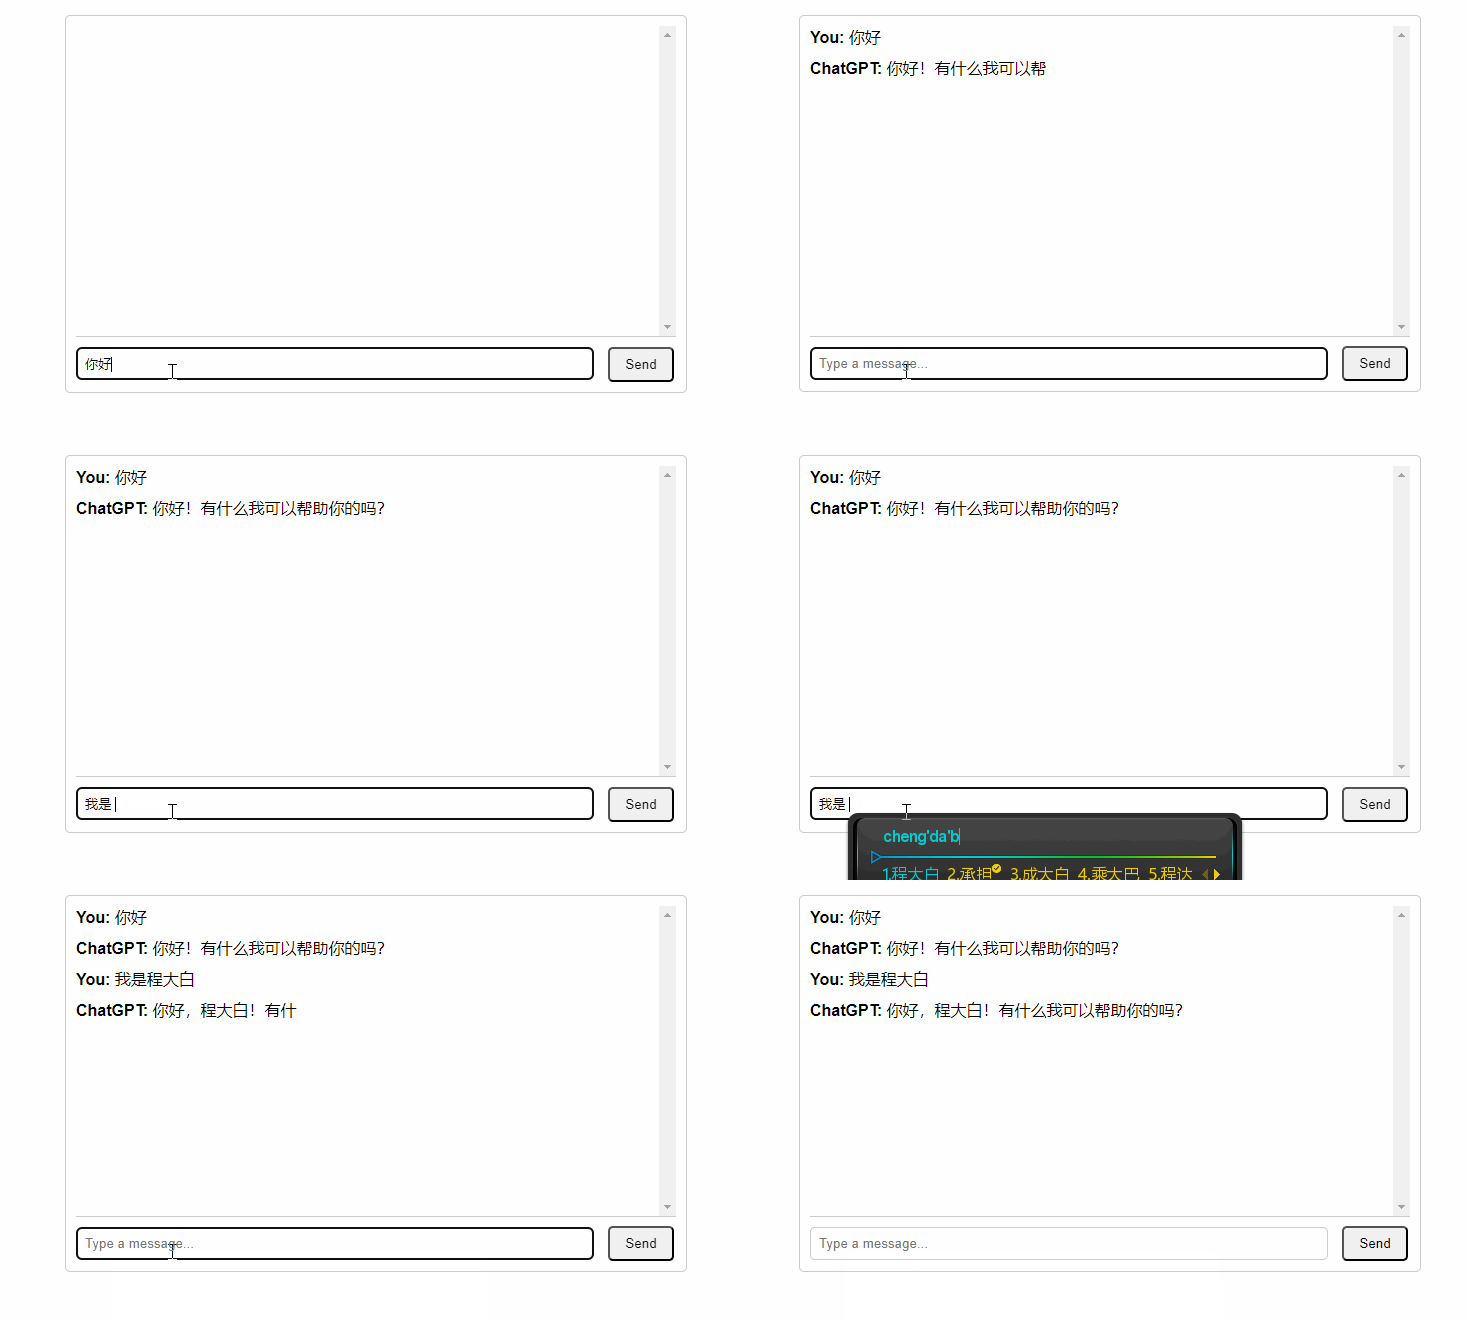
本文主要是介绍原生JS调用OpenAI GPT接口并实现ChatGPT逐字输出效果,希望对大家解决编程问题提供一定的参考价值,需要的开发者们随着小编来一起学习吧!
效果:

猜你感兴趣:springboot+vue实现ChatGPT逐字输出打字效果 附源码,也是小弟原创,感谢支持!
没废话,上代码:
<!DOCTYPE html>
<html lang="en">
<head><meta charset="UTF-8"><title>Title</title><style>/* CSS样式 */body {font-family: Arial, sans-serif;margin: 0;padding: 0;}.chat-container {max-width: 600px;margin: 20px auto;border: 1px solid #ccc;border-radius: 5px;padding: 10px;}.chat-box {height: 300px;overflow-y: scroll;border-bottom: 1px solid #ccc;padding-bottom: 10px;}#user-input {width: calc(100% - 100px);padding: 8px;margin-top: 10px;border-radius: 5px;border: 1px solid #ccc;}button {padding: 8px 15px;margin-left: 10px;border-radius: 5px;}.message {margin-bottom: 10px;}.sender {font-weight: bold;}</style>
</head><body><div class="chat-container" id="chat-container"><div class="chat-box" id="chat-box"><!-- 聊天消息将会在这里显示 --></div><input type="text" id="user-input" placeholder="Type a message..."><button id="send-button" onclick="sendMessage()">Send</button></div>
</body><script>// --------------------init--------------------------------------const API_KEY = "你的key";const ENDPOINT = "https://api.openai.com/v1/chat/completions";// 获取输入框元素const userInput = document.getElementById('user-input');// 监听输入框的回车事件userInput.addEventListener('keydown', (event) => {if (event.key === "Enter") {// 处理回车事件sendMessage();}});// 历史消息const messages = [];// 等待let waiting = false;// -------------------------------------------------------------------------------------------------/*** 发送消息*/function sendMessage() {// 等待if (waiting) {alert('等待回复中');return;}waiting = true;// 获取到用户的输入const message = userInput.value.trim();// 判断用户输入是否为空if (message === '') {alert('请输入内容');waiting = false;return;}// 将用户输入显示在聊天框中displayUserMessage(message);userInput.value = '';// 创建ChatGPT的回复,并获取到显示回复的容器const htmlSpanElement = displayChatGPTMessageAndGetContainer();// 发送消息到ChatGPTaddMessage("user", message);const body = JSON.stringify({model: "gpt-3.5-turbo", messages: messages, stream: true});ssePost(// 请求地址ENDPOINT,// 请求头{"Content-Type": "application/json", Authorization: "Bearer " + API_KEY },// params,这里没有参数{},// bodybody,// 收到事件时的回调。这里将事件的data显示在htmlSpanElement中(event) => {const content = getContent(event.data); if (content) htmlSpanElement.innerHTML += content},// 结束时的回调。1.将消息添加到历史消息中 2.将等待状态设置为false() => {addMessage("assistant", htmlSpanElement.innerHTML); waiting = false},// 发生错误时的回调(error) => {console.log(error)});}// 匹配回复内容的正则表达式const contentPattern = /"content":"(.*?)"}/;/*** 获取回复内容* @param data 数据* @returns 回复内容*/function getContent(data) {const match = data.match(contentPattern);if (match) {return match[1];} else {return null;}}/*** 将消息添加到历史消息中* @param role 角色。user或者assistant* @param content 消息内容*/function addMessage(role, content) {messages.push({role: role, content: content});}const chatBox = document.getElementById('chat-box');/*** 将用户输入显示在聊天框中* @param text 用户的输入*/function displayUserMessage(text) {const messageDiv = document.createElement('div');messageDiv.classList.add('message');const senderSpan = document.createElement('span');senderSpan.classList.add('sender');senderSpan.textContent = 'You: ';const textSpan = document.createElement('span');textSpan.textContent = text;messageDiv.appendChild(senderSpan);messageDiv.appendChild(textSpan);chatBox.appendChild(messageDiv);chatBox.scrollTop = chatBox.scrollHeight;}/*** 将ChatGPT的回复显示在聊天框中* @returns {HTMLSpanElement}*/function displayChatGPTMessageAndGetContainer() {const messageDiv = document.createElement('div');messageDiv.classList.add('message');const senderSpan = document.createElement('span');senderSpan.classList.add('sender');senderSpan.textContent = 'ChatGPT: ';const textSpan = document.createElement('span');messageDiv.appendChild(senderSpan);messageDiv.appendChild(textSpan);chatBox.appendChild(messageDiv);chatBox.scrollTop = chatBox.scrollHeight;return textSpan;}function objectToQueryString(obj) {return Object.keys(obj).map(key => `${encodeURIComponent(key)}=${encodeURIComponent(obj[key])}`).join('&');}/*** 发送POST请求并处理sse事件* @param url 请求地址* @param headers 请求头* @param params 请求参数* @param body 请求体* @param onEvent 收到事件时的回调* @param onEnd 结束时的回调* @param onError 发生错误时的回调*/function ssePost(url, headers, params, body, onEvent, onEnd, onError) {// 拼接urlif (Object.keys(params).length > 0) {url += '?' + objectToQueryString(params);}// 发送请求fetch(url, {method: 'POST',headers: headers,body: body,}).then(async response => {// 判断响应状态码if (!response.ok) {onError(new Error('Network response was not ok'));return;}// 异步处理响应流const reader = response.body.getReader();// 响应缓冲区let buffer = '';// 响应的前一个字符,用于判断一个事件是否结束let before = '';// 循环读取响应流,直到响应流结束while (true) {// 读取响应流const {done, value} = await reader.read();// 响应流结束if (done) {break;}// 将响应流转换为文本const text = new TextDecoder().decode(value);// 遍历文本for (const element of text) {// 判断是否为事件结束。连续两个'\n'表示一个事件结束if (element === '\n' && before === '\n') {// 将事件中的字段分割出来。例如:event: message \n data: hello world \n id: 123 \n\nconst eventAndData = buffer.substring(0, buffer.length - 1).split('\n');// 将事件中的字段转换为对象, 例如:{event: message, data: hello world, id: 123}const resultObject = {};eventAndData.forEach(pair => {const colonIndex = pair.indexOf(':');if (colonIndex === -1) {return;}resultObject[pair.substring(0, colonIndex)] = pair.substring(colonIndex + 2);});// 回调onEvent(resultObject);// 清空缓冲区buffer = '';} else// 不是事件结束,将字符添加到缓冲区{before = element;buffer += element;}}}// 结束时的回调onEnd();}).catch(error => {// 发生错误时的回调onError(error);})}
</script>
</html>
这篇关于原生JS调用OpenAI GPT接口并实现ChatGPT逐字输出效果的文章就介绍到这儿,希望我们推荐的文章对编程师们有所帮助!


