本文主要是介绍Unity 广告牌 (Billboard)的实现,希望对大家解决编程问题提供一定的参考价值,需要的开发者们随着小编来一起学习吧!
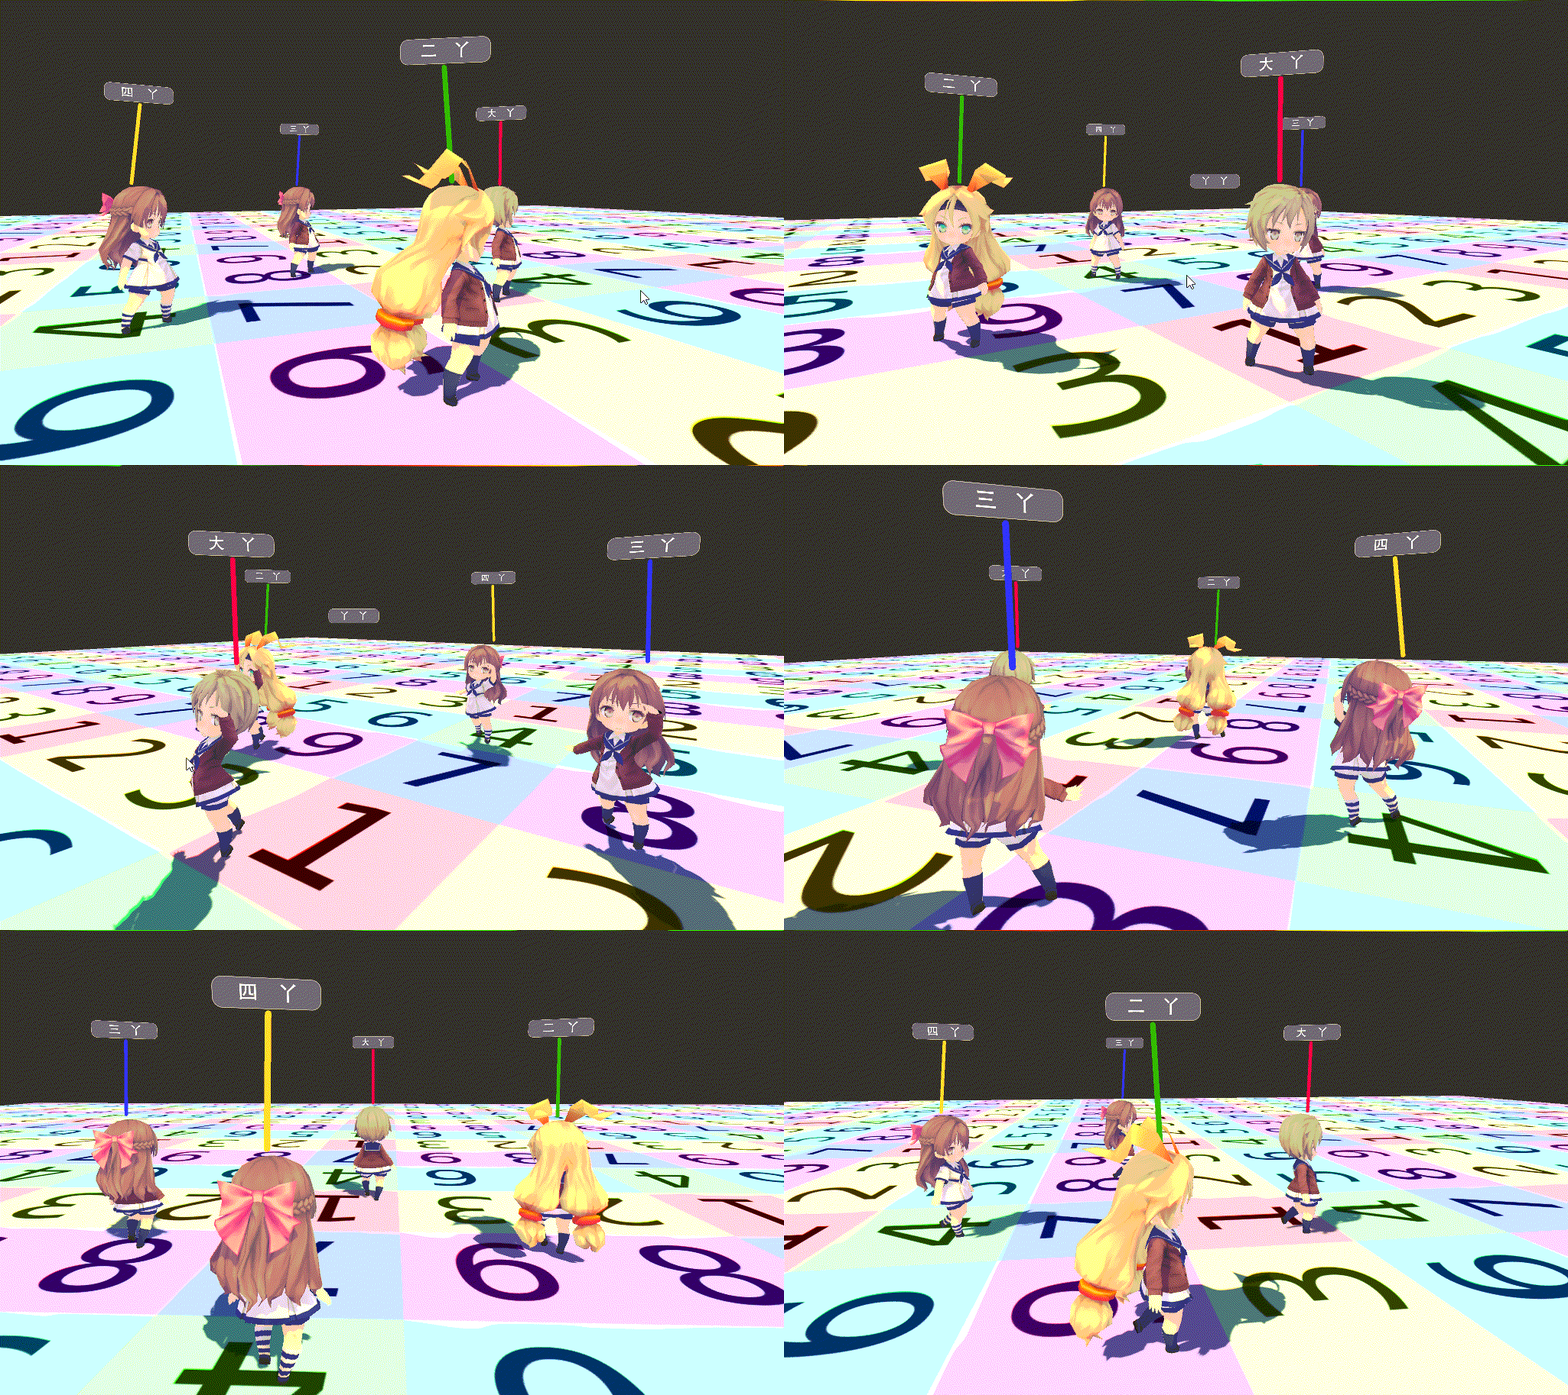
实现一个广告牌的效果,使一个面片在摄像机旋转的过程中始终面向摄像机。
效果如下截图。

实现的Shader之一
(来自于冯姐Unity Shader入门精要十一章11.3.2的Shader)
// Upgrade NOTE: replaced 'mul(UNITY_MATRIX_MVP,*)' with 'UnityObjectToClipPos(*)'// Upgrade NOTE: replaced '_World2Object' with 'unity_WorldToObject'Shader "Unlit/fll-Billboard" {Properties {_MainTex ("Main Tex", 2D) = "white" {}_Color ("Color Tint", Color) = (1, 1, 1, 1)_VerticalBillboarding ("Vertical Restraints", Range(-5, 5)) = 2}SubShader {// Need to disable batching because of the vertex animationTags {"Queue"="Transparent" "IgnoreProjector"="True" "RenderType"="Transparent" "DisableBatching"="True"}Cull offPass { Tags { "LightMode"="ForwardBase" }ZWrite OnBlend SrcAlpha OneMinusSrcAlphaCull OffCGPROGRAM#pragma vertex vert#pragma fragment frag#include "Lighting.cginc"sampler2D _MainTex;float4 _MainTex_ST;fixed4 _Color;fixed _VerticalBillboarding;struct a2v {float4 vertex : POSITION;float4 texcoord : TEXCOORD0;};struct v2f {float4 pos : SV_POSITION;float2 uv : TEXCOORD0;};v2f vert (a2v v) {v2f o;// Suppose the center in object space is fixedfloat3 center = float3(0, 0, 0);float3 viewer = mul(unity_WorldToObject,float4(_WorldSpaceCameraPos, 1));float3 normalDir = viewer - center;// If _VerticalBillboarding equals 1, we use the desired view dir as the normal dir// Which means the normal dir is fixed// Or if _VerticalBillboarding equals 0, the y of normal is 0// Which means the up dir is fixednormalDir.y =normalDir.y * _VerticalBillboarding;normalDir = normalize(normalDir);// Get the approximate up dir// If normal dir is already towards up, then the up dir is towards frontfloat3 upDir = abs(normalDir.y) > 0.999 ? float3(0, 0, 1): float3(0, 1, 0);float3 rightDir = normalize(cross(upDir, normalDir))*-1;upDir = normalize(cross(normalDir, rightDir));// Use the three vectors to rotate the quadfloat3 centerOffs = v.vertex.xyz - center;float3 localPos = center + rightDir * centerOffs.x + upDir * centerOffs.y + normalDir * centerOffs.z;o.pos = UnityObjectToClipPos(float4(localPos, 1));o.uv = TRANSFORM_TEX(v.texcoord,_MainTex);return o;}fixed4 frag (v2f i) : SV_Target {fixed4 c = tex2D (_MainTex, i.uv);c.rgb *= _Color.rgb;return c;}ENDCG}} FallBack "Transparent/VertexLit"
}
注意:代码中有一处需要修改,如下:
v2f vert (a2v v) {//*****float3 rightDir = normalize(cross(upDir, normalDir))*-1;//*****
}
乘以-1旋转方向,否则在Unity中可能出现翻转。
实现的Shader之二
来自于Wiki Cg_Programming(https://en.wikibooks.org/wiki/Cg_Programming/Unity/Billboards)
原代码:
Shader "Cg  shader for billboards" {Properties {_MainTex ("Texture Image", 2D) = "white" {}_ScaleX ("Scale X", Float) = 1.0_ScaleY ("Scale Y", Float) = 1.0}SubShader {Pass {   CGPROGRAM#pragma vertex vert  #pragma fragment frag// User-specified uniforms            uniform sampler2D _MainTex;        uniform float _ScaleX;uniform float _ScaleY;struct vertexInput {float4 vertex : POSITION;float4 tex : TEXCOORD0;};struct vertexOutput {float4 pos : SV_POSITION;float4 tex : TEXCOORD0;};vertexOutput vert(vertexInput input) {vertexOutput output;output.pos = mul(UNITY_MATRIX_P, mul(UNITY_MATRIX_MV, float4(0.0, 0.0, 0.0, 1.0))+ float4(input.vertex.x, input.vertex.y, 0.0, 0.0)* float4(_ScaleX, _ScaleY, 1.0, 1.0));output.tex = input.tex;return output;}float4 frag(vertexOutput input) : COLOR{return tex2D(_MainTex, float2(input.tex.xy));   }ENDCG}}
}
这段代码使用有一些限制:
- 不支持透明通道
- 当shader开启批处理时会产生显示错误,即当独享距离摄像机比较远时,对象会被裁剪
- 不能再Unity的Transform变换界面对其进行缩放和变换
修改后代码如下:
Shader "Unlit/fll-Billboard-2" {Properties {_MainTex ("Texture Image", 2D) = "white" {}_ScaleX ("Scale X", Float) = 1.0_ScaleY ("Scale Y", Float) = 1.0_Color("_Color",Color)=(1,1,1,1)}SubShader {Tags {"Queue"="Transparent" "IgnoreProjector"="True" "RenderType"="Transparent" "DisableBatching"="True"}//Tags { "DisableBatching" = "True" }Pass {   	Tags { "DisableBatching" = "True" }ZWrite OnBlend SrcAlpha OneMinusSrcAlphaCull OffCGPROGRAM#pragma vertex vert  #pragma fragment frag#include "Lighting.cginc"// User-specified uniforms            uniform sampler2D _MainTex;        uniform float _ScaleX;uniform float _ScaleY;uniform fixed4 _Color;uniform float4 _MainTex_ST;struct vertexInput {float4 vertex : POSITION;float4 tex : TEXCOORD0;};struct vertexOutput {float4 pos : SV_POSITION;float2 tex : TEXCOORD0;//float2 uv:TEXCOORD1;};vertexOutput vert(vertexInput input) {vertexOutput output;output.pos = mul(UNITY_MATRIX_P, mul(UNITY_MATRIX_MV, float4(0.0, 0.0, 0.0, 1.0))+ float4(input.vertex.x, input.vertex.y, 0.0, 0.0)* float4(_ScaleX, _ScaleY, 1.0, 1.0));output.tex = TRANSFORM_TEX(input.tex,_MainTex);//output.uv=TRANSFORM_TEX(input.tex,_MainTex);//output.tex=input.tex;return output;}float4 frag(vertexOutput input) : SV_Target{fixed4 c=tex2D(_MainTex, float2(input.tex.xy));//return tex2D();   c.rgb*=_Color.rgb;return c;}ENDCG}}
}
绘制人物头顶到面片的线段代码如下:
using System.Collections;
using System.Collections.Generic;
using UnityEngine;
using System;
public class DrawLineRender : MonoBehaviour {public Color materialColor;LineRenderer lineRenderer_global;Vector3 startPos;Vector3 endPos;Vector3[] poss;[SerializeField]private Vector3 offset=Vector3.zero;[SerializeField][Range(0f,0.2f)]private float width=0.1f;void Awake () {LineRenderer lineRenderer = this.gameObject.AddComponent<LineRenderer> ();Material material=new Material(Shader.Find("Unlit/Color"));lineRenderer.material = material;lineRenderer.material.color = materialColor;lineRenderer.widthMultiplier = width;lineRenderer.positionCount = 2;lineRenderer.numCornerVertices=30;lineRenderer.numCapVertices=30;startPos = this.transform.parent.GetChild (2).transform.localPosition;endPos = this.transform.parent.GetChild (0).transform.localPosition;//var offset=new Vector3(0,1.254f,0);poss = new Vector3[2] { startPos-offset, endPos-offset };		}void Start(){lineRenderer_global= this.GetComponent<LineRenderer> ();}void Update () {for (int i = 0; i < lineRenderer_global.positionCount; i++) {lineRenderer_global.SetPosition (i, poss[i]);}}
}
工程地址->扫码->关注->历史消息->当前文章末尾

这篇关于Unity 广告牌 (Billboard)的实现的文章就介绍到这儿,希望我们推荐的文章对编程师们有所帮助!


