本文主要是介绍vue+mockjs 模拟数据,实现前后端分离开发,希望对大家解决编程问题提供一定的参考价值,需要的开发者们随着小编来一起学习吧!
在项目中尝试了mockjs,mock数据,实现前后端分离开发。
关于mockjs,官网描述的是
1.前后端分离
2.不需要修改既有代码,就可以拦截 Ajax 请求,返回模拟的响应数据。
3.数据类型丰富
4.通过随机数据,模拟各种场景。
等等优点。
总结起来就是在后端接口没有开发完成之前,前端可以用已有的接口文档,在真实的请求上拦截ajax,并根据mockjs的mock数据的规则,模拟真实接口返回的数据,并将随机的模拟数据返回参与相应的数据交互处理,这样真正实现了前后台的分离开发。
与以往的自己模拟的假数据不同,mockjs可以带给我们的是:在后台接口未开发完成之前模拟数据,并返回,完成前台的交互;在后台数据完成之后,你所做的只是去掉mockjs:停止拦截真实的ajax,仅此而已。
下面一步步的来实现vue-cli创建项目并添加一条新闻类的数据模拟接口:
1.安装vue-cli全局脚手架
| 1 |
|
2.创建vue项目
| 1 |
|
3.安装mockjs
| 1 |
|
4.项目目录

axios/api 用来封装axios
Hello.vue 页面首页
NeswCell.vue 新闻组件
router/index.js 路由
main.js 入口js
mock.js mockjs文件
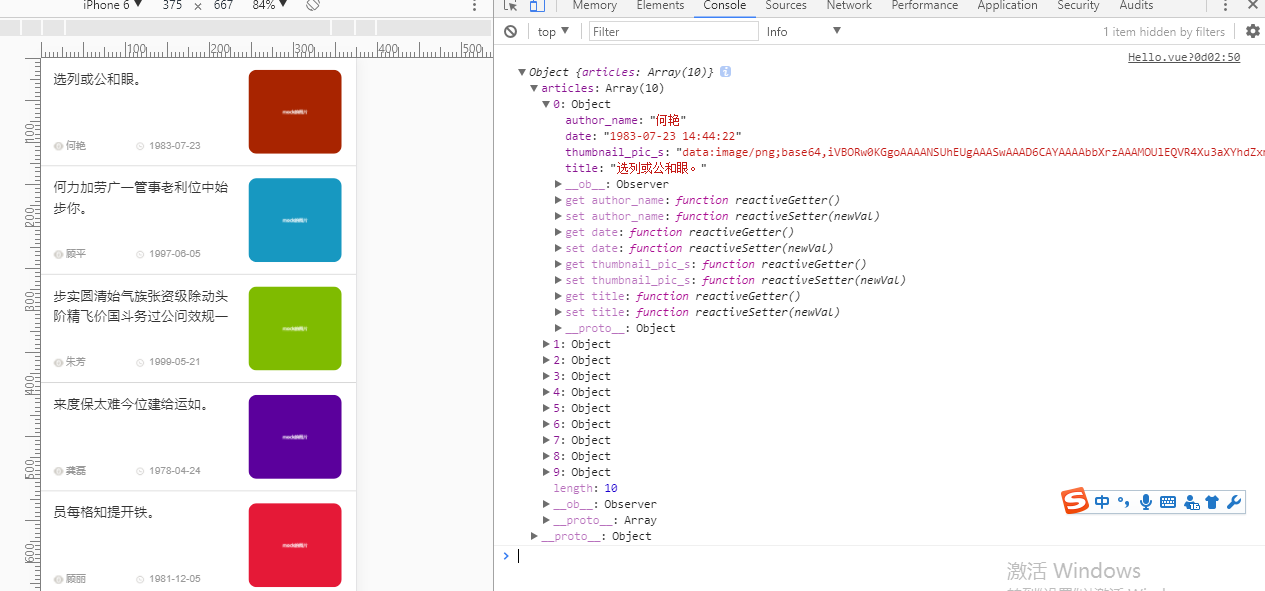
在来看下完成后的效果
5.在入口js(main.js)里引入mockjs
| 1 2 3 4 5 6 7 8 9 10 11 12 13 14 15 16 17 18 19 20 21 22 23 24 |
|
这里我添加了额一个常用的时间整理过滤器 getYMD
6. 添加一个mock规则(mock.js)
| 1 2 3 4 5 6 7 8 9 10 11 12 13 14 15 16 17 18 19 20 21 22 23 24 |
|
7.在Hello.vue 中请求文档接口,并接收mock数据
| 1 2 3 4 5 6 7 8 9 10 11 12 13 14 15 16 17 18 19 20 21 22 23 24 25 26 27 28 29 30 31 32 33 34 35 36 37 38 39 40 41 42 43 44 45 46 47 48 49 50 51 52 53 54 55 56 57 58 59 60 61 62 63 64 65 66 67 68 69 70 71 72 73 74 75 76 |
|
注意:api.JH_news是我封装的axios函数
axios/api.js如下
| 1 2 3 4 5 6 7 8 9 10 11 12 13 14 15 16 17 18 19 20 21 22 23 24 25 26 27 28 29 30 31 32 33 34 35 36 |
|
8.在NewsCell.vue展示数据
| 1 2 3 4 5 6 7 8 9 10 11 12 13 14 15 16 17 18 19 20 21 22 23 24 25 26 27 28 29 30 31 32 33 34 35 36 37 38 39 40 41 42 43 44 45 46 47 48 49 50 51 52 53 54 55 56 57 58 59 60 61 62 63 64 65 66 67 68 69 70 71 72 73 74 75 76 77 78 79 80 81 82 83 84 85 86 87 88 89 90 91 92 93 94 95 96 97 98 99 100 101 102 103 104 105 106 107 108 109 110 111 112 113 114 115 116 117 118 119 120 121 122 |
|
完成
9.所有代码可以查看我的github: https://github.com/Jasonwang911/vue_mockjs
原文https://www.cnblogs.com/jasonwang2y60/p/7302449.html
这篇关于vue+mockjs 模拟数据,实现前后端分离开发的文章就介绍到这儿,希望我们推荐的文章对编程师们有所帮助!


