本文主要是介绍JavaFx:采用SceneBuilder方式实现格式化java源文件(引入fxml文件完成样式布局),希望对大家解决编程问题提供一定的参考价值,需要的开发者们随着小编来一起学习吧!
开发环境:jdk8、openjfx11.0.2、eclipse
1. 声明
当前内容主要为本人学习和了解使用SceneBuilder方式实现样式布局,并实现之前的格式化java源文件并显示(本人直接以lib方式导入javafx依赖)
基本步骤:
- 使用SceneBuilder画图
- 使用Controller控制调用事件
- 加载fxml文件完成渲染
- 读取java源文件并使用javaparser进行格式化输出在TextArea
- 弹出消息窗口提示错误事件(alert)
基本pom
<dependency><groupId>com.github.javaparser</groupId><artifactId>javaparser-symbol-solver-core</artifactId><version>3.22.1</version>
</dependency>
关于javaparser的使用参考之前的博文
2. 下载和使用SceneBuilder
1.直接在openjfx官方下载(这里选择jdk1.8的版本):openjfx-java1.8

这里直接下载jar的可执行包,使用java -jar启动
2. 开始画图(直接开始画图操作)

3.为所有的组件添加fx:id属性,方便与controller中的属性进行绑定操作


4.最后生成一个fxml文件,考入启动main方法相同目录即可

javaFileFormatTolls.fxml其内容如下:
<?xml version="1.0" encoding="UTF-8"?><?import javafx.geometry.Insets?>
<?import javafx.scene.control.Button?>
<?import javafx.scene.control.Label?>
<?import javafx.scene.control.SplitPane?>
<?import javafx.scene.control.TextArea?>
<?import javafx.scene.control.TextField?>
<?import javafx.scene.layout.AnchorPane?>
<?import javafx.scene.layout.ColumnConstraints?>
<?import javafx.scene.layout.GridPane?>
<?import javafx.scene.layout.RowConstraints?>
<?import javafx.scene.layout.VBox?><VBox prefHeight="436.0" prefWidth="657.0" xmlns="http://javafx.com/javafx/8.0.151" xmlns:fx="http://javafx.com/fxml/1" fx:controller="com.hy.java.gui.javafx.javafile.controller.JavaFileFormatAppController" ><children><GridPane alignment="CENTER_RIGHT" prefHeight="28.0" prefWidth="640.0"><columnConstraints><ColumnConstraints hgrow="SOMETIMES" minWidth="10.0" prefWidth="100.0" /><ColumnConstraints hgrow="SOMETIMES" minWidth="10.0" prefWidth="100.0" /><ColumnConstraints hgrow="SOMETIMES" minWidth="10.0" prefWidth="100.0" /></columnConstraints><rowConstraints><RowConstraints minHeight="10.0" prefHeight="30.0" vgrow="SOMETIMES" /></rowConstraints><children><TextField fx:id="sourceJavaFilePath" GridPane.columnIndex="1" /><Label alignment="CENTER_RIGHT" prefHeight="20.0" prefWidth="216.0" text="源文件" textAlignment="RIGHT"><GridPane.margin><Insets /></GridPane.margin></Label><Button mnemonicParsing="false" onAction="#handlerFormatButtonClick" text="格式化" GridPane.columnIndex="2" /></children><opaqueInsets><Insets /></opaqueInsets><VBox.margin><Insets bottom="10.0" top="10.0" /></VBox.margin></GridPane><AnchorPane><children><SplitPane dividerPositions="0.5" AnchorPane.bottomAnchor="0.0" AnchorPane.leftAnchor="0.0" AnchorPane.rightAnchor="0.0" AnchorPane.topAnchor="0.0"><items><AnchorPane prefHeight="469.0" prefWidth="324.0"><children><TextArea fx:id="leftTextArea" layoutY="7.0" prefHeight="278.0" prefWidth="315.0" AnchorPane.bottomAnchor="0.0" AnchorPane.leftAnchor="0.0" AnchorPane.rightAnchor="0.0" AnchorPane.topAnchor="0.0" /></children></AnchorPane><AnchorPane minHeight="0.0" minWidth="0.0" prefHeight="278.0" prefWidth="253.0"><children><TextArea fx:id="rightTextArea" editable="false" layoutX="7.0" prefHeight="278.0" prefWidth="315.0" AnchorPane.bottomAnchor="0.0" AnchorPane.leftAnchor="0.0" AnchorPane.rightAnchor="0.0" AnchorPane.topAnchor="0.0" /></children></AnchorPane></items></SplitPane></children></AnchorPane></children>
</VBox>
3.开始编写代码
1.controller层:
package com.hy.java.gui.javafx.javafile.controller;import java.io.File;
import java.io.IOException;
import java.util.Optional;import com.hy.java.gui.javafx.javafile.FormatTools;import javafx.fxml.FXML;
import javafx.fxml.FXMLLoader;
import javafx.scene.Parent;
import javafx.scene.Scene;
import javafx.scene.control.Alert;
import javafx.scene.control.Alert.AlertType;
import javafx.scene.control.Button;
import javafx.scene.control.ButtonType;
import javafx.scene.control.Dialog;
import javafx.scene.control.TextArea;
import javafx.scene.control.TextField;
import javafx.stage.Stage;
import javafx.scene.control.ButtonBar;public class JavaFileFormatAppController {@FXMLTextArea leftTextArea;@FXMLTextArea rightTextArea;@FXMLTextField sourceJavaFilePath;@FXMLpublic void handlerFormatButtonClick() {//System.out.println("点击当前的格式化按钮");//System.out.println("开始获取当前左边文本框中的内容:" + leftTextArea.getText());//System.out.println("开始获取当前右边文本框中的内容:" + rightTextArea.getText());//System.out.println("开始和获取输入框的内容:" + sourceJavaFilePath.getText());String text = sourceJavaFilePath.getText();if (isEmpty(text)) {// 提示输入文件showErrorAlert("错误", "请输入需要格式化的java源文件");return;} else {File file = new File(text);if (file.exists() && !file.isDirectory() && file.canRead()) {try {String leftTextAreaContext = this.leftTextArea.getText();if (isEmpty(leftTextAreaContext)) {String fileContext = FormatTools.getFileContext(file);leftTextArea.setText(fileContext);String formatJavaFile = FormatTools.formatJavaFile(fileContext);rightTextArea.setText(formatJavaFile);}} catch (IOException e) {//e.printStackTrace();showErrorAlert("错误",e.getMessage());}} else {// 不可操作showErrorAlert("错误", "当前文件不可读");}}}/*** * @author hy* @createTime 2021-07-25 10:02:01* @description 弹出一个消息框* @param title* @param msg**/private void showErrorAlert(String title, String msg) {Alert alert = new Alert(AlertType.ERROR, msg, ButtonType.YES, ButtonType.NO);alert.setTitle(title);alert.setHeaderText("");Optional<ButtonType> showAndWait = alert.showAndWait();if (showAndWait.get() == ButtonType.YES) {alert.close();}}private boolean isEmpty(String text) {if (text == null || "".equals(text.trim())) {return true;}return false;}}
其中以@FXML开始的就是绑定的对应fxml中的组件中的fx:controller范围内的fx:id,或者#方法名称
2.开始编写文件格式化工具(FormatTools.java)
import java.io.BufferedReader;
import java.io.File;
import java.io.FileInputStream;
import java.io.FileNotFoundException;
import java.io.IOException;
import java.io.InputStreamReader;
import java.util.List;
import java.util.Optional;import com.github.javaparser.JavaParser;
import com.github.javaparser.ParseResult;
import com.github.javaparser.ast.CompilationUnit;
import com.github.javaparser.ast.ImportDeclaration;
import com.github.javaparser.ast.Node;
import com.github.javaparser.ast.PackageDeclaration;import de.hunsicker.jalopy.Jalopy;public abstract class FormatTools {public static String formatJavaFile(String fileContext) {JavaParser javaParser = new JavaParser();ParseResult<CompilationUnit> parse = javaParser.parse(fileContext);StringBuffer buffer = new StringBuffer();if (parse.isSuccessful()) {Optional<CompilationUnit> result = parse.getResult();CompilationUnit compilationUnit = result.get();List<Node> childNodes = compilationUnit.getChildNodes();for (Node node : childNodes) {if (node instanceof ImportDeclaration) {buffer.append(String.valueOf(node));} else if (node instanceof PackageDeclaration) {buffer.append(String.valueOf(node));} else {buffer.append(String.valueOf(node));buffer.append("\r\n");}}}return buffer.toString();}public static String getFileContext(File file) throws IOException {StringBuffer buffer = new StringBuffer();try (BufferedReader bufferReader = new BufferedReader(new InputStreamReader(new FileInputStream(file)))) {String line = null;while ((line = bufferReader.readLine()) != null) {buffer.append(line);buffer.append("\r\n");}}return buffer.toString();}}
3.开始编写入口类
import javafx.application.Application;
import javafx.fxml.FXMLLoader;
import javafx.scene.Parent;
import javafx.scene.Scene;
import javafx.stage.Stage;public class JavaFileFormatTest extends Application {public static void main(String[] args) {launch(args);}@Overridepublic void start(Stage stage) throws Exception {Parent root = FXMLLoader.load(getClass().getResource("javaFileFormatTools.fxml"));Scene scene = new Scene(root, 1200,800);stage.setTitle("Java File Formatter");stage.setScene(scene);stage.show();}
}
4. 测试
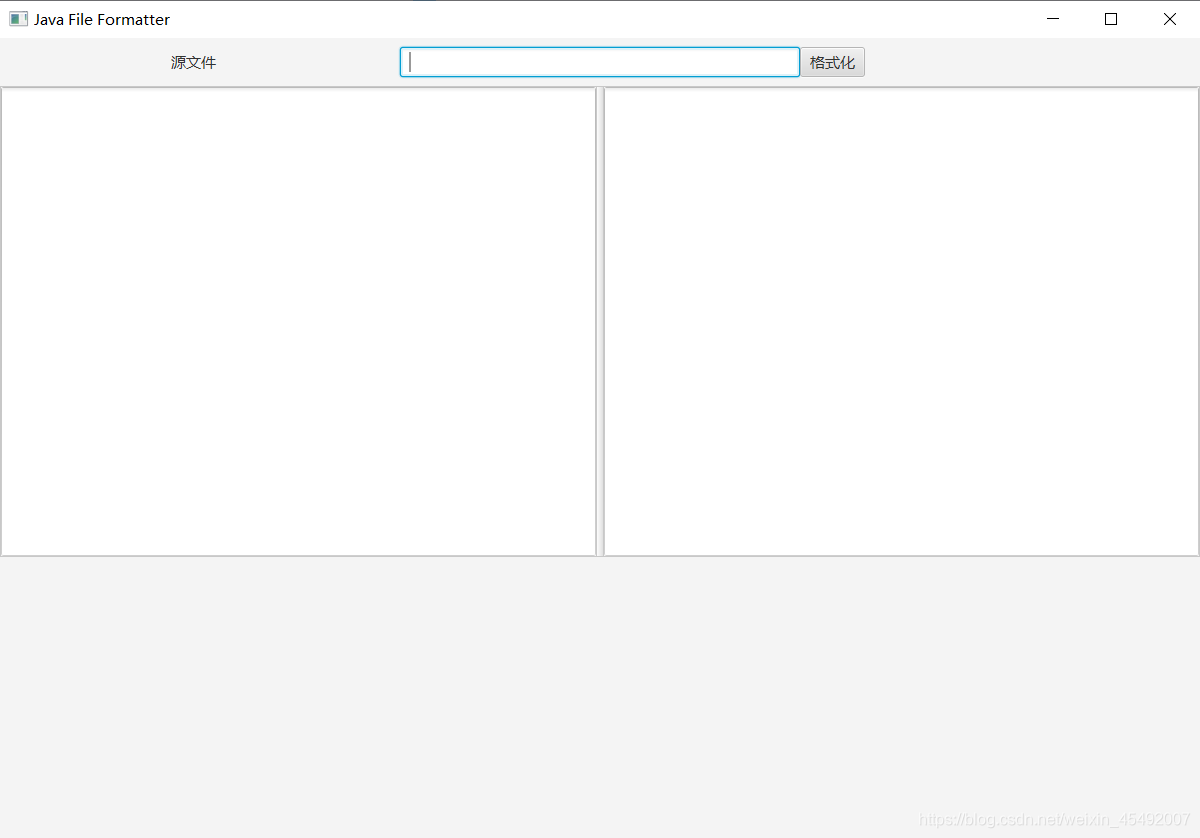
输入需要格式化的文件名称路径,并点击格式化

实现代码格式化成功,如果未填写直接格式化就会出现提示框

注意这个alert,实现成功!
这篇关于JavaFx:采用SceneBuilder方式实现格式化java源文件(引入fxml文件完成样式布局)的文章就介绍到这儿,希望我们推荐的文章对编程师们有所帮助!


