本文主要是介绍TabHost BottomNavigationBar,希望对大家解决编程问题提供一定的参考价值,需要的开发者们随着小编来一起学习吧!
1.直接使用TabHost控件TabHost可以方便地在窗口中放置多个标签页,每个标签页相当于获得了一个与外部容器相同大小的摆放区域
目的:一个Activity里尽量多的显示页面TabHost
重要方法
1)TabHost getTabHost()
是TabActivity类的方法用于创建TabHost(选项卡)对象,程序要继承TabActivity
在API22里显示过时
2)addTab()
添加一个选项卡
3)tabHost.newTabSpec(String tag);
为选项卡指定一个字符串类型的Tag,该Tag用来区分不同的选项卡
4)setIndicator(String title);设置选项卡的标题
5)setContent(int resId);设置选项卡的显示内容,参数是布局文件或控件的资源索引值
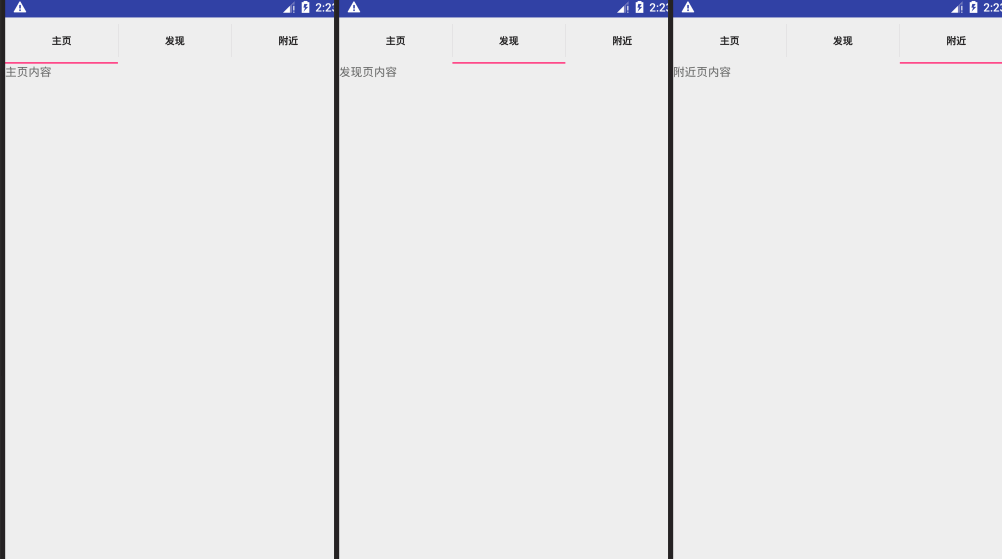
<TabHostandroid:layout_width="200dip"android:layout_height="300dip"tools:layout_editor_absoluteX="70dp"tools:layout_editor_absoluteY="34dp"><LinearLayoutandroid:layout_width="match_parent"android:layout_height="match_parent"android:orientation="vertical"><TabWidgetandroid:id="@android:id/tabs"android:layout_width="match_parent"android:layout_height="wrap_content" /><FrameLayoutandroid:id="@android:id/tabcontent"android:layout_width="match_parent"android:layout_height="match_parent"><LinearLayoutandroid:id="@+id/tab1"android:layout_width="match_parent"android:layout_height="match_parent"android:orientation="vertical"><TextViewandroid:id="@+id/tvtab1"android:layout_width="match_parent"android:layout_height="wrap_content"android:text="TextView" /></LinearLayout><LinearLayoutandroid:id="@+id/tab2"android:layout_width="match_parent"android:layout_height="match_parent"android:orientation="vertical"><TextViewandroid:id="@+id/tvtab2"android:layout_width="match_parent"android:layout_height="wrap_content"android:text="TextView" /></LinearLayout><LinearLayoutandroid:id="@+id/tab3"android:layout_width="match_parent"android:layout_height="match_parent"android:orientation="vertical"><TextViewandroid:id="@+id/tvtab3"android:layout_width="match_parent"android:layout_height="wrap_content"android:text="TextView" /></LinearLayout></FrameLayout></LinearLayout></TabHost>public class TabHostActivity extends TabActivity {private TabHost tabHost;@Overrideprotected void onCreate(Bundle savedInstanceState) {super.onCreate(savedInstanceState);//1)获取tabHost 在API22里面TabActivity已显示过时tabHost = getTabHost();//2)将activity_tab_host.xml作为窗口的显示内容LayoutInflater.from(this).inflate(R.layout.activity_tab_host,tabHost.getTabContentView(),true);//3)添加第一个标签//2)创建选项卡tabHost.addTab(tabHost.newTabSpec("tab1").setIndicator("主页").setContent(R.id.tvtab1));tabHost.addTab(tabHost.newTabSpec("tab2").setIndicator("发现").setContent(R.id.tvtab2));tabHost.addTab(tabHost.newTabSpec("tab3").setIndicator("附近").setContent(R.id.tvtab3));TextView tv1 = (TextView)findViewById(R.id.tvtab1);tv1.setText("主页内容");TextView tv2 = (TextView)findViewById(R.id.tvtab2);tv2.setText("发现页内容");TextView tv3 = (TextView)findViewById(R.id.tvtab3);tv3.setText("附近页内容");}
}
2.BottomNavigatorBar
https://github.com/Ashok-Varma/BottomNavigation
https://github.com/zhouxu88/BottomNavigationBar
官方出了BottomNavigatorBar这个底部导航控制器
1)在Gradle中增加
dependencies{
compile 'com.ashokvarma.android:bottom-navigation-bar:2.0.4'
}
2)布局
<LinearLayout xmlns:android="http://schemas.android.com/apk/res/android"xmlns:app="http://schemas.android.com/apk/res-auto"xmlns:tools="http://schemas.android.com/tools"android:layout_width="match_parent"android:layout_height="match_parent"android:orientation="vertical"tools:context="com.xx.andbasetest.TabBottomActivity"><android.support.v4.view.ViewPagerandroid:layout_width="match_parent"android:layout_height="0dp"android:layout_weight="1"/><com.ashokvarma.bottomnavigation.BottomNavigationBarandroid:layout_gravity="bottom"android:id="@+id/bottom_navigation_bar"android:layout_width="match_parent"android:layout_height="wrap_content"/></LinearLayout>3)代码添加
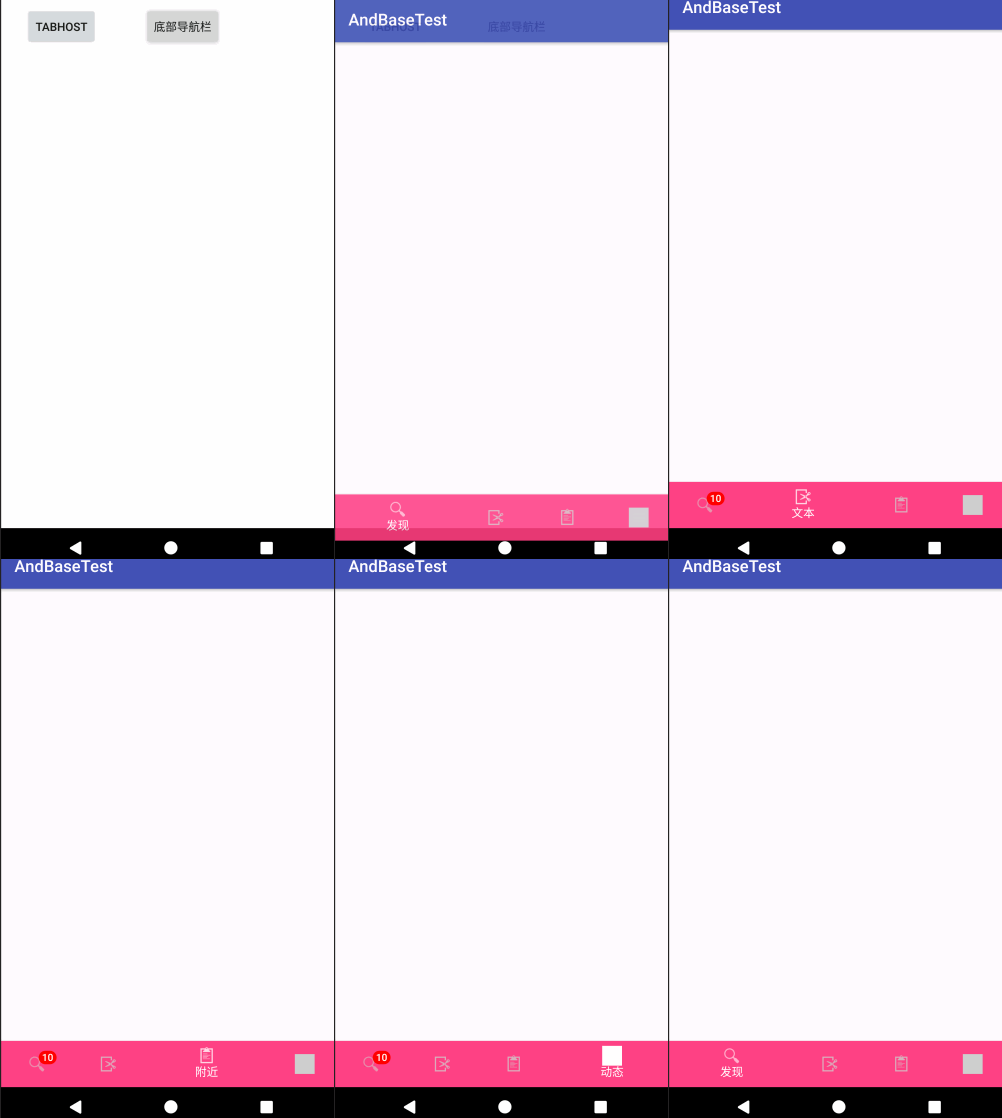
public class TabBottomActivity extends AppCompatActivity {private BottomNavigationBar bottomNavigationBar;private TextBadgeItem badgeItem;//角标@Overrideprotected void onCreate(Bundle savedInstanceState) {super.onCreate(savedInstanceState);setContentView(R.layout.activity_tab_bottom);badgeItem = new TextBadgeItem().setHideOnSelect(true) //设置选中时隐葳角标.setBackgroundColor(Color.RED).setText("10");bottomNavigationBar = (BottomNavigationBar)findViewById(R.id.bottom_navigation_bar);bottomNavigationBar.addItem(new BottomNavigationItem(R.mipmap.ic_menu_search_n,"发现").setBadgeItem(badgeItem)).addItem(new BottomNavigationItem(R.mipmap.ic_menu_cut_f,"文本")).addItem(new BottomNavigationItem(R.mipmap.ic_menu_paste_f,"附近")).addItem(new BottomNavigationItem(R.mipmap.menu_f,"动态")).initialise();//选项卡切换监听事件bottomNavigationBar.setTabSelectedListener(new BottomNavigationBar.OnTabSelectedListener() {@Overridepublic void onTabSelected(int position) {Log.i("tab"," onTabSelected position="+position);}@Overridepublic void onTabUnselected(int position) {Log.i("tab"," onTabUnselected position="+position);}@Overridepublic void onTabReselected(int position) {}});}
}参考:
http://blog.csdn.net/weihua_li/article/details/78561323
这篇关于TabHost BottomNavigationBar的文章就介绍到这儿,希望我们推荐的文章对编程师们有所帮助!


