本文主要是介绍Human3.6m数据处理(mhformer代码解读),希望对大家解决编程问题提供一定的参考价值,需要的开发者们随着小编来一起学习吧!
对于3d人体姿态估计任务中数据集human3.6m的处理
写在最前面:这是我自己的理解,说的不一定对。
human3.6m有很多格式的数据,包括视频、2d ground truth、3d ground truth,还分为xyz坐标的表示形式和旋转向量表示形式,这篇只用到2d 和3d ground truth(坐标表示的)。
这篇csdn以cvpr2022的mhformer为例,基本上videopose3d之后数据处理的方式都差不多。
源码地址:
GitHub - Vegetebird/MHFormer: [CVPR 2022] MHFormer: Multi-Hypothesis Transformer for 3D Human Pose Estimation![]() https://github.com/Vegetebird/MHFormer
https://github.com/Vegetebird/MHFormer
1 数据集下载
在代码dataset下的readme中给出了processed data的下载地址,由论文VideoPose3D给出。
(不要从官网下,那个需要实验室申请,很麻烦,点最后的here下载,下面是下载地址)https://drive.google.com/drive/folders/112GPdRC9IEcwcJRyrLJeYw9_YV4wLdKC?usp=sharing![]() https://drive.google.com/drive/folders/112GPdRC9IEcwcJRyrLJeYw9_YV4wLdKC?usp=sharing 下载的数据放到代码dataset下:
https://drive.google.com/drive/folders/112GPdRC9IEcwcJRyrLJeYw9_YV4wLdKC?usp=sharing 下载的数据放到代码dataset下:
包括3d, 2d ground truth, 由cpn获得的2d label
|-- dataset
|   |-- data_3d_h36m.npz
|   |-- data_2d_h36m_gt.npz
|   |-- data_2d_h36m_cpn_ft_h36m_dbb.npz
2 数据格式解析
由官网信息及各种对数据集介绍的帖子得知,human3.6m数据的具体内容是人体的32个关键点的坐标信息。
可以用debug查看内容 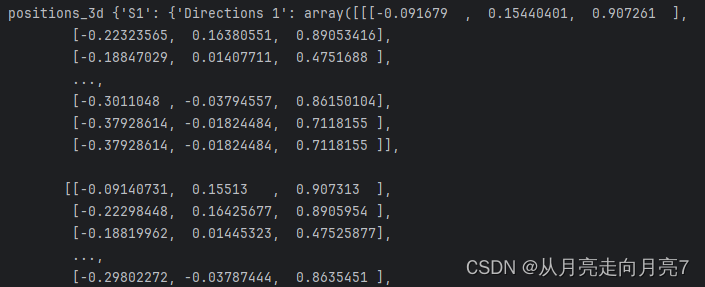
图2-1 data_3d_h36m.npz的具体内容示意图
可以看到,具体内容包括S1等多个subject的数据,每个subject分为15个action,action下是具体的xyz坐标信息。
3 模型的数据处理部分
3.1 3d数据加载 (Human36mDataset)
root_path = opt.root_pathdataset_path = root_path + 'data_3d_' + opt.dataset + '.npz'dataset = Human36mDataset(dataset_path, opt)actions = define_actions(opt.actions)加载3d数据集,这里用到Human36mDataset类(common->load_data_hm36.py中):
这个类主要用于加载和处理数据,具体来说有两个作用,一:复制相机参数到每一个subject、action的数据下(由原来的position变为 position和camera两块数据);二:remove不需要的点(从32个keypoints到17个keypoints)
ps:1 相机参数说明:
相机参数可以用于坐标系的转换等,分为内部参数(intrinsic_params)和外部参数(extrinsic_params)
内参:
- 'id':相机的唯一标识符。
- 'center':相机的中心坐标,是一个包含两个元素的列表,分别表示x和y坐标。
- 'focal_length':相机的焦距,是一个包含两个元素的列表,分别表示主焦距和次焦距。
- 'radial_distortion':径向畸变系数,是一个包含三个元素的列表。
- 'tangential_distortion':切向畸变系数,是一个包含两个元素的列表。
- 'res_w':相机的水平分辨率。
- 'res_h':相机的垂直分辨率。
- 'azimuth':相机的方位角。
外参:
- 'orientation':相机的旋转矩阵,是一个包含四个元素的列表,分别表示四元数的四个分量。
- 'translation':相机的平移向量,是一个包含三个元素的列表,分别表示x、y和z方向上的平移距离。
ps:2 世界坐标和相机坐标说明:
世界坐标系就是正常的坐标系,3d ground truth的坐标系。
说一下相机坐标系:相机坐标系是在相机上建立的坐标系。这个坐标系的原点位于小孔,z轴与光轴重合,x轴和y轴平行投影面。
世界坐标->相机坐标:世界坐标 * 旋转矩阵 + 平移变换 -> 相机坐标(大概是这样,就是说复制相机参数是用于坐标转换的)
为什么要转换: 我的理解是,原数据每个subject,每个action都有4个机位的视频,对于每一段视频都有自己对应的3d label,而3d ground truth里只是一个实验室的坐标系,所以用相机参数进行转换,可以得到对应的4份3d label
class Human36mDataset(MocapDataset):def __init__(self, path, opt, remove_static_joints=True):super().__init__(fps=50, skeleton=h36m_skeleton)self.train_list = ['S1', 'S5', 'S6', 'S7', 'S8']self.test_list = ['S9', 'S11']self._cameras = copy.deepcopy(h36m_cameras_extrinsic_params)for cameras in self._cameras.values():for i, cam in enumerate(cameras):cam.update(h36m_cameras_intrinsic_params[i])for k, v in cam.items():if k not in ['id', 'res_w', 'res_h']:cam[k] = np.array(v, dtype='float32') if opt.crop_uv == 0:cam['center'] = normalize_screen_coordinates(cam['center'], w=cam['res_w'], h=cam['res_h']).astype('float32')cam['focal_length'] = cam['focal_length'] / cam['res_w'] * 2if 'translation' in cam:cam['translation'] = cam['translation'] / 1000 cam['intrinsic'] = np.concatenate((cam['focal_length'],cam['center'],cam['radial_distortion'],cam['tangential_distortion']))data = np.load(path,allow_pickle=True)['positions_3d'].item()self._data = {}for subject, actions in data.items():self._data[subject] = {}for action_name, positions in actions.items():self._data[subject][action_name] = {'positions': positions,'cameras': self._cameras[subject],}if remove_static_joints:self.remove_joints([4, 5, 9, 10, 11, 16, 20, 21, 22, 23, 24, 28, 29, 30, 31])self._skeleton._parents[11] = 8self._skeleton._parents[14] = 8def supports_semi_supervised(self):return True
上面是Human36mDataset类代码,通过3.1 3d数据加载这一步,3d的数据到了一个Human36mDataset类的对象中,包括position和camera。
3.2 数据处理(包括2d和3d)(Fusion)
if opt.train:train_data = Fusion(opt=opt, train=True, dataset=dataset, root_path=root_path)train_dataloader = torch.utils.data.DataLoader(train_data, batch_size=opt.batch_size,shuffle=True, num_workers=int(opt.workers), pin_memory=True)test_data = Fusion(opt=opt, train=False, dataset=dataset, root_path =root_path)test_dataloader = torch.utils.data.DataLoader(test_data, batch_size=opt.batch_size,shuffle=False, num_workers=int(opt.workers), pin_memory=True)用到Fusion类(common->load_data_hm36.py),下面具体说一下这个类:
1 Fusion->perpare_data
先说perpare_data:
下面这块代码,传入的dataset是3.1中加载的3d数据,folder_list当训练时选s1 s5 s6 s7 s8 测试的时候选s9 s11。
具体的作用 1:通过world_to_camera把3d数据从世界坐标系转为相机坐标系;2:让2d的序列的长度和3d的序列长度保持一致; 3:数据标准化
def prepare_data(self, dataset, folder_list):for subject in folder_list:for action in dataset[subject].keys():anim = dataset[subject][action]positions_3d = []for cam in anim['cameras']:pos_3d = world_to_camera(anim['positions'], R=cam['orientation'], t=cam['translation'])pos_3d[:, 1:] -= pos_3d[:, :1] positions_3d.append(pos_3d)anim['positions_3d'] = positions_3dkeypoints = np.load(self.root_path + 'data_2d_' + self.data_type + '_' + self.keypoints_name + '.npz',allow_pickle=True)keypoints_symmetry = keypoints['metadata'].item()['keypoints_symmetry']self.kps_left, self.kps_right = list(keypoints_symmetry[0]), list(keypoints_symmetry[1])self.joints_left, self.joints_right = list(dataset.skeleton().joints_left()), list(dataset.skeleton().joints_right())keypoints = keypoints['positions_2d'].item()for subject in folder_list:assert subject in keypoints, 'Subject {} is missing from the 2D detections dataset'.format(subject)for action in dataset[subject].keys():assert action in keypoints[subject], 'Action {} of subject {} is missing from the 2D detections dataset'.format(action,subject)for cam_idx in range(len(keypoints[subject][action])):mocap_length = dataset[subject][action]['positions_3d'][cam_idx].shape[0]assert keypoints[subject][action][cam_idx].shape[0] >= mocap_lengthif keypoints[subject][action][cam_idx].shape[0] > mocap_length:keypoints[subject][action][cam_idx] = keypoints[subject][action][cam_idx][:mocap_length]for subject in keypoints.keys():for action in keypoints[subject]:for cam_idx, kps in enumerate(keypoints[subject][action]):cam = dataset.cameras()[subject][cam_idx]if self.crop_uv == 0:kps[..., :2] = normalize_screen_coordinates(kps[..., :2], w=cam['res_w'], h=cam['res_h'])keypoints[subject][action][cam_idx] = kpsreturn keypoints2 Fusion->fetch
def fetch(self, dataset, subjects, subset=1, parse_3d_poses=True):out_poses_3d = {}out_poses_2d = {}out_camera_params = {}for subject in subjects:for action in self.keypoints[subject].keys():if self.action_filter is not None:found = Falsefor a in self.action_filter:if action.startswith(a):found = Truebreakif not found:continueposes_2d = self.keypoints[subject][action]for i in range(len(poses_2d)):out_poses_2d[(subject, action, i)] = poses_2d[i]if subject in dataset.cameras():cams = dataset.cameras()[subject]assert len(cams) == len(poses_2d), 'Camera count mismatch'for i, cam in enumerate(cams):if 'intrinsic' in cam:out_camera_params[(subject, action, i)] = cam['intrinsic']if parse_3d_poses and 'positions_3d' in dataset[subject][action]:poses_3d = dataset[subject][action]['positions_3d']assert len(poses_3d) == len(poses_2d), 'Camera count mismatch'for i in range(len(poses_3d)): out_poses_3d[(subject, action, i)] = poses_3d[i]if len(out_camera_params) == 0:out_camera_params = Noneif len(out_poses_3d) == 0:out_poses_3d = Nonestride = self.downsampleif subset < 1:for key in out_poses_2d.keys():n_frames = int(round(len(out_poses_2d[key]) // stride * subset) * stride)start = deterministic_random(0, len(out_poses_2d[key]) - n_frames + 1, str(len(out_poses_2d[key])))out_poses_2d[key] = out_poses_2d[key][start:start + n_frames:stride]if out_poses_3d is not None:out_poses_3d[key] = out_poses_3d[key][start:start + n_frames:stride]elif stride > 1:for key in out_poses_2d.keys():out_poses_2d[key] = out_poses_2d[key][::stride]if out_poses_3d is not None:out_poses_3d[key] = out_poses_3d[key][::stride]return out_camera_params, out_poses_3d, out_poses_2d..今天先写这么多吧,希望下次打开它的时候不用再重读这个代码了
下次打开的时候该看fetch函数了
如果方向可以选,不要做hpe!光是数据就好复杂啊!
在草稿箱里存了半年了吧,今天终于动笔了,为什么要写这个呢,因为我含泪看了很久,困扰了好几个月,当时多么希望有人能给我讲讲,希望写出来能给别人撑撑伞(555
这篇关于Human3.6m数据处理(mhformer代码解读)的文章就介绍到这儿,希望我们推荐的文章对编程师们有所帮助!


