本文主要是介绍深度学习实践:图像去雨网络实现Pytoch,希望对大家解决编程问题提供一定的参考价值,需要的开发者们随着小编来一起学习吧!
第二集教程链接:http://t.csdn.cn/QxpgD (更详细)
本文引用 听 风、的博客 图像去雨:超详细手把手写 pytorch 实现代码(带注释)的网络框架,并进行了优化,主要加入了BatchNormalized模块。优化了代码整体框架和书写规范,加入了更多注释。
代码链接:
Kaggle:Derain_Study | Kaggle
Github:Learn_Pytorch/derain-study.ipynb at main · DLee0102/Learn_Pytorch (github.com)
改进后的代码加入了验证集以观察训练的模型是否过拟合。同时使用了tqdm工具包,方便观察训练进度。在保存模型方面使用了更高效的方法,即保存在验证集上损失最小的模型。
数据集采用的是Kaggle上的JRDR - Deraining Dataset的Light数据集,使用了更优化的dataset方法,以使input和label的图片能准确匹配。
import os
import torchvision.transforms as transforms
from torch.utils.data import Dataset
from PIL import Image
import torch.optim as optim
import torch
import torch.nn as nn
import torch.nn.functional as F
import matplotlib.pyplot as plt
from torch.utils.data import DataLoader
from tqdm.auto import tqdm
import numpy as np
import re'''
Dataset for Training.
'''
class MyTrainDataset(Dataset):def __init__(self, input_path, label_path):self.input_path = input_pathself.input_files = os.listdir(input_path)self.label_path = label_pathself.label_files = os.listdir(label_path)self.transforms = transforms.Compose([transforms.CenterCrop([64, 64]), transforms.ToTensor(),])def __len__(self):return len(self.input_files)def __getitem__(self, index):label_image_path = os.path.join(self.label_path, self.label_files[index])label_image = Image.open(label_image_path).convert('RGB')'''Ensure input and label are in couple.'''temp = self.label_files[index][:-4]self.input_files[index] = temp + 'x2.png'input_image_path = os.path.join(self.input_path, self.input_files[index])input_image = Image.open(input_image_path).convert('RGB')input = self.transforms(input_image)label = self.transforms(label_image)return input, label'''
Dataset for testing.
'''
class MyValidDataset(Dataset):def __init__(self, input_path, label_path):self.input_path = input_pathself.input_files = os.listdir(input_path)self.label_path = label_pathself.label_files = os.listdir(label_path)self.transforms = transforms.Compose([transforms.CenterCrop([64, 64]), transforms.ToTensor(),])def __len__(self):return len(self.input_files)def __getitem__(self, index):label_image_path = os.path.join(self.label_path, self.label_files[index])label_image = Image.open(label_image_path).convert('RGB')temp = self.label_files[index][:-4]self.input_files[index] = temp + 'x2.png'input_image_path = os.path.join(self.input_path, self.input_files[index])input_image = Image.open(input_image_path).convert('RGB')input = self.transforms(input_image)label = self.transforms(label_image)return input, label
'''
Residual_Network with BatchNormalized.
'''
class Net(nn.Module):def __init__(self):super(Net, self).__init__()self.conv0 = nn.Sequential(nn.Conv2d(6, 32, 3, 1, 1),nn.BatchNorm2d(32),nn.ReLU())self.res_conv1 = nn.Sequential(nn.Conv2d(32, 32, 3, 1, 1),nn.BatchNorm2d(32),nn.ReLU(),nn.Conv2d(32, 32, 3, 1, 1),nn.BatchNorm2d(32),nn.ReLU())self.res_conv2 = nn.Sequential(nn.Conv2d(32, 32, 3, 1, 1),nn.BatchNorm2d(32),nn.ReLU(),nn.Conv2d(32, 32, 3, 1, 1),nn.BatchNorm2d(32),nn.ReLU())self.res_conv3 = nn.Sequential(nn.Conv2d(32, 32, 3, 1, 1),nn.BatchNorm2d(32),nn.ReLU(),nn.Conv2d(32, 32, 3, 1, 1),nn.BatchNorm2d(32),nn.ReLU())self.res_conv4 = nn.Sequential(nn.Conv2d(32, 32, 3, 1, 1),nn.BatchNorm2d(32),nn.ReLU(),nn.Conv2d(32, 32, 3, 1, 1),nn.BatchNorm2d(32),nn.ReLU())self.res_conv5 = nn.Sequential(nn.Conv2d(32, 32, 3, 1, 1),nn.BatchNorm2d(32),nn.ReLU(),nn.Conv2d(32, 32, 3, 1, 1),nn.BatchNorm2d(32),nn.ReLU())self.conv = nn.Sequential(nn.Conv2d(32, 3, 3, 1, 1),)def forward(self, input):x = inputfor i in range(6): # Won't change the number of parameters'''Different from Classification.'''x = torch.cat((input, x), 1)x = self.conv0(x)x = F.relu(self.res_conv1(x) + x)x = F.relu(self.res_conv2(x) + x)x = F.relu(self.res_conv3(x) + x)x = F.relu(self.res_conv4(x) + x)x = F.relu(self.res_conv5(x) + x)x = self.conv(x)x = x + inputreturn x'''
Check the number of GPU.
'''
print("Let's use", torch.cuda.device_count(), "GPUs!")'''
Path of Dataset.
'''
input_path = "../input/jrdr-deraining-dataset/JRDR/rain_data_train_Light/rain"
label_path = "../input/jrdr-deraining-dataset/JRDR/rain_data_train_Light/norain"
valid_input_path = '../input/jrdr-deraining-dataset/JRDR/rain_data_test_Light/rain/X2'
valid_label_path = '../input/jrdr-deraining-dataset/JRDR/rain_data_test_Light/norain''''
Check the device.
'''
device = 'cpu'
if torch.cuda.is_available():device = 'cuda''''
Move the Network to the CUDA.
'''
net = Net().to(device)'''
Hyper Parameters.TODO: fine-tuning.
'''
learning_rate = 1e-3
batch_size = 50
epoch = 100
patience = 30
stale = 0
best_valid_loss = 10000'''
Prepare for plt.
'''
Loss_list = []
Valid_Loss_list = []'''
Define optimizer and Loss Function.
'''
optimizer = optim.Adam(net.parameters(), lr=learning_rate)
loss_f = nn.MSELoss()'''
Check the model.
'''
if os.path.exists('./model.pth'): print('Continue train with last model...')net.load_state_dict(torch.load('./model.pth'))
else: print("Restart...")'''
Prepare DataLoaders.Attension:'pin_numbers=True' can accelorate CUDA computing.
'''
dataset_train = MyTrainDataset(input_path, label_path)
dataset_valid = MyValidDataset(valid_input_path, valid_label_path)
train_loader = DataLoader(dataset_train, batch_size=batch_size, shuffle=True, pin_memory=True)
valid_loader = DataLoader(dataset_valid, batch_size=batch_size, shuffle=True, pin_memory=True)'''
START Training ...
'''
for i in range(epoch):
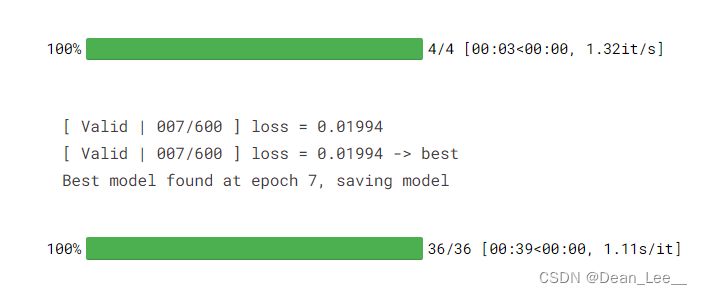
# ---------------Train----------------net.train()train_losses = []'''tqdm is a toolkit for progress bar.'''for batch in tqdm(train_loader):inputs, labels = batchoutputs = net(inputs.to(device))loss = loss_f(outputs, labels.to(device))optimizer.zero_grad()loss.backward()'''Avoid grad to be too BIG.'''grad_norm = nn.utils.clip_grad_norm_(net.parameters(), max_norm=10)optimizer.step()'''Attension:We need set 'loss.item()' to turn Tensor into Numpy, or plt will not work.'''train_losses.append(loss.item())train_loss = sum(train_losses)Loss_list.append(train_loss)print(f"[ Train | {i + 1:03d}/{epoch:03d} ] loss = {train_loss:.5f}")# -------------Validation-------------
'''
Validation is a step to ensure training process is working.
You can also exploit Validation to see if your net work is overfitting.Firstly, you should set model.eval(), to ensure parameters not training.
'''net.eval()valid_losses = []for batch in tqdm(valid_loader):inputs, labels = batch'''Cancel gradient decent.'''with torch.no_grad():outputs = net(inputs.to(device))loss = loss_f(outputs, labels.to(device))valid_losses.append(loss.item())valid_loss = sum(valid_losses)Valid_Loss_list.append(valid_loss)print(f"[ Valid | {i + 1:03d}/{epoch:03d} ] loss = {valid_loss:.5f}")'''Update Logs and save the best model.Patience is also checked.'''if valid_loss < best_valid_loss:print(f"[ Valid | {i + 1:03d}/{epoch:03d} ] loss = {valid_loss:.5f} -> best")else:print(f"[ Valid | {i + 1:03d}/{epoch:03d} ] loss = {valid_loss:.5f}")if valid_loss < best_valid_loss:print(f'Best model found at epoch {i+1}, saving model')torch.save(net.state_dict(), f'model_best.ckpt')best_valid_loss = valid_lossstale = 0else:stale += 1if stale > patience:print(f'No improvement {patience} consecutive epochs, early stopping.')break'''
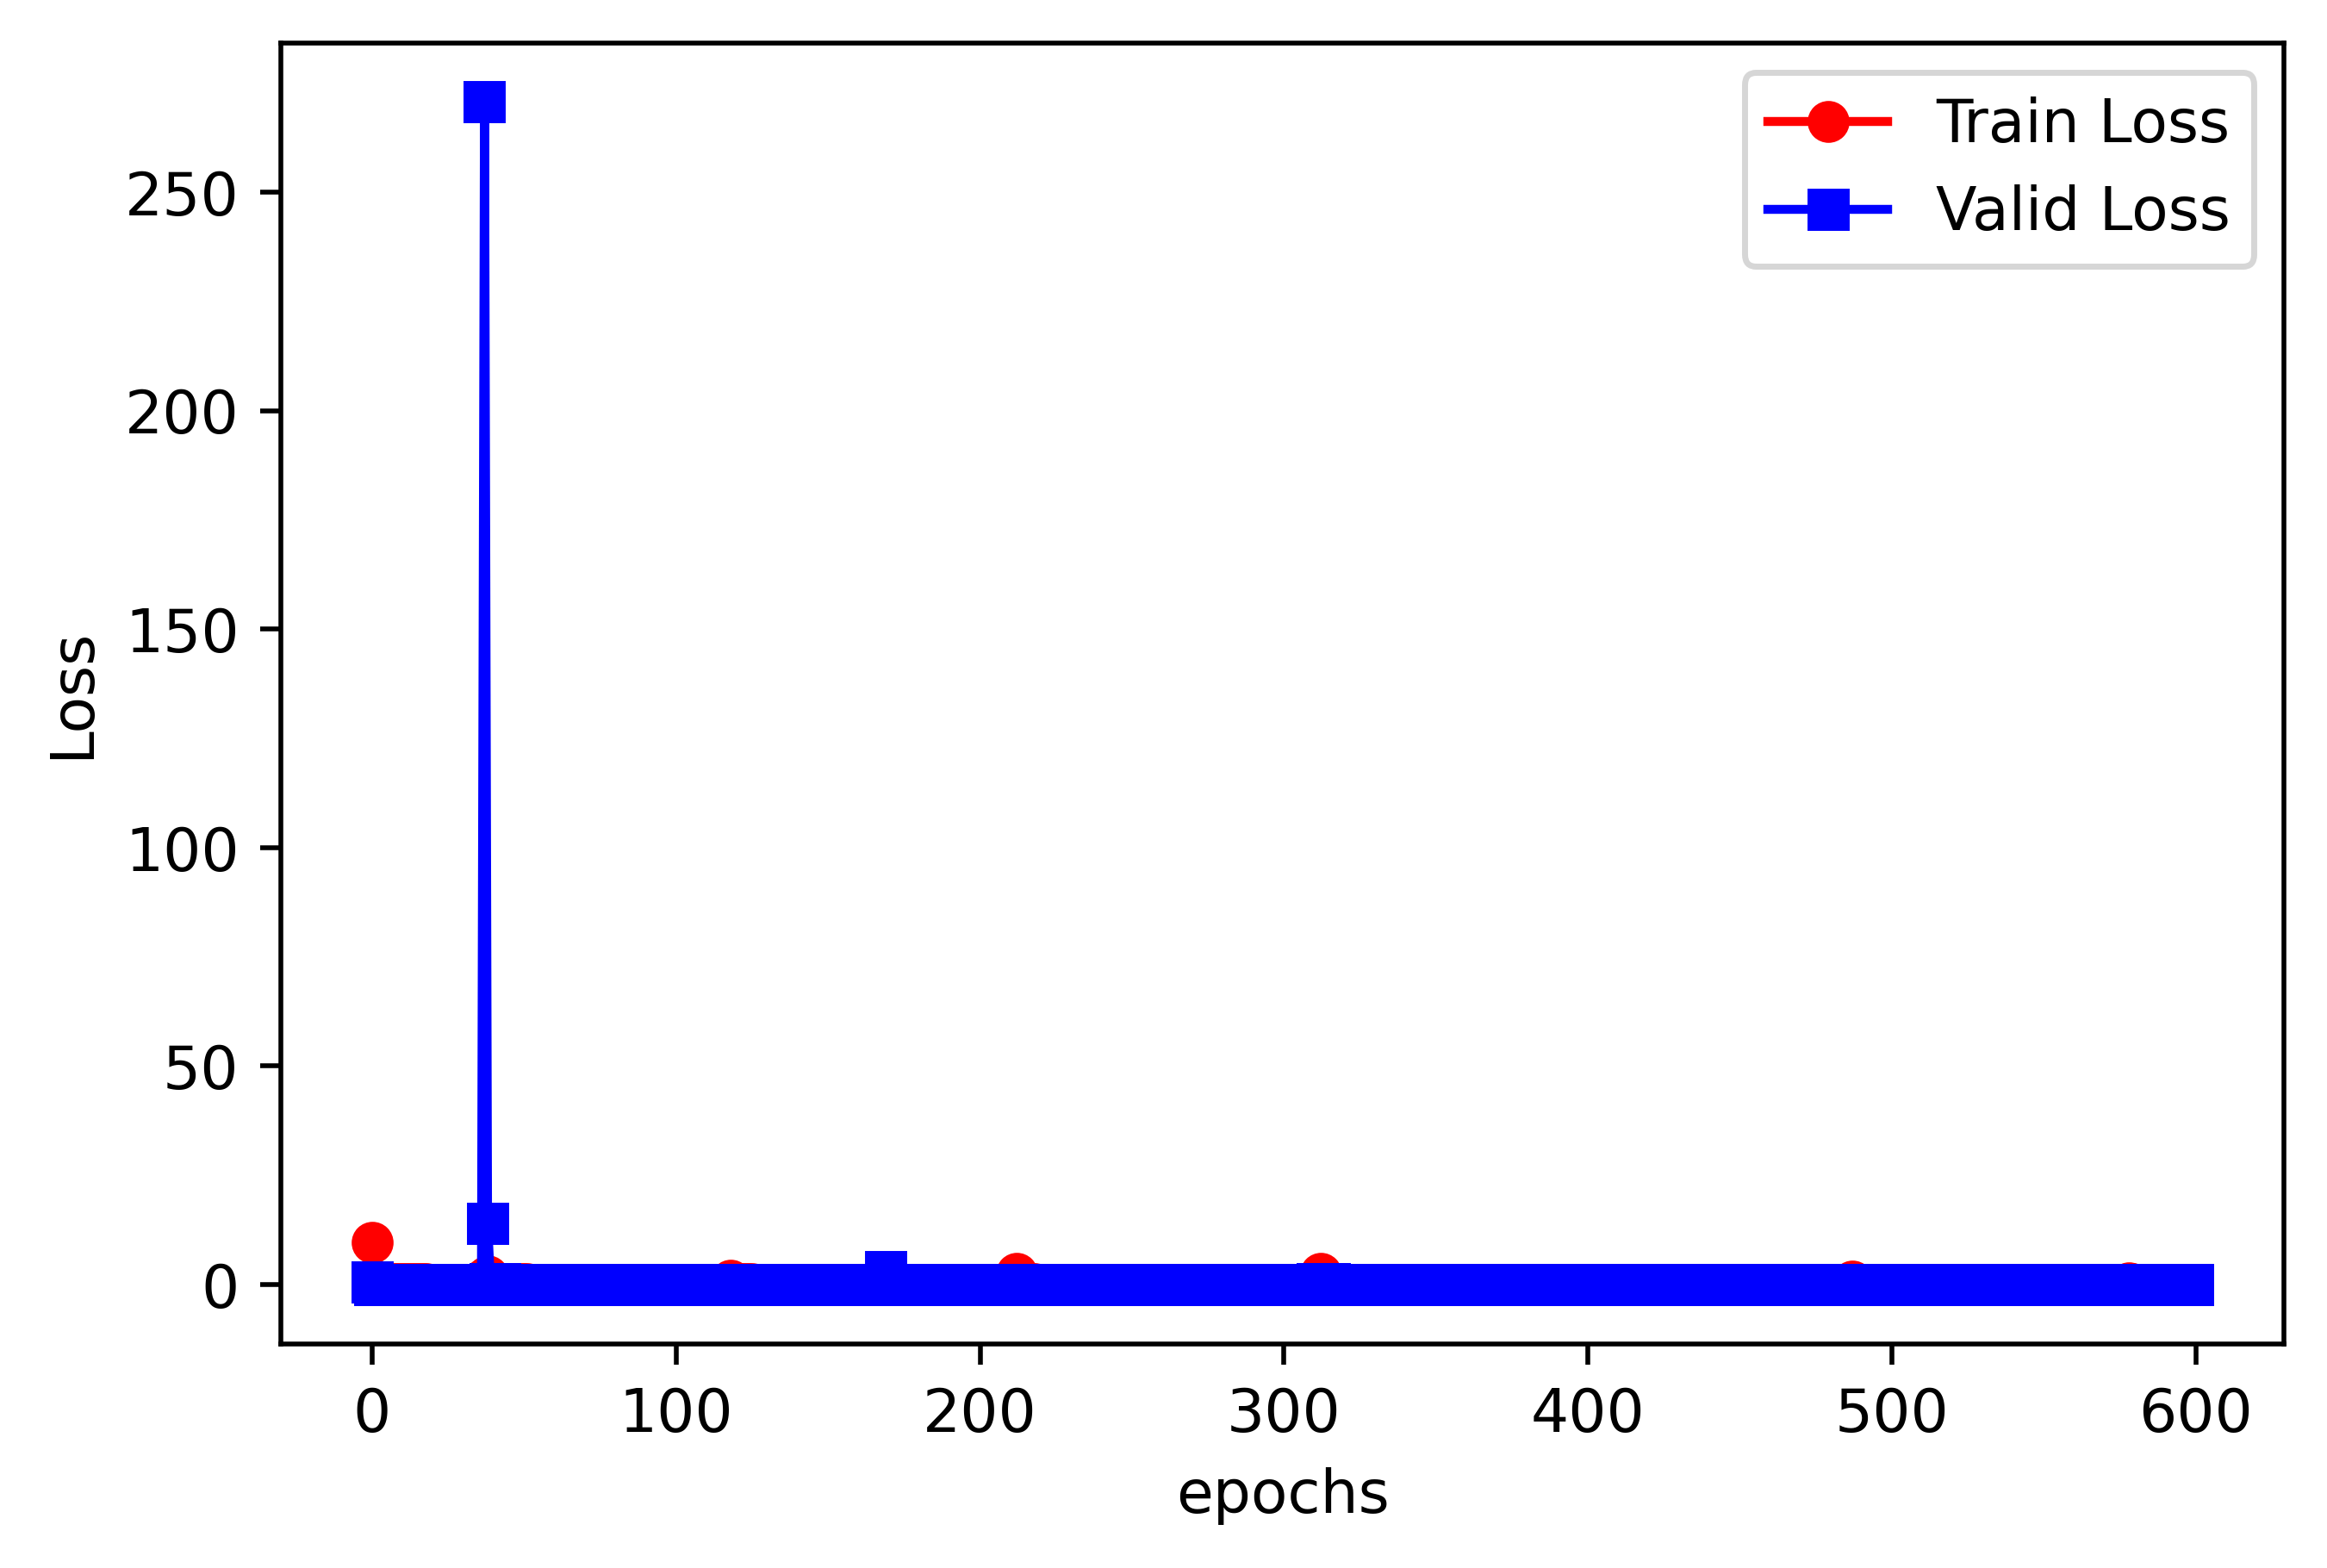
Use plt to draw Loss curves.
'''
plt.figure(dpi=500)
x = range(epoch)
y = Loss_list
plt.plot(x, y, 'ro-', label='Train Loss')
plt.plot(range(epoch), Valid_Loss_list, 'bs-', label='Valid Loss')
plt.ylabel('Loss')
plt.xlabel('epochs')
plt.legend()
plt.show()训练结果如下:(显示效果不太好)
test上实际去雨效果:
原图:

未加入BatchNormalize的效果:

加入BatchNormalize后的结果:
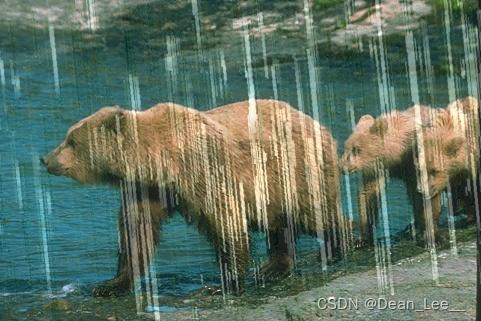
可以看到,同样训练论述的情况下,加入BatchNormalize后雨线数目明显减少
第二集教程链接:http://t.csdn.cn/QxpgD (更详细)
这篇关于深度学习实践:图像去雨网络实现Pytoch的文章就介绍到这儿,希望我们推荐的文章对编程师们有所帮助!


