本文主要是介绍【Java闭关修炼】SpringBoot项目-贪吃蛇对战小游戏-创建个人中心页面(上),希望对大家解决编程问题提供一定的参考价值,需要的开发者们随着小编来一起学习吧!
【Java闭关修炼】SpringBoot项目-贪吃蛇对战小游戏-创建个人中心页面(上)
- 创建一个user表
- 创建pojo.bot
- 实现后端API
- AddService接口
- AddService接口实现
- AddController
- 添加bot记录的前端页面
- RemoveServiceImpl
- RemoveController
- 前端删除Bot记录测试
- UpdateServiceImpl
- UpdateController
- Update前端测试
- GetListImpl
- GetListController
- 前端页面测试
创建一个user表
![[外链图片转存失败,源站可能有防盗链机制,建议将图片保存下来直接上传(img-lzGoccPt-1679971611476)(../images/c939cbdfeb83e820a543223dc335b7269138908472d45f7a2fb22e64e359019c.png)]](https://img-blog.csdnimg.cn/cfefd0a462aa49f683e61d02fdbf351b.png)
![[外链图片转存失败,源站可能有防盗链机制,建议将图片保存下来直接上传(img-XpDj1xeK-1679971611478)(../images/3ee716150da0fada3cc78c1ab2322c2fc92acb9f51ad2f11c0f834c4ed15462c.png)]](https://img-blog.csdnimg.cn/759a282961234abdacff5f6db7c986dd.png)
创建pojo.bot
package com.kob.backedn2.pojo;import com.baomidou.mybatisplus.annotation.IdType;
import com.baomidou.mybatisplus.annotation.TableId;
import com.fasterxml.jackson.annotation.JsonFormat;
import lombok.AllArgsConstructor;
import lombok.Data;
import lombok.NoArgsConstructor;
import java.util.Date;// 变量一定是驼峰命名
@Data
@AllArgsConstructor
@NoArgsConstructor
public class Bot {// 主键自增 添加注解@TableId(type = IdType.AUTO)private Integer id;private Integer userId;private String title;private String description;private String content;private Integer rating;// 注解添加日期格式@JsonFormat(pattern = "yyyy-MM-dd HH:mm:ss")private Date createtime;@JsonFormat(pattern = "yyyy-MM-dd HH:mm:ss")private Date modifytime;
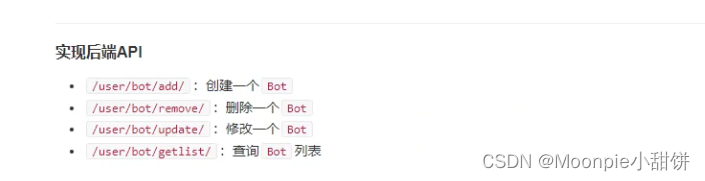
}实现后端API
AddService接口
package com.kob.backedn2.service.user.bot;import java.util.Map;// 添加bot接口
public interface AddService {public Map<String,String> add(Map<String,String> data);
}
AddService接口实现
package com.kob.backedn2.service.impl.user.bot;import com.kob.backedn2.mapper.BotMapper;
import com.kob.backedn2.pojo.Bot;
import com.kob.backedn2.pojo.User;
import com.kob.backedn2.service.impl.utils.UserDetailsImpl;
import com.kob.backedn2.service.user.bot.AddService;
import org.springframework.beans.factory.annotation.Autowired;
import org.springframework.security.authentication.UsernamePasswordAuthenticationToken;
import org.springframework.security.core.context.SecurityContextHolder;
import org.springframework.stereotype.Service;import java.util.Date;
import java.util.HashMap;
import java.util.Map;@Service
public class AddServiceImpl implements AddService {// 将接口注入进来@Autowiredprivate BotMapper botMapper;// 使用Mapper操作数据库@Overridepublic Map<String, String> add(Map<String, String> data) {// 从token中获取用户UsernamePasswordAuthenticationToken authenticationToken = (UsernamePasswordAuthenticationToken) SecurityContextHolder.getContext().getAuthentication();UserDetailsImpl loginUser = (UserDetailsImpl) authenticationToken.getPrincipal();User user = loginUser.getUser();// 根据key获取map中的数据String title = data.get("title");String description = data.get("description");String content = data.get("content");Map<String,String> map = new HashMap<>();if(title == null || title.length() == 0){map.put("error_message","标题不能为空");return map;}if(title.length() > 100){map.put("error_message","标题长度不能大于100");return map;}if(description == null || description.length() == 0){description = "这个用户很懒,什么也没留下";}if(description != null && description.length() > 300){map.put("error_message","Bot描述的长度不能大于300");return map;}if(content == null || content.length() == 0){map.put("error_message","代码不能为空");return map;}if(content.length() > 10000){map.put("error_message","代码长度不能超过10000");return map;}// 创建一个bot对象Date now = new Date();Bot bot = new Bot(null,user.getId(),title,description,content,1500,now,now);// 将Bot对象添加到数据库中botMapper.insert(bot);map.put("error_message","success");return map;}
}
AddController
package com.kob.backedn2.controller.user.bot;import com.kob.backedn2.service.user.bot.AddService;
import org.springframework.beans.factory.annotation.Autowired;
import org.springframework.web.bind.annotation.PostMapping;
import org.springframework.web.bind.annotation.RequestParam;
import org.springframework.web.bind.annotation.RestController;import java.util.Map;@RestController
public class AddController {// 将实现的service接口进行注入@Autowiredprivate AddService addService;// 用户访问该url路径 获取资源@PostMapping("/user/bot/add/")public Map<String,String> add(@RequestParam Map<String,String> data){// 调用service 插入数据return addService.add(data);}
}
添加bot记录的前端页面
点击我的bot页面 自动创建一个bot
<template><ContentField>我的Bot</ContentField>
</template><script>
import ContentField from '../../../components/ContentField.vue'
import $ from 'jquery'
import { useStore} from 'vuex';export default {components: {ContentField},setup(){const store = useStore();// 获取全局资源$.ajax({url:"http://127.0.0.1:3000/user/bot/add/",type:"POST",data:{title:"Bot的标题",description:"Bot的描述",content:"Bot的代码",},headers:{// 验证Authorization:"Bearer " + store.state.user.token,},success(resp){//  打印是否成功的消息console.log(resp);},error(resp){console.log(resp);}})}
}
</script><style scoped>
</style>
RemoveServiceImpl
package com.kob.backedn2.service.impl.user.bot;import com.kob.backedn2.mapper.BotMapper;
import com.kob.backedn2.pojo.Bot;
import com.kob.backedn2.pojo.User;
import com.kob.backedn2.service.impl.utils.UserDetailsImpl;
import com.kob.backedn2.service.user.bot.RemoveService;
import org.springframework.beans.factory.annotation.Autowired;
import org.springframework.security.authentication.UsernamePasswordAuthenticationToken;
import org.springframework.security.core.context.SecurityContextHolder;
import org.springframework.stereotype.Service;import java.util.HashMap;
import java.util.Map;@Service
public class RemoveServiceImpl implements RemoveService {@Autowiredprivate BotMapper botMapper;@Overridepublic Map<String, String> remove(Map<String, String> data) {UsernamePasswordAuthenticationToken authenticationToken = (UsernamePasswordAuthenticationToken) SecurityContextHolder.getContext().getAuthentication();UserDetailsImpl loginUser = (UserDetailsImpl) authenticationToken.getPrincipal();User user = loginUser.getUser();// 获取用户int bot_id = Integer.parseInt(data.get("bot_id"));// 获取bot的id// 获取botBot bot = botMapper.selectById(bot_id);Map<String,String> map = new HashMap<>();if(bot == null){map.put("error_message","Bot不存在或者已经被删除");return map;}if(!bot.getUserId().equals(user.getId())){map.put("error_message","没有权限删除bot");return map;}// 删除botMapper.deleteById(bot_id);map.put("error_message","success");return null;}
}
RemoveController
package com.kob.backedn2.controller.user.bot;import com.kob.backedn2.service.user.bot.RemoveService;
import org.springframework.beans.factory.annotation.Autowired;
import org.springframework.web.bind.annotation.PostMapping;
import org.springframework.web.bind.annotation.RequestParam;
import org.springframework.web.bind.annotation.RestController;import java.util.Map;@RestController
public class RemoveController {@Autowiredprivate RemoveService removeService;@PostMapping("/user/bot/remove")public Map<String,String> remove(@RequestParam Map<String,String> data){return removeService.remove(data);//调用service接口的方法}}
前端删除Bot记录测试
<template><ContentField>我的Bot</ContentField>
</template><script>
import ContentField from '../../../components/ContentField.vue'
import $ from 'jquery'
import { useStore} from 'vuex';export default {components: {ContentField},setup(){const store = useStore();// 获取全局资源// $.ajax({//     url:"http://127.0.0.1:3000/user/bot/add/",//     type:"POST",//     data:{//         title:"Bot的标题",//         description:"Bot的描述",//         content:"Bot的代码",//     },//     headers://     {//         // 验证//         Authorization:"Bearer " + store.state.user.token,//     },//     success(resp){//         //  打印是否成功的消息//         console.log(resp);//     },//     error(resp){//         console.log(resp);//     }// })$.ajax({url:"http://127.0.0.1:3000/user/bot/remove/",type:"POST",data:{// 删除bot_id 为2 的数据库Bot记录bot_id:2,},headers:{// 验证Authorization:"Bearer " + store.state.user.token,},success(resp){//  打印是否成功的消息console.log(resp);},error(resp){console.log(resp);}})}
}
</script><style scoped>
</style>
UpdateServiceImpl
package com.kob.backedn2.service.impl.user.bot;import com.kob.backedn2.mapper.BotMapper;
import com.kob.backedn2.pojo.Bot;
import com.kob.backedn2.pojo.User;
import com.kob.backedn2.service.impl.utils.UserDetailsImpl;
import com.kob.backedn2.service.user.bot.UpdateService;
import org.springframework.beans.factory.annotation.Autowired;
import org.springframework.security.authentication.UsernamePasswordAuthenticationToken;
import org.springframework.security.core.context.SecurityContextHolder;
import org.springframework.stereotype.Service;import javax.jws.soap.SOAPBinding;
import java.util.Date;
import java.util.HashMap;
import java.util.Map;@Service
public class UpdateServiceImpl implements UpdateService {@Autowiredprivate BotMapper botMapper;@Overridepublic Map<String, String> update(Map<String, String> data) {// 现根据token知道自己是谁 获取userUsernamePasswordAuthenticationToken usernamePasswordAuthenticationToken = (UsernamePasswordAuthenticationToken) SecurityContextHolder.getContext().getAuthentication();UserDetailsImpl loginUser = (UserDetailsImpl) usernamePasswordAuthenticationToken.getPrincipal();User user = loginUser.getUser();// 然后获取前端返回的数据  首先根据data中的bot_id 获取idint bot_id = Integer.parseInt(data.get("bot_id"));// 获取的是字符串  然后解析成int数据// 从data数据中获取title description  content三个信息  填充到新的Bot记录 然后使用Mapper接口 插入到数据库String title = data.get("title");String description = data.get("description");String content = data.get("content");Map<String,String> map = new HashMap<>();// 根据前端解析出来的bot_id  使用botMapper接口 查询数据库 返回一个bot记录Bot bot = botMapper.selectById(bot_id);if(title == null || title.length() == 0){map.put("error_message","标题不能为空");return map;}if(title.length() > 100){map.put("error_message","标题长度不能大于100");return map;}if(description == null || description.length() == 0){description = "这个用户很懒,什么也没留下";}if(description != null && description.length() > 300){map.put("error_message","Bot描述的长度不能大于300");return map;}if(content == null || content.length() == 0){map.put("error_message","代码不能为空");return map;}if(content.length() > 10000){map.put("error_message","代码长度不能超过10000");return map;}if(bot == null){map.put("error_message","Bot不存在或者已经删除");return map;}if(!bot.getUserId().equals(user.getId())){map.put("error_message","没有权限修改Bot");return  map;}Bot new_bot = new Bot(bot.getId(),user.getId(),title,description,content,bot.getRating(),bot.getCreatetime(),new Date());// 调用接口 更新BotbotMapper.updateById(new_bot);map.put("error_message","success");return map;}
}
UpdateController
package com.kob.backedn2.controller.user.bot;import com.kob.backedn2.service.user.bot.UpdateService;
import org.springframework.beans.factory.annotation.Autowired;
import org.springframework.web.bind.annotation.PostMapping;
import org.springframework.web.bind.annotation.RequestParam;
import org.springframework.web.bind.annotation.RestController;import java.util.Map;@RestController
public class UpdateController {// 注入实现的接口 然后调用实现的接口板中的方法@Autowiredprivate UpdateService updateService;// 将请求获取的data容器 作为参数 传入service接口中@PostMapping("/user/bot/update/")public Map<String,String> update(@RequestParam Map<String,String> data){return updateService.update(data);}
}
Update前端测试
<template><ContentField>我的Bot</ContentField>
</template><script>
import ContentField from '../../../components/ContentField.vue'
import $ from 'jquery'
import { useStore} from 'vuex';export default {components: {ContentField},setup(){const store = useStore();// 获取全局资源// $.ajax({//     url:"http://127.0.0.1:3000/user/bot/add/",//     type:"POST",//     data:{//         title:"Bot的标题",//         description:"Bot的描述",//         content:"Bot的代码",//     },//     headers://     {//         // 验证//         Authorization:"Bearer " + store.state.user.token,//     },//     success(resp){//         //  打印是否成功的消息//         console.log(resp);//     },//     error(resp){//         console.log(resp);//     }// })// $.ajax({//     url:"http://127.0.0.1:3000/user/bot/remove/",//     type:"POST",//     data:{//         // 删除bot_id 为1 的数据库Bot记录//         bot_id:1,//     },//     headers://     {//         // 验证//         Authorization:"Bearer " + store.state.user.token,//     },//     success(resp){//         //  打印是否成功的消息//         console.log(resp);//     },//     error(resp){//         console.log(resp);//     }// })$.ajax({url:"http://127.0.0.1:3000/user/bot/update/",type:"POST",data:{// 删除bot_id 为1 的数据库Bot记录bot_id:3,title:"更新的标题",description:"更新的描述",content:"更新的代码",},headers:{// 验证Authorization:"Bearer " + store.state.user.token,},success(resp){//  打印是否成功的消息console.log(resp);},error(resp){console.log(resp);}})}
}
</script><style scoped>
</style>
GetListImpl
package com.kob.backedn2.service.impl.user.bot;import com.baomidou.mybatisplus.core.conditions.query.QueryWrapper;
import com.baomidou.mybatisplus.core.mapper.BaseMapper;
import com.kob.backedn2.mapper.BotMapper;
import com.kob.backedn2.pojo.Bot;
import com.kob.backedn2.pojo.User;
import com.kob.backedn2.service.impl.utils.UserDetailsImpl;
import com.kob.backedn2.service.user.bot.GetListService;
import org.springframework.beans.factory.annotation.Autowired;
import org.springframework.security.authentication.UsernamePasswordAuthenticationToken;
import org.springframework.security.core.context.SecurityContextHolder;
import org.springframework.stereotype.Service;import java.util.List;@Service
public class GetListServiceImpl implements GetListService {@Autowiredprivate BotMapper botMapper;// 注入数据库查询接口@Overridepublic List<Bot> getList() {UsernamePasswordAuthenticationToken authenticationToken = (UsernamePasswordAuthenticationToken) SecurityContextHolder.getContext().getAuthentication();UserDetailsImpl loginUser = (UserDetailsImpl) authenticationToken.getPrincipal();User user = loginUser.getUser();QueryWrapper<Bot> queryWrapper = new QueryWrapper<>();queryWrapper.eq("user_id",user.getId());return botMapper.selectList(queryWrapper);}
}
GetListController
package com.kob.backedn2.controller.user.bot;import com.kob.backedn2.pojo.Bot;
import com.kob.backedn2.service.user.bot.GetListService;
import org.springframework.beans.factory.annotation.Autowired;
import org.springframework.web.bind.annotation.GetMapping;
import org.springframework.web.bind.annotation.RestController;
import java.util.List;@RestController
public class GetListController {@Autowiredprivate GetListService getListService;@GetMapping("/user/bot/getlist/")public List<Bot> getList(){return getListService.getList();}}
前端页面测试
<template><ContentField>我的Bot</ContentField>
</template><script>
import ContentField from '../../../components/ContentField.vue'
import $ from 'jquery'
import { useStore} from 'vuex';export default {components: {ContentField},setup(){const store = useStore();// 获取全局资源// $.ajax({//     url:"http://127.0.0.1:3000/user/bot/add/",//     type:"POST",//     data:{//         title:"Bot的标题",//         description:"Bot的描述",//         content:"Bot的代码",//     },//     headers://     {//         // 验证//         Authorization:"Bearer " + store.state.user.token,//     },//     success(resp){//         //  打印是否成功的消息//         console.log(resp);//     },//     error(resp){//         console.log(resp);//     }// })// $.ajax({//     url:"http://127.0.0.1:3000/user/bot/remove/",//     type:"POST",//     data:{//         // 删除bot_id 为1 的数据库Bot记录//         bot_id:1,//     },//     headers://     {//         // 验证//         Authorization:"Bearer " + store.state.user.token,//     },//     success(resp){//         //  打印是否成功的消息//         console.log(resp);//     },//     error(resp){//         console.log(resp);//     }// })// $.ajax({//     url:"http://127.0.0.1:3000/user/bot/update/",//     type:"POST",//     data:{//         // 删除bot_id 为1 的数据库Bot记录//         bot_id:3,//         title:"更新的标题",//         description:"更新的描述",//         content:"更新的代码",//     },//     headers://     {//         // 验证//         Authorization:"Bearer " + store.state.user.token,//     },//     success(resp){//         //  打印是否成功的消息//         console.log(resp);//     },//     error(resp){//         console.log(resp);//     }// })$.ajax({url:"http://127.0.0.1:3000/user/bot/getlist/",type:"get",headers:{// 验证Authorization:"Bearer " + store.state.user.token,},success(resp){//  打印是否成功的消息console.log(resp);},error(resp){console.log(resp);}})}
}
</script><style scoped>
</style>
这篇关于【Java闭关修炼】SpringBoot项目-贪吃蛇对战小游戏-创建个人中心页面(上)的文章就介绍到这儿,希望我们推荐的文章对编程师们有所帮助!


