本文主要是介绍YOLOv8添加AIFI(Attention-based Intrascale Feature Interaction模块替换SPPF模块),希望对大家解决编程问题提供一定的参考价值,需要的开发者们随着小编来一起学习吧!
1. 引言
1.1 相关介绍
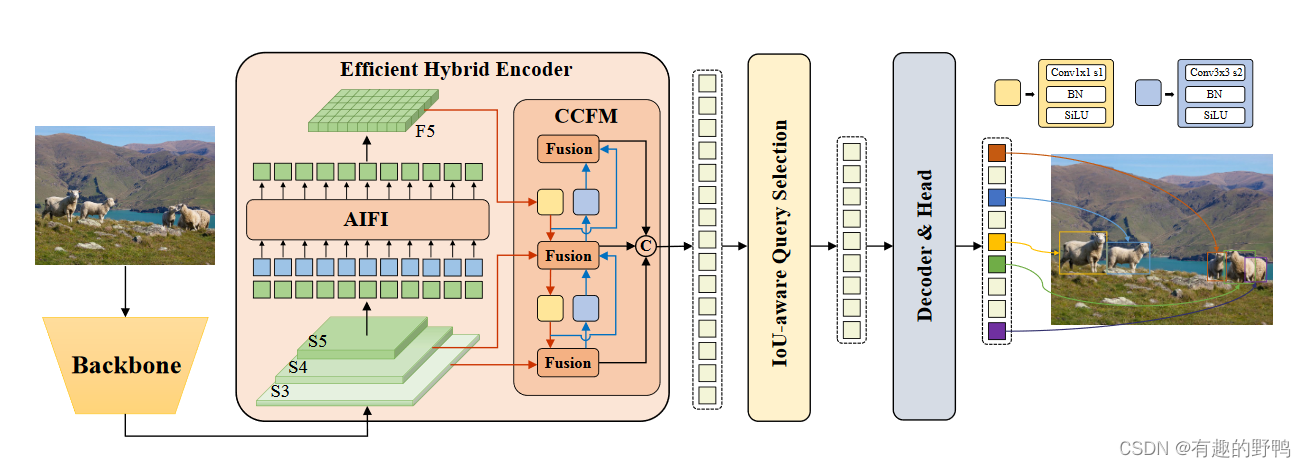
模块名称:Attention-based Intrascale Feature Interaction
论文名称:RT-DETR: DETRs Beat Yolos on Real-time Object Detection
这是论文中的图,此处将其中的AIFI模块拿过来改进YOLOv8。
1.2 其他可改进SPPF模块
- 如何修改:YOLOv8修改特征金字塔(替换SPPF模块)
- 或者看此贴:yolov8改进——SFFP特征金字塔池化修改(详细版)
- 常见特征金字塔模块代码实现:常见特征金字塔模块代码实现
2.改进
2.1 AIFI代码
在YOLOv8新版中,已经集成了这个模块,因此,这里不展示如何放置到yolov8中。
如果使用的是老版的YOLOV8代码,nn模块下新建一个AIFI.py即可。
代码如下:
class TransformerEncoderLayer(nn.Module):"""Defines a single layer of the transformer encoder."""def __init__(self, c1, cm=2048, num_heads=8, dropout=0.0, act=nn.GELU(), normalize_before=False):"""Initialize the TransformerEncoderLayer with specified parameters."""super().__init__()self.ma = nn.MultiheadAttention(c1, num_heads, dropout=dropout, batch_first=True)# Implementation of Feedforward modelself.fc1 = nn.Linear(c1, cm)self.fc2 = nn.Linear(cm, c1)self.norm1 = nn.LayerNorm(c1)self.norm2 = nn.LayerNorm(c1)self.dropout = nn.Dropout(dropout)self.dropout1 = nn.Dropout(dropout)self.dropout2 = nn.Dropout(dropout)self.act = actself.normalize_before = normalize_before@staticmethoddef with_pos_embed(tensor, pos=None):"""Add position embeddings to the tensor if provided."""return tensor if pos is None else tensor + posdef forward_post(self, src, src_mask=None, src_key_padding_mask=None, pos=None):"""Performs forward pass with post-normalization."""q = k = self.with_pos_embed(src, pos)src2 = self.ma(q, k, value=src, attn_mask=src_mask, key_padding_mask=src_key_padding_mask)[0]src = src + self.dropout1(src2)src = self.norm1(src)src2 = self.fc2(self.dropout(self.act(self.fc1(src))))src = src + self.dropout2(src2)return self.norm2(src)def forward_pre(self, src, src_mask=None, src_key_padding_mask=None, pos=None):"""Performs forward pass with pre-normalization."""src2 = self.norm1(src)q = k = self.with_pos_embed(src2, pos)src2 = self.ma(q, k, value=src2, attn_mask=src_mask, key_padding_mask=src_key_padding_mask)[0]src = src + self.dropout1(src2)src2 = self.norm2(src)src2 = self.fc2(self.dropout(self.act(self.fc1(src2))))return src + self.dropout2(src2)def forward(self, src, src_mask=None, src_key_padding_mask=None, pos=None):"""Forward propagates the input through the encoder module."""if self.normalize_before:return self.forward_pre(src, src_mask, src_key_padding_mask, pos)return self.forward_post(src, src_mask, src_key_padding_mask, pos)class AIFI(TransformerEncoderLayer):"""Defines the AIFI transformer layer."""def __init__(self, c1, cm=2048, num_heads=8, dropout=0, act=nn.GELU(), normalize_before=False):"""Initialize the AIFI instance with specified parameters."""super().__init__(c1, cm, num_heads, dropout, act, normalize_before)def forward(self, x):"""Forward pass for the AIFI transformer layer."""c, h, w = x.shape[1:]pos_embed = self.build_2d_sincos_position_embedding(w, h, c)# Flatten [B, C, H, W] to [B, HxW, C]x = super().forward(x.flatten(2).permute(0, 2, 1), pos=pos_embed.to(device=x.device, dtype=x.dtype))return x.permute(0, 2, 1).view([-1, c, h, w]).contiguous()@staticmethoddef build_2d_sincos_position_embedding(w, h, embed_dim=256, temperature=10000.0):"""Builds 2D sine-cosine position embedding."""grid_w = torch.arange(int(w), dtype=torch.float32)grid_h = torch.arange(int(h), dtype=torch.float32)grid_w, grid_h = torch.meshgrid(grid_w, grid_h, indexing='ij')assert embed_dim % 4 == 0, \'Embed dimension must be divisible by 4 for 2D sin-cos position embedding'pos_dim = embed_dim // 4omega = torch.arange(pos_dim, dtype=torch.float32) / pos_dimomega = 1. / (temperature ** omega)out_w = grid_w.flatten()[..., None] @ omega[None]out_h = grid_h.flatten()[..., None] @ omega[None]return torch.cat([torch.sin(out_w), torch.cos(out_w), torch.sin(out_h), torch.cos(out_h)], 1)[None]2.2 task.py
这里新版YOLOv8也帮我们写好了,因此,不需要改动。
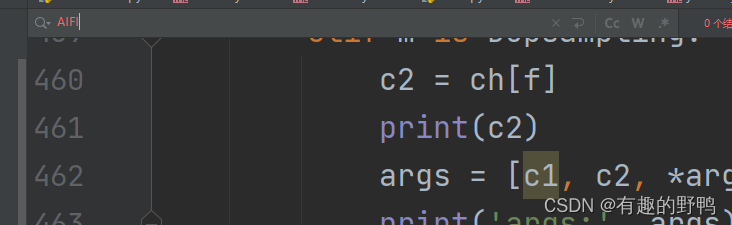
如果是老版的代码,在parse_model方法下,找到一堆elif的地方添加以下代码。
elif m is AIFI:args = [ch[f], *args]
老版如下。并没有AIFI的代码。
2.3 模型改进
将yolov8.yaml复制一份,新建yolov8-AIFI.yaml,将SPPF模块替换为AIFI即可,如下。
SPPF那一行修改如下: - [-1, 1, AIFI, [1024, 8]] # 9
# Ultralytics YOLO 🚀, AGPL-3.0 license
# YOLOv8 object detection model with P3-P5 outputs. For Usage examples see https://docs.ultralytics.com/tasks/detect# Parameters
nc: 80 # number of classes
scales: # model compound scaling constants, i.e. 'model=yolov8n.yaml' will call yolov8.yaml with scale 'n'# [depth, width, max_channels]n: [0.33, 0.25, 1024] # YOLOv8n summary: 225 layers, 3157200 parameters, 3157184 gradients, 8.9 GFLOPss: [0.33, 0.50, 1024] # YOLOv8s summary: 225 layers, 11166560 parameters, 11166544 gradients, 28.8 GFLOPsm: [0.67, 0.75, 768] # YOLOv8m summary: 295 layers, 25902640 parameters, 25902624 gradients, 79.3 GFLOPsl: [1.00, 1.00, 512] # YOLOv8l summary: 365 layers, 43691520 parameters, 43691504 gradients, 165.7 GFLOPsx: [1.00, 1.25, 512] # YOLOv8x summary: 365 layers, 68229648 parameters, 68229632 gradients, 258.5 GFLOPs# YOLOv8.0n backbone
backbone:# [from, repeats, module, args]- [-1, 1, Conv, [64, 3, 2]] # 0-P1/2- [-1, 1, Conv, [128, 3, 2]] # 1-P2/4- [-1, 3, C2f, [128, True]]- [-1, 1, Conv, [256, 3, 2]] # 3-P3/8- [-1, 6, C2f, [256, True]]- [-1, 1, Conv, [512, 3, 2]] # 5-P4/16- [-1, 6, C2f, [512, True]]- [-1, 1, Conv, [1024, 3, 2]] # 7-P5/32- [-1, 3, C2f, [1024, True]]- [-1, 1, AIFI, [1024, 8]] # 9# YOLOv8.0n head
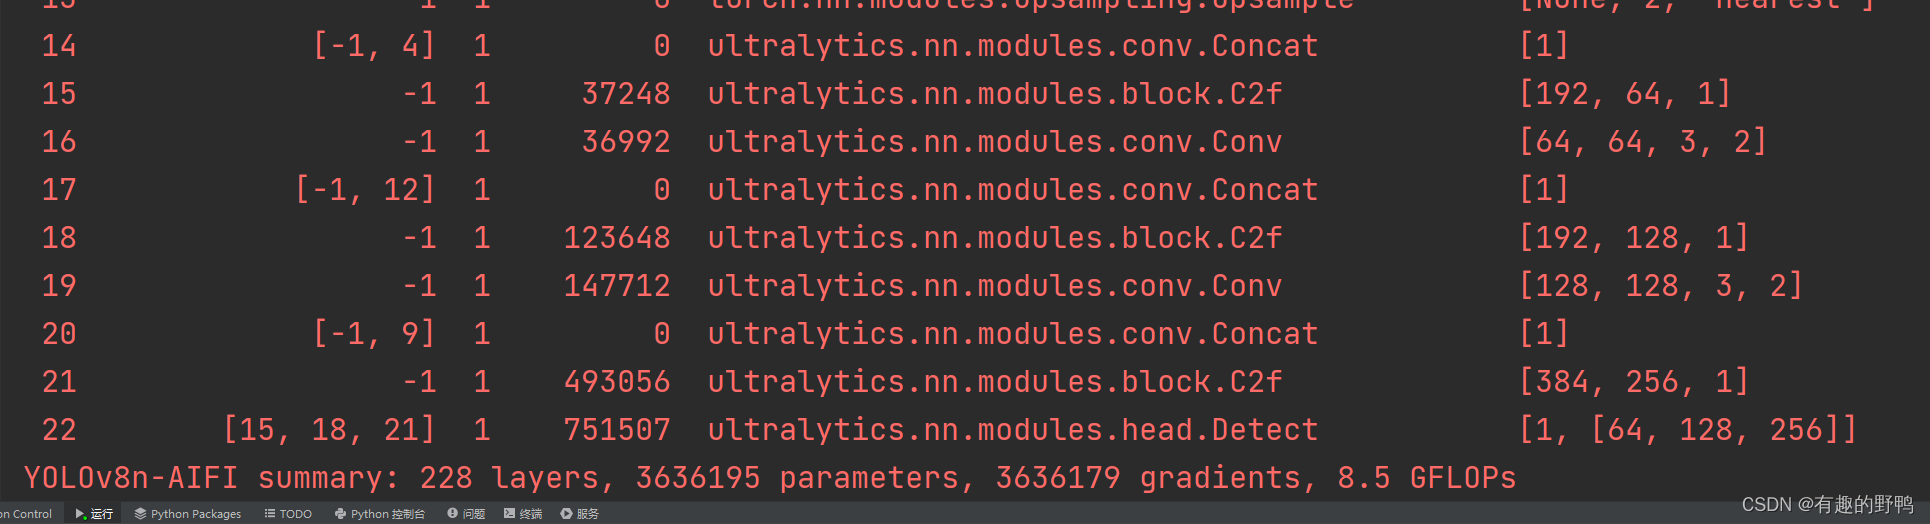
head:- [-1, 1, nn.Upsample, [None, 2, 'nearest']]- [[-1, 6], 1, Concat, [1]] # cat backbone P4- [-1, 3, C2f, [512]] # 12- [-1, 1, nn.Upsample, [None, 2, 'nearest']]- [[-1, 4], 1, Concat, [1]] # cat backbone P3- [-1, 3, C2f, [256]] # 15 (P3/8-small)- [-1, 1, Conv, [256, 3, 2]]- [[-1, 12], 1, Concat, [1]] # cat head P4- [-1, 3, C2f, [512]] # 18 (P4/16-medium)- [-1, 1, Conv, [512, 3, 2]]- [[-1, 9], 1, Concat, [1]] # cat head P5- [-1, 3, C2f, [1024]] # 21 (P5/32-large)- [[15, 18, 21], 1, Detect, [nc]] # Detect(P3, P4, P5)3. 运行图
运行效果如下,没有报错。
提醒:这个对torch版本要求比较高!!!
这篇关于YOLOv8添加AIFI(Attention-based Intrascale Feature Interaction模块替换SPPF模块)的文章就介绍到这儿,希望我们推荐的文章对编程师们有所帮助!


