本文主要是介绍React中antv X6 2.0的使用体验(含demo),希望对大家解决编程问题提供一定的参考价值,需要的开发者们随着小编来一起学习吧!
BB一下🫧:写这antv X6系列文章的初衷是发现antv X6 2.0版本的相关文章不多,大多都是老版本的一些操作,2.0版本有一些升级,当我遇到问题时能够参考的资料非常有限,同时也是为了记录自己的学习到的一些知识点。
本次X6使用体验的功能包括:
1、节点右键菜单;
2、节点自动布局;
3、根据列表动态渲染节点;
4、节点之间的连线;
5、模版引用时的预览功能;
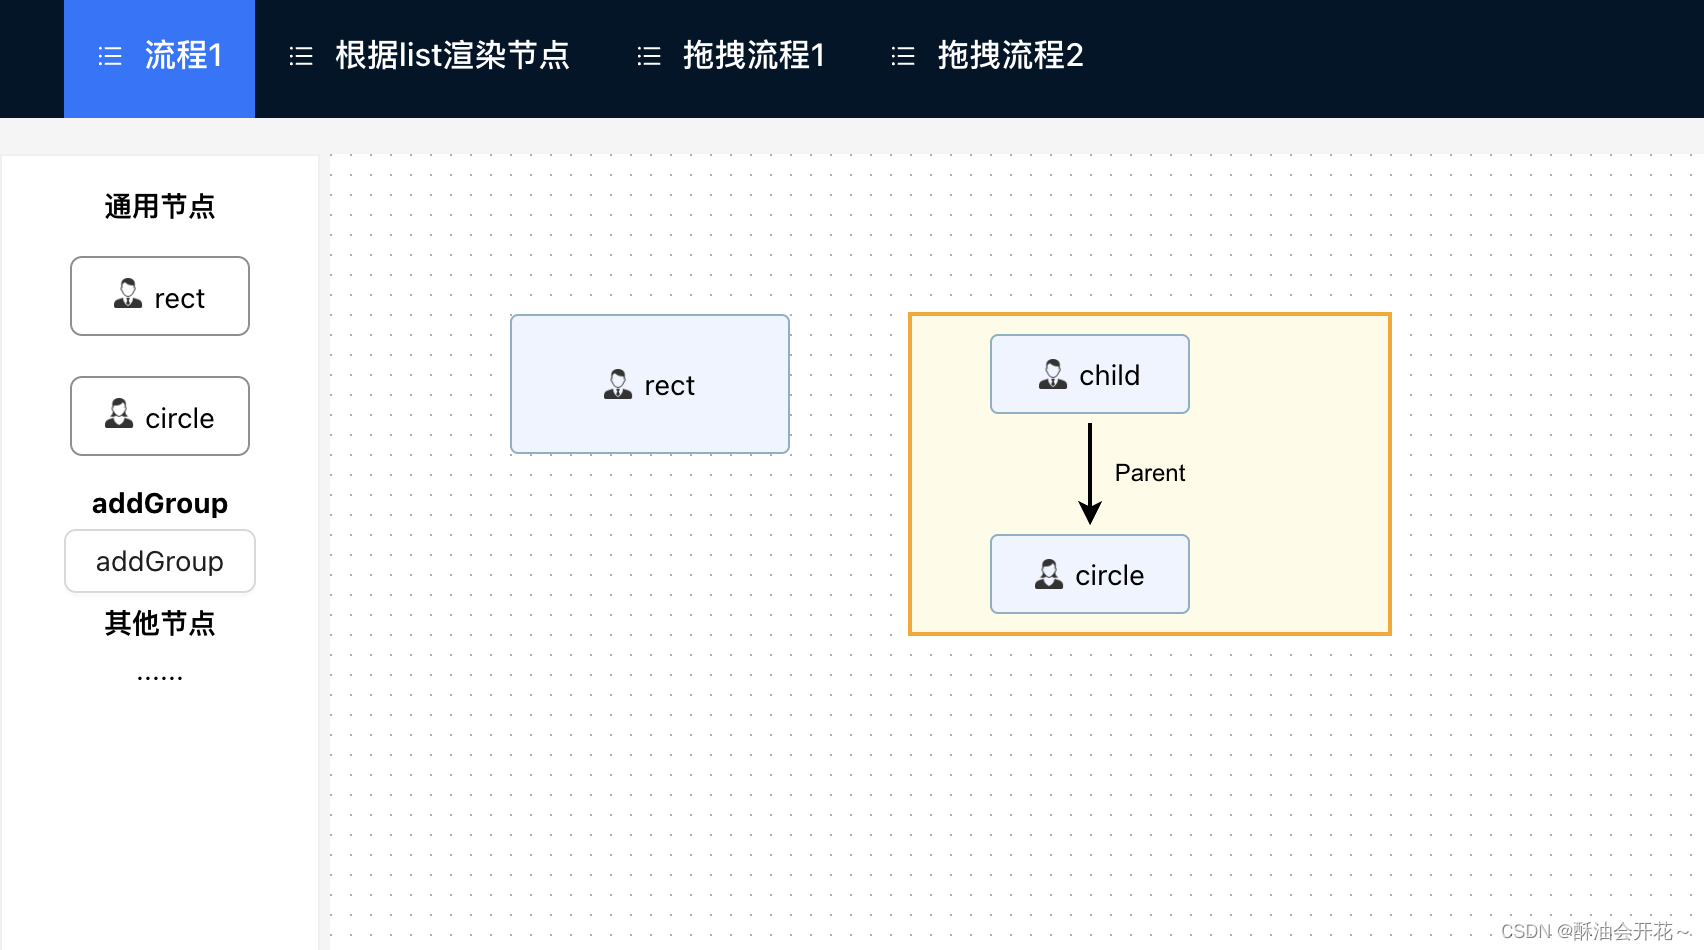
6、使用拖拽组件添加节点(包含2种样式 及群组的添加);
仓库地址:https://github.com/Tipchak5/antvX6_2.0_React.git
一、节点右键菜单
参考了官方文档写法后自己的的右键菜单功能( 官方案例:https://x6.antv.antgroup.com/zh/examples/edge/tool/#context-menu),个人感觉就是注册一个带有右键菜单功能的自定义节点。在初始化画布时注册一个菜单组件,并将你定义的节点返回出来(返回出来的节点要被Dropdown组件包裹),最后 再把你注册的这个右键菜单作为component放进注册的自定义节点中。 具体如下:

首先在init函数中去把你需要的组件定义好然后注册,我这里是CustomComponent,label是这个节点中要显示的内容,color是这个节点要动态显示的颜色(你可以在生成节点时去定义你要的字段),考虑到可能会有使用动态图片的情况,也在节点中添加了img,是否需要图标可以自行判断。
const CustomComponent = ({ node }) => {const label = node.prop('label');const color = node.prop('color');const boder = node.store?.data?.attrs?.body?.stroke;return (<Dropdownmenu={{items: [{key: 'add',label: 'addNode',onClick: () => {console.log('addNode!!!');},},],}}trigger={['contextMenu']}><divclassName='custom-react-node'style={{background: label === '开始' ? '#7AA874' : color,border: `3px solid ${boder}`,}}><img className='img' src={male} alt='Icon' />{label}</div></Dropdown>);};register({shape: 'custom-react-node', // 后续生成的节点shap只要是这个 就会有右键菜单width: 100,height: 40,attrs: {label: {textAnchor: 'left',refX: 8,textWrap: {ellipsis: true,},},},component: CustomComponent,});当组件注册好了之后,再引入注册自定义节点用的插件 import { register } from '@antv/x6-react-shape';
注册的时候有一个shape字段 ,当你后续生成的节点shap只要和注册的节点shap一致就会有右键菜单
当对某一节点右键操作后,想要获取改节点信息可以使用:
graph.on('node:contextmenu', ({ node }) => {setNodeInfo(node); // 获取点击了右键的节点信息console.log(node, '我是被右键点击的节点!');});完整代码
import { useEffect, useRef, useState } from 'react';
import { register } from '@antv/x6-react-shape';
import { Graph } from '@antv/x6';
import { Export } from '@antv/x6-plugin-export';
import { Selection } from '@antv/x6-plugin-selection';
import { Snapline } from '@antv/x6-plugin-snapline';
import { Keyboard } from '@antv/x6-plugin-keyboard';
import { Clipboard } from '@antv/x6-plugin-clipboard';
import { History } from '@antv/x6-plugin-history';
import { Transform } from '@antv/x6-plugin-transform';
import { reset, showPorts } from '../../utils/method';
import './nodeFlow.less';const male ='https://gw.alipayobjects.com/mdn/rms_43231b/afts/img/A*kUy8SrEDp6YAAAAAAAAAAAAAARQnAQ'; // iconconst ports = {}; // 连接桩 此处省略 可参考demo 或官网/** 函数组件 */
function Flow(props) {let graph;const nodeInfoRef = useRef(null);const [newGraph, setNewGraph] = useState(null); // 画布const [nodeInfo, setNodeInfo] = useState(null); // 节点信息useEffect(() => {nodeInfoRef.current = nodeInfo;// console.log(nodeInfoRef.current);}, [nodeInfo]);useEffect(() => {init(); // 初始graph.centerContent();graph.use(new Snapline({enabled: true,})).use(new Selection({enabled: true,})).use(new Keyboard({enabled: true,})).use(new Clipboard({enabled: true,})).use(new History({enabled: true,})).use(new Transform({resizing: true,rotating: true,enabled: true,})).use(new Export());graph.on('node:click', ({ node }) => {console.log(node);});graph.on('edge:click', ({ edge }) => {reset(graph);edge.attr('line/stroke', 'orange');});/** 右键操作 */graph.on('node:contextmenu', ({ node }) => {setNodeInfo(node); // 获取点击了右键的节点信息console.log(node, '我是被右键点击的节点!');});graph.bindKey(['ctrl+1', 'meta+1'], () => {const zoom = graph.zoom();if (zoom < 1.5) {graph.zoom(0.1);}});graph.bindKey(['ctrl+2', 'meta+2'], () => {const zoom = graph.zoom();if (zoom > 0.5) {graph.zoom(-0.1);}});// 删除处理graph.bindKey('backspace', () => {const cells = graph.getSelectedCells();const cellsId = cells[0].id;if (cellsId) {graph.removeCells(cells);// 删除节点信息 接口}});graph.zoomTo(0.8);return () => {graph.dispose(); // 销毁画布};}, []);return (<div className='FlowManage'><div className='content'><div className='graphBox'><div className='react-shape-app graph'><div id='graph-container' className='app-content' style={{ flex: 1 }}></div></div></div></div></div>);/** 初始化画布 */function init() {// 右键菜单const CustomComponent = ({ node }) => {const label = node.prop('label');const color = node.prop('color');const boder = node.store?.data?.attrs?.body?.stroke;return (<Dropdownmenu={{items: [{key: 'add',label: 'addNode',onClick: () => {console.log('addNode!!!');},},],}}trigger={['contextMenu']}><divclassName='custom-react-node'style={{background: label === '开始' ? '#7AA874' : color,border: `3px solid ${boder}`,}}>{label === '开始' ? null : <img className='img' src={male} alt='Icon' />}{label}</div></Dropdown>);};register({shape: 'custom-react-node',width: 100,height: 40,attrs: {label: {textAnchor: 'left',refX: 8,textWrap: {ellipsis: true,},},},component: CustomComponent,});graph = new Graph({container: document.getElementById('graph-container'),grid: true,panning: true,mousewheel: {enabled: true,zoomAtMousePosition: true,modifiers: 'ctrl',minScale: 0.4,maxScale: 3,},connecting: {snap: true,router: 'manhattan', // 路由模式highlight: true,},scroller: true,});graph.addNode({shape: 'custom-react-node',id: -1,label: '开始',ports: { ...ports },});graph.centerContent();graph.on('node:mouseenter', () => {const container = document.getElementById('graph-container');const ports = container.querySelectorAll('.x6-port-body');showPorts(ports, true);});graph.on('node:mouseleave', () => {const container = document.getElementById('graph-container');const ports = container.querySelectorAll('.x6-port-body');showPorts(ports, false);});setNewGraph(graph);}
}export default Flow;
二、节点自动布局
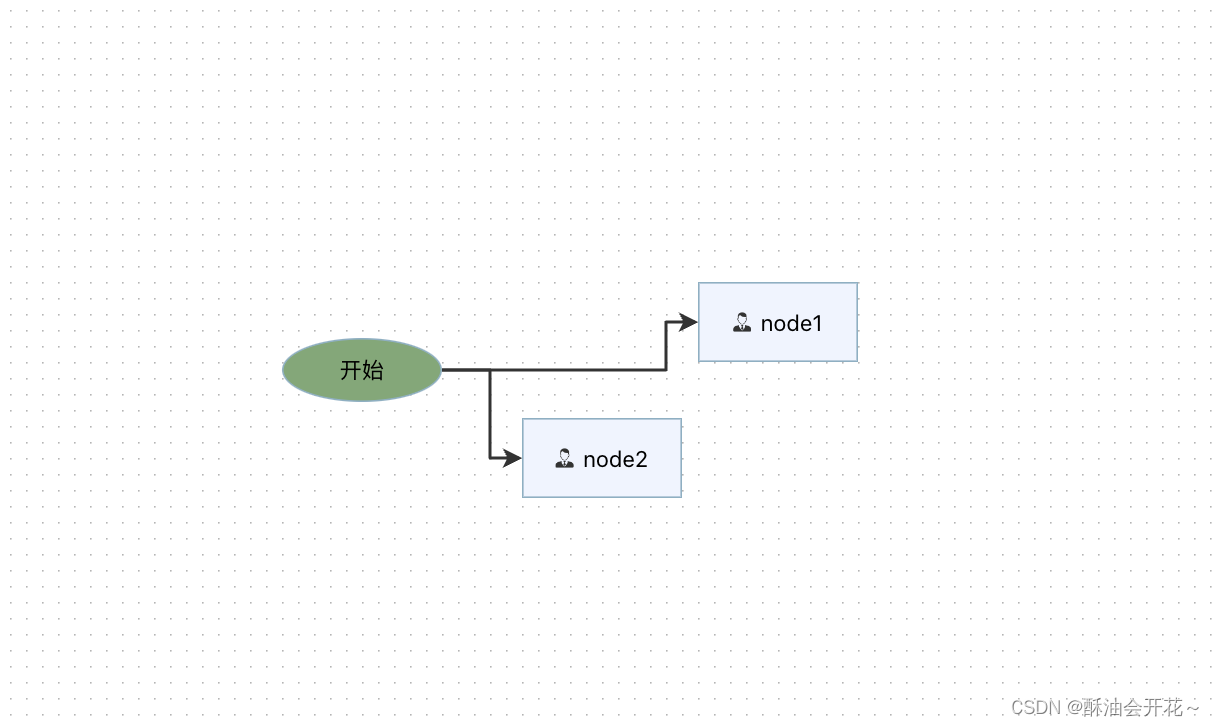
未自动布局:
自动布局后:
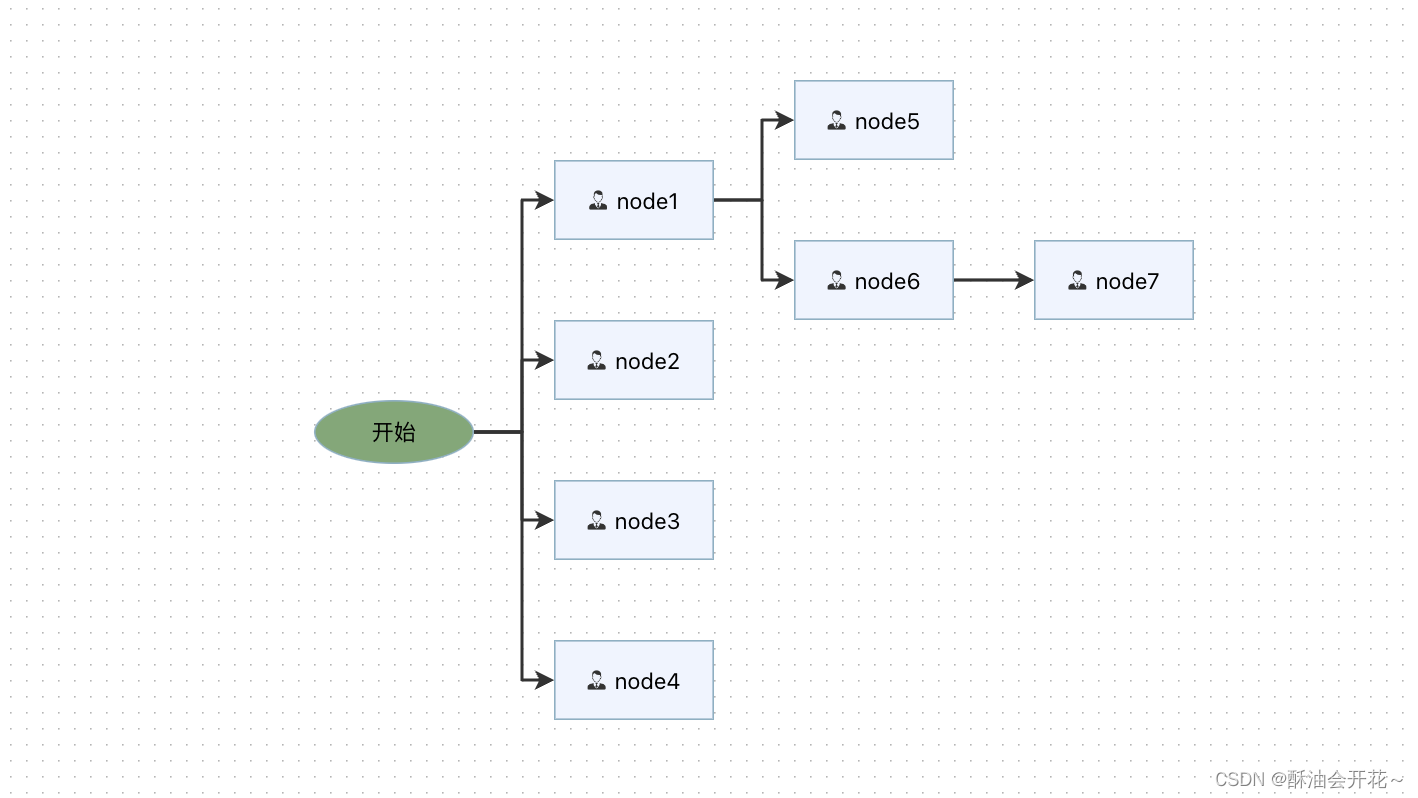
自动布局官方也有推荐(使用的是antv/layout插件,但是我这边和官方有点差别,我这里是需要安装dagre,使用的"dagre": "^0.8.5"版本,在使用的地方引入:import dagre from 'dagre';

具体代码如下(你只用在需要的时候直接调用这个函数即可,如:新增节点后调用):
import dagre from 'dagre';function layout() {const g = graph ? graph : newGraph;const layout = new dagre.graphlib.Graph();layout.setGraph({ rankdir: 'LR', ranksep: 50, nodesep: 50, controlPoints: true });layout.setDefaultEdgeLabel(() => ({}));g?.getNodes()?.forEach((node) => {layout.setNode(node.id, { width: node.size().width, height: node.size().height });});g?.getEdges()?.forEach((edge) => {layout.setEdge(edge.getSourceCell()?.id, edge.getTargetCell()?.id);});dagre.layout(layout);g?.getNodes()?.forEach((node) => {const pos = layout.node(node.id);node.position(pos.x, pos.y);});g?.centerContent();}当然,你可以根据官方文档来实现(网址:x6.antv.antgroup.com/temp/layout#布局流程)
三、根据列表动态渲染节点

最开始我想的是画布上渲染的内容由前端导出成json给后端,当进入页面又让后端返回给前端,这样来渲染,加上当时新增的节点ID和后端是两套ID,而且每次有节点修改都需要后端去json里面改了又返给我,这样对后端不是很友好,在我这个项目中也不算很合理,尤其是一些操作上的处理会很麻烦,考虑到这些问题,最后领导推荐根据列表数据去动态渲染节点,只需要在列表里,把每个节点的信息定义好,比如:节点的名称、颜色、源节点的id,然后再通过遍历去将节点添加到画布中。
具体代码如下:
/** 根据列表渲染节点 */function refreshGraph() {const g = graph ? graph : newGraph;g?.clearCells(); // 清除先前的数据graph.addNode({shape: 'custom-react-node',id: -1,label: '开始',ports: { ...ports },}); // 原节点treeList[0].children?.forEach((i) => { // treeList节点列表let newNodeOptions = null;newNodeOptions = {shape: 'custom-react-node',id: i.key,label: i.title,color: i.color,ports: { ...ports },};// 如果存在父节点 连接两个节点let newNode = null;if (i.parents && g) {// const node = g.getCellById(i.parent);newNode = g?.addNode(newNodeOptions);i.parents.forEach((id) => {// 根据父id 连接子g?.addEdge({source: id,target: i.key,router: {name: 'manhattan',},});});} else {// 如果没有父节点g?.addEdge({source: -1,target: i.key,router: {name: 'manhattan',},});g?.addNode(newNodeOptions);}autoLayout(g); // 自动布局 抽成的公共方法 记得的引入});}四、节点连线时的操作

在useEffect中加入这段代码,当你连接两个节点时,就能获取到源节点 和 目标节点的信息,比如:ID、Label等。
具体代码如下:
graph.on('edge:connected', ({ isNew, edge }) => {if (isNew) {// 如果连接节点成功const source = edge.getSourceNode(); // 源节点const target = edge?.getTargetNode(); // 目标节点console.log(`源节点`, source, `目标节点`, target);}});五、模版插入时的预览功能
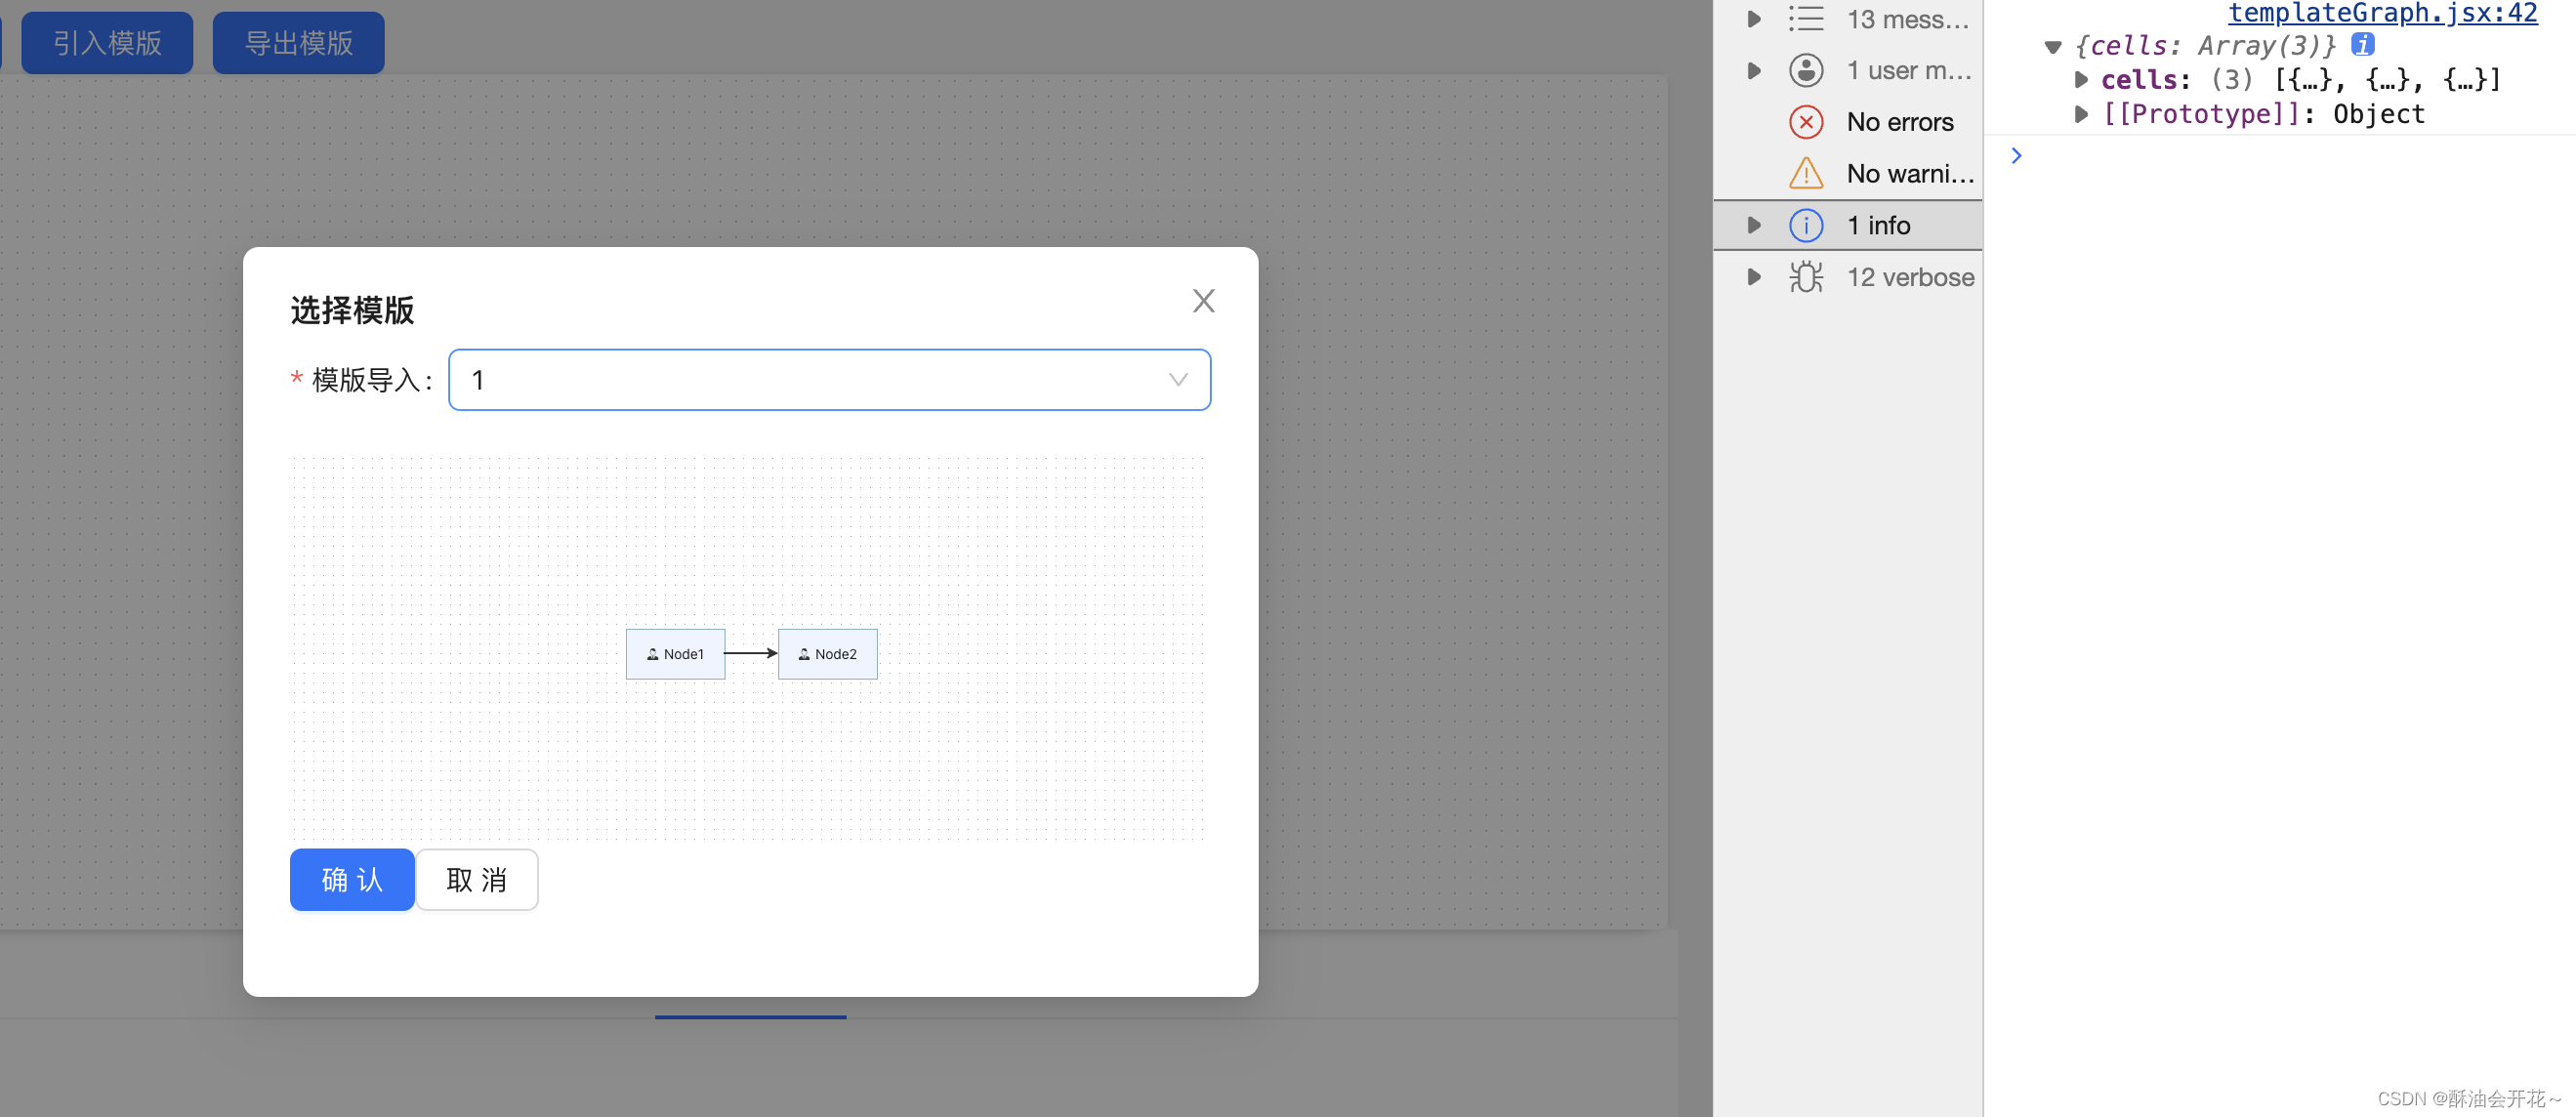
antv X6 的模版预览比较简单,这边是抽成一个组件,只需要从父组件把要预览的数据导出之后,传递到模版预览组件就好了。
具体代码如下:
import { Graph } from '@antv/x6';
import { useState, useEffect, useRef } from 'react';const templateGraph = (props) => {const graphRef = useRef(null);const [graph, setGraph] = useState(null);useEffect(() => {// 画布初始化if (graphRef.current) {const newGraph = new Graph({container: graphRef.current,width: '100%',height: 200,grid: true,panning: true,mousewheel: {enabled: true,zoomAtMousePosition: true,modifiers: 'ctrl',minScale: 0.4,maxScale: 3,},scroller: true,node: {draggable: false,},});newGraph.centerContent();newGraph.zoomTo(0.5); // 画布缩放setGraph(newGraph);return () => {newGraph.dispose(); // 销毁画布};}}, [graphRef]);useEffect(() => {// 渲染父组件传来的画布数据if (props.data && graph) {tempate();}}, [props.data, graph]);return (<div className='graphBox' style={{ width: '100%', height: '200px' }}><div className='react-shape-app' style={{ width: '100%' }}><div ref={graphRef} style={{ width: '100%', height: '100%' }}></div></div></div>);/** 模版渲染 */async function tempate() {graph.removeCells(graph.getCells()); // 清除先前的数据await new Promise((resolve) => setTimeout(resolve, 100));graph.fromJSON(props.data).centerContent(); // 节点内容渲染与剧中}
};export default templateGraph;
六、使用拖拽组件添加节点 (两种样式)
我这里的写法是根据自己的需要改的,可以直接使用官方的(使用场景 | X6 (antgroup.com))
记得安装dnd插件 然后引入 import { Dnd } from '@antv/x6-plugin-dnd';
样式一:(代码详情看demo,内含添加节点群组的方法 写的比较简单)
样式二 :
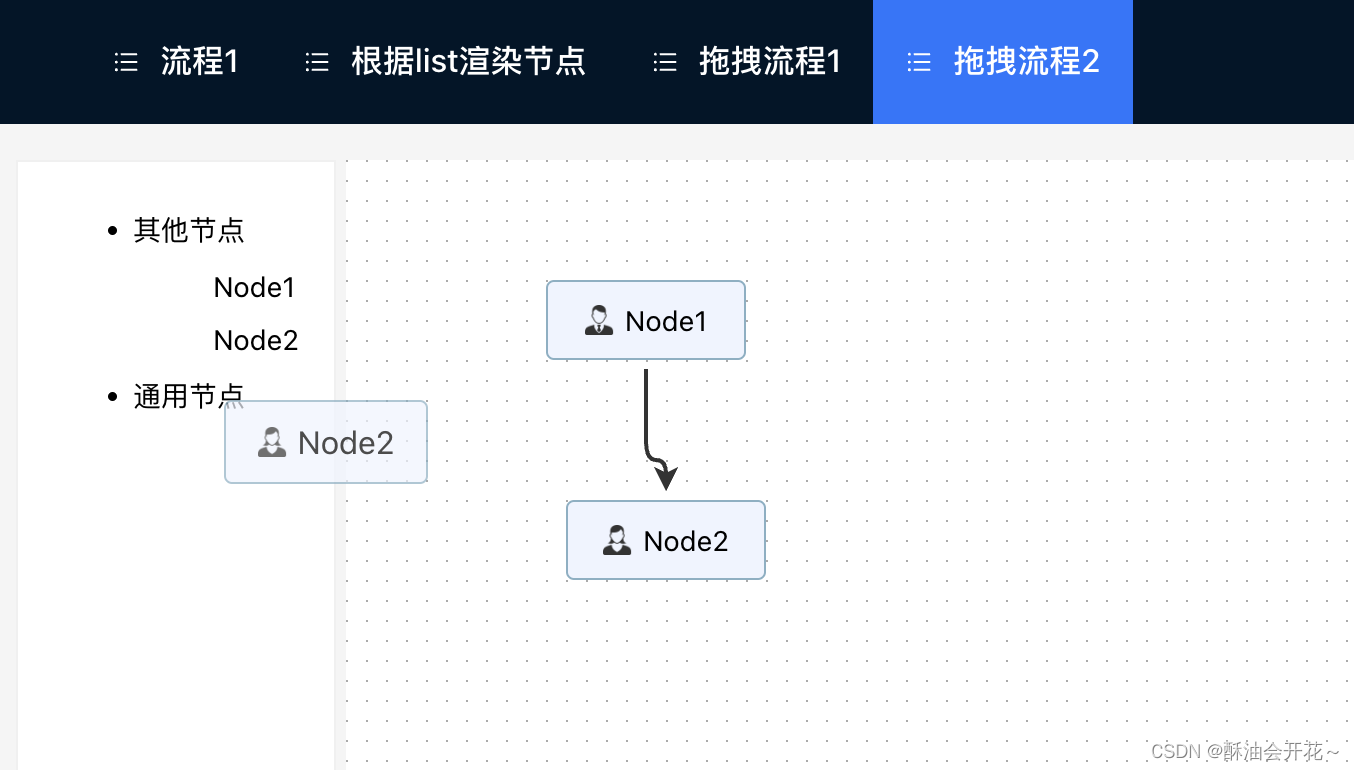
这里比较重要的一点是在list中想要使用拖拽的这个插件功能只能在原生的标签中使用(这里用的是ul和li标签),如果想要在antd的组件中使用需要自行去修改源码。
注意:在如果每个节点的img不一样那么就需要在init方法中把每个样式都作为一个自定义的节点去注册一遍!
代码太多,这边就放一小部分,具体的可以看demo
nodeArr[0]?.children?.forEach((node) => {const { key, title, img } = node;const shape = `custom-node${key}`;register({shape,width: 100,height: 40,attrs: {image: {'xlink:href': img,},},component: (props) => <CustomComponent {...props} image={img} label={title} />,});}); // 注册每一个节点const nodeArr = [{title: '其他节点',key: 'myTool',children: [{key: 1,title: 'Node1',img:'',},{key: 2,title: 'Node2',img:'',},],},{title: '通用节点',key: 'publicTool',children: [],},
];<ul><li>其他节点<ul>{nodeArr[0].children.map((i) => {return (<div style={{ marginTop: '10px' }} key={i.key} onMouseDown={(e)=> {startDrag(e, i);}}>{i.title}</div>);})}</ul></li><li style={{ marginTop: '10px' }}>通用节点</li>
</ul>/** 拖拽节点到画布 */
function startDrag(e, i) {const g = graph ? graph : newGraph;// console.log(id);const nodeTypes = {Node1: `custom-node${i.key}`,Node2: `custom-node${i.key}`,//其他节点类型};const node = g?.createNode({label: i.title,ports: { ...ports },color: '',shape: nodeTypes[i.title],});dndRef.current?.start(node, e?.nativeEvent);
}
项目差不多也要进入测试阶段了,抽空把自己在antv X6 2.0版本中遇到的一些难点和值得记录的地方写了出来,欢迎大家共同交流,一起进步!👏👏👏~
这篇关于React中antv X6 2.0的使用体验(含demo)的文章就介绍到这儿,希望我们推荐的文章对编程师们有所帮助!


