本文主要是介绍elixir 教程_如何在不到15分钟的时间内使用phoenix构建Elixir博客应用,希望对大家解决编程问题提供一定的参考价值,需要的开发者们随着小编来一起学习吧!
elixir 教程
Okay, let’s get real for a second. No-one can actually build a production-ready blog application from scratch in less than 15 minutes. That’s not how the world works. However, creating a working prototype — that’s totally possible.
好吧,让我们成为现实。 实际上,没有人可以在不到15分钟的时间内从头开始构建可用于生产环境的博客应用程序。 这不是世界的运作方式。 但是,创建可行的原型是完全可能的。
So here is the plan — we are gonna spend the next 15min or so building a prototype of a blog application that meets the following criteria:
因此,这是计划—我们将在接下来的15分钟左右时间内构建符合以下条件的博客应用程序原型:
- User can create, update, display and delete posts 用户可以创建,更新,显示和删除帖子
- User can add comments to a post 用户可以在帖子中添加评论
- User can see all the comments for a particular post 用户可以查看特定帖子的所有评论
- User can see how many comments does each post have 用户可以看到每个帖子有多少条评论
A small side note — this blog post is inspired by an article I read a couple of days back — “Elixir Blog in 15 Minutes Using Phoenix Framework — Step By Step Tutorial” written by Jakub Cieślar. Since the article was published way back in 2015, I felt it will be nice to get an updated version that properly reflects the current state of Elixir and Phoenix.
一个小小的注释-这篇博客文章的灵感来自我几天前读到的一篇文章-由JakubCieślar撰写的“ 使用Phoenix Framework在15分钟之内的Elixir博客 —逐步教程” 。 自从该文章于2015年发布以来,我感到很高兴获得一个能够正确反映Elixir和Phoenix的当前状态的更新版本。
步骤0:先决条件 (STEP 0: Prerequisites)
The Phoenix Framework has a fantastic set of installation docs. I suggest you follow these and you’ll be set up and ready to go in no time.
Phoenix Framework提供了一套很棒的安装文档 。 我建议您遵循这些步骤,这样您就可以立即进行设置并准备就绪。
Another small side note — if you are planning to explore and work with different versions of Elixir in the future, you might want to install Elixir (and Erlang) via asdf.
另一个小注意事项-如果您打算将来探索和使用不同版本的Elixir,则可能要通过asdf安装Elixir(和Erlang)。
步骤1:创建博客应用程序 (STEP 1: Create the blog application)
First of all, meet your new best friend — Mix. This is an Elixir build tool that provides a basic set of tasks to help create and manage Elixir apps.
首先,结识新朋友-Mix 。 这是一个Elixir构建工具,提供了一组基本任务来帮助创建和管理Elixir应用程序。
To create a new application from scratch, all you need to do is open a new terminal window and enter the following command:
要从头开始创建新的应用程序,您需要做的就是打开一个新的终端窗口并输入以下命令:
mix phx.new blogHalfway through the installation process you will be asked if you want to fetch and install the project dependancies — I suggest you go ahead and do so.
在安装过程的一半,系统将询问您是否要获取并安装项目相关性-我建议您继续进行。
* creating blog/config/config.exs
* creating blog/config/dev.exs
* creating blog/config/prod.exs
...
* creating blog/assets/css/phoenix.css
* creating blog/assets/static/images/phoenix.png
* creating blog/assets/static/robots.txtFetch and install dependencies? [Yn]
If you choose not to install the dependancies, you must make sure to run the below mentioned mix tasks in order to complete your setup process. Otherwise, you won’t be able to start your application.
如果选择不安装依赖项,则必须确保运行以下提到的混合任务,以完成设置过程。 否则,您将无法启动您的应用程序。
* running mix deps.get
* running mix deps.compile
* running cd assets && npm install && node node_modules/webpack/bin/webpack.js --mode development
And that’s it — you now have a working application. Well… not just yet. There are still a couple of extra things you need to take care of first.
就是这样-您现在有一个正在运行的应用程序。 好吧...不仅如此。 首先,您还需要处理一些额外的事情。
Check the dev.ex and test.ex files that have been created under the config folder of your project. Make sure that the database username and password match the ones you have setup on your local machine.
检查在项目的config文件夹下创建的dev.ex和test.ex文件。 确保数据库用户名和密码与您在本地计算机上设置的用户名和密码匹配。
config :blog, Blog.Repo,username: "postgres",password: "postgres",
  database: "blog_dev",
  hostname: "localhost",
  show_sensitive_data_on_connection_error: true,
pool_size: 10- You need to create the database of your application 您需要创建应用程序的数据库
$ mix ecto.create
The database for Blog.Repo has been created
And now it’s done. You can go ahead and start the server using the following command:
现在完成了。 您可以使用以下命令继续并启动服务器:
$ mix phx.server步骤2:设置发布资源 (STEP 2: Setting up the Post resource)
Phoenix provides us out of the box with a neat set of generators — mix tasks that are responsible for setting up all the modules we need to spin up a resource in a fast and efficient manner.
Phoenix为我们提供了一组整洁的生成器,这些生成器-混合任务负责设置我们需要的所有模块,以快速,高效的方式启动资源。
To create a new Post resource we are gonna use phx.gen.html — it will generate the controller, views and context for us.
要创建一个新的Post资源,我们将使用phx.gen.html它会为我们生成控制器,视图和上下文。
mix phx.gen.html Posts Post posts title:string body:textBasically, we just told mix that we want to create a new resource named Post that has context Posts and a database table posts that has two fields — title of type string and body of type text.
基本上,我们只是告诉搭配,我们要创建一个名为新的资源Post有上下文Posts和数据库表中posts有两个字段- title字符串类型和body类型的文本。
Next, we need to go to the Blog.Router module and add the route definitions for our new resource:
接下来,我们需要转到Blog.Router模块,并为我们的新资源添加路由定义:
resources "/posts", PostControllerAdding the new Post resource has generated a new database migration. To persist the changes in the database, we must run the following command:
添加新的Post资源已生成新的数据库迁移。 要将更改保留在数据库中,我们必须运行以下命令:
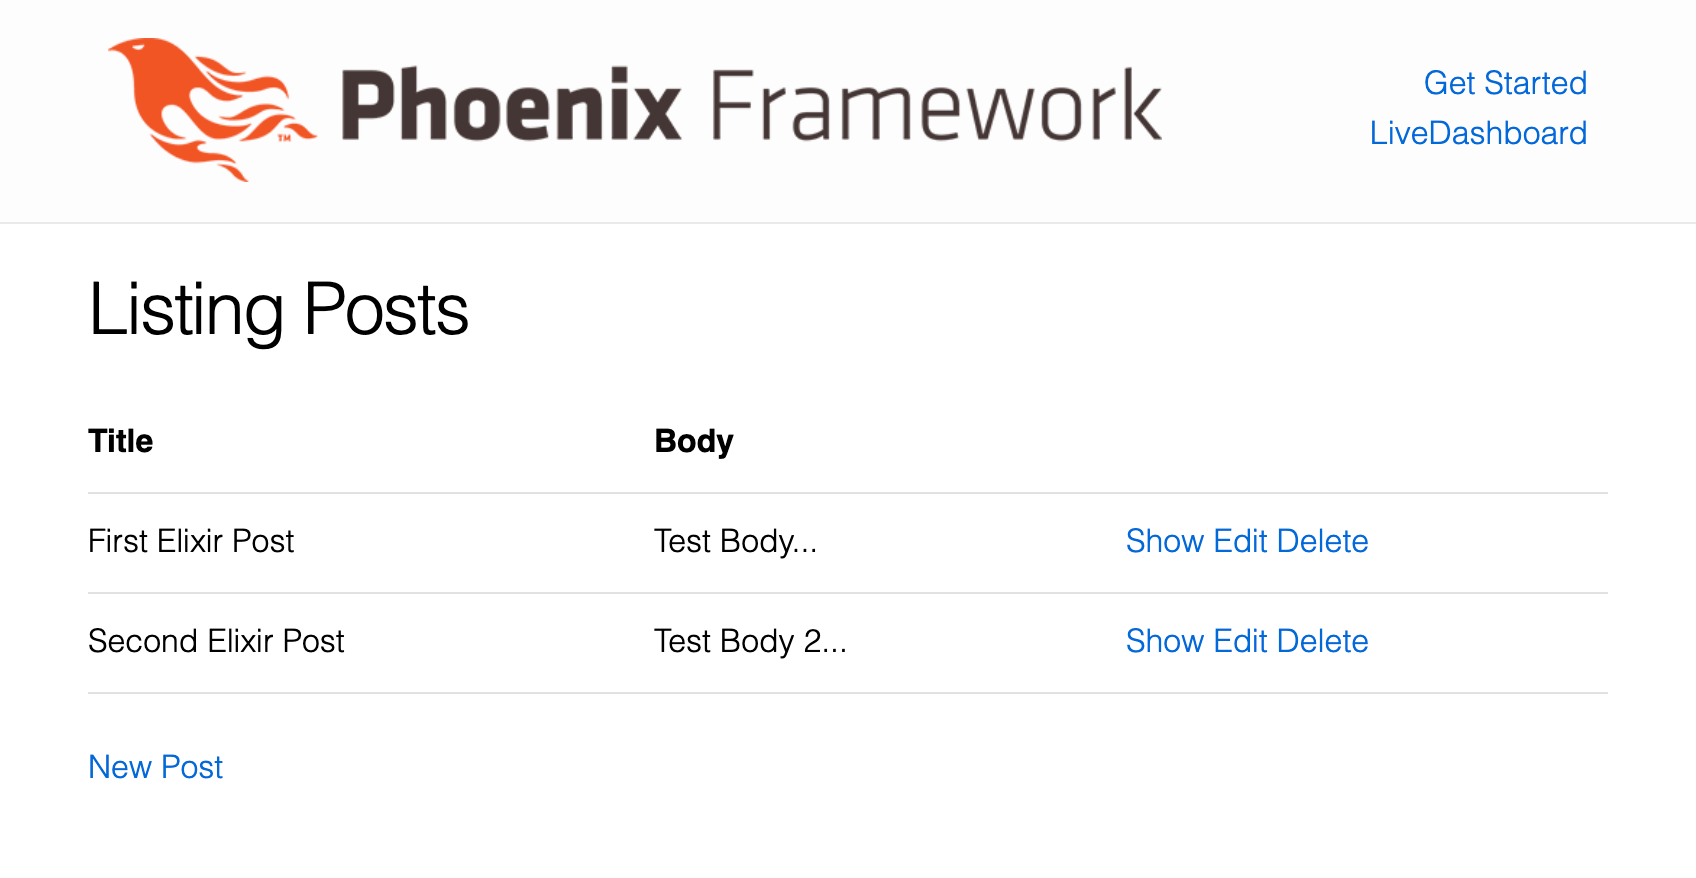
$ mix ecto.migrateNow we can start the server via mix phx.server and see the new changes by hitting the http://localhost:4000/posts route.
现在,我们可以通过mix phx.server启动服务器,并通过mix phx.server http://localhost:4000/posts路由查看新更改。
步骤3:在帖子中添加评论 (STEP 3: Adding Comments to a Post)
To create a new Comment resource we are gonna use phx.gen.context — another phoenix generator that will help us to setup a context with some functions around an ecto schema.
为了创建一个新的Comment资源,我们将使用phx.gen.context -另一个凤凰生成器,它将帮助我们使用ecto模式围绕一些函数设置上下文。
mix phx.gen.context Comments Comment comments name:string content:text post_id:references:postsA closer look at the command above tells us that we have used the generator to define the relationship between Post and Comment by adding the post_id field to the comments table.
仔细查看上面的命令可以发现,我们已经使用生成器通过将post_id字段添加到comments表来定义Post和Comment之间的关系。
However, we still need to manually define the association between the two schemas. To do that we will use the functions — belongs_to and has_many.If you want to know more about them, you can check the Ecto.Schema docs.
但是,我们仍然需要手动定义两个模式之间的关联。 要做到这一点,我们将使用函数belongs_to和has_many 。如果您想进一步了解它们,可以查看Ecto.Schema文档。
A small side note — all of the code samples in this blog post are using aliases to substitute the full module names. That’s why writing belongs_to(:post, Post) is equal to belongs_to(:post, Blog.Posts.Post)
一个小注释-本博客文章中的所有代码示例都使用别名代替完整的模块名称。 这就是为什么编写belongs_to(:post, Post)等于belongs_to(:post, Blog.Posts.Post)
defmodule Blog.Comments.Comment do
  use Ecto.Schema
  import Ecto.Changeset  alias Blog.Posts.Post  schema "comments" do
    field :content, :string
    field :name, :stringbelongs_to(:post, Post)    timestamps()
  end  @doc false
  def changeset(comment, attrs) do
    comment
    |> cast(attrs, [:name, :content, :post_id])
    |> validate_required([:name, :content, :post_id])
  end
end
defmodule Blog.Posts.Post do
use Ecto.Schema
import Ecto.Changesetalias Blog.Comments.Comment schema "posts" do
field :body, :string
field :title, :stringhas_many :comments, Commenttimestamps()
end @doc false
def changeset(post, attrs) do
post
|> cast(attrs, [:title, :body])
|> validate_required([:title, :body])
end
endAfter making the above changes, don’t forget to run mix ecto.migrate ;)
完成上述更改后,请不要忘记运行mix ecto.migrate ;)
Having properly set up our schema associations, we turn our attention to completing the task at hand — we want to enable a user to add a comment to a blog post from the UI.
正确设置架构关联后,我们将注意力转移到完成手头的任务上-我们希望使用户能够从UI向博客帖子添加评论。
First, we are gonna add a new route to our Blog.Router module:
首先,我们Blog.Router模块添加一条新路由:
resources "/posts", PostController dopost "/comment", PostController, :add_comment
end
Next, we are gonna add the add_comment action to our post_controller.ex It will create a new comment in the database and associate it to a post.In addition, it will load the post page and display the status of the create operation in a flash message.
接下来,我们将add_comment动作添加到post_controller.ex ,它将在数据库中创建一个新注释并将其与帖子关联。此外,它将加载帖子页面并在瞬间显示create操作的状态信息。
def add_comment(conn, %{"comment" => comment_params, "post_id" => post_id}) do
  post =
    post_id
    |> Posts.get_post!()
    |> Repo.preload([:comments])  case Posts.add_comment(post_id, comment_params) do
    {:ok, _comment} ->
      conn
      |> put_flash(:info, "Comment added :)")
      |> redirect(to: Routes.post_path(conn, :show, post))
    {:error, _error} ->
      conn
      |> put_flash(:error, "Comment not added :(")
      |> redirect(to: Routes.post_path(conn, :show, post))
  end
end
Personally, I am not a fan of big controller modules. That’s why I have chosen to put the add_comment function as part of Blog.Posts context module.
我个人不喜欢大型控制器模块。 这就是为什么我选择将add_comment函数作为Blog.Posts上下文模块的一部分的Blog.Posts 。
def add_comment(post_id, comment_params) do
  comment_params
  |> Map.put("post_id", post_id)
  |> Comments.create_comment()
end
Next, we are going to implement a simple Add Comment form and add it to the page that displays a single post. For that to happen, we need to modify the show action in the post controller. We are going to add the Comment.changeset and pass it to the show.html template.
接下来,我们将实现一个简单的“ Add Comment表单,并将其添加到显示单个帖子的页面中。 为此,我们需要在post控制器中修改show动作。 我们将添加Comment.changeset并将其传递给show.html模板。
def show(conn, %{"id" => id}) do
  post =
    id
    |> Posts.get_post! |> Repo.preload([:comments])  changeset = Comment.changeset(%Comment{}, %{})
  render(conn, "show.html", post: post, changeset: changeset)
end
After that we are going to create a new comment_form.html template that will be used to enter and save comment data.
之后,我们将创建一个新的comment_form.html模板,该模板将用于输入和保存评论数据。
<%= form_for @changeset, @action, fn f -> %>
  <div class="form-group">
   <label>Name</label>
   <%= text_input f, :name, class: "form-control" %>
  </div>  <div class="form-group">
    <label>Content</label>
    <%= textarea f, :content, class: "form-control" %>
  </div>
  <div class="form-group">
    <%= submit "Add comment", class: "btn btn-primary" %>
  </div>
<% end %>
Lastly, we need to add the comments_form.html template to the show.html and make sure to pass it the correct data:
最后,我们需要将添加comments_form.html模板到show.html并确保传递正确的数据:
<%= render "comments_form.html", post: @post, changeset: @changeset, action: Routes.post_post_path(@conn, :add_comment, @post) %>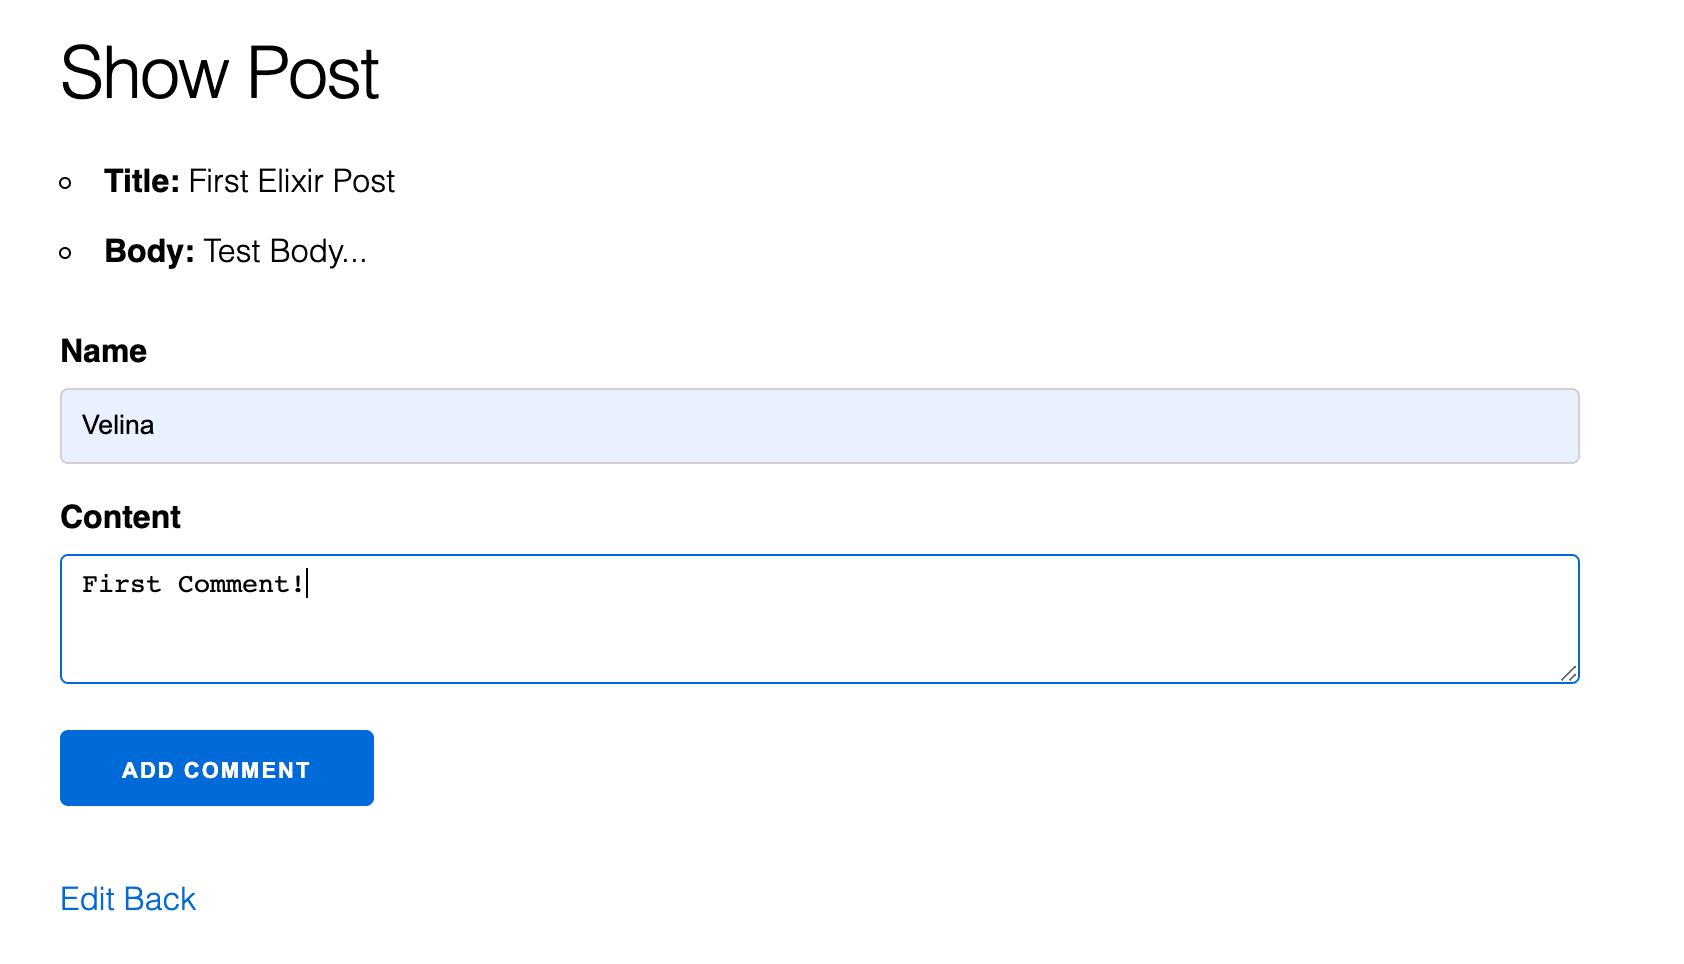
步骤4:显示给定帖子的所有评论 (STEP 4: Displaying all comments for a given post)
To display all the comments of a blog post we will create a new template — comments.html
要显示博客文章的所有评论,我们将创建一个新模板comments.html
<h3>Comments:</h3>
<div class="comments">
  <div class="comment header">
    <div>Name</div>
    <div>Content</div>
  </div><%= for comment <- @comments do %>
    <div class="comment">
      <div><%= comment.name %></div>
      <div><%= comment.content%></div>
    </div>
  <% end %>
</div>
We can pretty up the template by adding some css styles. These can be inserted into the main app.scss file.
我们可以通过添加一些CSS样式来修饰模板。 这些可以插入到主app.scss文件中。
.comments {
  padding-bottom: 2em;
}
.comment {
  display: grid;
  grid-template-columns: 1fr 1fr;
  padding: 0.5em;
  border-bottom: 1px solid lightgrey;
}
.comment.header {
  font-weight: bold;
}
Lastly, we need to insert the comments.html template into the show.html and make sure to pass it the correct data.
最后,我们需要插入comments.html模板到show.html并确保传递正确的数据。
<%= render “comments.html”, comments: @post.comments %>
步骤5:显示每个帖子的评论数 (STEP 5: Displaying number of comments per post)
We can write a simple function to calculate the number of comments associated with a post and add it to the Blog.Posts context.
我们可以编写一个简单的函数来计算与帖子关联的评论数量,并将其添加到Blog.Posts上下文中。
def get_number_of_comments(post_id) do
  post = Posts.get_post!(post_id) |> Repo.preload([:comments])
  Enum.count(post.comments)
end
Next we can call that function from the BlogWeb.PostView module in the following manner:
接下来,我们可以按以下方式从BlogWeb.PostView模块调用该函数:
defmodule BlogWeb.PostView do
  use BlogWeb, :view
  alias Blog.Posts  def get_comments_count(post_id) do
    Posts.get_number_of_comments(post_id)
  end
end
Lastly we can extend the index.html template by adding a couple of lines of code that will help us to display the number of comments.
最后,我们可以通过添加几行代码来扩展index.html模板,这将有助于我们显示注释的数量。
<th># of Comments</th>
...
<td><%= get_comments_count(post.id) %></td>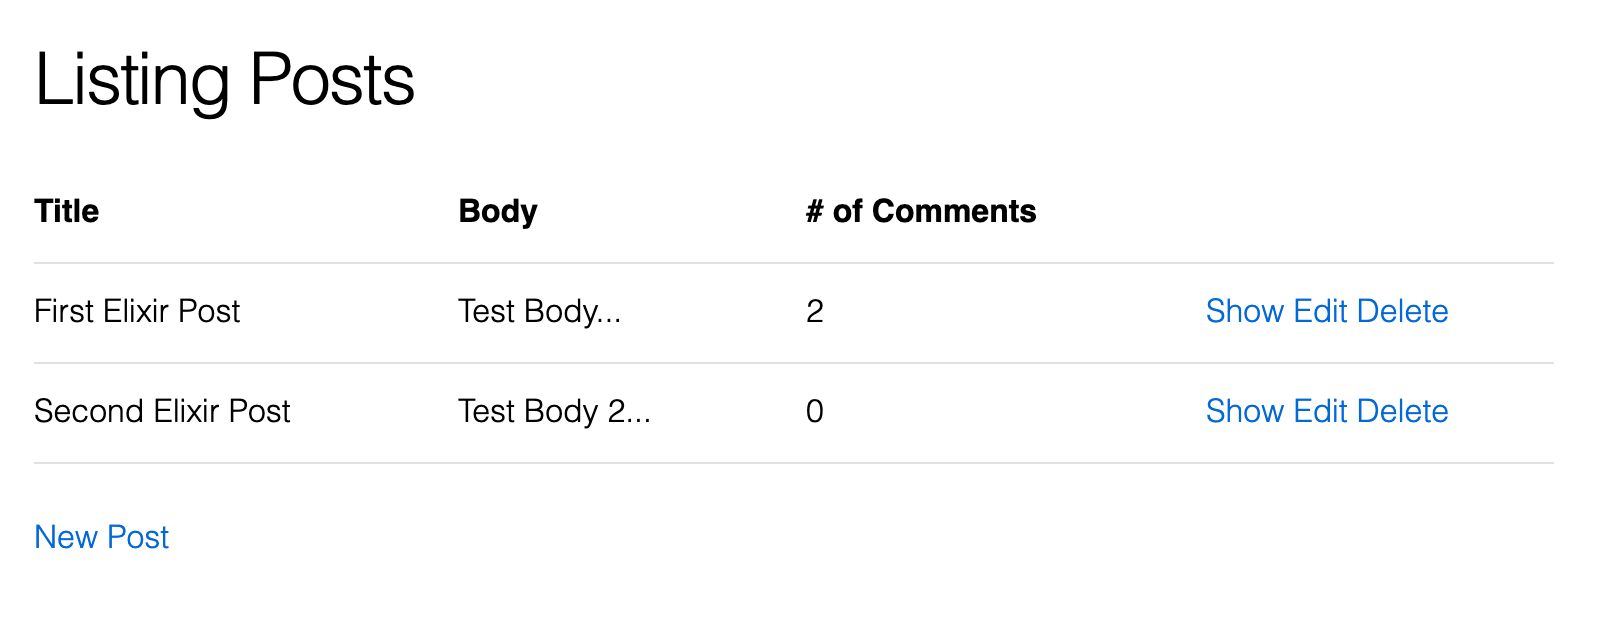
And… that’s about it. Our blog application prototype is now complete.You can find the source code of the project in the following Github repository.
而且...就是这样。 我们的博客应用程序原型现已完成。您可以在下面的Github存储库中找到项目的源代码。
翻译自: https://medium.com/swlh/how-to-build-elixir-blog-app-with-phoenix-in-less-than-15min-815366590e85
elixir 教程
相关文章:
这篇关于elixir 教程_如何在不到15分钟的时间内使用phoenix构建Elixir博客应用的文章就介绍到这儿,希望我们推荐的文章对编程师们有所帮助!


