本文主要是介绍【Flutter Widget】布局-用Stack+Positioned做书籍封面,希望对大家解决编程问题提供一定的参考价值,需要的开发者们随着小编来一起学习吧!
Stack是Flutter布局中的堆叠组件,用于将多个组件按顺序从底到上依次叠放,配合Positioned还可以实现将每个子组件放在不同位置。例如在图片上加水印、在用户头像上加图案等都可以用Stack实现[1]。
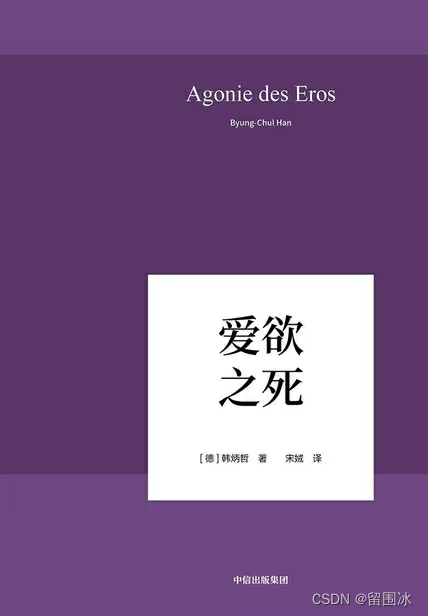
在学习完Stack布局后我就想找个例子来实战一下,看到手头的书,感觉封面还挺适合用Stack布局,就又找了一个相对简单的书的图片实现一下。下面是微信读书《爱欲之死》(向大家推荐此书)的封面。

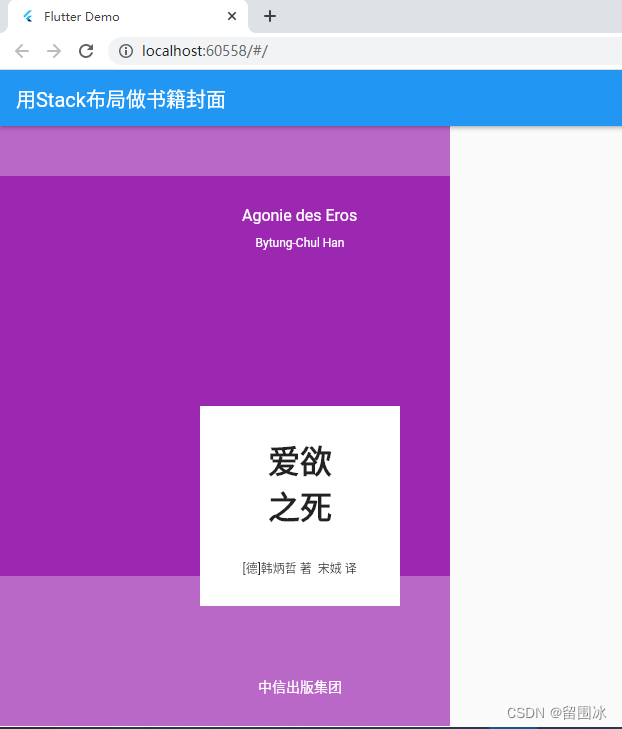
我用Stack布局实现的效果如下:

布局代码
这本书封面布局简单,用一个浅一点儿的紫色做底色,然后用一块较深的紫色作为主色,内容上德语书名、中文书名、作译者和出版社都靠右竖向居中排列,布局上全部使用 Stack+Positioned。
话不多说,直接上代码:
import 'package:flutter/material.dart';void main() {runApp(const MyApp());
}class MyApp extends StatelessWidget {const MyApp({Key? key}) : super(key: key);Widget build(BuildContext context) {return MaterialApp(title: 'Flutter Demo',theme: ThemeData(primarySwatch: Colors.blue,),home: const MyHomePage(),);}
}class MyHomePage extends StatelessWidget {const MyHomePage({Key? key}) : super(key: key);Widget build(BuildContext context) {return Scaffold(appBar: AppBar(title: const Text('用Stack布局做书籍封面'),),body: Container(width: 450,height: 600,color: Colors.purple[300],child: Stack(children: [Positioned(top: 50,child: Container(width: 450,height: 400,color: Colors.purple,),),Positioned(right: 50,width: 200,height: 600,child: Stack(alignment: Alignment.topCenter,children: [const Positioned(top: 80,child: Text('Agonie des Eros',style: TextStyle(fontSize: 16, color: Colors.white),),),const Positioned(top: 110,child: Text('Bytung-Chul Han',style: TextStyle(fontSize: 12, color: Colors.white),),),Positioned(top: 280,child: Container(width: 200,height: 200,color: Colors.white,child: Stack(alignment: Alignment.topCenter,children: const [Positioned(top: 30,child: Text('爱欲\n之死',style: TextStyle(fontSize: 32, fontFamily: '宋体', fontWeight: FontWeight.bold),),),Positioned(bottom: 30,child: Text('[德]韩炳哲 著 宋娀 译',style: TextStyle(fontSize: 12, fontFamily: '黑体'),),),],),),),const Positioned(bottom: 30,child: Text('中信出版集团',style: TextStyle(color: Colors.white),),),],),),],),),);}
}参考
[1]《Flutter 组件详解实战》[加] 王浩然(Bradley Wang) 编著
这篇关于【Flutter Widget】布局-用Stack+Positioned做书籍封面的文章就介绍到这儿,希望我们推荐的文章对编程师们有所帮助!


