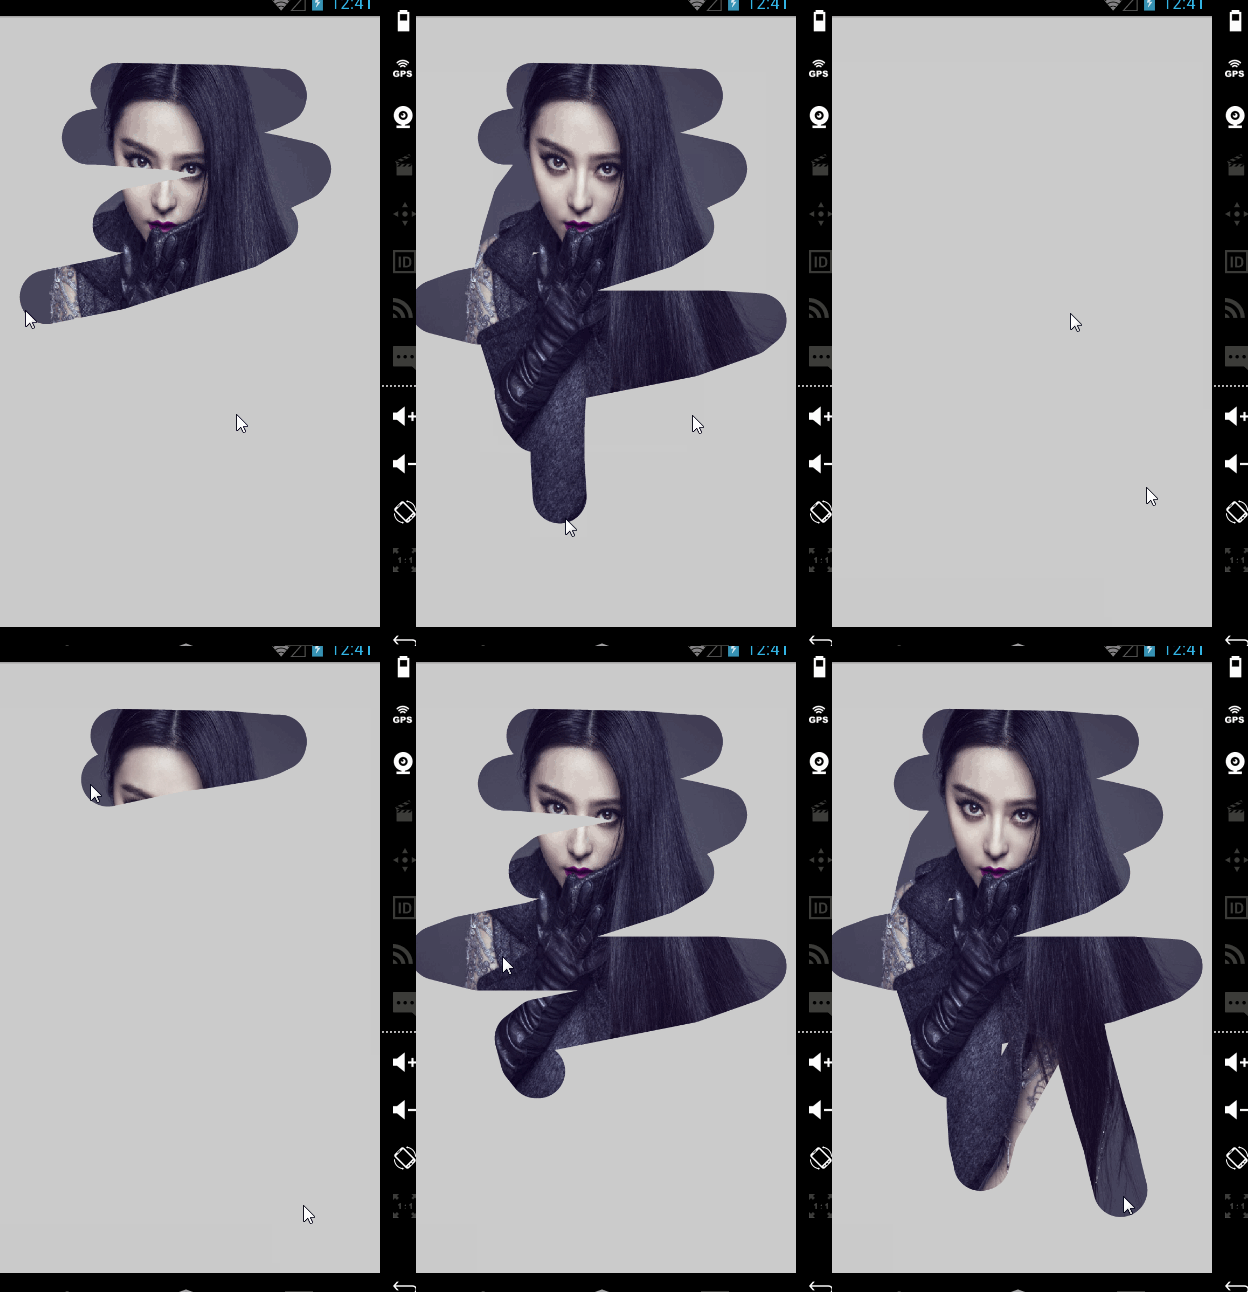
本文主要是介绍Android 自定义View——蒙版擦除效果实现,希望对大家解决编程问题提供一定的参考价值,需要的开发者们随着小编来一起学习吧!
本博客转自http://blog.csdn.net/to_be_designer/article/details/48553657
控件功能介绍
首先介绍一下控件的功能:
- 在View中有背景图片和蒙版,通过手指触碰屏幕和滑动,可以将背景上层的蒙版擦除进而显示出背景图片。
- 可以在xml布局文件中设置背景图片,且背景只能是mipmap中的图片。
- 可以设置蒙版的颜色。
可以设置擦除画笔的宽度大小。
功能就这么多,接下来我们看代码的实现……
擦除功能实现
- 创建一个MyBitmapViewAnother继承View。(这里命名不太规则,不要介意……)
- 实现自定义View中的构造器。
public MyBitmapViewAnother(Context context) {super(context);}/*该构造器必须实现,因为AttributeSet代表了xml布局文件在引用布局文件时传入的参数集合。当我们在布局文件中设置控件的相关参数:宽、高、颜色等时,我们要通过AttributeSet对象获得。*/public MyBitmapViewAnother(Context context, AttributeSet attrs) {super(context, attrs);}重写View的onMeasure(int widthMeasureSpec, int heightMeasureSpec)和onDraw(Canvas canvas)方法。onMeasure()方法实现是在自定义View构造器调用结束之后调用的,只有onMeasure()方法调用结束之后,我们才可以获得xml布局中设置的我们这个控件的宽和高。onDraw()方法是绘制我们的View界面,通过方法中传入的Canvas对象绘制我们的View。当我们使用自定义的控件时,UI主线程会调用onDraw()方法绘制控件的界面。
定义一个Bitmap代表背景图片,将Bitmap添加到中View的Canvas上。
- 然后在定义一个Bitmap,为这个Bitmap定义一个Canvas,我们将在这个Bitmap的Canvas上绘制蒙版,和我们手指的路径。然后通过PorterDuff.Mode将我们手指划过的路径与蒙版相交的部分去除掉。
代码:
public class MyBitmapViewAnother extends View {private int width;//设置高private int height;//设置高private Paint mPaint;//设置一个Bitmapprivate Bitmap bitmap;//创建该Bitmap的画布private Canvas bitmapCanvas;private Paint mPaintCover;private Paint mPaintRect;//定义一样个背景的Bitmapprivate Bitmap mBitmapBackground;private Matrix matrix;private Path mPath;public MyBitmapViewAnother(Context context) {super(context);}public MyBitmapViewAnother(Context context, AttributeSet attrs) {super(context, attrs);mPaint = new Paint();//Bitmap的画笔//设置背景mBitmapBackground = BitmapFactory.decodeResource(getResources(), R.mipmap.bb);mPaintCover = new Paint();mPaintCover.setAntiAlias(true);mPaintCover.setColor(Color.GRAY);mPaintCover.setStrokeWidth(50);//设置图形混合方式,这里使用PorterDuff.Mode.XOR模式,与底层重叠部分设为透明PorterDuffXfermode mode = new PorterDuffXfermode(PorterDuff.Mode.XOR);mPaintCover.setXfermode(mode);//这三句代码很重要,别忘记写了mPaintCover.setStyle(Paint.Style.STROKE);//设置笔刷的样式,默认为BUTT,如果设置为ROUND(圆形),SQUARE(方形),需要将填充类型Style设置为STROKE或者FILL_AND_STROKEmPaintCover.setStrokeCap(Paint.Cap.ROUND);//设置画笔的结合方式mPaintCover.setStrokeJoin(Paint.Join.ROUND);//绘制蒙版的画笔mPaintRect = new Paint();mPaintRect.setAntiAlias(true);mPaintRect.setColor(Color.LTGRAY);//路径记录滑动屏幕的路径。mPath = new Path();}@Overrideprotected void onMeasure(int widthMeasureSpec, int heightMeasureSpec) {super.onMeasure(widthMeasureSpec, heightMeasureSpec);width = getDefaultSize(getSuggestedMinimumWidth(), widthMeasureSpec);height = getDefaultSize(getSuggestedMinimumHeight(), heightMeasureSpec);setMeasuredDimension(width, height);//设置宽和高//创建一个Bitmap,用于绘图。bitmap = Bitmap.createBitmap(width, height, Bitmap.Config.ARGB_8888);bitmapCanvas = new Canvas(bitmap);//该画布为bitmap。//绘制背景BitmapBackground大小的矩阵matrix = new Matrix();//如果在构造器中初始化,需要使用reset()方法matrix.postScale((float)width/mBitmapBackground.getWidth(), (float)height/mBitmapBackground.getHeight());}@Overrideprotected void onDraw(Canvas canvas) {super.onDraw(canvas);//将bitmapBackground设置该View画布的背景canvas.drawBitmap(mBitmapBackground,matrix,null);//然后画布添加背景的基础上添加bitmap。canvas.drawBitmap(bitmap, 0, 0, mPaint);bitmapCanvas.drawRect(0, 0, width, height, mPaintRect);//bitmap上绘制一个蒙版bitmapCanvas.drawPath(mPath, mPaintCover);//bitmap上绘制手 划过的路径}//这里设置初始值是为了不点击屏幕时 ,不显示路径private float down_x=-100;private float down_y=-100;private float move_x=-100;private float move_y=-100;@Overridepublic boolean onTouchEvent(MotionEvent event) {switch (event.getAction()) {case MotionEvent.ACTION_DOWN://获得点击屏幕时的坐标down_x= event.getX();down_y=event.getY();//将Path移动到点击点mPath.moveTo(down_x, down_y);invalidate();//更新画面return true;case MotionEvent.ACTION_MOVE://获得在屏幕上移动的坐标move_x= event.getX();move_y=event.getY();//将移动的轨迹画成直线mPath.lineTo(move_x, move_y);//然后移动到下一个点。mPath.moveTo(move_x, move_y);invalidate();//更新画面return true;}return super.onTouchEvent(event);}
}
接下来就是我们要通过在xml布局文件中为我们的控件自定义设置背景图片,蒙版颜色,以及擦除画笔宽度的属性,这里就用到了自定义View中,自定义View属性的实现了。
自定义属性实现
这里就直接上实现的步骤了:
- 在res资源文件中的values文件夹中创建一个mybitmapviewanother_attrs的xml文件。在这个xml文件中定义一个的标签,并定义标签的”name”。在标签内添加添加属性,“name”为属性名,“format”为属性值的类型。
注意:这里的属性名“name”不要定义“background”之类的,因为Android中已经使用的这写名字,我们在去使用的时候就会出错。
<?xml version="1.0" encoding="utf-8"?>
<resources><declare-styleable name="MyBitmapViewAnother"><!--背景图片属性,其属性值可以是res中的资源文件--><attr name="mybitmapviewanother_background" format="reference"></attr><!--擦除画笔宽度属性,其属性值可以是具体的值"10dp",也可以是res中的资源文件--><attr name="mybitmapviewanother_paintwidth" format="dimension|reference"></attr></declare-styleable>
</resources>- 在使用自定义View的布局文件中添加标签:
<LinearLayout xmlns:android="http://schemas.android.com/apk/res/android"<!--首先声明这里添加注释是错误的,使用时请删除。下面这一句就是对控件属性的声明。格式:xmlns:自定义的名字(就像上面的android)="http://schemas.android.com/apk/res-auto"-->xmlns:mybitmapviewanother="http://schemas.android.com/apk/res-auto"xmlns:tools="http://schemas.android.com/tools"android:layout_width="match_parent"android:layout_height="match_parent"android:orientation="vertical"tools:context="com.example.administrator.mywidgetdemo.activity.PathActivity"><com.example.administrator.mywidgetdemo.bitmap.MyBitmapViewAnother
        android:id="@+id/mypicture"android:layout_width="match_parent"android:layout_height="match_parent"mybitmapviewanother:mybitmapviewanother_background="@mipmap/aa"/><!--使用时,通过如上方式使用。注意:冒号签名的名字和声明时的名字是相同的。-->
</LinearLayout>
3.在然后就是在代码的构造器中获取我们布局中的属性了
//通过自定义的属性文件,来获取相关的属性值if (attrs!=null){TypedArray array=getContext().obtainStyledAttributes(attrs, R.styleable.MyView);int width= (int) array.getDimension(R.styleable.MyView_myview_paintwidth,30);coverPaint.setStrokeWidth(width);int pic=array.getResourceId(R.styleable.MyView_myview_pic,R.mipmap.ic_launcher);backGroundBitmap= BitmapFactory.decodeResource(getResources(), pic);} 这样 我们通过布局文件更改画笔宽度,背景图片:
这篇关于Android 自定义View——蒙版擦除效果实现的文章就介绍到这儿,希望我们推荐的文章对编程师们有所帮助!


