本文主要是介绍MBProgressHUD 源代码分析,希望对大家解决编程问题提供一定的参考价值,需要的开发者们随着小编来一起学习吧!
ProgressHUD 真好用,一般只用到加载一朵花指示器,和一秒钟的文本弹窗
第一个例子,UIActivityIndicatorView, 菊花

调用部分
swift 调用代码
let hud = ProgressHUD.show()DispatchQueue.main.asyncAfter(deadline: .now() + 1) {hud?.hide()}swift 封装代码
func getWindow() -> UIView?{// 存在 SceneDelegate, 这样取 windowlet windows = UIApplication.shared.windowsif let vue = windows.first{return vue}return nil
}extension ProgressHUD{// 显示static func show() -> ProgressHUD?{guard let view = getWindow() else{return nil}let hud = ProgressHUD.showAdded(to: view)return hud}// 隐藏func hide(){hideAnimated()}}
源代码
- MBProgressHUDMode 的 mode 有 6 个,常用两个,默认和自定制视图
第一个例子,采用的模式是默认 ProgressHUDModeIndeterminate
- MBProgressHUD 就是一个自定制的 UIView,
他的 frame 就是传入视图的 bounds
调用的便利方法
+ (instancetype)showHUDAddedTo:(UIView *)view{ProgressHUD *hud = [[self alloc] initWithView:view];[view addSubview:hud];[hud showAnimated];return hud;
}
实际的实例化方法,
决定了 ProgressHUD 的 frame = 父视图的 frame
- (id)initWithView:(UIView *)view {NSAssert(view, @"View must not be nil.");return [self initWithFrame:view.bounds];
}
- 视图层级
MBProgressHUD 上面放置背景视图,MBBackgroundView,
背景视图 MBBackgroundView 的 frame = MBProgressHUD 的 frame
菊花对应中间方块,是第二层背景视图 MBBackgroundView *bezelView
_bezelView 上面,放了一个 UILabel,
例子中只看见菊花,没看见标签,是因为该 Label 的 text 为空
- 看见的菊花
初始化继续
- (instancetype)initWithFrame:(CGRect)frame {if ((self = [super initWithFrame:frame])) {[self commonInit];}return self;
}
基础配置
- (void)commonInit {// Set default values for properties// 基本模式_mode = ProgressHUDModeIndeterminate;// 基础配置// ...self.autoresizingMask = UIViewAutoresizingFlexibleWidth | UIViewAutoresizingFlexibleHeight;[self setupViews];  // 视图层级[self updateIndicators];
}
更新提示样式
- (void)updateIndicators {UIView *indicator = self.indicator;BOOL isActivityIndicator = [indicator isKindOfClass:[UIActivityIndicatorView class]];// 基本模式ProgressHUDMode mode = self.mode;if (mode == ProgressHUDModeIndeterminate) {if (!isActivityIndicator) {// Update to indeterminate indicator// 我们看到的菊花,就是 UIActivityIndicatorView// 开始旋转 startAnimating[indicator removeFromSuperview];indicator = [[UIActivityIndicatorView alloc] initWithActivityIndicatorStyle:UIActivityIndicatorViewStyleLarge];((UIActivityIndicatorView *)indicator).color = UIColor.blackColor;[(UIActivityIndicatorView *)indicator startAnimating];[self.bezelView addSubview:indicator];}}// ....// 其他模式
}
布局非常的有特色
多种约束,含可视化约束
- (void)updateConstraints {// bezelView 第二层背景视图,水平居中[centeringConstraints addObject:[NSLayoutConstraint constraintWithItem:bezel_pecs attribute:NSLayoutAttributeCenterX relatedBy:NSLayoutRelationEqual toItem:self attribute:NSLayoutAttributeCenterX multiplier:1.f constant: offset.x]];// bezelView 第二层背景视图,竖直居中[centeringConstraints addObject:[NSLayoutConstraint constraintWithItem:bezel_pecs attribute:NSLayoutAttributeCenterY relatedBy:NSLayoutRelationEqual toItem:self attribute:NSLayoutAttributeCenterY multiplier:1.f constant: offset.y]];// 子视图NSMutableArray *subviews = [[NSMutableArray alloc] initWithArray: @[self.topSpacer, self.label, self.bottomSpacer]];if (self.indicator){// 子视图,竖直方向上,从上到下依次是// 顶部占位图,菊花,文本标签,底部占位图[subviews insertObject:self.indicator atIndex:1];}// 遍历设置布局NSMutableArray *paddingConstraints = [NSMutableArray new];[subviews enumerateObjectsUsingBlock:^(UIView *view, NSUInteger idx, BOOL *stop) {// Center in bezel_pecs// 批量水平居中[bezelConstraints addObject:[NSLayoutConstraint constraintWithItem:view attribute:NSLayoutAttributeCenterX relatedBy:NSLayoutRelationEqual toItem:bezel_pecs attribute:NSLayoutAttributeCenterX multiplier:1.f constant:0.f]];// Ensure the minimum edge margin is kept// 设置父视图[bezelConstraints addObjectsFromArray:[NSLayoutConstraint constraintsWithVisualFormat:@"|-(>=margin)-[view]-(>=margin)-|" options:0 metrics:metrics views:NSDictionaryOfVariableBindings(view)]];// Element spacingif (idx == 0) {// 第一个视图// First, ensure spacing to bezel_pecs edge[bezelConstraints addObject:[NSLayoutConstraint constraintWithItem:view attribute:NSLayoutAttributeTop relatedBy:NSLayoutRelationEqual toItem:bezel_pecs attribute:NSLayoutAttributeTop multiplier:1.f constant:0.f]];} else if (idx == subviews.count - 1) {// 最后一个视图// Last, ensure spacing to bezel_pecs edge[bezelConstraints addObject:[NSLayoutConstraint constraintWithItem:view attribute:NSLayoutAttributeBottom relatedBy:NSLayoutRelationEqual toItem:bezel_pecs attribute:NSLayoutAttributeBottom multiplier:1.f constant:0.f]];}if (idx > 0) {// Has previous// 上一个视图NSLayoutConstraint *padding = [NSLayoutConstraint constraintWithItem:view attribute:NSLayoutAttributeTop relatedBy:NSLayoutRelationEqual toItem:subviews[idx - 1] attribute:NSLayoutAttributeBottom multiplier:1.f constant:0.f];[bezelConstraints addObject:padding];[paddingConstraints addObject:padding];}}];// 遍历调整布局[self updatePaddingConstraints];[super updateConstraints];}遍历调整布局
- (void)updatePaddingConstraints {// Set padding dynamically, depending on whether the view is visible or not__block BOOL hasVisibleAncestors = NO;[self.paddingConstraints enumerateObjectsUsingBlock:^(NSLayoutConstraint *padding, NSUInteger idx, BOOL *stop) {UIView *firstView = (UIView *)padding.firstItem;UIView *secondView = (UIView *)padding.secondItem;BOOL firstVisible = !firstView.hidden && !CGSizeEqualToSize(firstView.intrinsicContentSize, CGSizeZero);BOOL secondVisible = !secondView.hidden && !CGSizeEqualToSize(secondView.intrinsicContentSize, CGSizeZero);// Set if both views are visible or if there's a visible view on top that doesn't have padding// added relative to the current view yet// 有视图,就有间距padding.constant = (firstVisible && (secondVisible || hasVisibleAncestors)) ? 4.f : 0.f;hasVisibleAncestors |= secondVisible;}];
}
- 隐藏提示
上面已经介绍了,显示提示
- (void)hideAnimated{// 主线程检测MBMainThreadAssert();// 提示操作完成的标识self.finished = YES;// 隐藏动画[self hideUsingAnimation];
}
隐藏动画
- (void)hideUsingAnimation{// 这个计时器,主要第二个例子有用到[self.hideDelayTimer invalidate];if (self.showStarted) {// 存在开始的时间// 恢复状态self.showStarted = nil;[self animateIn:NO completion:^(BOOL finished) {// 结束提示,移除视图[self done];}];}else {self.showStarted = nil;self.bezelView.alpha = 0.f;self.backgroundView.alpha = 1.f;[self done];}
}
结束提示,移除视图
- (void)done{if (self.hasFinished) {self.alpha = 0.0f;[self removeFromSuperview];}
}
第 2 个例子,ProgressHUDModeCustomView, 提示文本
调用部分
swift 调用代码
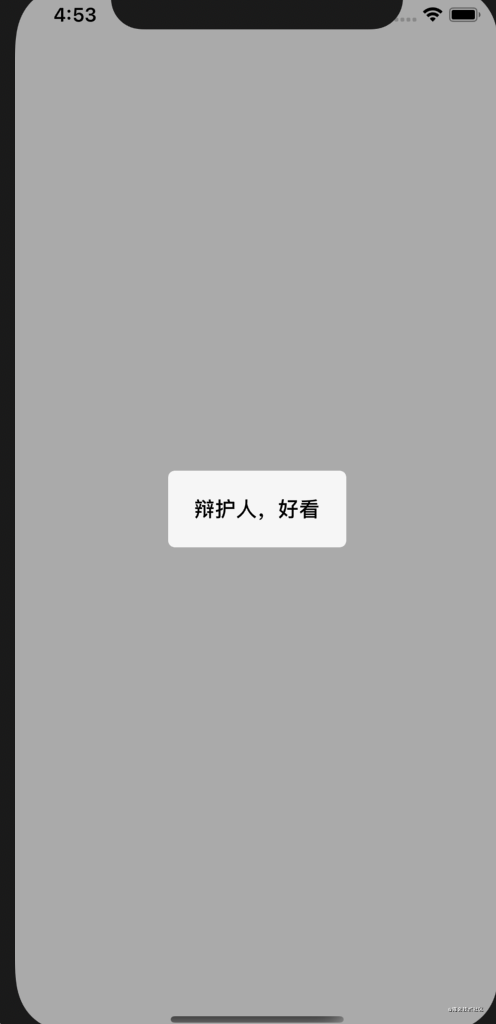
ProgressHUD.show("辩护人,好看")swift 封装代码
@discardableResultstatic func show(_ message: String) -> ProgressHUD?{guard let view = getWindow(), message != "" else{return nil}let hud = ProgressHUD.showAdded(to: view)// 这时候,我们看到文字,因为给了字符串hud.label.text = message// 自定制视图模式,然而 customView 为空hud.customView = nilhud.mode = ProgressHUDMode.customViewhud.hide(afterDelay: 1.5)return hud}
源代码
- 显示
// 改模式
- (void)setMode:(ProgressHUDMode)mode {if (mode != _mode) {_mode = mode;[self updateIndicators];}
}
更新指示器样式
- (void)updateIndicators {// initWithFrame 中,走了一次这个方法,// self.indicator, 这时候是 UIActivityIndicatorViewUIView *indicator = self.indicator;BOOL isActivityIndicator = [indicator isKindOfClass:[UIActivityIndicatorView class]];ProgressHUDMode mode = self.mode;// ... // 第一个例子,省略// 这里是第二个例子if (mode == ProgressHUDModeCustomView && self.customView != indicator) {// Update custom view indicator[indicator removeFromSuperview];// 为空,不用管indicator = self.customView;indicator.tintColor = UIColor.blackColor;[self.bezelView addSubview:indicator];}indicator.translatesAutoresizingMaskIntoConstraints = NO;self.indicator = indicator;// 做布局// ...[self setNeedsUpdateConstraints];
}
因为给了字符串,所以看得到文字
- 隐藏
MBProgressHUD 有一个计时器属性,
@property (nonatomic, weak) NSTimer *hideDelayTimer;
hideAfterDelay 自动隐藏
- (void)hideAfterDelay:(NSTimeInterval)delay {// Cancel any scheduled hideAnimated:afterDelay: calls[self.hideDelayTimer invalidate];// 自动隐藏的时候,初始化计时器,// 这个计时器,只调用一次NSTimer *timer = [NSTimer timerWithTimeInterval:delay target:self selector:@selector(hideAnimated) userInfo: nil repeats:NO];[[NSRunLoop currentRunLoop] addTimer:timer forMode:NSRunLoopCommonModes];self.hideDelayTimer = timer;
}
标记隐藏
- (void)hideAnimated{// ...// 标记完成self.finished = YES;// 隐藏处理// 逻辑同例子一[self hideUsingAnimation];
}
MBProgressHUD 的结构大致这样,实际源代码扩展更加丰富一些
github repo
这篇关于MBProgressHUD 源代码分析的文章就介绍到这儿,希望我们推荐的文章对编程师们有所帮助!


