本文主要是介绍[鸿蒙/Harmony] HarmonyOS Codelab挑战赛记录之图片的四种常见操作,希望对大家解决编程问题提供一定的参考价值,需要的开发者们随着小编来一起学习吧!
上一期介绍了组件模块-Java 布局,这一期主要展示图片的四种常见操作
目录
1.HarmonyOS开发工具的安装
2.组件模块-Java 布局
3.基于图像模块实现图库图片的四种常见操作
1.准备一张像素尺寸为1024*768的图片
放到ImageDemo\entry\src\main\resources\base\media目录下


2.设计布局样式。功能上我打算能使图片旋转、裁剪、缩放、镜像
所以我需要创建的布局里边有四个按钮,以及一个图片控件。我创建了一个ability_pixel_map的layout样式
相对来讲比较简单,
<?xml version="1.0" encoding="utf-8"?>
<DirectionalLayoutxmlns:ohos="http://schemas.huawei.com/res/ohos"ohos:height="match_parent"ohos:width="match_parent"ohos:orientation="vertical"><DirectionalLayoutohos:height="200"ohos:width="match_parent"ohos:orientation="horizontal"ohos:layout_direction="locale"ohos:top_margin="20vp"><Buttonohos:id="$+id:whirl_image"ohos:height="50"ohos:width="200"ohos:text="旋转"ohos:text_size="18fp"/><Buttonohos:id="$+id:crop_image"ohos:height="50"ohos:width="200"ohos:text="裁剪"ohos:text_size="18fp"/><Buttonohos:id="$+id:scale_image"ohos:height="50"ohos:width="200"ohos:text="缩放"ohos:text_size="18fp"/><Buttonohos:id="$+id:mirror_image"ohos:height="50"ohos:width="200"ohos:text="镜像"ohos:text_size="18fp"/></DirectionalLayout><Imageohos:id="$+id:image"ohos:height="1024"ohos:width="1024"ohos:background_element="#000"/></DirectionalLayout>
设计效果(为了更直观看到Image,我给他设置了黑色背景)

3.在slice文件夹下继续创建一个类:PixelMapSlice 并且继承 AbilitySlice

4.编写一个图片转换的方法,可以将图片的资源id转换成PixelMap
(这里的代码主要展示对图片处理的核心操作)
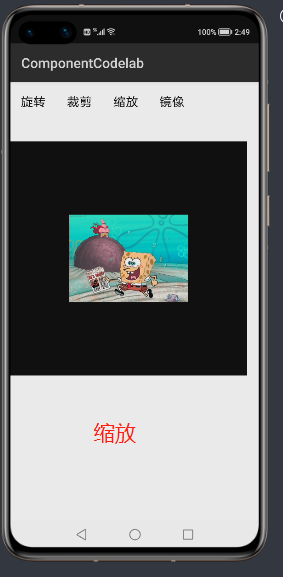
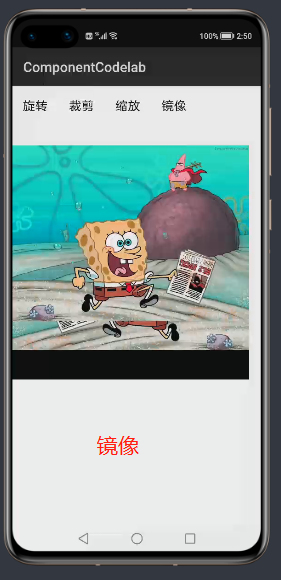
/*** 通过图片ID返回PixelMap ** @param resourceId 图片的资源ID * @return 图片的PixelMap*/private PixelMap getPixelMapFromResource(int resourceId) {InputStream inputStream = null;try {// 创建图像数据源ImageSource对象 inputStream = getContext().getResourceManager().getResource(resourceId);ImageSource.SourceOptions srcOpts = new ImageSource.SourceOptions();srcOpts.formatHint = "image/jpg";ImageSource imageSource = ImageSource.create(inputStream, srcOpts);// 设置图片参数。本例使用图片像素的尺寸为1024*768// 点击一次旋转按钮会进行90度的旋转,// 缩放是按照2:1的比例进行缩放,// 剪裁是保证宽度不变的情况下对高度进行400像素的剪裁,ImageSource.DecodingOptions decodingOptions = new ImageSource.DecodingOptions();// 旋转(通过改变whirlCount变量控制旋转)decodingOptions.rotateDegrees = 90 * whirlCount;// 缩放(通过改变isScale变量控制缩放)decodingOptions.desiredSize = new Size(isScale ? 512 : 0, isScale ? 384 : 0);// 剪裁(通过改变isCorp变量控制裁剪区域)decodingOptions.desiredRegion = new Rect(0, 0, isCorp ? 1024 : 0, isCorp ? 400 : 0);decodingOptions.desiredPixelFormat = PixelFormat.ARGB_8888;return imageSource.createPixelmap(decodingOptions);} catch (IOException e) {HiLog.info(LABEL_LOG, "IOException");} catch (NotExistException e) {HiLog.info(LABEL_LOG, "NotExistException");} finally {if (inputStream != null) {try {inputStream.close();} catch (IOException e) {HiLog.info(LABEL_LOG, "inputStream IOException");}}}return null;}5.完整代码
package com.huawei.codelab.slice;import com.huawei.codelab.ResourceTable;
import ohos.aafwk.ability.AbilitySlice;
import ohos.aafwk.content.Intent;
import ohos.agp.components.Button;
import ohos.agp.components.Component;
import ohos.agp.components.Image;
import ohos.agp.render.Canvas;
import ohos.agp.render.Paint;
import ohos.agp.render.PixelMapHolder;
import ohos.global.resource.NotExistException;
import ohos.hiviewdfx.HiLog;
import ohos.hiviewdfx.HiLogLabel;
import ohos.media.image.ImageSource;
import ohos.media.image.PixelMap;
import ohos.media.image.common.PixelFormat;
import ohos.media.image.common.Rect;
import ohos.media.image.common.Size;import java.io.IOException;
import java.io.InputStream;/*** 图像主页面 */
public class PixelMapSlice extends AbilitySlice {private static final HiLogLabel LABEL_LOG = new HiLogLabel(3, 0xD001100, "PixelMapSlice");Image image;PixelMap imagePixelMap;Button whirlImageBtn;Button cropImageBtn;Button scaleImageBtn;Button mirrorImageBtn;private int whirlCount = 0;private boolean isCorp = false;private boolean isScale = false;private boolean isMirror = false;private float scaleX = 1.0f;@Overridepublic void onStart(Intent intent) {super.onStart(intent);super.setUIContent(ResourceTable.Layout_ability_pixel_map);initView();}private void initView() {if (findComponentById(ResourceTable.Id_whirl_image) instanceof Button) {whirlImageBtn = (Button) findComponentById(ResourceTable.Id_whirl_image);}if (findComponentById(ResourceTable.Id_crop_image) instanceof Button) {cropImageBtn = (Button) findComponentById(ResourceTable.Id_crop_image);}if (findComponentById(ResourceTable.Id_scale_image) instanceof Button) {scaleImageBtn = (Button) findComponentById(ResourceTable.Id_scale_image);}if (findComponentById(ResourceTable.Id_mirror_image) instanceof Button) {mirrorImageBtn = (Button) findComponentById(ResourceTable.Id_mirror_image);}if (findComponentById(ResourceTable.Id_image) instanceof Image) {image = (Image) findComponentById(ResourceTable.Id_image);}whirlImageBtn.setClickedListener(new ButtonClick());cropImageBtn.setClickedListener(new ButtonClick());scaleImageBtn.setClickedListener(new ButtonClick());mirrorImageBtn.setClickedListener(new ButtonClick());}private class ButtonClick implements Component.ClickedListener {@Overridepublic void onClick(Component component) {int btnId = component.getId();switch (btnId) {case ResourceTable.Id_whirl_image:// 旋转图片 whirlCount++;isCorp = false;isScale = false;isMirror = false;imagePixelMap = getPixelMapFromResource(ResourceTable.Media_ic_sponge_baby);image.setPixelMap(imagePixelMap);break;case ResourceTable.Id_crop_image:// 剪裁图片 whirlCount = 0;isCorp = !isCorp;isScale = false;isMirror = false;imagePixelMap = getPixelMapFromResource(ResourceTable.Media_ic_sponge_baby);image.setPixelMap(imagePixelMap);break;case ResourceTable.Id_scale_image:// 缩放图片 whirlCount = 0;isCorp = false;isScale = !isScale;isMirror = false;imagePixelMap = getPixelMapFromResource(ResourceTable.Media_ic_sponge_baby);image.setPixelMap(imagePixelMap);break;case ResourceTable.Id_mirror_image:// 镜像图片 whirlCount = 0;isCorp = false;isScale = false;isMirror = true;imagePixelMap = getPixelMapFromResource(ResourceTable.Media_ic_sponge_baby);mirrorImage(imagePixelMap);image.setPixelMap(imagePixelMap);break;default:break;}}}private void mirrorImage(PixelMap pixelMap) {scaleX = -scaleX;image.addDrawTask(new Component.DrawTask() {@Overridepublic void onDraw(Component component, Canvas canvas) {if (isMirror) {isMirror = false;PixelMapHolder pmh = new PixelMapHolder(pixelMap);canvas.scale(scaleX,1.0f,(float) pixelMap.getImageInfo().size.width / 2,(float) pixelMap.getImageInfo().size.height / 2);canvas.drawPixelMapHolder(pmh,0,0,new Paint());}}});}/*** 通过图片ID返回PixelMap ** @param resourceId 图片的资源ID * @return 图片的PixelMap*/private PixelMap getPixelMapFromResource(int resourceId) {InputStream inputStream = null;try {// 创建图像数据源ImageSource对象 inputStream = getContext().getResourceManager().getResource(resourceId);ImageSource.SourceOptions srcOpts = new ImageSource.SourceOptions();srcOpts.formatHint = "image/jpg";ImageSource imageSource = ImageSource.create(inputStream, srcOpts);// 设置图片参数。本例使用图片像素的尺寸为1024*768// 点击一次旋转按钮会进行90度的旋转,// 缩放是按照2:1的比例进行缩放,// 剪裁是保证宽度不变的情况下对高度进行400像素的剪裁,ImageSource.DecodingOptions decodingOptions = new ImageSource.DecodingOptions();// 旋转 decodingOptions.rotateDegrees = 90 * whirlCount;// 缩放 decodingOptions.desiredSize = new Size(isScale ? 512 : 0, isScale ? 384 : 0);// 剪裁 decodingOptions.desiredRegion = new Rect(0, 0, isCorp ? 1024 : 0, isCorp ? 400 : 0);decodingOptions.desiredPixelFormat = PixelFormat.ARGB_8888;return imageSource.createPixelmap(decodingOptions);} catch (IOException e) {HiLog.info(LABEL_LOG, "IOException");} catch (NotExistException e) {HiLog.info(LABEL_LOG, "NotExistException");} finally {if (inputStream != null) {try {inputStream.close();} catch (IOException e) {HiLog.info(LABEL_LOG, "inputStream IOException");}}}return null;}@Overridepublic void onActive() {super.onActive();}@Overridepublic void onForeground(Intent intent) {super.onForeground(intent);}
}
6.运行应用。我们通过上期组件模块-Java 布局 MainAbilitySlice类的点击事件,更改TabListSlice为PixelMapSlice启动我们的布局

运行效果


点击这里可以去到HarmonyOS开发文档学习基于图像模块实现图库图片的四种常见操作
这篇关于[鸿蒙/Harmony] HarmonyOS Codelab挑战赛记录之图片的四种常见操作的文章就介绍到这儿,希望我们推荐的文章对编程师们有所帮助!


