本文主要是介绍Windows环境下es8的集群部署,希望对大家解决编程问题提供一定的参考价值,需要的开发者们随着小编来一起学习吧!
原创文章:Windows环境下es8的集群部署 – 编程屋
目录
1 相关概念
1.1 单机集群
1.2 集群Cluster
1.3 节点Node
2 Windows下部署
2.1 节点node-1001
2.2 节点node-1002
2.3 节点node-1003
1 相关概念
1.1 单机集群
单台Elasticsearch服务器提供服务,往往都有最大的负载能力,超过这个阀值,服务器新能就会大大降低不可用,所以生产环境中,一般都是运行在指定服务器集群中。
除了负载能力,单点服务器也存在其他问题:
- 单台机器存储容量有限
- 单服务器容易出现单点故障,无法实现高可用
- 单服务的并发能力有限
配置服务器集群时,集群中节点数量没有限制,大于等于两个节点就能够看做集群了,一般出于高性能和高可用来说集群节点数量都是3个月以上。
1.2 集群Cluster
一个集群就是由一个或多个服务器节点组织在一起,共同持有整个的数据,并一起提供索引和搜索功能。一个Elasticsearch集群有一个唯一的名字标识,这个名字默认就是“elasticsearch”。一个节点只能通过指定某个集群的名字,来加入这个集群。
1.3 节点Node
集群中包含很多服务器,一个节点就是其中的一台服务器。作为集群的一部分,它存储数据,参与集群的索引和搜索功能。
一个节点也是由一个名字来标识的,默认情况下,这个名字是一个随机的角色的名字,这个名字会在启动的时候赋予节点。这个名字对于管理工作挺重要的,因为在管理过程中,你会去确定网络中的哪些服务器对于Elasticsearch集群中的哪些节点。
一个节点可以通过配置集群名称的方式来加入一个指定的集群。默认情况下,每个节点都会安排加入到一个叫做“Elasticsearch”的集群中。
2 Windows下部署
我们准备部署3个节点:node-1001、node-1002、node-1003。
es:8.1.1版本
2.1 节点node-1001
将之前使用过的es文件夹复制到一个文件夹中。并打开我们的es文件夹
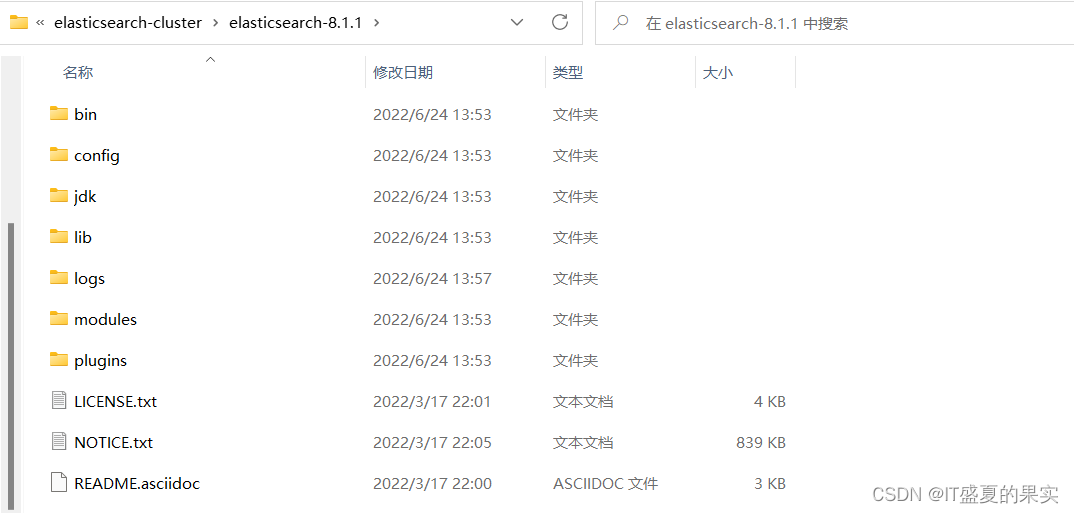
1)删除掉其中的data文件夹和清空logs文件夹下的日志。
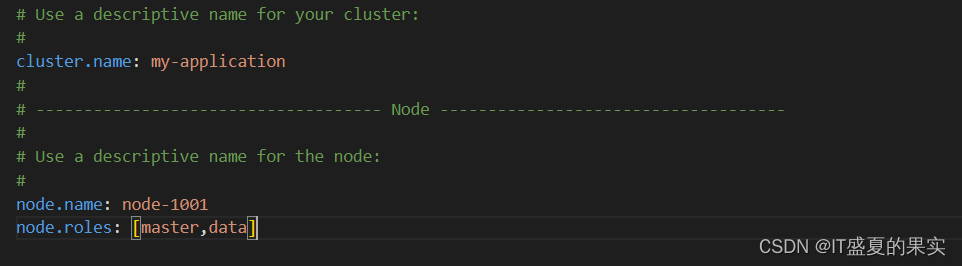
2)打开config目录,修改elasticsearch.yml文件
官网文档:Networking | Elasticsearch Guide [8.2] | Elastic
放开集群名称和节点名称(并告知当前节点可以是master也可以是数据):
放开通信端口、端口号、监听端口
 增加跨域配置:
http.cors.enabled: true
http.cors.allow-origin: "*"
3)将文件夹名称改成node-1001

4)双击bin目录下elasticsearch.bat启动,
 5)访问:http://localhost:1001/_cluster/health 查看集群状态
 可以看到当前节点数一个,数据节点也是1个。
2.2 节点node-1002
将节点1的文件夹复制一份

注意:需要将其中的data文件夹删掉,并且清空logs下的日志
除了相应的端口号需要改变外,还需要加上如下配置,发现其他的节点。
discovery.seed_hosts: ["localhost:9301"]完整yml文件如下:
# ======================== Elasticsearch Configuration =========================
#
# NOTE: Elasticsearch comes with reasonable defaults for most settings.
#       Before you set out to tweak and tune the configuration, make sure you
#       understand what are you trying to accomplish and the consequences.
#
# The primary way of configuring a node is via this file. This template lists
# the most important settings you may want to configure for a production cluster.
#
# Please consult the documentation for further information on configuration options:
# https://www.elastic.co/guide/en/elasticsearch/reference/index.html
#
# ---------------------------------- Cluster -----------------------------------
#
# Use a descriptive name for your cluster:
#
cluster.name: my-application
#
# ------------------------------------ Node ------------------------------------
#
# Use a descriptive name for the node:
#
node.name: node-1002
node.roles: [master,data]#
# Add custom attributes to the node:
#
#node.attr.rack: r1
#
# ----------------------------------- Paths ------------------------------------
#
# Path to directory where to store the data (separate multiple locations by comma):
#
#path.data: /path/to/data
#
# Path to log files:
#
#path.logs: /path/to/logs
#
# ----------------------------------- Memory -----------------------------------
#
# Lock the memory on startup:
#
#bootstrap.memory_lock: true
#
# Make sure that the heap size is set to about half the memory available
# on the system and that the owner of the process is allowed to use this
# limit.
#
# Elasticsearch performs poorly when the system is swapping the memory.
#
# ---------------------------------- Network -----------------------------------
#
# By default Elasticsearch is only accessible on localhost. Set a different
# address here to expose this node on the network:
#
network.host: localhost
#
# By default Elasticsearch listens for HTTP traffic on the first free port it
# finds starting at 9200. Set a specific HTTP port here:
#
http.port: 1002
#集群之间通信的tcp端口
transport.port: 9302
discovery.seed_hosts: ["localhost:9301"]
#
# For more information, consult the network module documentation.
#
# --------------------------------- Discovery ----------------------------------
#
# Pass an initial list of hosts to perform discovery when this node is started:
# The default list of hosts is ["127.0.0.1", "[::1]"]
#
#discovery.seed_hosts: ["localhost:1001"]
#
# Bootstrap the cluster using an initial set of master-eligible nodes:
#
#cluster.initial_master_nodes: ["node-1001"]
#
# For more information, consult the discovery and cluster formation module documentation.
#
# ---------------------------------- Various -----------------------------------
#
# Allow wildcard deletion of indices:
#
#action.destructive_requires_name: false#----------------------- BEGIN SECURITY AUTO CONFIGURATION -----------------------
#
# The following settings, TLS certificates, and keys have been automatically
# generated to configure Elasticsearch security features on 27-03-2022 08:14:12
#
# --------------------------------------------------------------------------------# Enable security features
xpack.security.enabled: falsexpack.security.enrollment.enabled: true# Enable encryption for HTTP API client connections, such as Kibana, Logstash, and Agents
xpack.security.http.ssl:enabled: falsekeystore.path: certs/http.p12# Enable encryption and mutual authentication between cluster nodes
xpack.security.transport.ssl:enabled: trueverification_mode: certificatekeystore.path: certs/transport.p12truststore.path: certs/transport.p12
# Create a new cluster with the current node only
# Additional nodes can still join the cluster later# Allow HTTP API connections from localhost and local networks
# Connections are encrypted and require user authentication
http.host: [_local_, _site_]# Allow other nodes to join the cluster from localhost and local networks
# Connections are encrypted and mutually authenticated
#transport.host: [_local_, _site_]http.cors.enabled: true
http.cors.allow-origin: "*"#----------------------- END SECURITY AUTO CONFIGURATION -------------------------
此时我们依然访问节点1001:http://localhost:1001/_cluster/health 查看集群状态:

发现我们节点数量和数据节点数量变为2。
2.3 节点node-1003
按照节点2的方法如法炮制:唯一不同的是:需要发现节点有两个
discovery.seed_hosts: ["localhost:9301","localhost:9302"]此时我们依然访问节点1001:http://localhost:1001/_cluster/health 查看集群状态:

发现我们节点数量和数据节点数量变为3。
以上只是部分内容,为了维护方便,本文已迁移到新地址:
Windows环境下es8的集群部署 – 编程屋
这篇关于Windows环境下es8的集群部署的文章就介绍到这儿,希望我们推荐的文章对编程师们有所帮助!


