本文主要是介绍Qt 5.12--《Mastering Qt 5》介绍Qt3D,希望对大家解决编程问题提供一定的参考价值,需要的开发者们随着小编来一起学习吧!
Qt 5.12--《Mastering Qt 5》介绍Qt3D
- 1 Qt3D功能特色
- 2 ECS 架构
- 3 示例一
- 3.1 创建Entity
- 3.2 Apple.qml文件基本结构
- 3.3 成为别的Entity的子类
- 3.4 Qt3D处理为Item
- 4 示例二
- 4.1 定义场景
- 5 知识点
- 5.1 Qt3D模块的继承树
- 5.2 笛卡尔坐标系
- 参考
1 Qt3D功能特色
- 2D和3D被C++和Quick支持
- Meshes 网
- Materials 材料
- GLSL shaders GLSL着色器
- Shadow mapping 阴影贴图
- Deferred rendering 延迟渲染
- Instance rendering 实例渲染
- Uniform Buffer Object 统一缓冲区对象
2 ECS 架构
- Entity Component System。
Mesh + Material + shader 组成一个 component。
多个 component 组成一个 Entity 。
3 示例一
绘画一个3D的红苹果
3.1 创建Entity
- A mesh component, holding the vertices of your apple
mesh 组件,确定苹果的轮廓 - A material component,applying a texture on the mesh or coloring it
材料组件,在网格上应用纹理或为其着色
这两个组件组成定义了苹果的Entity,这便是ECS定义的两个部分。

3.2 Apple.qml文件基本结构
import Qt3D.Core 2.12
import Qt3D.Render 2.12
import Qt3D.Extras 2.12Entity {property alias position: transform.translationPhongMaterial {id: materialdiffuse: "red"}SphereMesh {id: mesh}Transform {id: transform}components: [material, mesh, transform]
}
Entity: 文件的根对象
PhongMaterial:定义材质
SphereMesh: 定义mesh的类型
Transform:定义了组件变换矩阵,变换、缩放、Entity元素位置
position:这是为派生类或者父类提供 transform.translation的属性,方便对模型移动操作
components:这是Entity元素包含的所有component控件ID的数组
3.3 成为别的Entity的子类
World.qml
import Qt3D.Core 2.12
import Qt3D.Render 2.12
import Qt3D.Extras 2.12Entity {id:sceneRootRenderSettings {id: renderSettingsactiveFrameGraph: ForwardRenderer {clearColor: Qt.rgba(0, 0, 0, 1)}}Apple {id: appleposition: Qt.vector3d(3.0, 0.0, 2.0)}components: [frameGraph]
}
3.4 Qt3D处理为Item
Qt3D 类没有继承Item,所以不能直接和QML控件使用。可以使用Scene3D,成为Item。
Rectangle {Scene3D {id: sceneanchors.fill: parentfocus: trueworld {}}
}
4 示例二
4.1 定义场景
- 初步定义场景
定义场景root,文件GameArea.qml
import Qt3D.Core 2.12
import Qt3D.Render 2.12
import Qt3D.Extras 2.12Entity {property alias gameRoot: rootid:rootCamera {property real x: 24.5property real y: 14.0id: cameraprojectionType: CameraLens.PerspectiveProjectionfieldOfView: 45aspectRatio: 16/9nearPlane: 0.1farPlane: 0.1position: Qt.vector3d(x, y, 33.0)upVector: Qt.vector3d(0.0, 1.0, 0.0)viewCenter: Qt.vector3d(x, y, 0.0)}RenderSettings {id: frameFraphactiveFrameGraph: ForwardRender {clearColor: Qt.rgba(0, 0, 0, 1)camera: camera}}components: [frameFraph]
}

position: Qt.vector3d(x, y, 33.0)
相机的位置
在相对于父实体的坐标中保持摄影机的当前位置
upVector: Qt.vector3d(0.0, 1.0, 0.0)
相机的朝向
将相机的当前上矢量保持在相对于父实体的坐标中。
viewCenter: Qt.vector3d(x, y, 0.0)
此向量描述了从摄影机(位置)到目标(viewCenter)的位移
clearColor: Qt.rgba(0, 0, 0, 1)
背景颜色为黑色
camera: camera
决定视野所见
- 添加用户输入
准备渲染场景时,需要处理用户输入(键盘)捕捉键盘事件,修改GameArea.qml如下
import Qt3D.Core 2.12
import Qt3D.Render 2.12
import Qt3D.Input 2.12
import Qt3D.Extras 2.12
import QtQuick 2.12Entity {property alias gameRoot: rootproperty alias timerInterval: timer.intervalproperty int initialTimeInterval: 80property int initialSnakeSize: 5property string state: ""id:rootCamera {property real x: 24.5property real y: 14.0id: cameraprojectionType: CameraLens.PerspectiveProjectionfieldOfView: 45aspectRatio: 16/9nearPlane: 0.1farPlane: 0.1position: Qt.vector3d(x, y, 33.0)upVector: Qt.vector3d(0.0, 1.0, 0.0)viewCenter: Qt.vector3d(x, y, 0.0)}RenderSettings {id: frameFraphactiveFrameGraph: ForwardRender {clearColor: Qt.rgba(0, 0, 0, 1)camera: camera}}KeyboardDevice {id: keyboardController}InputSettings { id: inputSettings }KeyboardHandler {id: inputsourceDevice: keyboardControllerfocus: trueonPressed: { }}Component.onCompleted: {console.log("start game ...")timer.start()}Timer {id: timerinterval: initialTimeIntervalrepeat: trueonTriggered: { }}components: [frameFraph, input]
}interval: initialTimeInterval
定时器80ms响应一次,调用update()
5 知识点
5.1 Qt3D模块的继承树
Qt3D 类没有继承Item,所以不能直接和QML控件使用。可以使用Scene3D,成为Item。

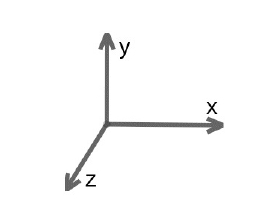
5.2 笛卡尔坐标系
OpenGL中采用右手坐标系
- 左手定则如图
- 右手定则如图

参考
1、笛卡尔坐标系左手坐标系与右手坐标系
2、《Mastering Qt 5》[2nd]
3、Camera QML Type
这篇关于Qt 5.12--《Mastering Qt 5》介绍Qt3D的文章就介绍到这儿,希望我们推荐的文章对编程师们有所帮助!


