本文主要是介绍保姆级手把手记录Android studio BottomNavigationView +FrameLayout暴力切换Fragment,希望对大家解决编程问题提供一定的参考价值,需要的开发者们随着小编来一起学习吧!
开发环境:
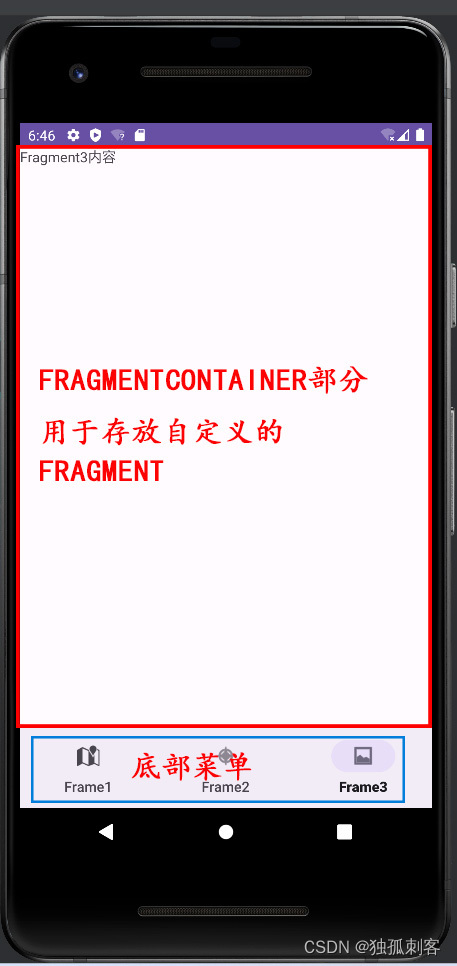
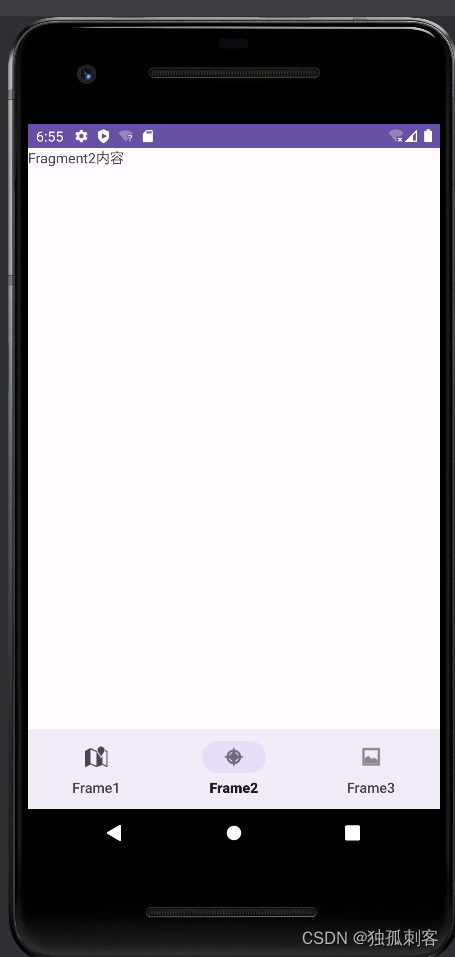
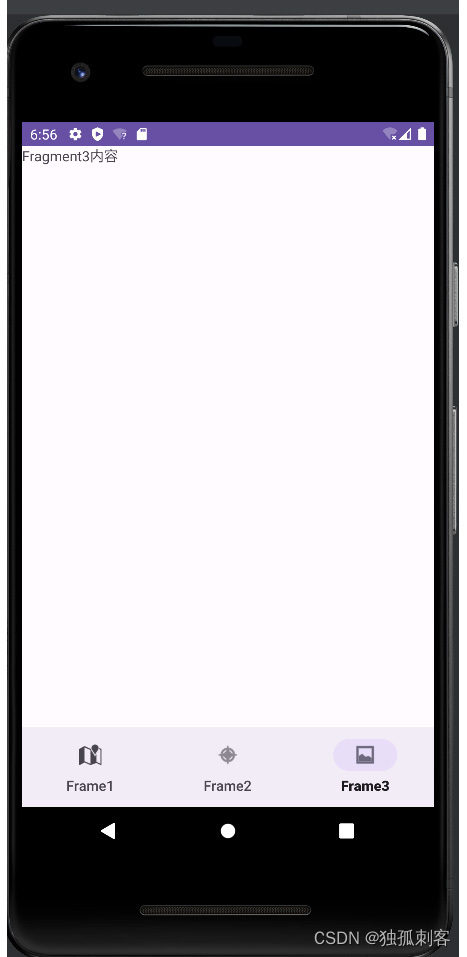
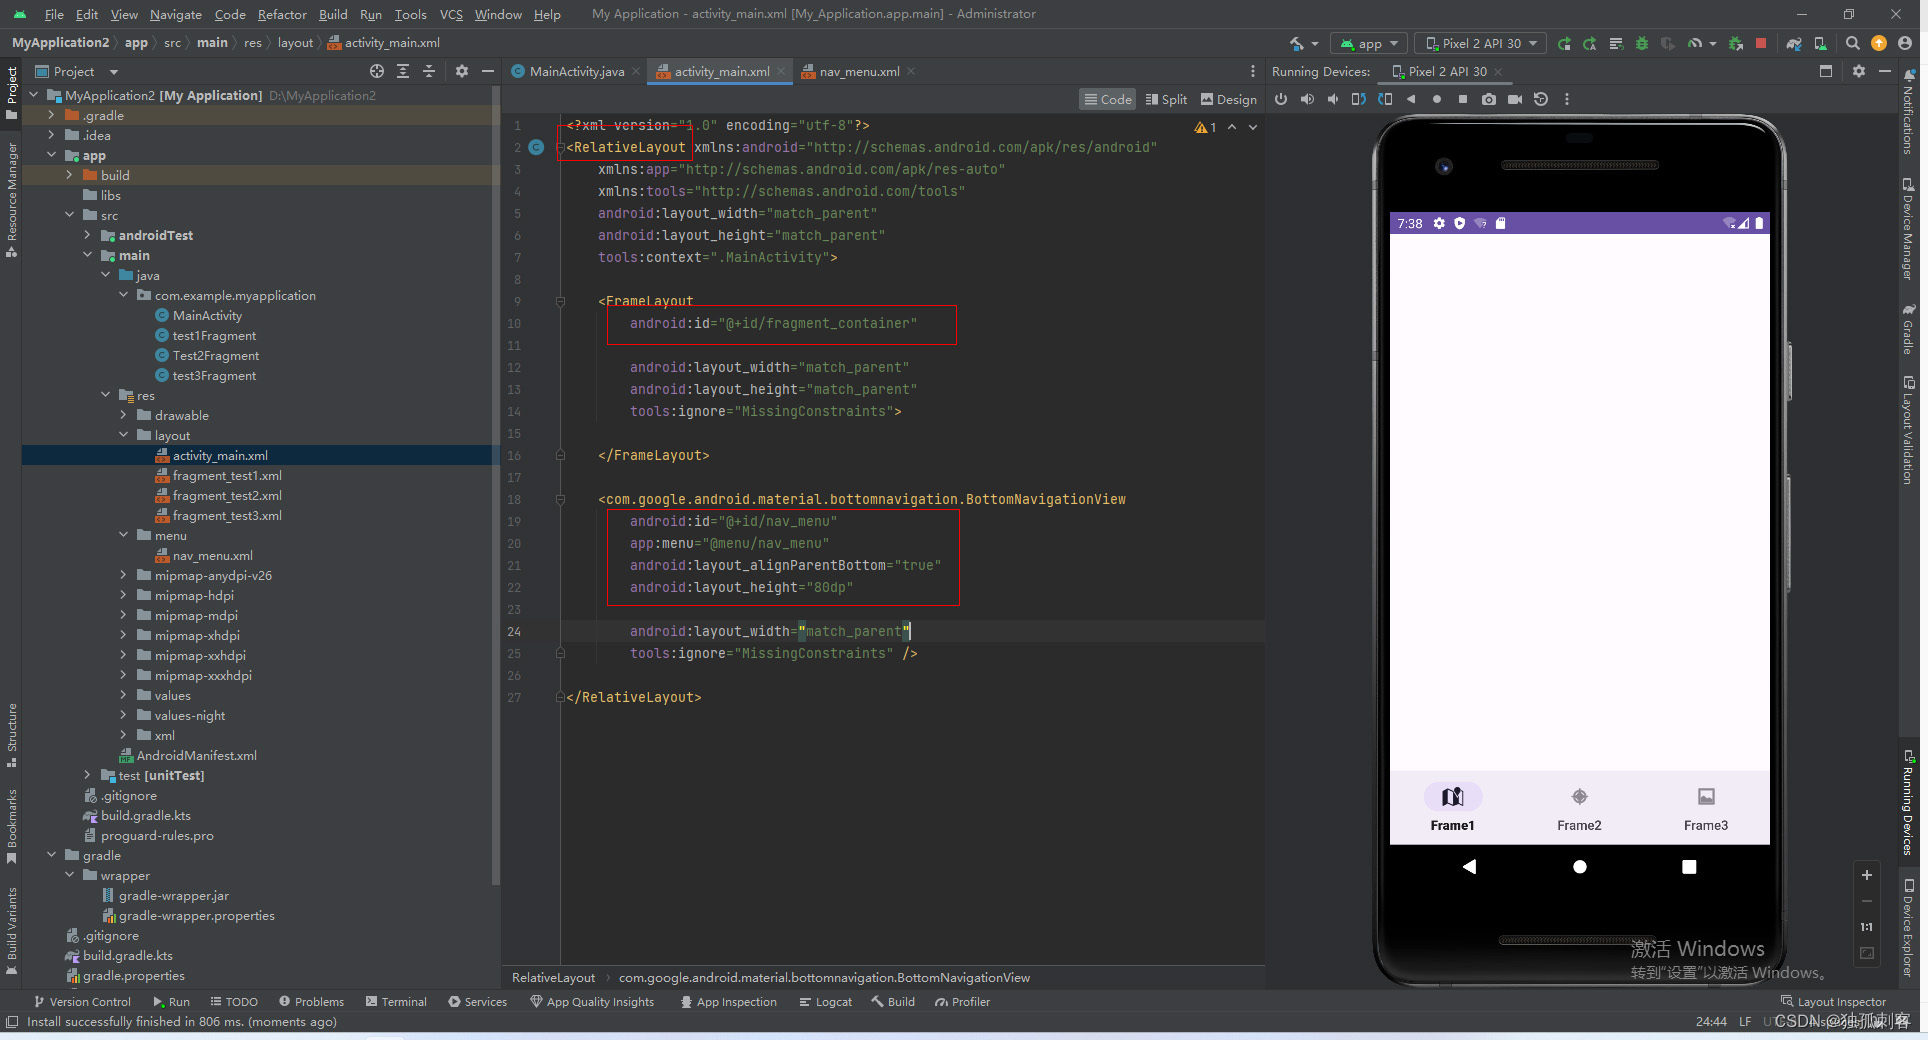
效果图:

《《《代码在底部》》》
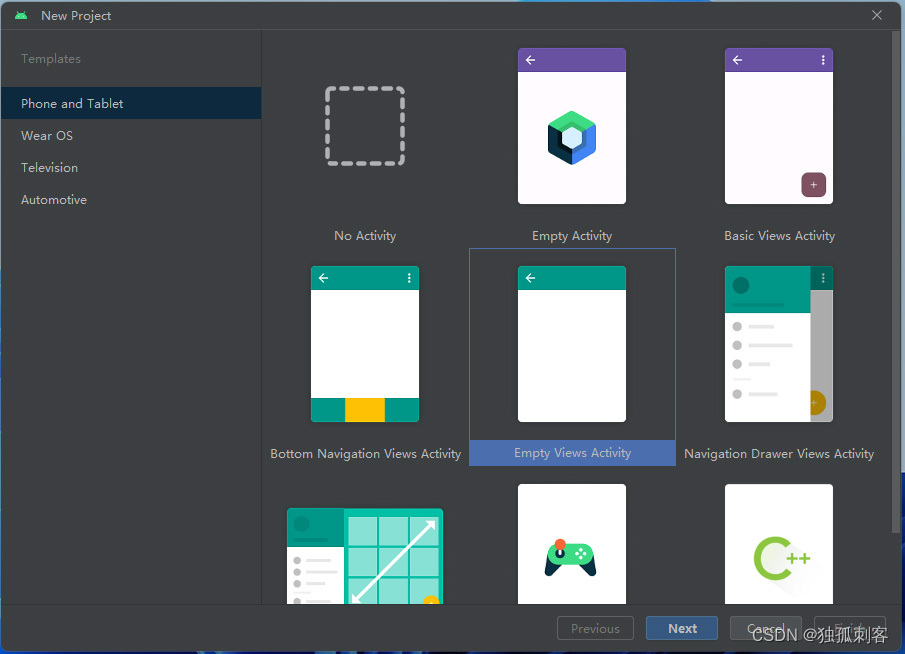
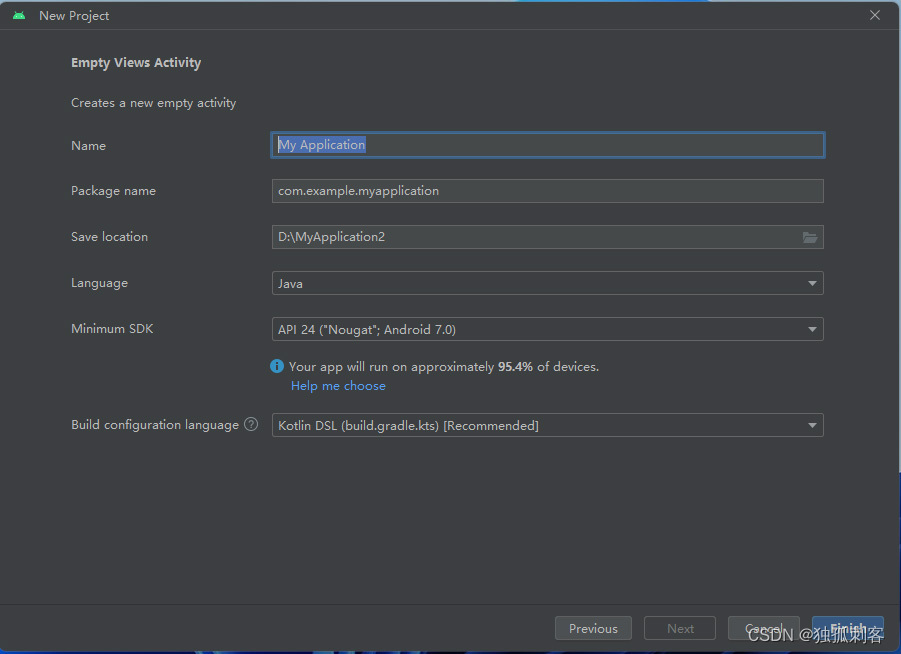
1,新建项目
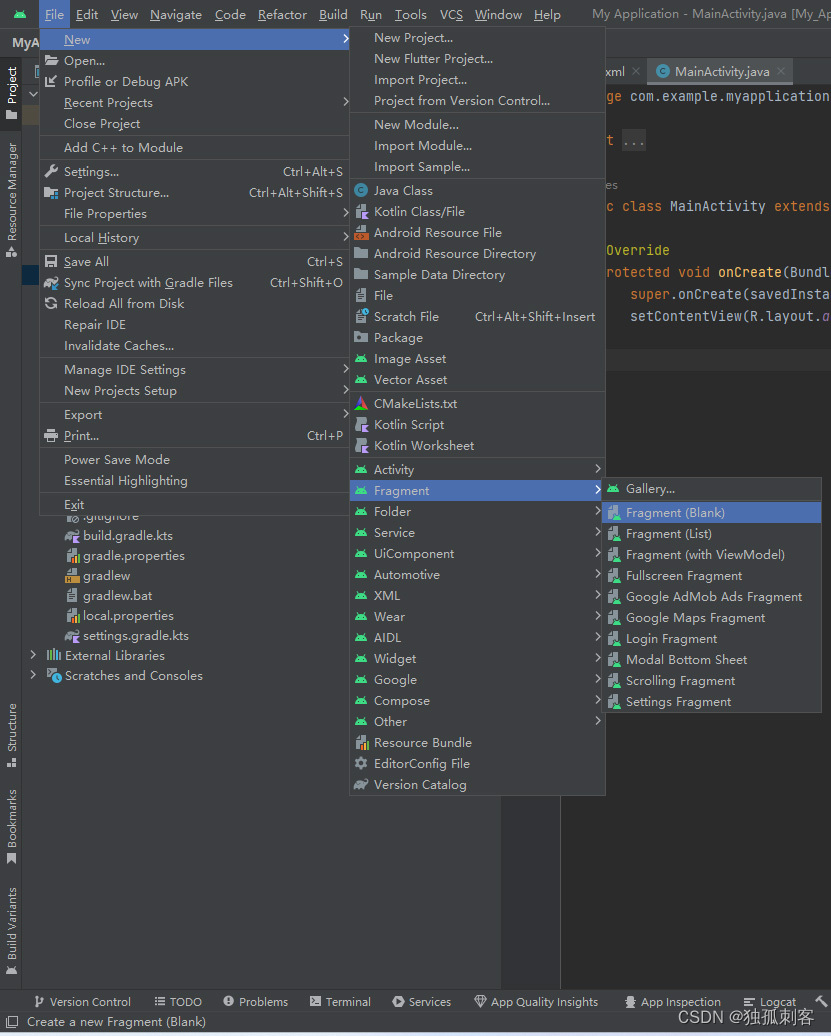
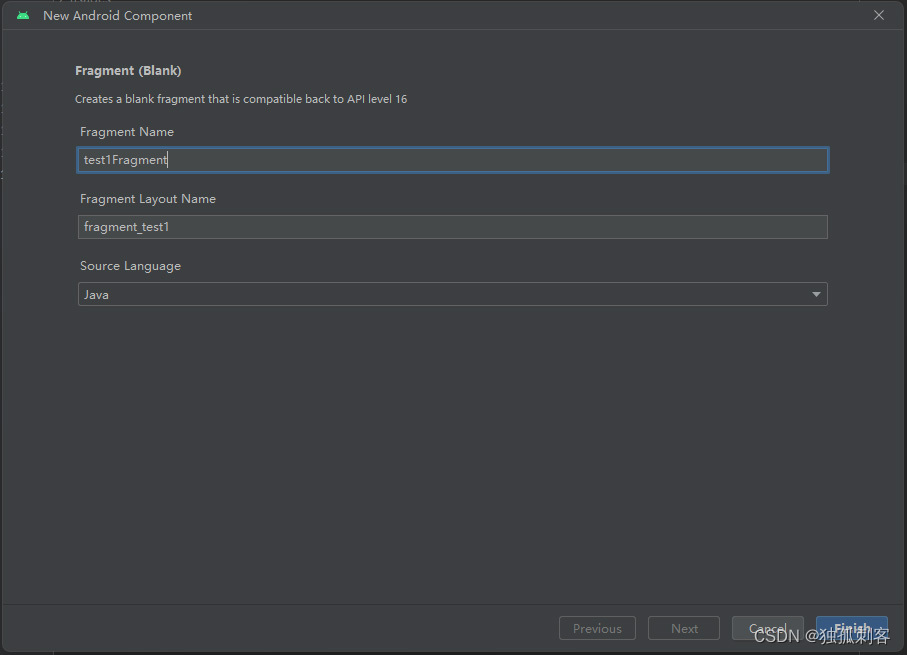
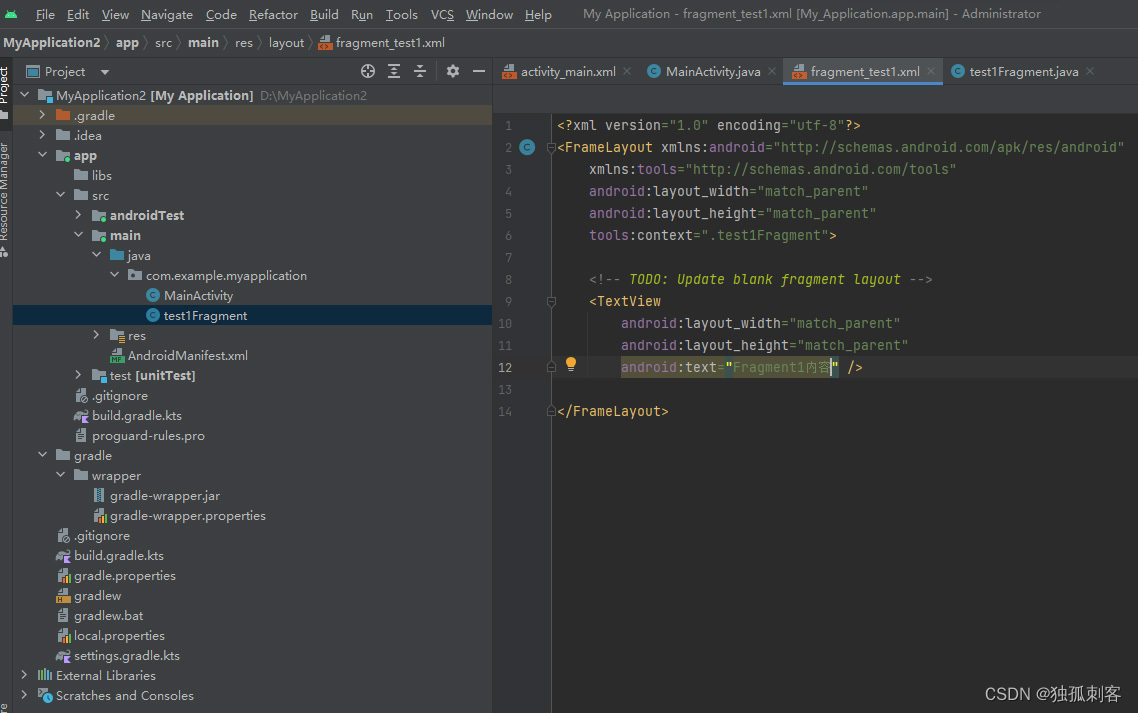
2,新建若干Fragment,内容一样,改一下显示出来的Text,名字分别为test1Fragment,test2Fragment,test3Fragment,默认TextView的Text属性分别设置为Fragment1内容,Fragment2内容,Fragment3内容,以示区分
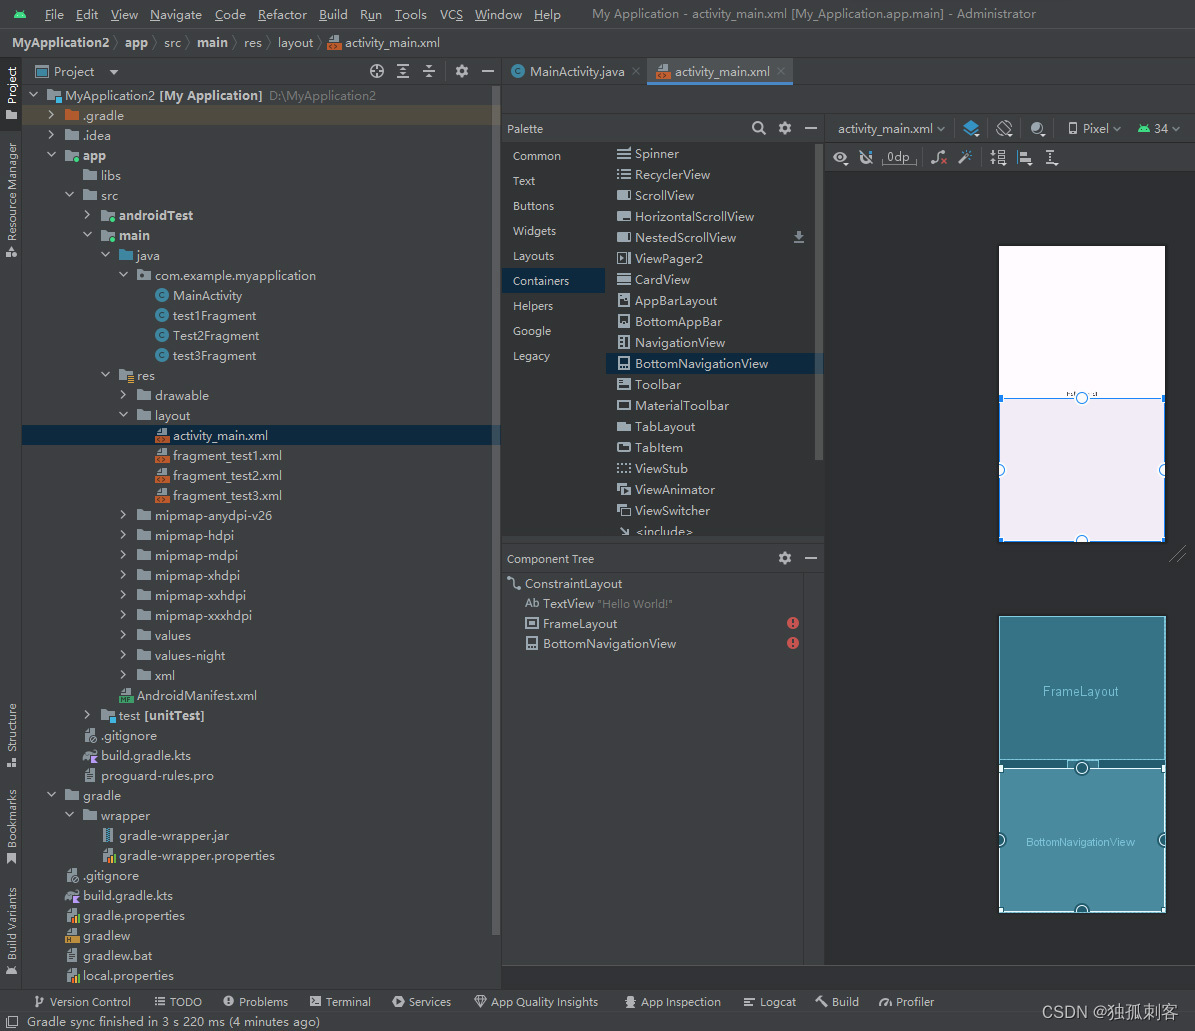
3,拖拽一个FrameLayout

4,拖拽一个BottomNavigationView
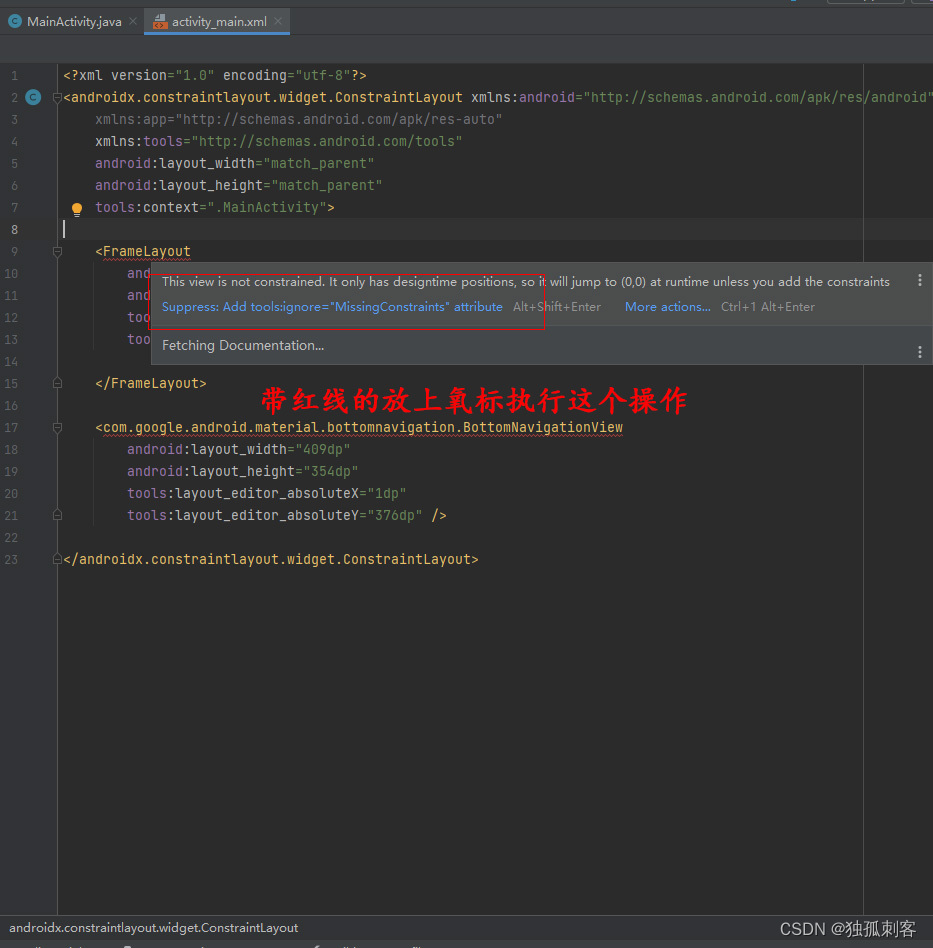
5,调整代码
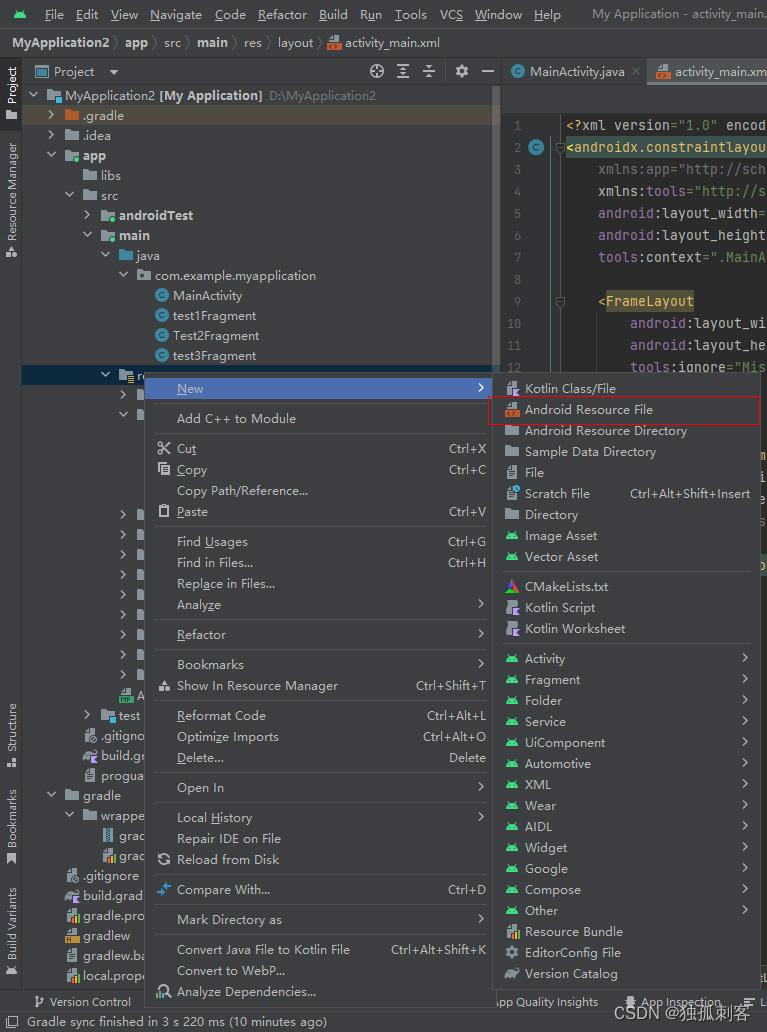
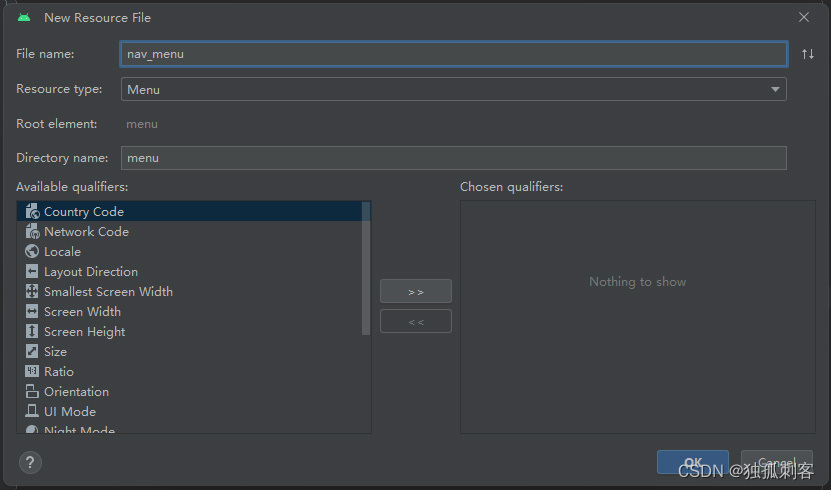
6,新建一个菜单资源给BottomNavigationView使用
7,BottomNavigationView和新建的菜单项关联
8,进一步调整代码
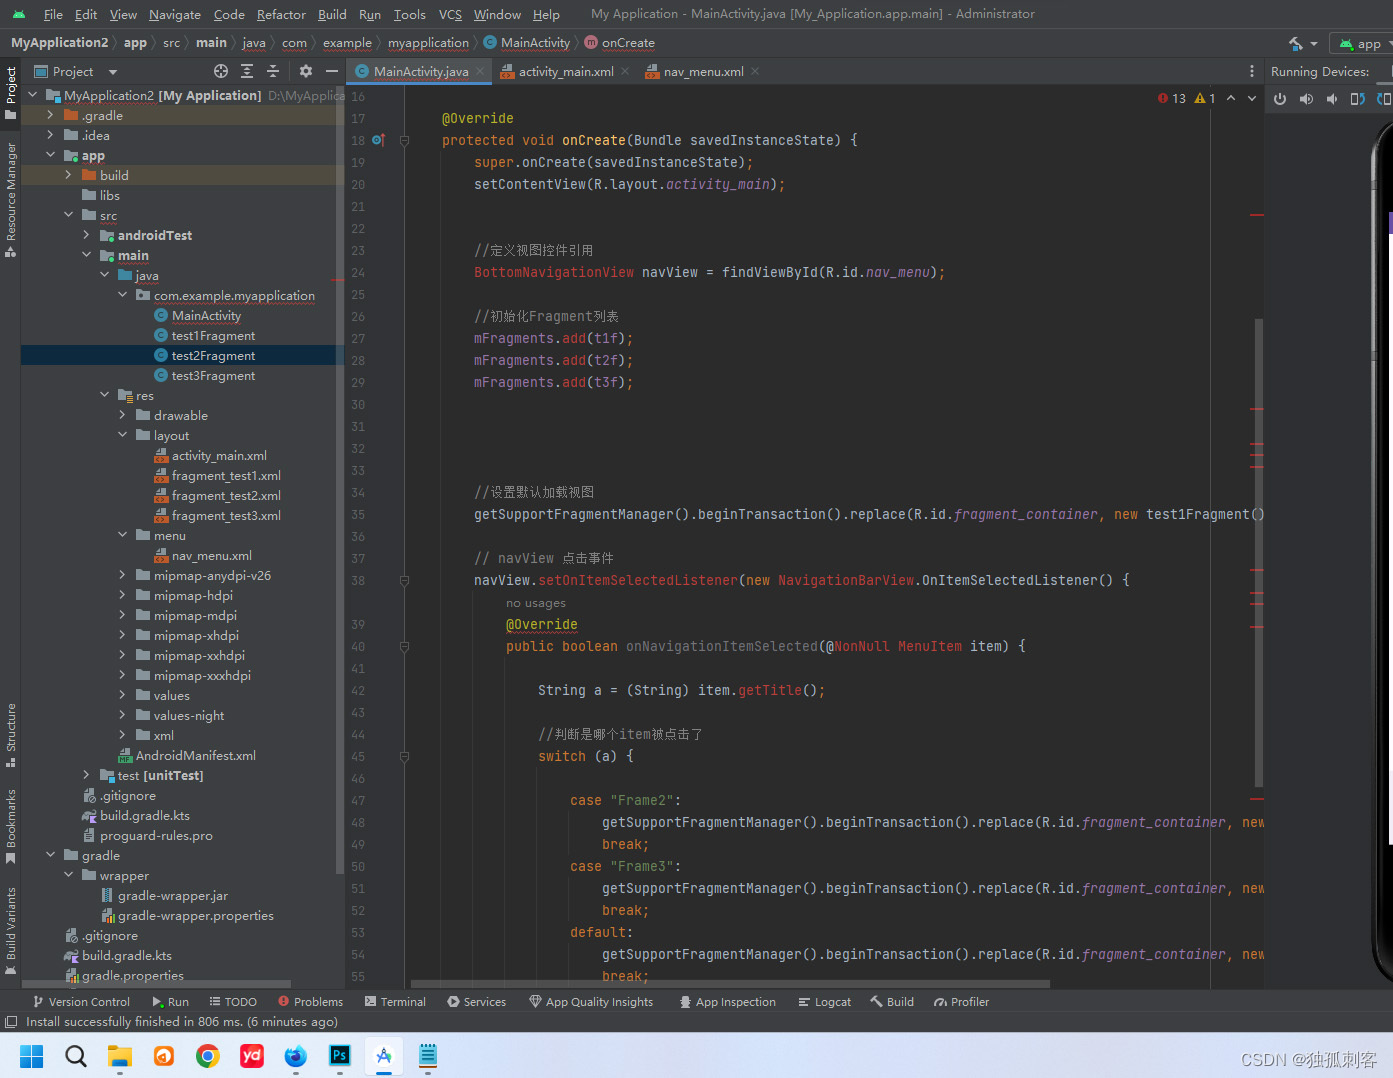
9,MainActivity中的代码
10,红色部分导入类即可解决

代码如下:
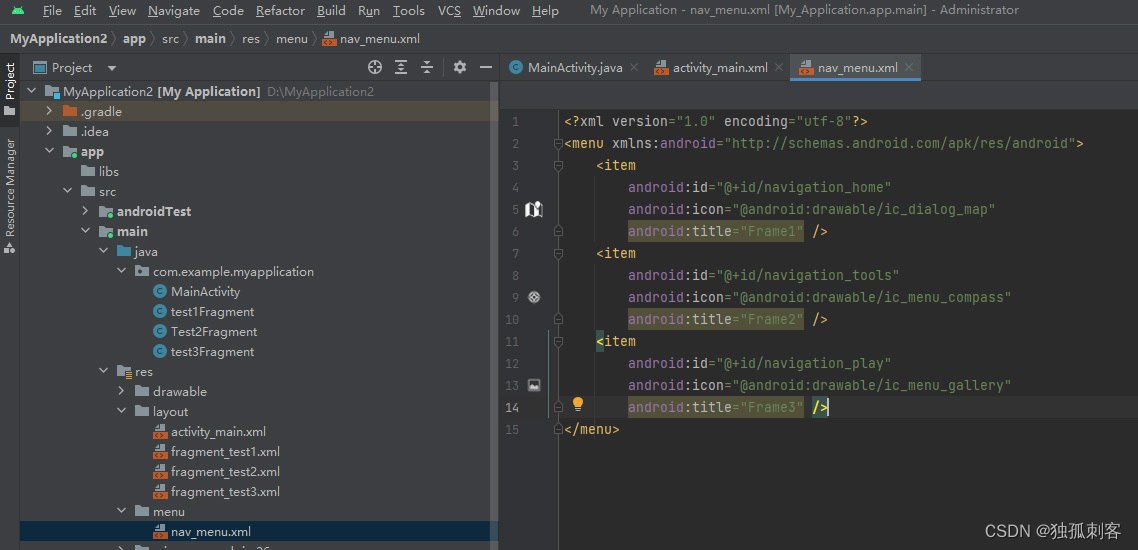
1,nav_menu.xml
<?xml version="1.0" encoding="utf-8"?>
<menu xmlns:android="http://schemas.android.com/apk/res/android"><itemandroid:id="@+id/navigation_home"android:icon="@android:drawable/ic_dialog_map"android:title="Frame1" /><itemandroid:id="@+id/navigation_tools"android:icon="@android:drawable/ic_menu_compass"android:title="Frame2" /><itemandroid:id="@+id/navigation_play"android:icon="@android:drawable/ic_menu_gallery"android:title="Frame3" />
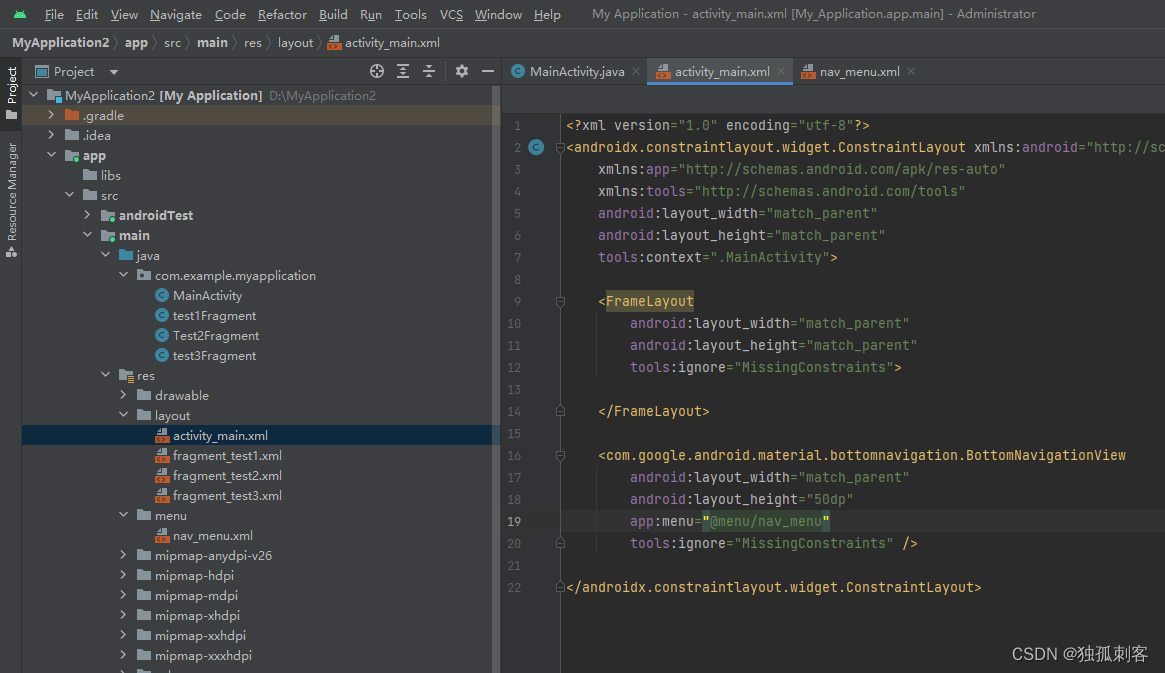
</menu>2,activity_main.xml
<?xml version="1.0" encoding="utf-8"?>
<RelativeLayout xmlns:android="http://schemas.android.com/apk/res/android"xmlns:app="http://schemas.android.com/apk/res-auto"xmlns:tools="http://schemas.android.com/tools"android:layout_width="match_parent"android:layout_height="match_parent"tools:context=".MainActivity"tools:ignore="ExtraText"><FrameLayoutandroid:id="@+id/fragment_container"android:layout_width="match_parent"android:layout_height="match_parent"android:layout_above="@id/nav_menu"/><com.google.android.material.bottomnavigation.BottomNavigationViewandroid:id="@+id/nav_menu"android:layout_width="match_parent"android:layout_height="wrap_content"android:layout_alignParentBottom="true"app:menu="@menu/nav_menu"tools:layout_height="50dp" /></RelativeLayout>
3,fragment_test1.xml
<?xml version="1.0" encoding="utf-8"?>
<FrameLayout xmlns:android="http://schemas.android.com/apk/res/android"xmlns:tools="http://schemas.android.com/tools"android:layout_width="match_parent"android:layout_height="match_parent"tools:context=".test1Fragment"><!-- TODO: Update blank fragment layout --><TextViewandroid:id="@+id/text1Fragment"android:layout_width="match_parent"android:layout_height="match_parent"android:text="Fragment1内容" /></FrameLayout>
4,MainActivity.java
package com.example.bottomnavigationviewstudy;import androidx.annotation.NonNull;
import androidx.appcompat.app.AppCompatActivity;
import androidx.fragment.app.Fragment;import android.os.Bundle;
import android.view.MenuItem;import com.google.android.material.bottomnavigation.BottomNavigationView;
import com.google.android.material.navigation.NavigationBarView;import java.util.ArrayList;public class MainActivity extends AppCompatActivity {ArrayList<Fragment> mFragments = new ArrayList<Fragment>();test1Fragment t1f = new test1Fragment();test2Fragment t2f = new test2Fragment();test3Fragment t3f = new test3Fragment();@Overrideprotected void onCreate(Bundle savedInstanceState) {super.onCreate(savedInstanceState);setContentView(R.layout.activity_main);BottomNavigationView navView = findViewById(R.id.nav_menu);mFragments.add(t1f);mFragments.add(t2f);mFragments.add(t3f);//设置默认加载视图getSupportFragmentManager().beginTransaction().replace(R.id.fragment_container, new test1Fragment()).commit();// navView 点击事件navView.setOnItemSelectedListener(new NavigationBarView.OnItemSelectedListener() {@Overridepublic boolean onNavigationItemSelected(@NonNull MenuItem item) {String a = (String) item.getTitle();//判断是哪个item被点击了switch (a) {case "Frame2":getSupportFragmentManager().beginTransaction().replace(R.id.fragment_container, new test2Fragment()).commit();break;case "Frame3":getSupportFragmentManager().beginTransaction().replace(R.id.fragment_container, new test3Fragment()).commit();break;default:getSupportFragmentManager().beginTransaction().replace(R.id.fragment_container, new test1Fragment()).commit();break;}item.setChecked(true);return true;}});}
}
这篇关于保姆级手把手记录Android studio BottomNavigationView +FrameLayout暴力切换Fragment的文章就介绍到这儿,希望我们推荐的文章对编程师们有所帮助!


