本文主要是介绍VScode搭建OpenCV环境(使用CMake和MinGW-w64),希望对大家解决编程问题提供一定的参考价值,需要的开发者们随着小编来一起学习吧!
VScode搭建OpenCV环境(使用CMake和MinGW-w64)
- 软件环境
- MinGW-w64安装与配置
- CMake安装与配置
- 使用 CMake 生成 OpenCV 的 Makefile
- 编译 OpenCV
- VScode配置
- 参考链接
用vscode来写opencv代码需要自己编译OpenCV,主要用到MinGW-w64和CMake工具。
软件环境
- Windows-10-64bit
- MinGW-x86_64-8.1.0-release-posix-seh-rt_v6-rev0
- CMake-3.19.3
- OpenCV-4.5.0
- VScode-x64-1.52.1
MinGW-w64安装与配置
MinGW-w64离线包下载地址:https://sourceforge.net/projects/mingw-w64/files/

下载后解压到自选路径:

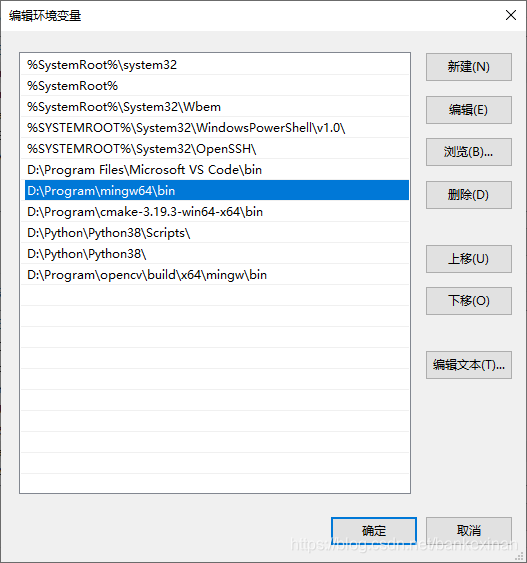
添加环境变量:
(右键“此电脑”->属性->高级系统设置->环境变量->编辑Path)
(如:D:\Program\mingw64\bin)
检查是否添加成功:
(win+r运行cmd->输入“gcc --version")

CMake安装与配置
CMake下载地址:https://cmake.org/download/
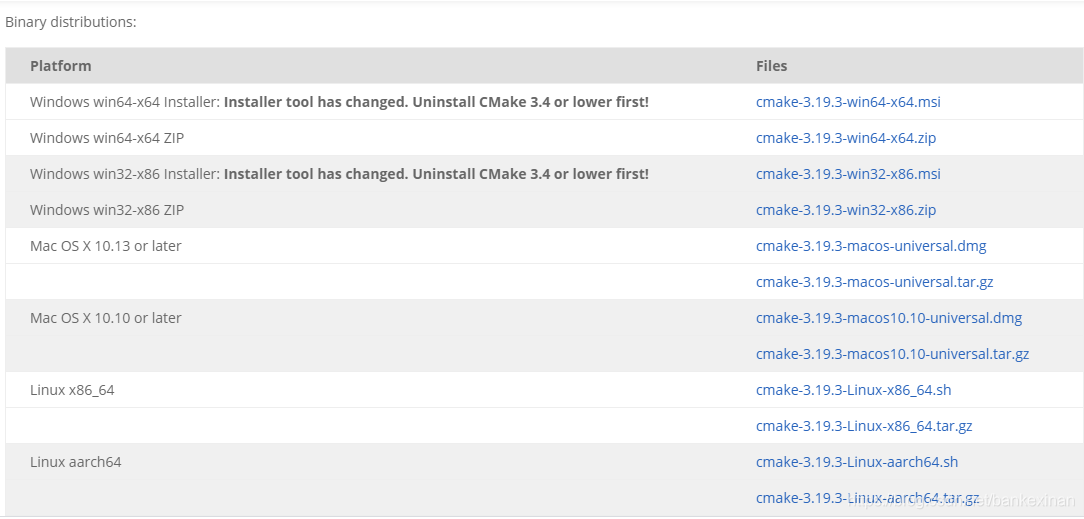
要选择二进制文件,即Binary distributions栏目。下载完后解压到自选路径。

添加环境变量:
(如:D:\Program Files\cmake-3.19.3-win64-x64\bin)

检查是否添加成功:

使用 CMake 生成 OpenCV 的 Makefile
注意事项:
- 因为cmake-gui会下载一些文件,这些文件都在raw.githubusercontent.com上,如果不修改一下hosts,许多文件很可能会下载失败。所以在操作cmake-gui前,如果没有翻过墙的话,要先在C:\Windows\System32\drivers\etc\hosts文件最后追加:151.101.72.133 raw.githubusercontent.com
- 使用 cmake 时要求安装 python3(版本没有限制,比2高就行),并且python 必须配好了环境变量。
- 放置opencv、MinGW这些文件夹时,路径一定不要有空格!!!要是加入了空格,在待会执行minGW32-make.exe时,就会产生文件读取路径找不到的问题。我原来把opencv这些文件夹放在了program files这个文件夹下,结果后面程序读取路径时居然没读到“program”,只读到“ files”,文件路径不完整,出错终止。
新建一个mingw文件夹:

运行cmake-gui.exe,设置源码和生成路径:
- Where is the source code: D:/Program/opencv/sources
- Where to build the binaries: D:/Program/opencv/build/x64/mingw

点击Configure,弹出窗口配置如下:

下拉框选MinGW。之后点击Next,选择MinGW文件中编译工具如下,最后点击Finish。

执行过程中消息框会出现一堆红色信息,最后显示Configure done,是正常的。
注意事项:
- 在列表项中找到ENABLE_CXX11这一项,对其Value值进行勾选。在最新版本情况下大概率是没有的,此时需要我们自行添加这一项,点击“Add Entry”按钮,在Name一栏中输入ENABLE_CXX11,并在Value一栏中点击勾选,后单击“OK”按钮。此时可在列表栏第一项中找到自行添加的表项。

2. 在列表项中找到OPENCV_ENABLE_ALLOCATOR_STATS这一项,将Value值取消勾选。

再次点击Configure,直到输出窗口看到 Configuring done。之后点击Generate 等待进度条读完,出现 Generating done。

编译 OpenCV
打开终端进行编译:
- cd /d D:\Program\opencv\build\x64\mingw
- minGW32-make
执行minGW32-make命令,过程很慢,可使用多线程minGW32-make -j 4 命令,根据自己机器情况开几个线程。

编译OpenCV的过程中可能会出现错误,如:MinGW编译OpenCV到vs_version.rc.obj处出现如下错误:

出错原因:可能是文件路径中有空格(Program Files)。
解决办法:1、加双引号(如:“D:\Program Files\mingw64\bin\windres.exe”)。2、从开始安装解压时就将opencv、mingw64等文件夹放到没有空格的路径位置(如:D:\Program\mingw64)。
编译完成之后,输入 minGW32-make install 来完成装载。
- minGW32-make install

最后,配置环境变量 path:
- D:\Program\opencv\build\x64\mingw\bin
VScode配置
- launch.json
{// 使用 IntelliSense 了解相关属性。 // 悬停以查看现有属性的描述。// 欲了解更多信息,请访问: https://go.microsoft.com/fwlink/?linkid=830387"version": "0.2.0","configurations": [{"name": "(gdb) Launch","type": "cppdbg","request": "launch",//"program": "${fileDirname}\\${fileBasenameNoExtension}.exe","program": "${fileDirname}\\${fileBasenameNoExtension}.o","args": [],"stopAtEntry": false,"cwd": "${workspaceFolder}","environment": [],"externalConsole": true,"MIMode": "gdb","miDebuggerPath": "D:\\Program\\mingw64\\bin\\gdb.exe","setupCommands": [{"description": "为 gdb 启用整齐打印","text": "-enable-pretty-printing","ignoreFailures": true}],"preLaunchTask": "g++"}]
}
- c_cpp_properties.json
{"configurations": [{"name": "win","includePath": ["${workspaceFolder}/**","D:/Program/opencv/build/x64/mingw/install/include","D:/Program/opencv/build/x64/mingw/install/include/opencv2"               ],"defines": [],"compilerPath": "D:/Program/mingw64/bin/gdb.exe","cStandard": "c11","cppStandard": "c++17","intelliSenseMode": "clang-x64"}],"version": 4
}
- tasks.json
{"version": "2.0.0","command": "g++","args": ["-g", "-std=c++11", "${file}", "-o", "${fileDirname}/${fileBasenameNoExtension}.o",//"${fileDirname}/${fileBasenameNoExtension}.exe", "-I", "D:/Program/opencv/build/x64/mingw/install/include","-I", "D:/Program/opencv/build/x64/mingw/install/include/opencv2","-L", "D:/Program/opencv/build/x64/mingw/install/x64/mingw/lib","-l", "libopencv_calib3d450","-l", "libopencv_core450","-l", "libopencv_dnn450","-l", "libopencv_features2d450","-l", "libopencv_flann450","-l", "libopencv_gapi450","-l", "libopencv_highgui450","-l", "libopencv_imgcodecs450","-l", "libopencv_imgproc450","-l", "libopencv_ml450","-l", "libopencv_objdetect450","-l", "libopencv_photo450","-l", "libopencv_stitching450","-l", "libopencv_video450","-l", "libopencv_videoio450"],// 编译命令参数"problemMatcher":{"owner": "cpp","fileLocation":["relative","${workspaceFolder}"],"pattern":[{"regexp": "^([^\\\\s].*)\\\\((\\\\d+,\\\\d+)\\\\):\\\\s*(.*)$","file": 1,"location": 2,"message": 3}]},"group": {"kind": "build","isDefault": true}}
参考链接
- 再整理:Visual Studio Code(vscode)下的基于C++的OpenCV的最新搭建攻略解析
- 【OpenCV】VScode下的OpenCV配置
- VScode搭建OpenCV环境
- OpenCV使用CMake和MinGW-w64的编译安装
- VSCode安装OpenCV(C++,window10)
- 学习OpenCV3:MinGW编译OpenCV到vs_version.rc.obj处出错
这篇关于VScode搭建OpenCV环境(使用CMake和MinGW-w64)的文章就介绍到这儿,希望我们推荐的文章对编程师们有所帮助!


