本文主要是介绍Introduction to Deep Learning with PyTorch,希望对大家解决编程问题提供一定的参考价值,需要的开发者们随着小编来一起学习吧!
1、Introduction to PyTorch, a Deep Learning Library
1.1、Importing PyTorch and related packages
import torch# supports:
## image data with torchvision
## audio data with torchaudio
## text data with torchtext
1.2、Tensors: the building blocks of networks in PyTorch
1.2.1、Load from list
import torchlst = [[1,2,3], [4,5,6]]
tensor = torch.tensor(lst)
1.2.2、Load from NumPy array
np_array = np.array(array)
np_tensor = torch.from_numpy(np_array)
1.3、Creating our first neural network
1.3.1、A basic, two-layer network with no hidden layers
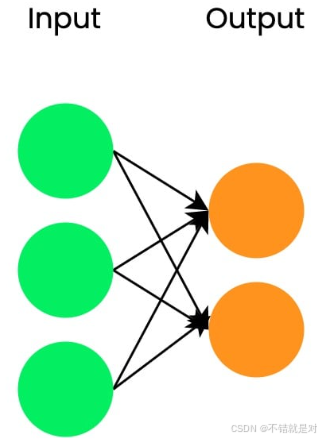
import torch.nn as nn# Create input_tensor with three features
input_tensor = torch.tensor([0.3471, 0.4547, -0.2356])# Define our first linear layer
linear_layer = nn.Linear(in_features=3, out_features=2# Pass input through linear layer
output = linear_layer(input_tensor)# Show the output
print(output)# Each linear layer has a .weight and .bias property
linear_layer.weight
linear_layer.bias- Networks with only linear layers are called fully connected networks.
1.3.2、Stacking layers with nn.Sequential()
# Create network with three linear layers
model = nn.Sequential(nn.Linear(10,18),nn.Linear(18,20),nn.Linear(20, 5),
)
1.4、Discovering activation functions
- Activation functions add non-linearity to the network.
- A model can learn more complex relationships with non-linearity.
- Two-class classification: Sigmoid function demo:
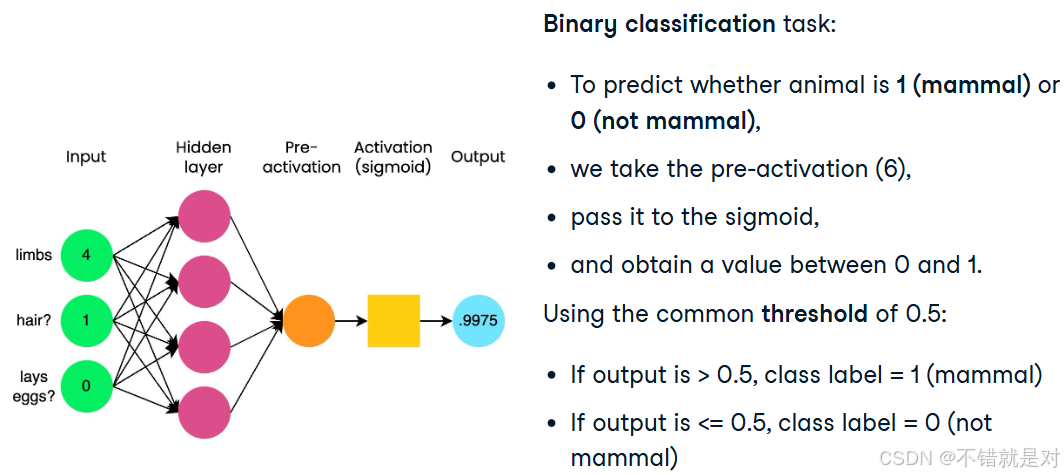
import torch import torch.nn as nninput_tensor = torch.tensor([[6.0]]) sigmoid = nn.Sigmoid() output = sigmoid(input_tensor)# tensor([[0.9975]]) - Application for Sigmoid function:
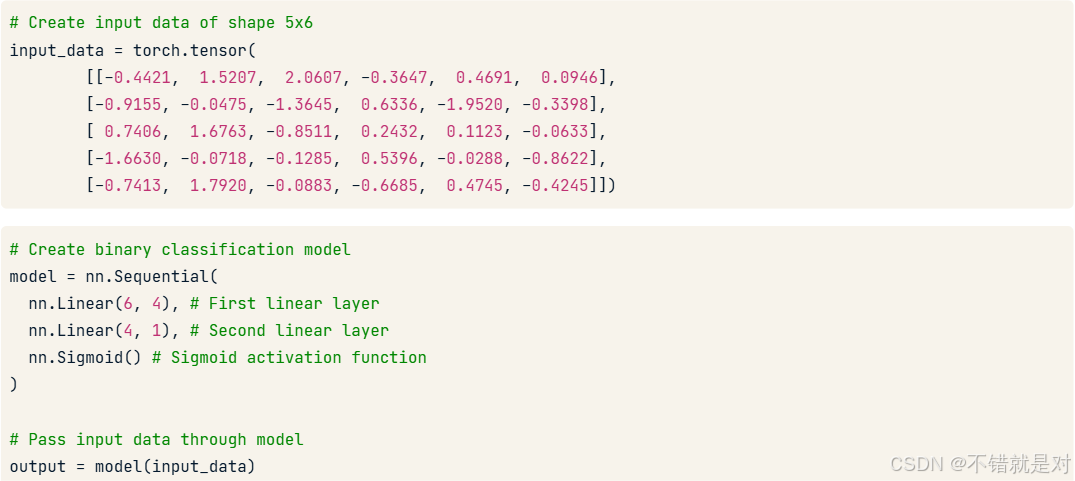
model = nn.Sequential(nn.Linear(6,4),nn.Linear(4,1),nn.Sigmoid() ) - Multi-class classification: Softmax demo:
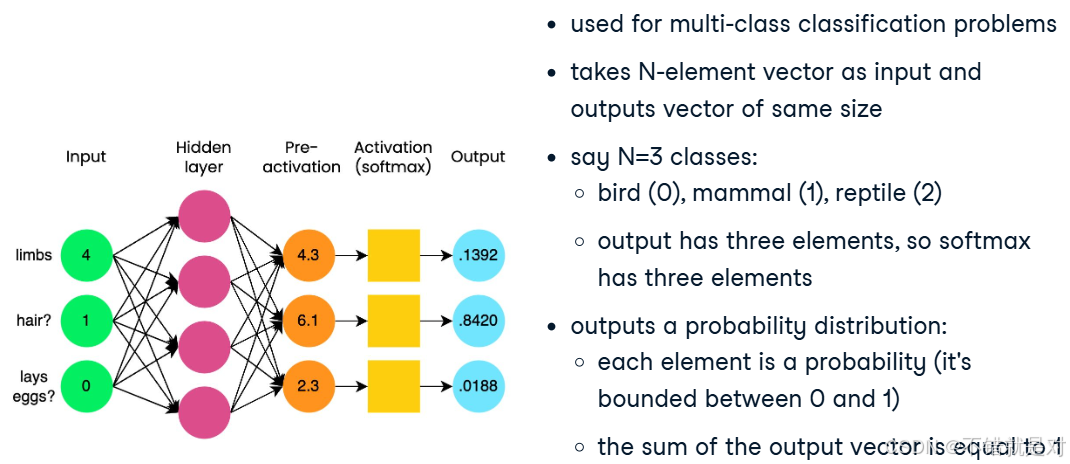
import torch
import torch.nn as nninput_tensor = torch.tensor([[4.3, 6.1, 2.3]])# dim=-1 indicates softmax is applied to the input tensor's last dimension
# nn.Softmax() can be used as last step in nn.Sequential()
probabilities = nn.Softmax(dim=-1)
output_tensor = probabilities(input_tensor)print(output_tensor)# tensor([[0.1392, 0.8420, 0.0188]])
2、Training Our First Neural Network with PyTorch
2.1、Running a forward pass
2.1.1、Forward pass
- Input data is passed forward or propagated through a network.
- Coputations performed at each layer.
- Outputs of each layer passed to each subsequent layer.
- Output of final layer: "prediction".
- Used for both training and prediction.
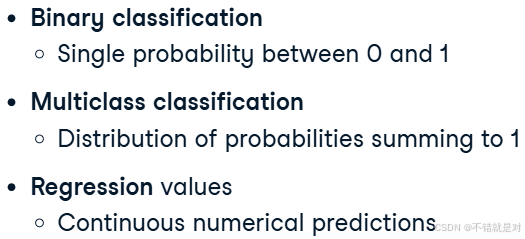
- Some possible outputs:
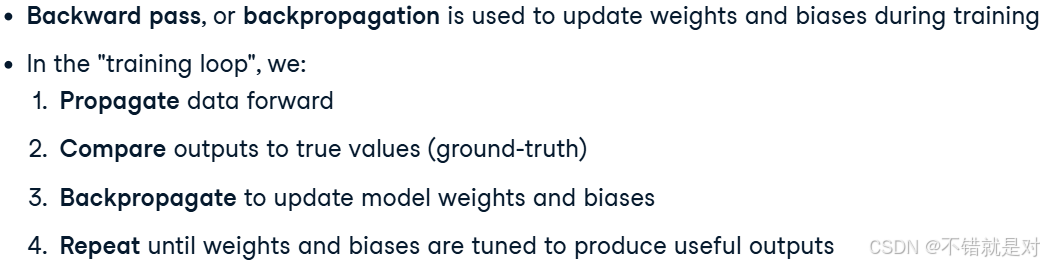
2.1.2、Backward pass
2.1.3、Binary classification: forward pass

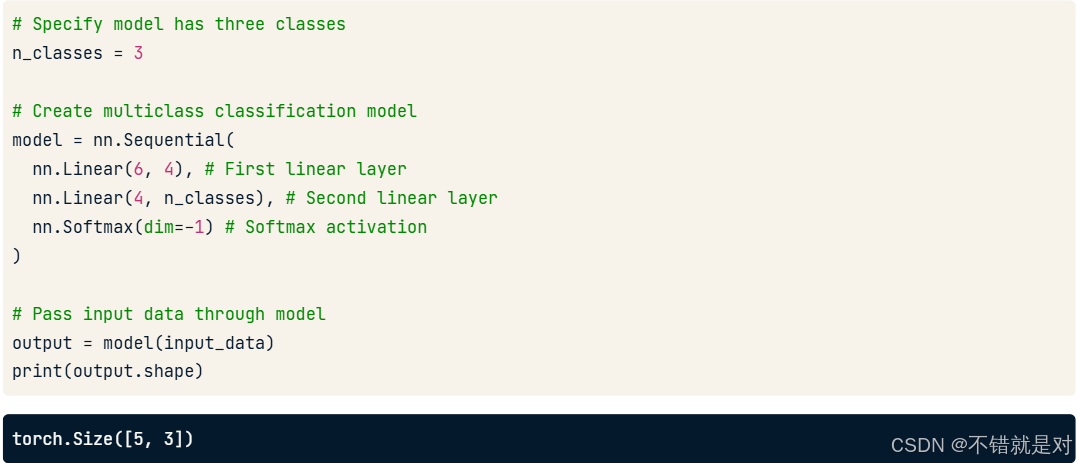
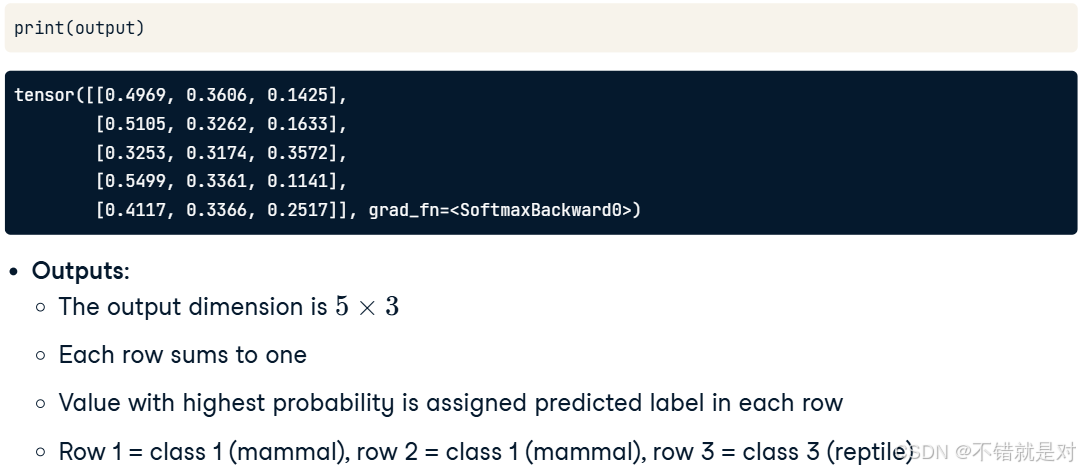
2.1.4、Multi-class classification: forward pass
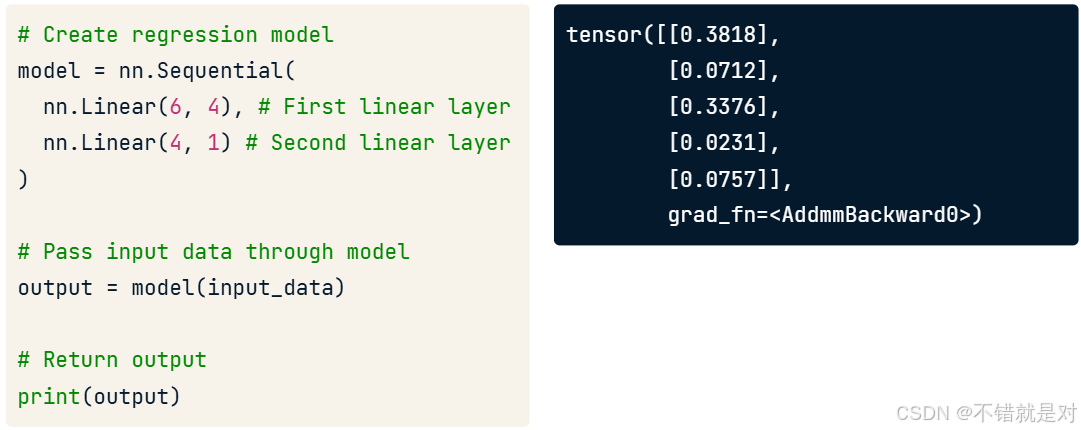
2.1.5、Regression: forward pass
2.2、Using loss functions to assess model predictions
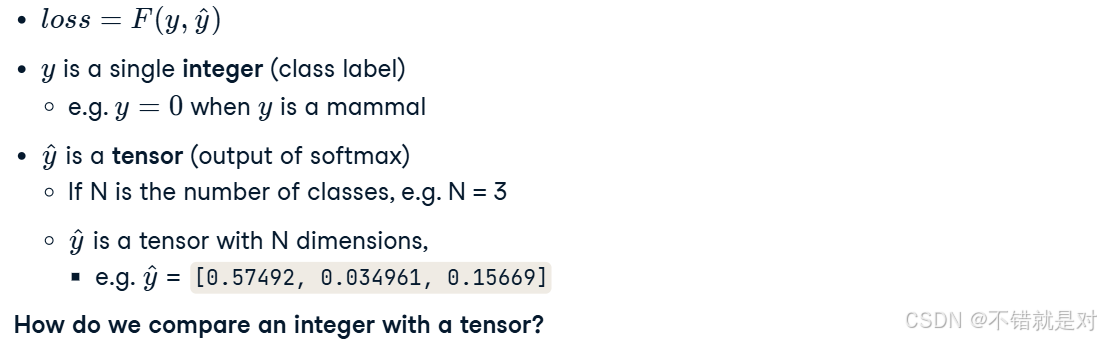
2.2.1、Why we need a loss function?
- Give feedback to model during training.
- Take in model prediction
and ground truth
.
- Output a float.

2.2.2、One-hot encoding concepts

import torch.nn.functional as FF.one_hot(torch.tensor(0), num_classes = 3)
# tensor([1,0,0]) --- first classF.one_hot(torch.tensor(1), num_classes = 3)
# tensor([0,1,0]) --- second classF.one_hot(torch.tensor(2), num_classes = 3)
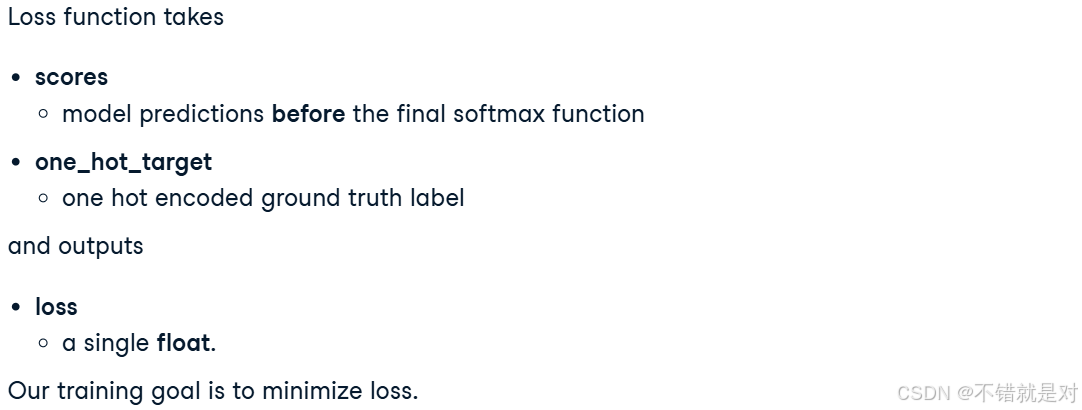
# tensor([0,0,1]) --- third class2.2.3、Cross entropy loss in PyTorch
from torch.nn import CrossEntropyLossscores = tensor([[-0.1211, 0.1059]])
one_hot_target = tensor([[1, 0]])criterion = CrossEntropyLoss()
criterion(scores.double(), one_hot_target.double())
# tensor(0.8131, dtype=torch.float64)
2.2.4、Bringing it all together
2.3、Using derivatives to update model parameters
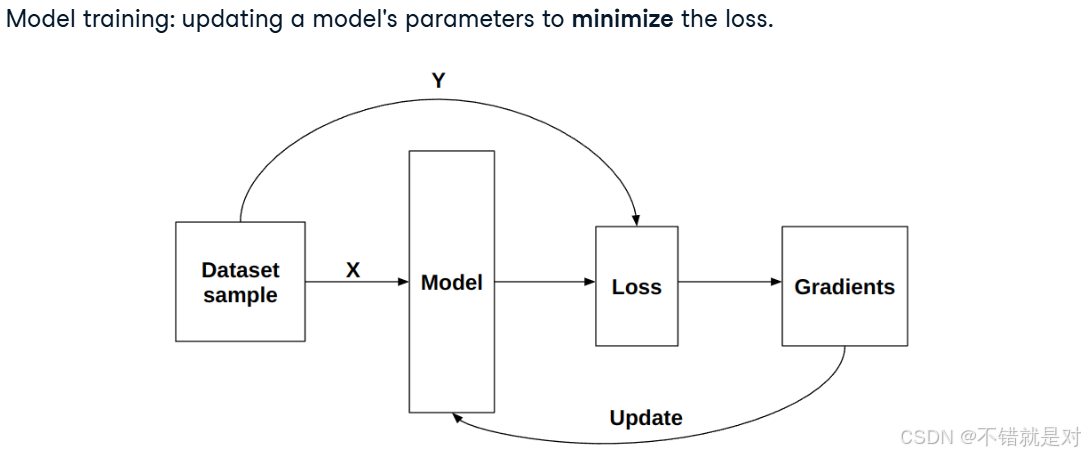
2.3.1、Minimizing the loss
- High loss: model prediction is wrong
- Low loss: model prediction is correct
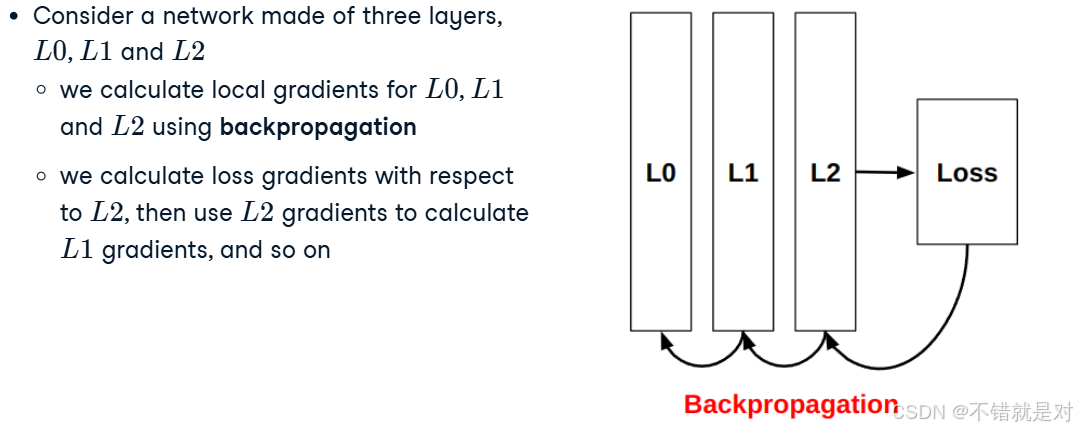
2.3.2、Connecting derivatives and model training
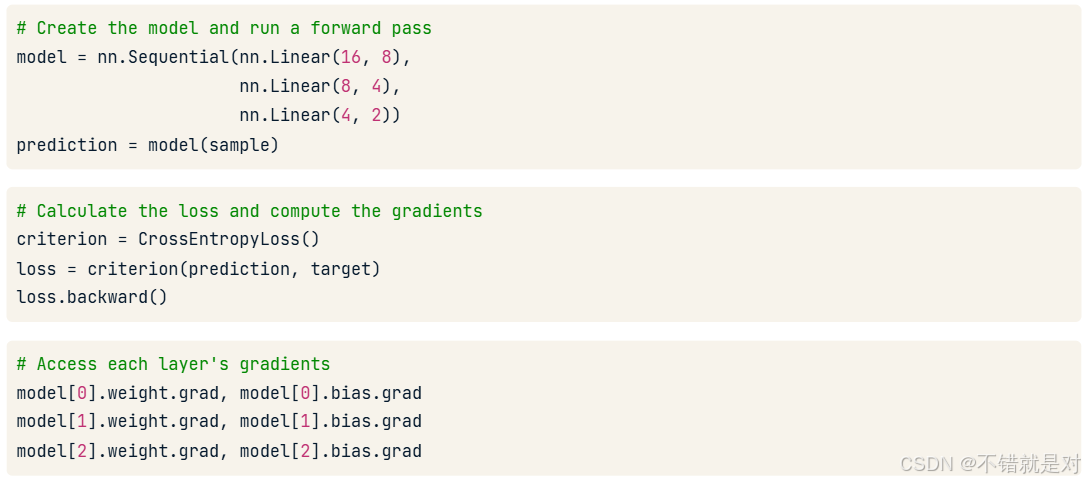
2.3.3、Backpropagation concepts
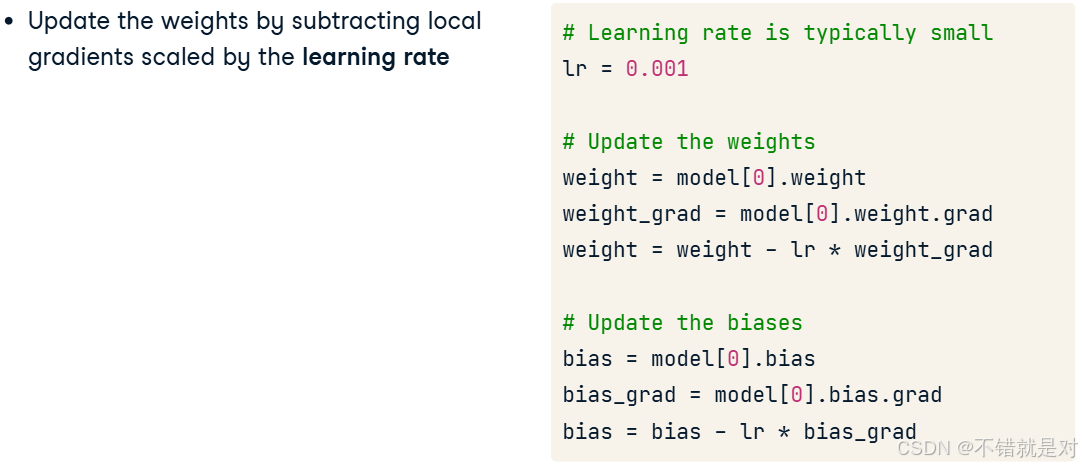
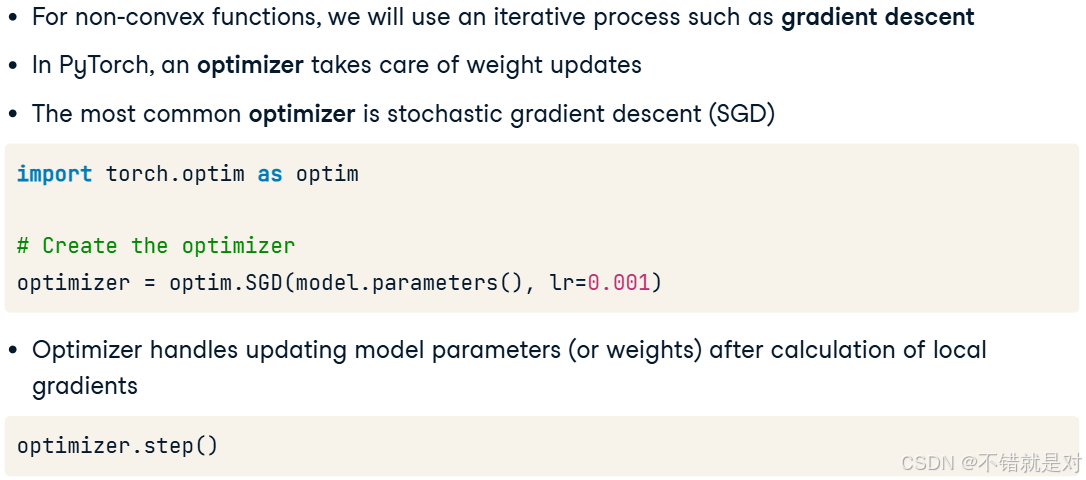
2.3.4、Gradient descent
2.4、Writing our first training loop
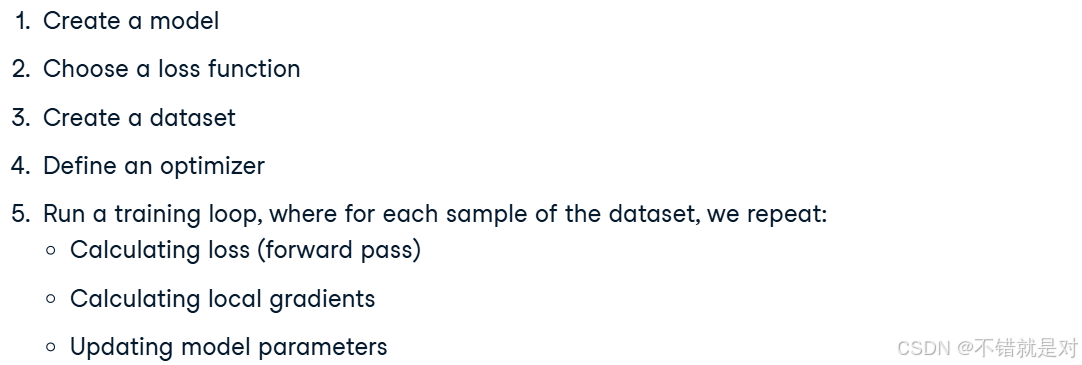
2.4.1、Training a neural network
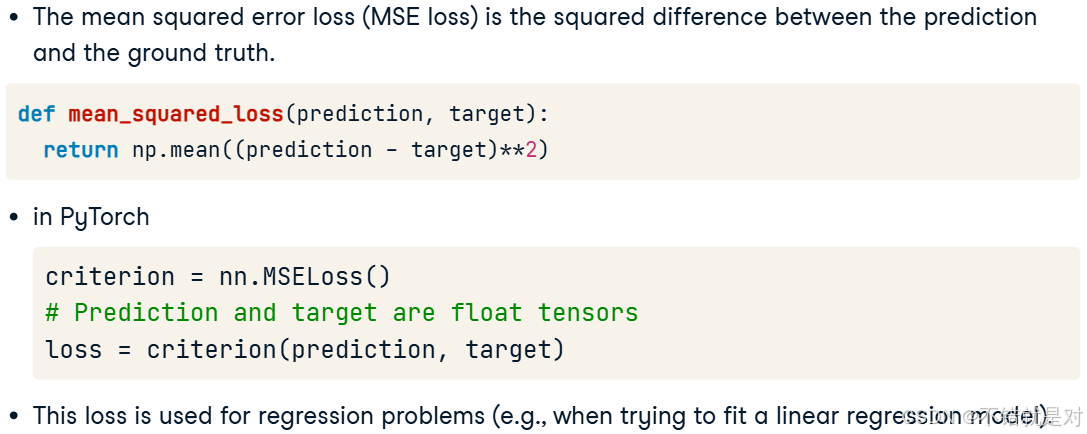
2.4.2、Mean Squared Error (MSE) Loss
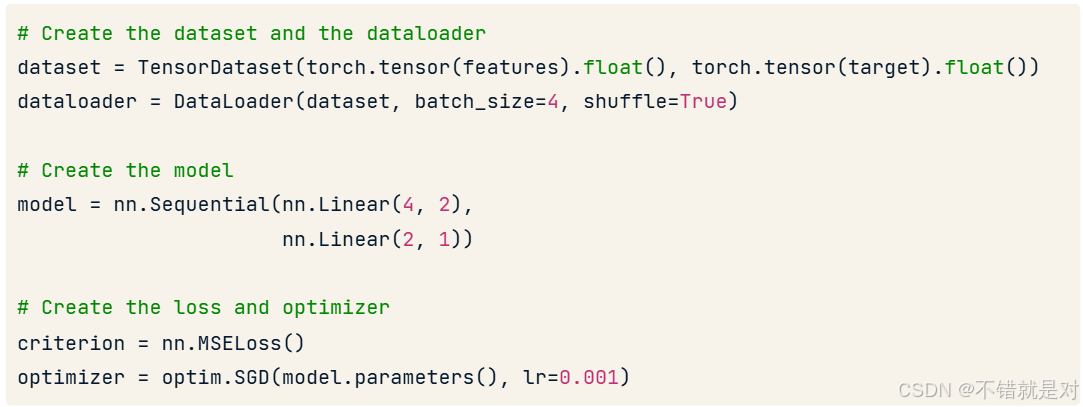
2.4.3、Before the training loop
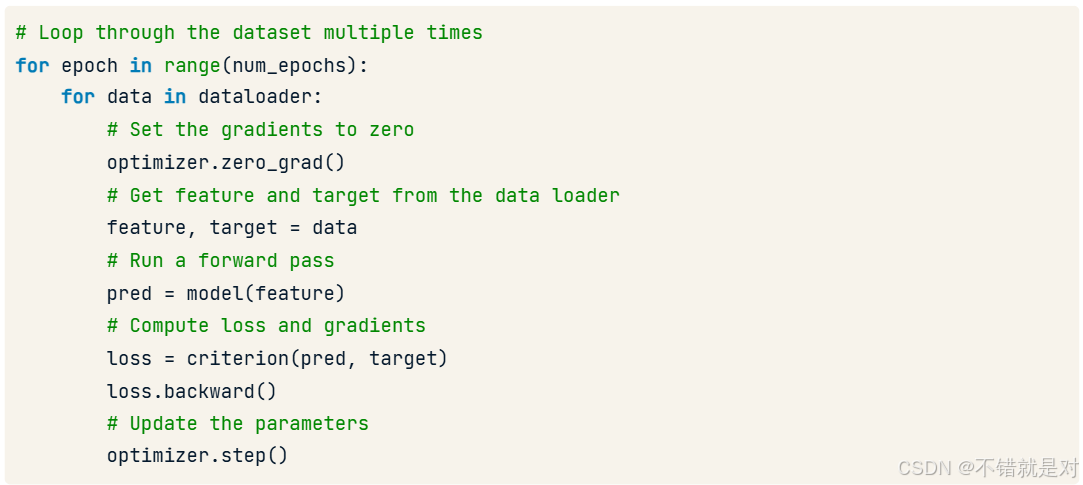
2.4.4、The training loop
3、Neural Network Architecture and Hyperparameters
3.1、Discovering activation functions between layers
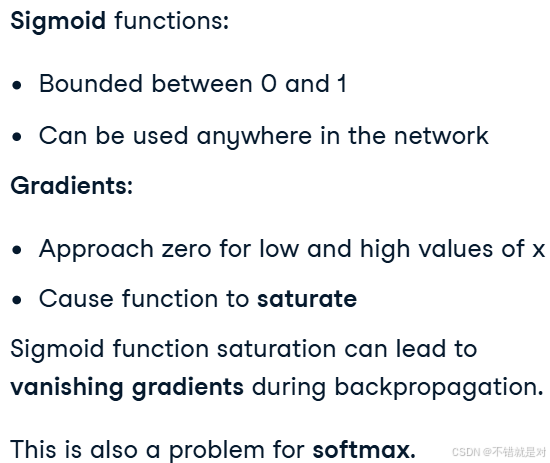
3.1.1、Limitations of the sigmoid and softmax function
3.1.2、Introducing ReLU

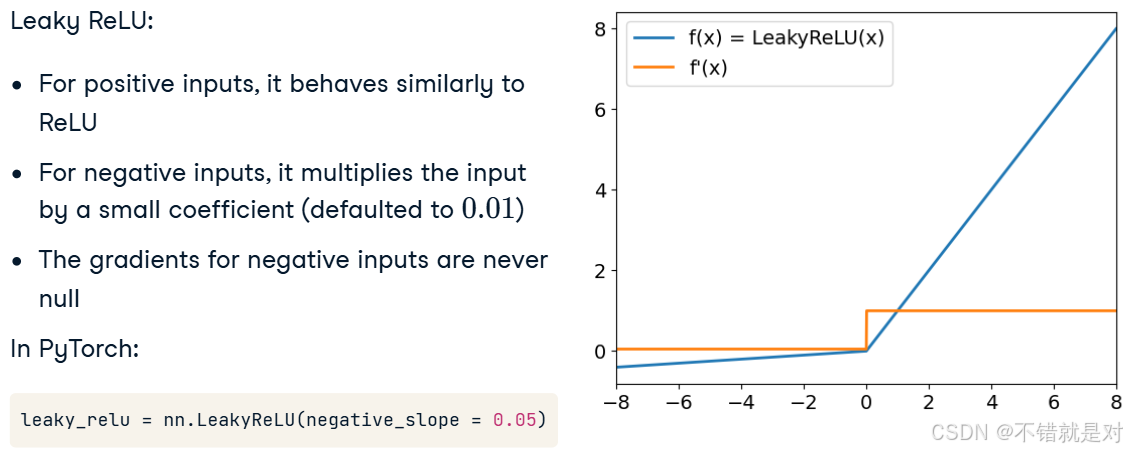
3.1.3、Introducing Leaky ReLU
3.2、A deeper dive into neural network architecture
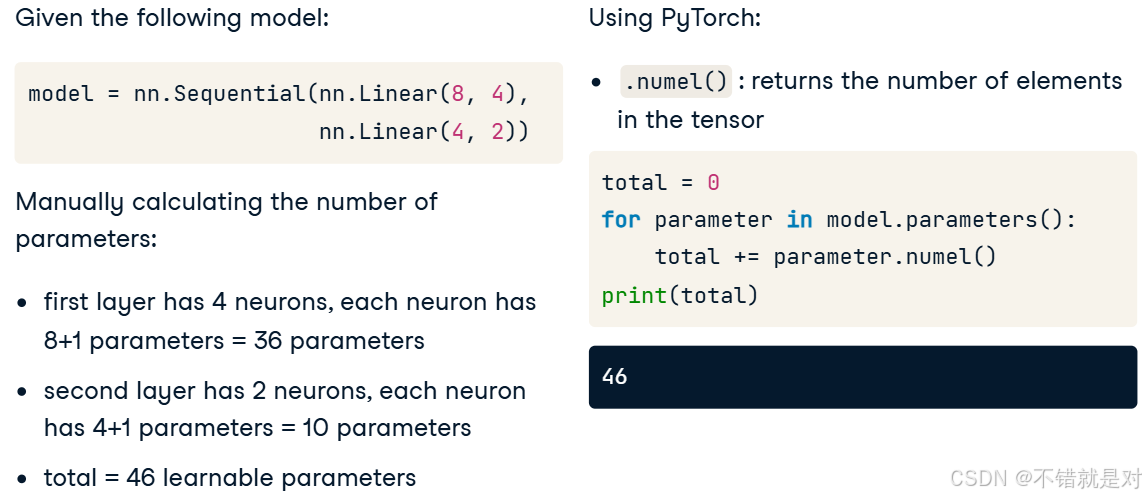
3.2.1、Counting the number of parameters
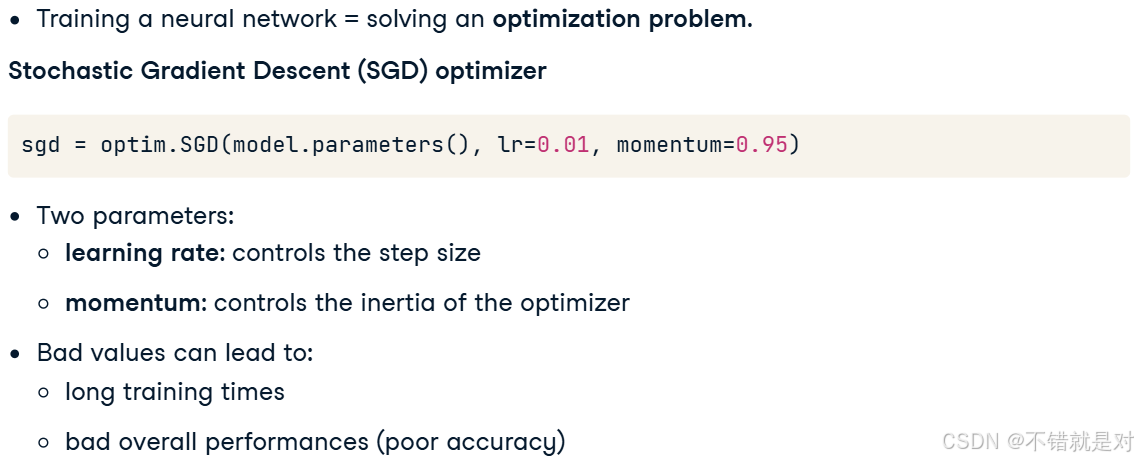
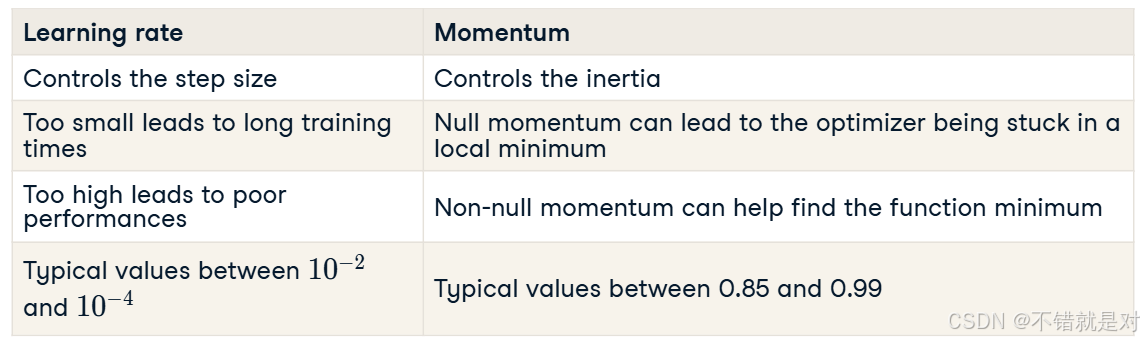
3.3、Learning rate and momentum
3.4、Layer initialization and transfer learning
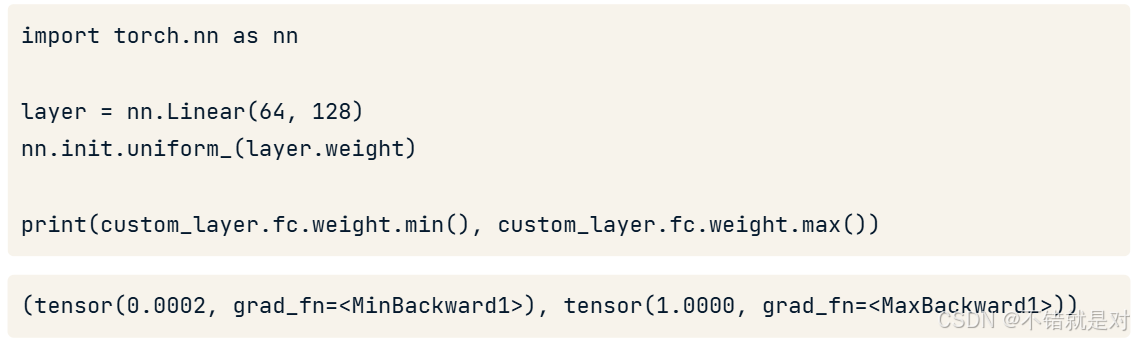
3.4.1、Layer initialization

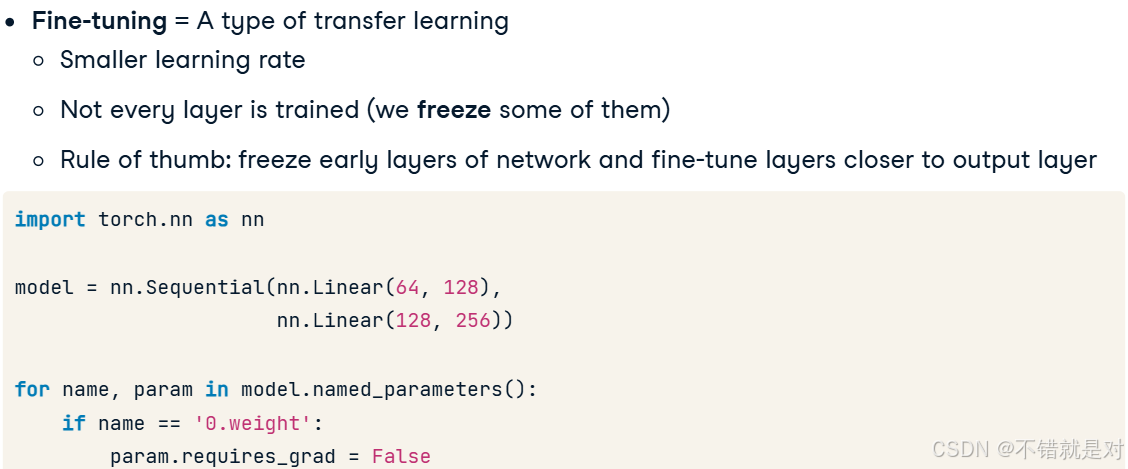
3.4.2、Transfer learning and fine tuning

4、Evaluating and Improving Models
4.1、A deeper dive into loading data
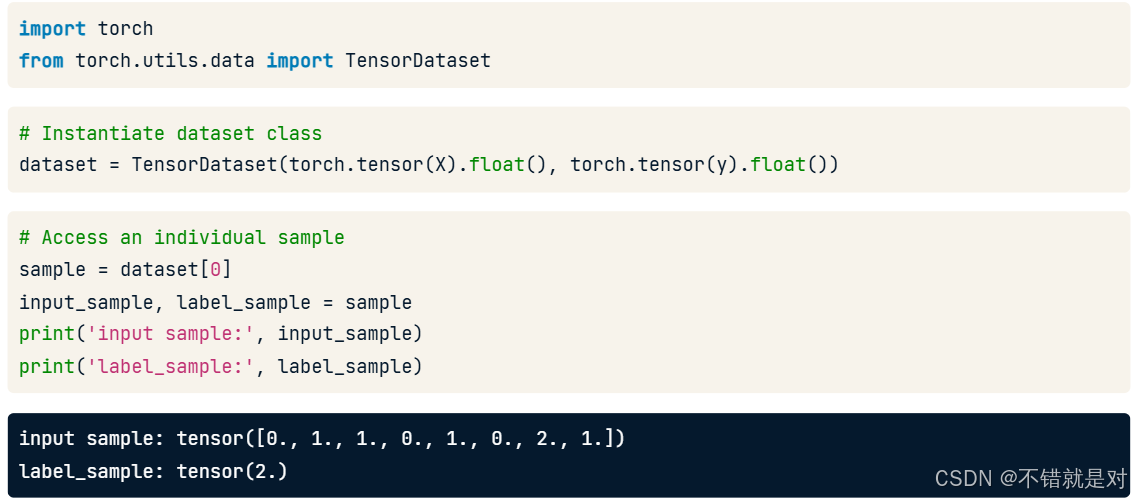
4.1.1、Recalling TensorDataset
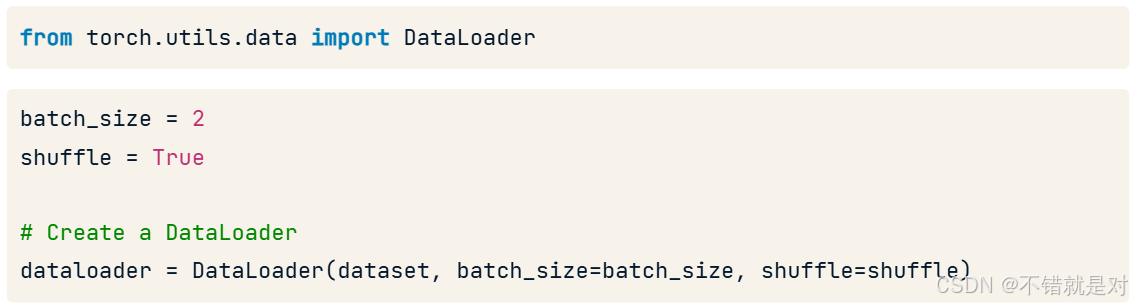
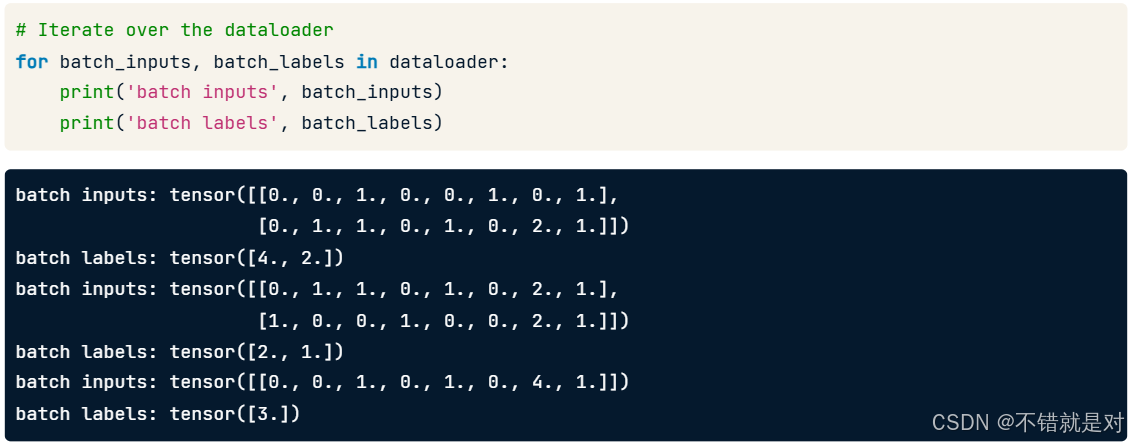
4.1.2、Recalling DataLoader
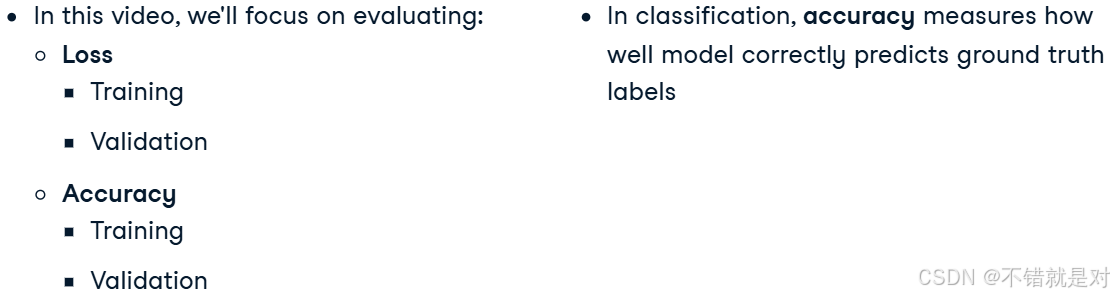
4.2、Evaluating model performance
4.2.1、Model evaluation metrics
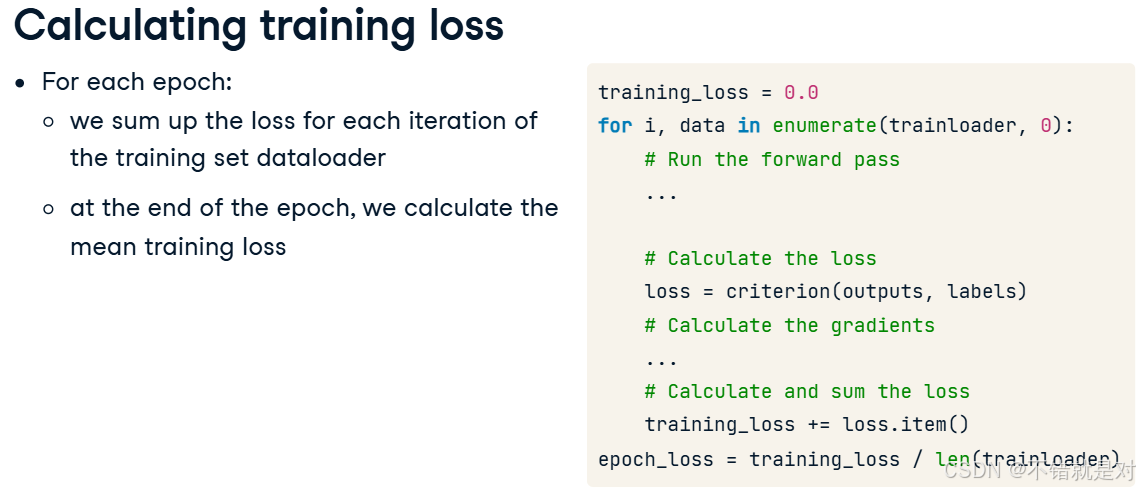
4.2.2、Calculating training loss
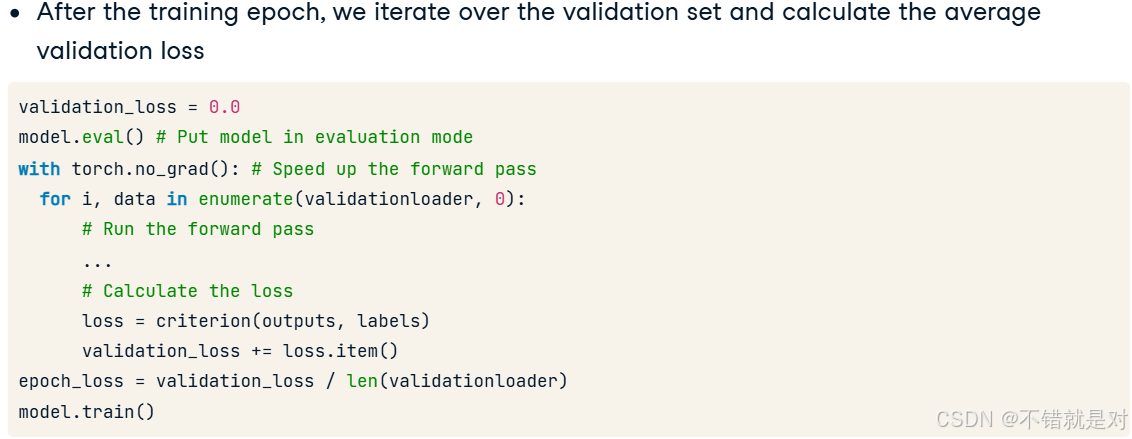
4.2.3、Calculating validation loss
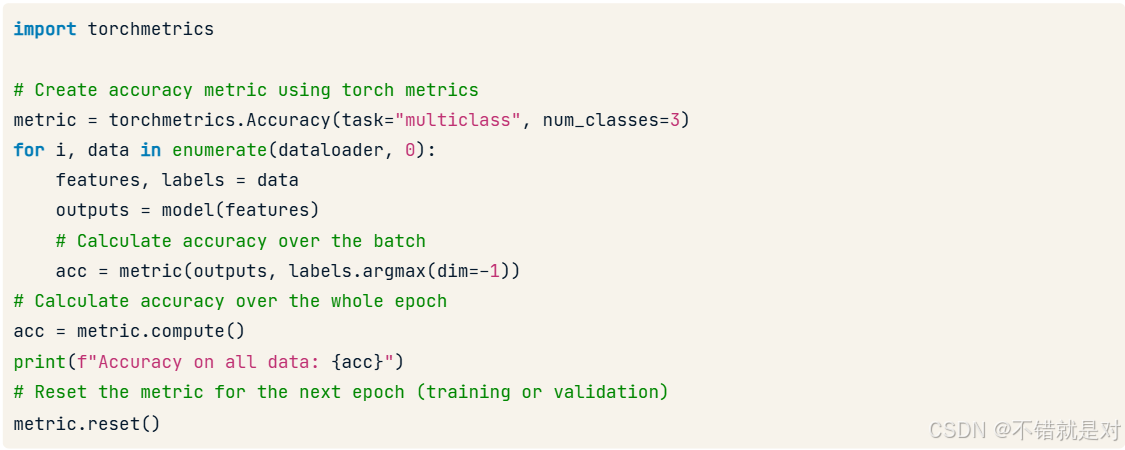
4.2.4、Calculating accuracy with torchmetrics
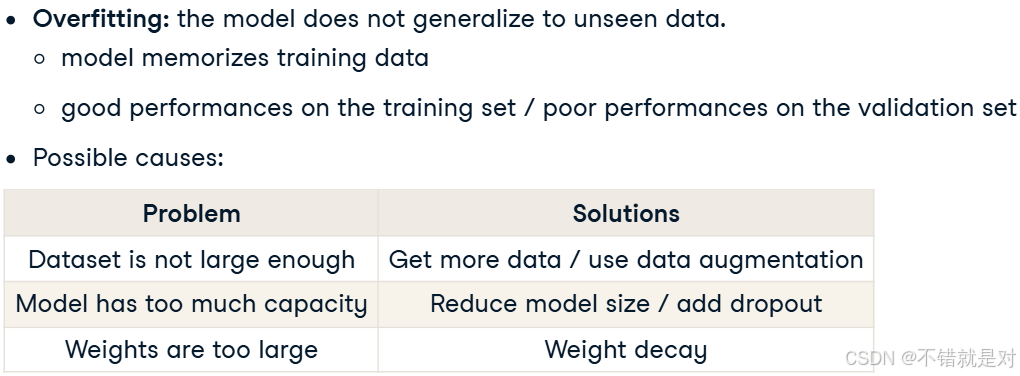
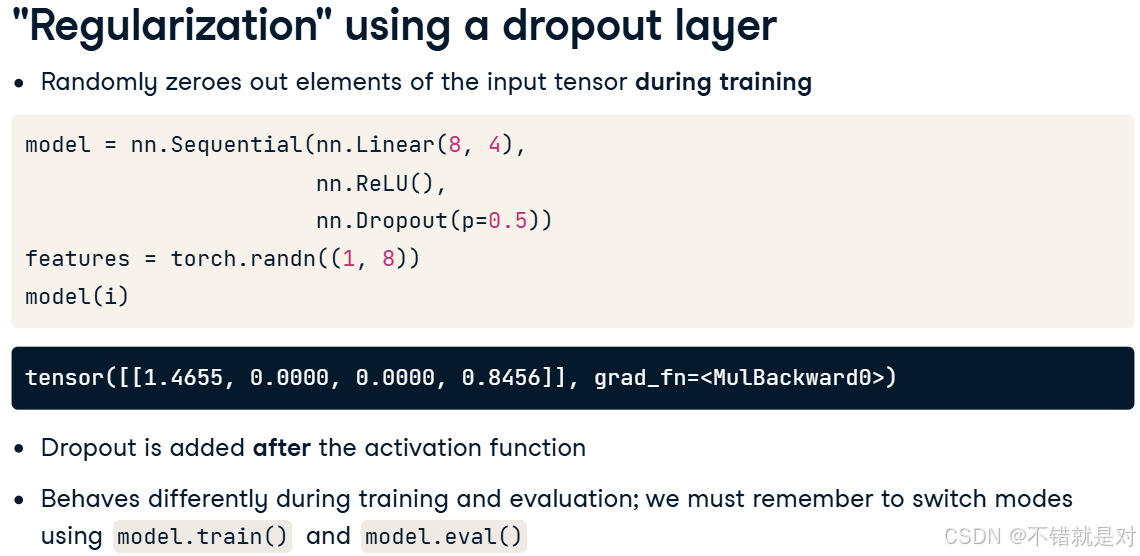
4.3、Fighting overfitting
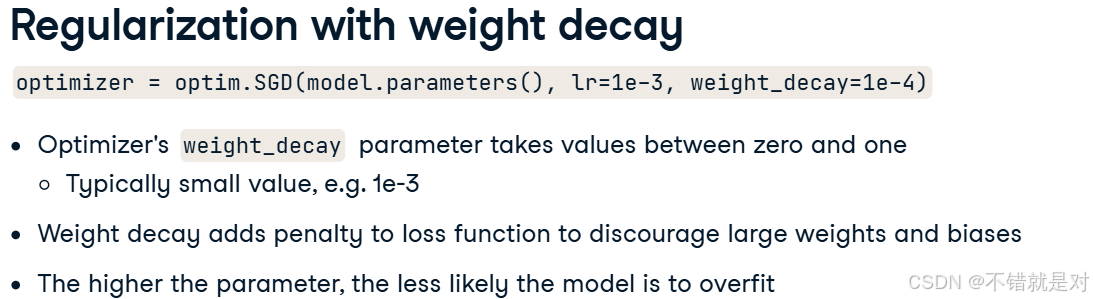
4.4、Improving model performance
- Overfit the training set
- Reduce overfitting
- Fine-tune the hyperparameters
这篇关于Introduction to Deep Learning with PyTorch的文章就介绍到这儿,希望我们推荐的文章对编程师们有所帮助!


