本文主要是介绍Flutter-实现头像叠加动画效果,希望对大家解决编程问题提供一定的参考价值,需要的开发者们随着小编来一起学习吧!
实现头像叠加动画效果
在这篇文章中,我们将介绍如何使用 Flutter 实现一个带有透明度渐变效果和过渡动画的头像叠加列表。通过这种效果,可以在图片切换时实现平滑的动画,使 UI 更加生动和吸引人。
需求
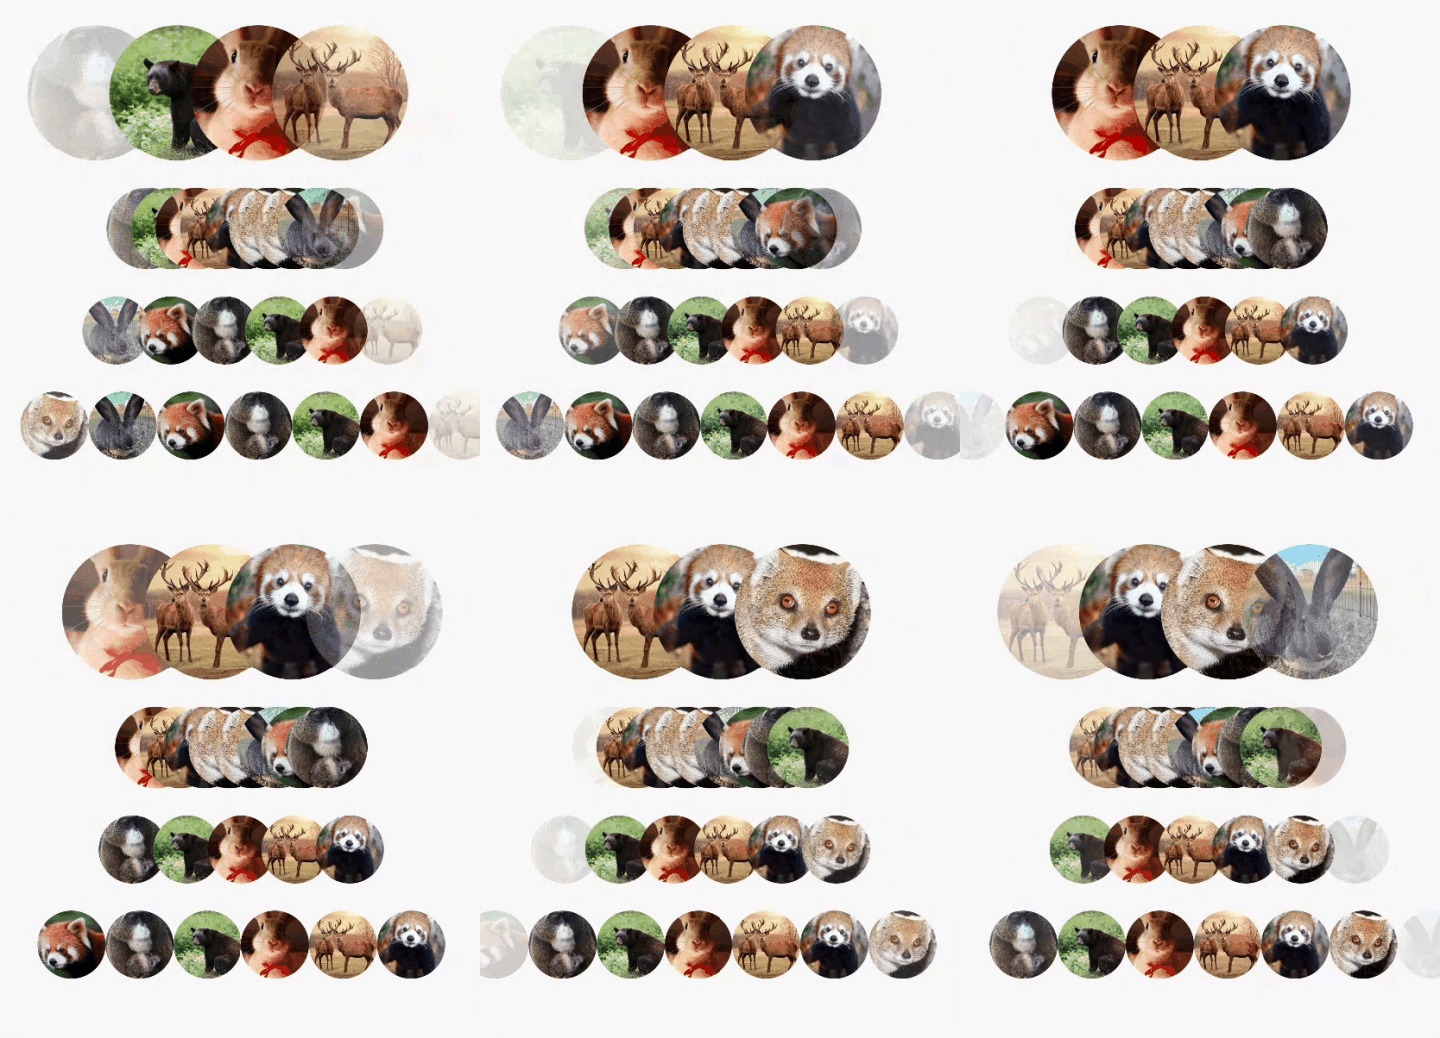
我们的目标是实现一个头像叠加列表,在每隔 2 秒时切换头像,并且在切换过程中,前一个头像逐渐消失,新进入的头像逐渐显示,同时有一个从右向左的移动过渡效果。
具体需求包括:
- 支持头像圆形显示。
- 支持设置头像重叠比例。
- 支持配置间隔时间切换一次头像。
- 切换时,前一个头像透明度渐变消失,后一个头像透明度渐变显示。
- 切换时,有平滑的移动动画。
效果

实现思路
为了实现这个效果,我们将使用 Flutter 的 AnimatedBuilder、AnimationController 和 Tween 来实现过渡动画和透明度渐变效果。主要步骤包括:
- 创建一个
CircularImageList组件,用于显示头像列表。 - 使用
AnimationController控制动画的执行。 - 使用
AnimatedBuilder和Opacity实现透明度渐变效果。 - 使用
Positioned和AnimatedBuilder实现位置移动过渡效果。 - 每隔 2 秒触发一次动画,并更新显示的头像列表。
实现代码
下面是实现上述需求的完整代码:
import 'package:cached_network_image/cached_network_image.dart';
import 'package:flutter/material.dart';class CircularImageList extends StatefulWidget {final List<String> imageUrls;final int maxDisplayCount;final double overlapRatio;final double height;final Duration animDuration;final Duration delayedDuration;const CircularImageList({super.key,required this.imageUrls,required this.maxDisplayCount,required this.overlapRatio,required this.height,this.animDuration = const Duration(milliseconds: 500),this.delayedDuration = const Duration(seconds: 1),});CircularImageListState createState() => CircularImageListState();
}class CircularImageListState extends State<CircularImageList>with SingleTickerProviderStateMixin {int _currentIndex = 0;List<String> _currentImages = [];late AnimationController _animationController;late Animation<double> _animation;int get maxDisplayCount {return widget.maxDisplayCount + 1;}double get circularImageWidth {var realCount = maxDisplayCount - 1;return realCount * widget.height -widget.height * (1 - widget.overlapRatio) * (realCount - 1);}void initState() {super.initState();_currentImages = widget.imageUrls.take(maxDisplayCount).toList();_animationController = AnimationController(duration: widget.animDuration,vsync: this,);_animation = Tween<double>(begin: 0, end: 1).animate(_animationController)..addStatusListener((status) {if (status == AnimationStatus.completed) {setState(() {_currentIndex = (_currentIndex + 1) % widget.imageUrls.length;_currentImages.removeAt(0);_currentImages.add(widget.imageUrls[_currentIndex]);});_animationController.reset();Future.delayed(widget.delayedDuration, () {_animationController.forward();});}});Future.delayed(widget.delayedDuration, () {_animationController.forward();});}void dispose() {_animationController.dispose();super.dispose();}Widget build(BuildContext context) {return Container(clipBehavior: Clip.none,width: circularImageWidth,height: widget.height,child: Stack(clipBehavior: Clip.none,children: _buildImageStack(),),);}double _opacity(int index) {if (index == 0) {return 1 - _animation.value;} else if (index == _currentImages.length - 1) {return _animation.value;} else {return 1;}}List<Widget> _buildImageStack() {List<Widget> stackChildren = [];for (int i = 0; i < _currentImages.length; i++) {double leftOffset = i * (widget.height * widget.overlapRatio);stackChildren.add(AnimatedBuilder(animation: _animation,builder: (context, child) {return Positioned(left: leftOffset -(_animation.value * widget.height * widget.overlapRatio),child: Opacity(opacity: _opacity(i),child: child!,),);},child: ClipOval(key: ValueKey<String>(_currentImages[i]),child: CachedNetworkImage(imageUrl: _currentImages[i],width: widget.height,height: widget.height,fit: BoxFit.cover,),),),);}return stackChildren;}
}
结束语
通过上述代码,我们实现了一个带有透明度渐变效果和过渡动画的头像叠加列表。在实际开发中,可以根据需求对动画的时长、重叠比例等进行调整,以达到最佳效果。希望这篇文章对您有所帮助,如果有任何问题或建议,详情见:github.com/yixiaolunhui/flutter_xy
这篇关于Flutter-实现头像叠加动画效果的文章就介绍到这儿,希望我们推荐的文章对编程师们有所帮助!


