本文主要是介绍CesiumJS整合ThreeJS插件封装,希望对大家解决编程问题提供一定的参考价值,需要的开发者们随着小编来一起学习吧!
最近做项目有一个三维需求使用CesiumJS比较难以实现,发现THREEJS中效果比较合适,于是准备将THREEJS整合到CesiumJS中
为实现效果所需我们找到官方Integrating Cesium with Three.js博客,于是根据该博客提供的思路去实现整合
文章目录
- 一、创建ThreeJS类
- 二、插件threeJs 优化
- 1、创建ThressScene工具
- 1.1、同步camera
- 1.2、同步场景中的物体
- 1.3、同步render
- 2、插件使用
- 2.1 引入插件初始化map
- 2.1 初始化Meshes
- 2.2 初始化threeScene
- 2.3 效果预览
一、创建ThreeJS类
为了开发时更好的扩展性把他写到了一个ThreeJS 类里面,功能直接调用即可
function ThreeJs(viewer, cesiumGlobal, defaultStatic, threeConf) {if (viewer && threeConf) {const { threeGlobal, containerId, threeContainerId } = threeConf;Cesium = cesiumGlobal;THREE = threeGlobal;this._viewer = viewer;this._containerId = containerId;this._threeContainerId = threeContainerId;this._initContainer();this._initThree();}
}
//部分省略......
项目中使用
import { ThreeJs } from 'cesium_dev_kit'// 初始化mapinitMap (){const ThreeJsObj = new ThreeJs({cesiumGlobal: Cesium,threeGlobal: THREE,containerId: 'cesiumContainer',threeContainerId: 'threeContainer',
//部分省略......})this.c_viewer = ThreeJsObj.viewer;this.threeJs = ThreeJsObj.threeJs;this.initThree(this.threeJs);},// 初始化ThreeJsinitThree (ThreeJs) {const threeDObject = this.create3DOject(ThreeJs, this.c_viewer);ThreeJs.addThreeObjects(threeDObject)this.c_viewer.camera.lookAtTransform(Cesium.Matrix4.IDENTITY)//解除视角锁定},// 创建三维模型create3DOject (threeObj, viewer) {let three = threeObj._three;let _3Dobjects = [], _3DOB;let entity = {name: 'Polygon',polygon: {hierarchy: Cesium.Cartesian3.fromDegreesArray([minWGS84[0], minWGS84[1],maxWGS84[0], minWGS84[1],maxWGS84[0], maxWGS84[1],minWGS84[0], maxWGS84[1]]),material: Cesium.Color.RED.withAlpha(0.1)}}let Polypon = viewer.entities.add(entity);let doubleSideMaterial = new THREE.MeshNormalMaterial({side: THREE.DoubleSide});
//部分省略......return _3Dobjects;}
根据官网的思量整合后最终实现效果如下

效果是实现了,但是这个封装耦合性相当高,多个功能都需要使用这个插件时特别蹩脚,于是开始了下一次造…
二、插件threeJs 优化
理解官方案例的思路整合关键主要有三个方面,第一个是同步Camera,第二个是同步Scene中的物体位置,第三个是需要同步CesiumJS和THREEJS 的render重绘程序
1、创建ThressScene工具
为了扩展与管理我们抽离一个Scene 的工具js
class Scene extends THREE.Scene {}
在这个js 里面去实现插件操作的优化
1.1、同步camera
创建一个updateCameraMatrix来同步项目位置,核心代码如下
  updateCameraMatrix() {//同步相机this.camera.fov = Cesium.Math.toDegrees(this.cesiumViewer.camera.frustum.fovy) // ThreeJS FOV is verticalthis.camera.updateProjectionMatrix()this.camera.matrixAutoUpdate = falseconst cvm = this.cesiumViewer.camera.viewMatrixconst civm = this.cesiumViewer.camera.inverseViewMatrixthis.camera.lookAt(this.cameraCenter)
//部分省略......const width = this.cesiumViewer.scene.canvas.clientWidthconst height = this.cesiumViewer.scene.canvas.clientHeightthis.camera.aspect = width / heightthis.camera.updateProjectionMatrix()this.renderer.setSize(width, height)return this}
1.2、同步场景中的物体
创建一个updateGroupMatrixWorld来进行物体位置同步,核心代码如下
// 重写add 方法add(object) {if (arguments.length > 1) {for (let i = 0; i < arguments.length; i++) {this.childrenGroup.add(arguments[i])}return this}//部分省略......return this}updateGroupMatrixWorld() {// 得到面向模型的前向方向const center = this.cartesian3ToVector(Cesium.Cartesian3.fromDegrees(this.lngLat[0], this.lngLat[1], 0))// 使用从左下到左上的方向作为上向量const topLeft = this.cartesian3ToVector(Cesium.Cartesian3.fromDegrees(this.lngLat[0], this.lngLat[1], 2))const latDir = new THREE.Vector3().subVectors(center, topLeft).normalize()// 配置实体的位置和方向// this.syncGroup.position.copy(center)this.syncGroup.lookAt(latDir)this.syncGroup.up.copy(latDir)this.syncGroup.updateMatrix()this.cameraOffset.copy(center)this.sphere.position.set(0 - center.x, 0 - center.y, 0 - center.z)this.syncGroup.up.set(0, 0, -1)this.up.set(0, 0, -1)return this}
1.3、同步render
renderCesium() {this.cesiumViewer.render()return this}renderThree() {this.renderer.render(this, this.camera)return this}loop(callback) {const _loop = function () {let time = requestAnimationFrame(_loop)callback && callback(time)}_loop()}
2、插件使用
插件改完了心里还是有点鸡冻,马上在项目中引入开始测试
2.1 引入插件初始化map
import { initCesium } from 'cesium_dev_kit'// 初始化mapinitMap (){const { viewer, threeJs, base, graphics, material } = new initCesium({cesiumGlobal: Cesium,threeGlobal: THREE,containerId: 'cesiumContainer',threeContainerId: 'threeContainer',//部分省略......})this.c_viewer = viewer;this.threeJs = threeJs;this.base = base;this.graphics = graphics;this.material = materialthis.initThree(this.threeJs);// this.getClickPosition()this.createAEllipsoid();this.createAFanShape();},
2.1 初始化Meshes
这里我们就使用官方的extrude案例
initMeshes (scene) {// 环形 extrudeconst closedSpline = new THREE.CatmullRomCurve3([new THREE.Vector3(-60, 30, 60), // 左下new THREE.Vector3(-60, 100, 60), // 左中new THREE.Vector3(-60, 220, 60), // 左上new THREE.Vector3(60, 80, -60), // 右中new THREE.Vector3(60, 30, -60), // 右下]);// 2、extrude settingsclosedSpline.curveType = "catmullrom";closedSpline.closed = true;const extrudeSettings = {steps: 100,bevelEnabled: false,extrudePath: closedSpline,};// 3、construct shapeconst r = 20; // 截面半径const pts1 = [];const count = 3; // 截面的棱边数量for (let index = 0; index < count; index++) {// index/count 几分之几,2π为周长const a = (index / count) * Math.PI * 2;pts1.push(new THREE.Vector2(r * Math.cos(a), r * Math.sin(a)));}const shape1 = new THREE.Shape(pts1);// create geometryconst geometry1 = new THREE.ExtrudeGeometry(shape1, extrudeSettings);// create materialconst material1 = new THREE.MeshLambertMaterial({color: 0xb00000,});// assembly meshesconst mesh1 = new THREE.Mesh(geometry1, material1);// add mesh to scenescene.add(mesh1);//部分省略......},
2.2 初始化threeScene
initThree (ThreeJs) {const { scene, camera } = ThreeJs.initThree({ center, axesHelper: true, threeHabit: false });this.initLight(scene, camera)this.initMeshes(scene);this.flyto(scene);ThreeJs.loop(function () {scene.update();})},
2.3 效果预览
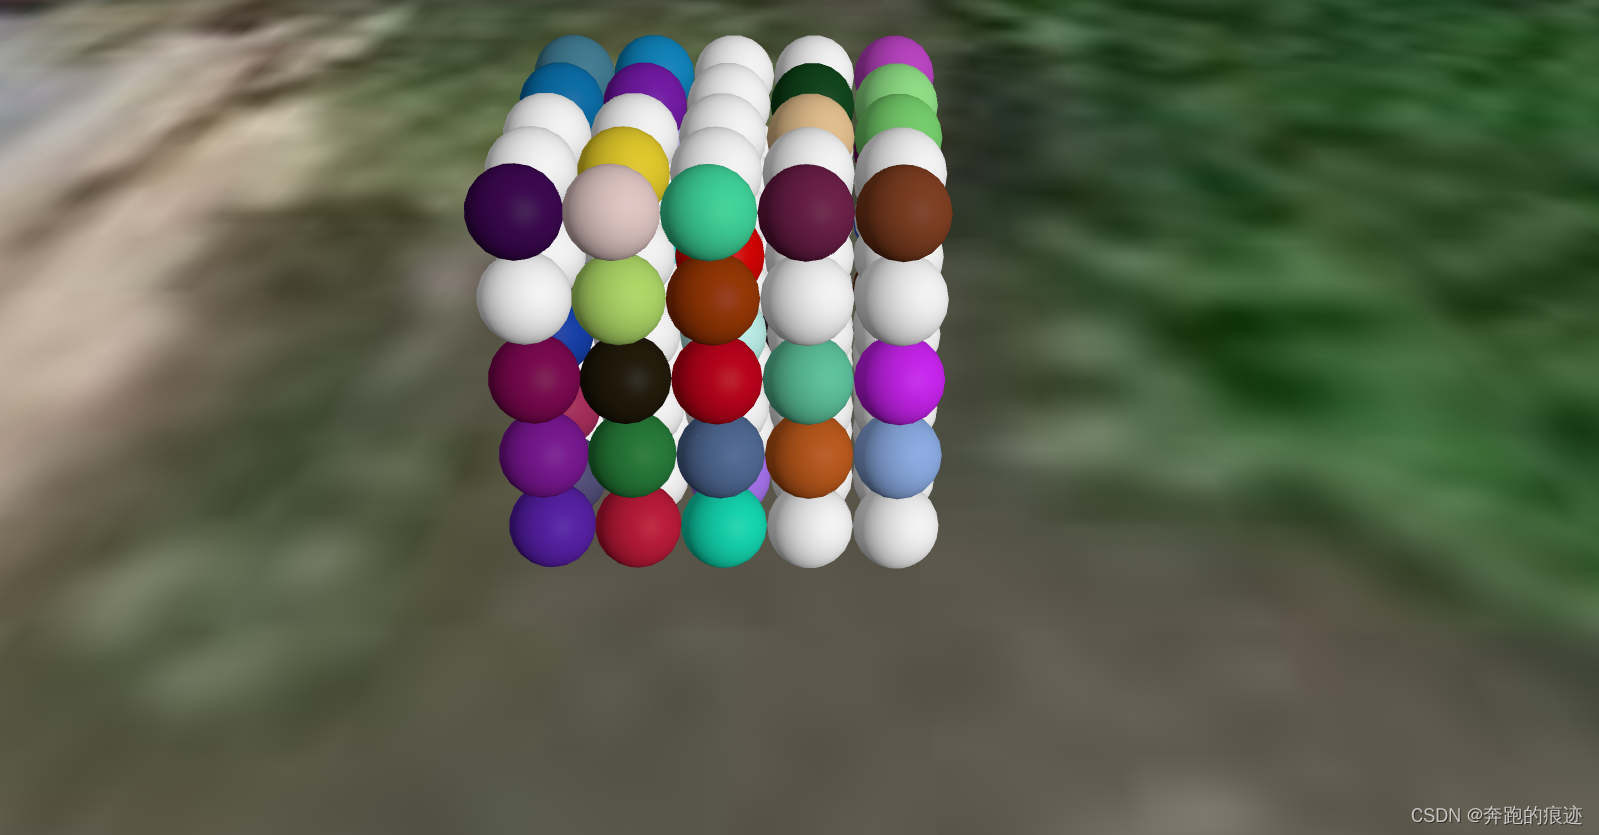
光线投射
 图形挤压
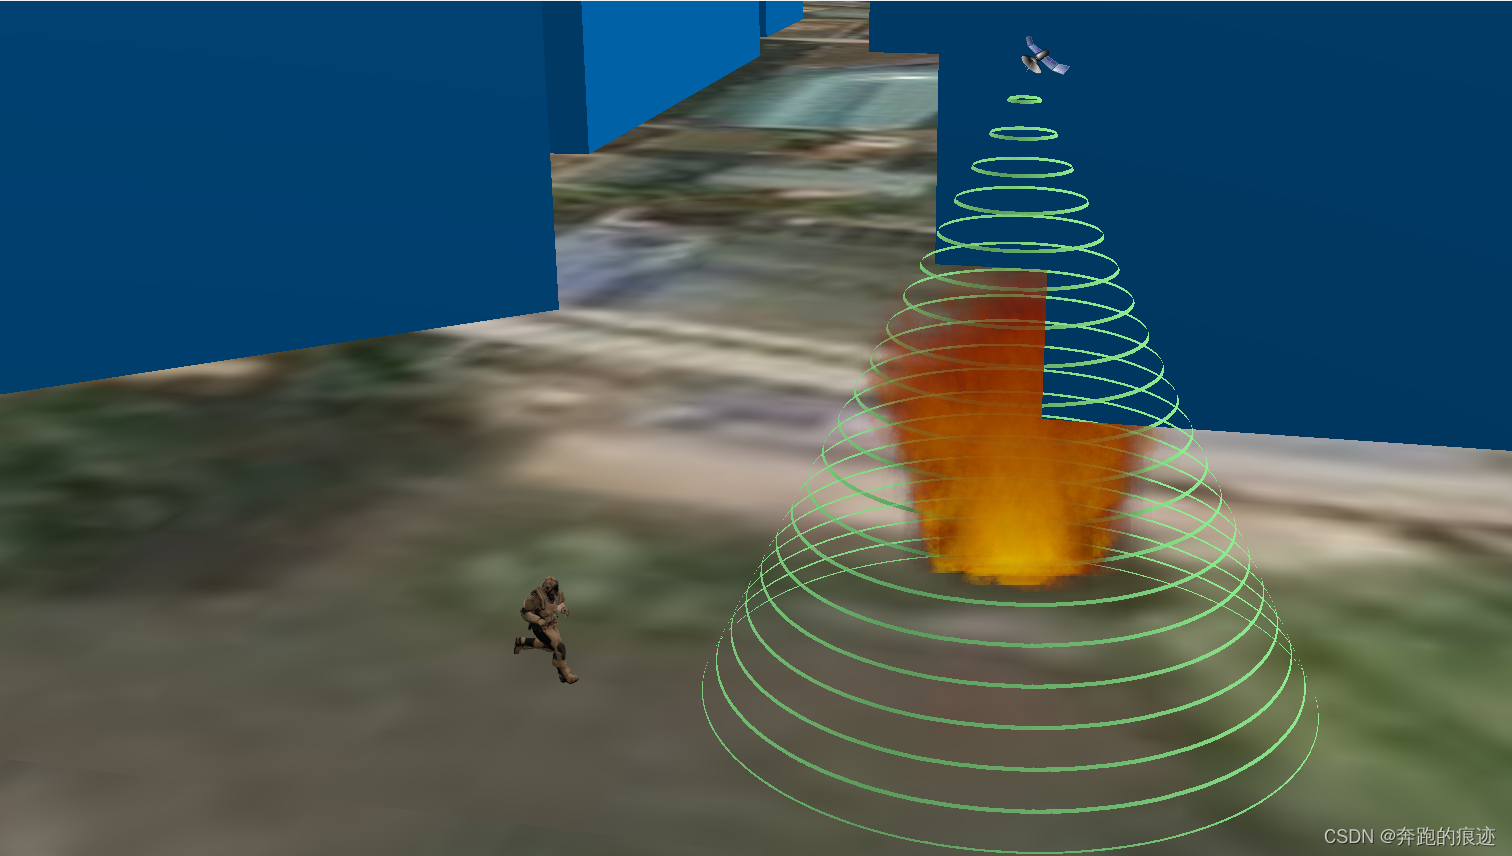
图形挤压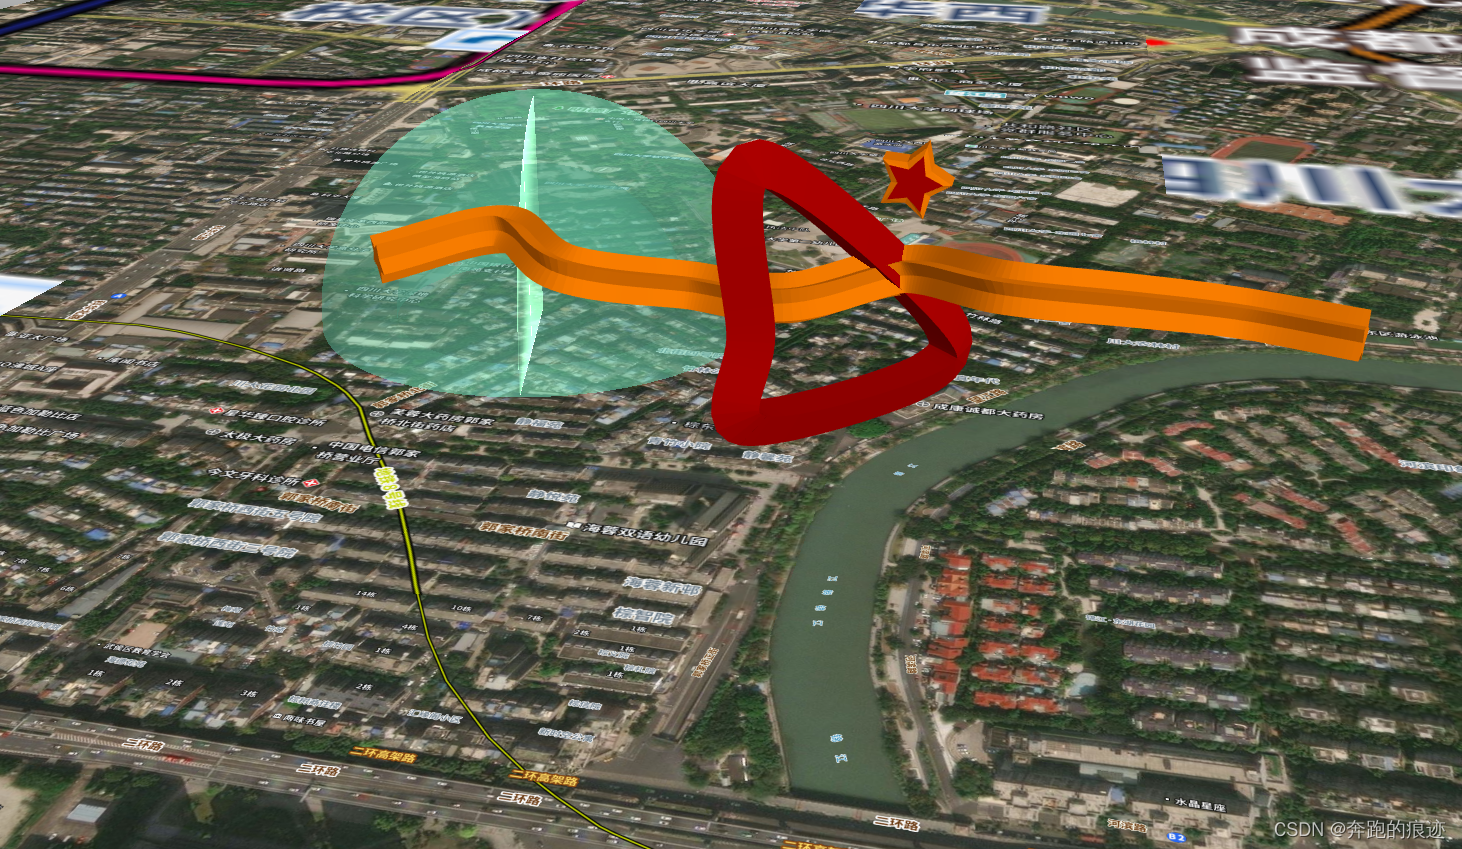 烟花效果
烟花效果

奔跑的士兵
嗯嗯测试了几个功能看了基本上问题不大了,ok先告一段落后期继续优化…
感谢您的阅读,最后附上插件下载与源码地址
- 插件下载安装
npm install cesium_dev_kit
- 案例源码地址
https://github.com/dengxiaoning/cesium_dev_kit
这篇关于CesiumJS整合ThreeJS插件封装的文章就介绍到这儿,希望我们推荐的文章对编程师们有所帮助!


