本文主要是介绍CISCN2024 初赛 wp 部分复现(Re),希望对大家解决编程问题提供一定的参考价值,需要的开发者们随着小编来一起学习吧!
Misc
1. 火锅链观光打卡
答题即可

Re
1. asm_re
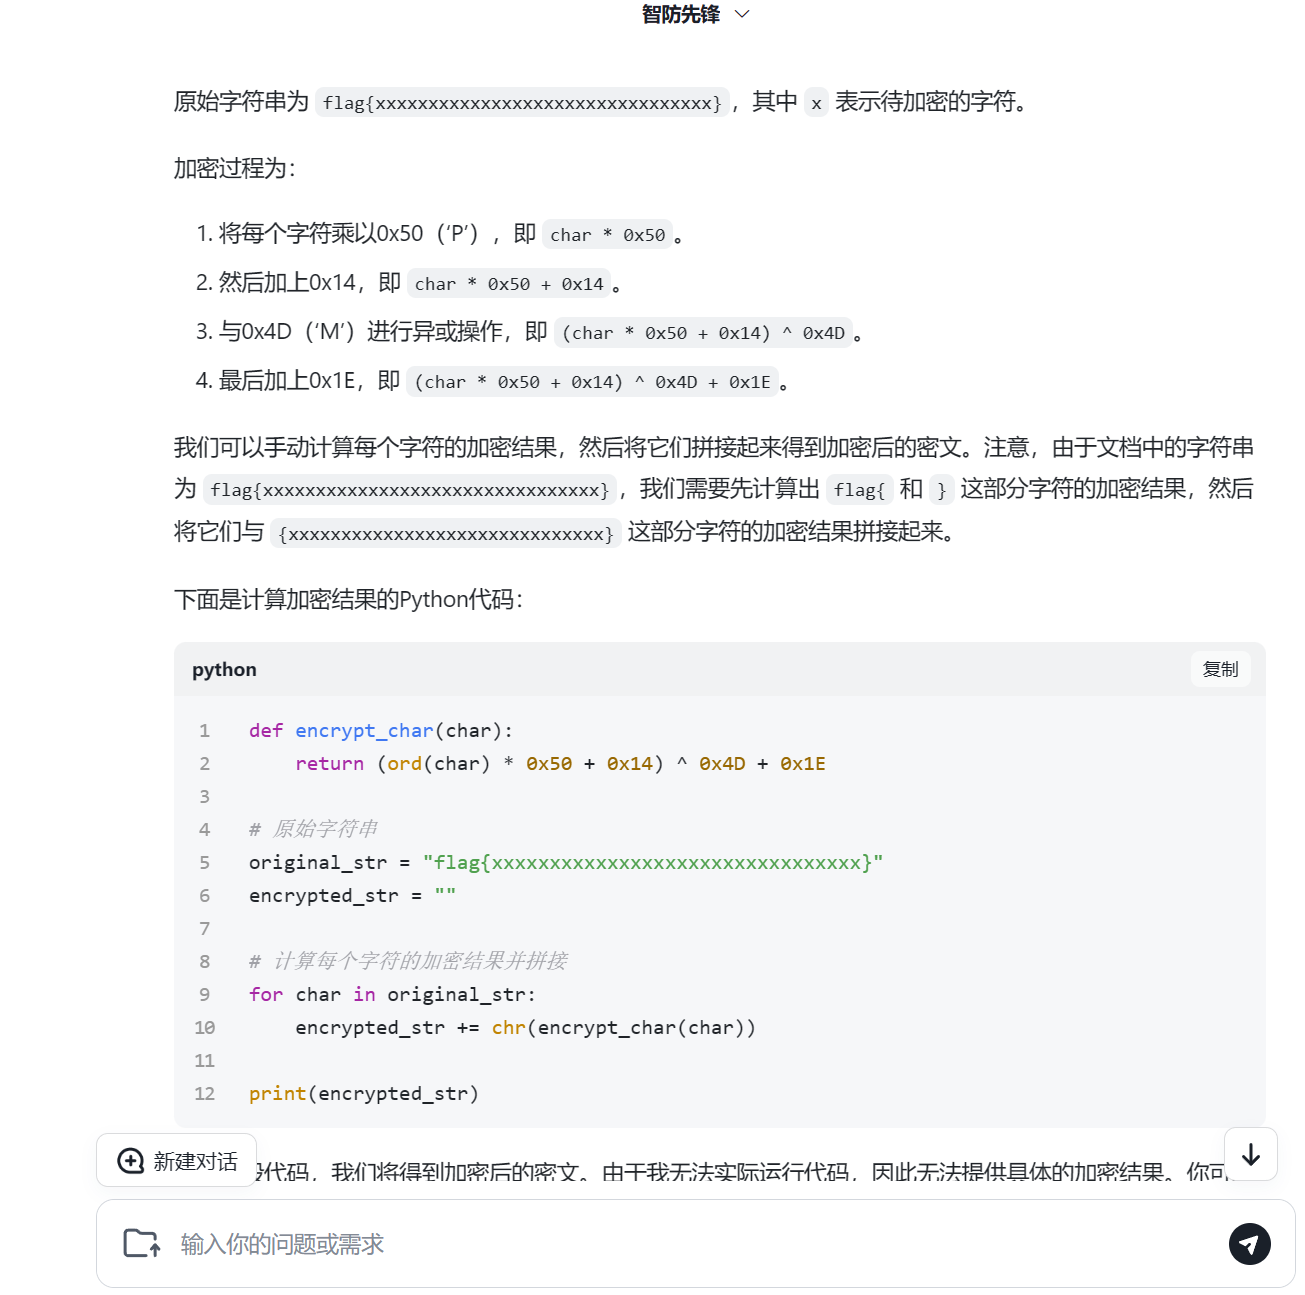
感谢智谱清言,可以读出大致加密算法

这是输入

这是加密部分

这里判断

找到疑似密文的部分,手动改一下端序
#asm_wp
def dec(char):return (((char - 0x1E) ^ 0x4D) - 0x14) // 0x50 #return (ord(char) * 0x50 + 0x14) ^ 0x4D + 0x1Eenc = [0x1fd7,0x21b7,0x1e47,0x2027,0x26e7,0x10d7,0x1127,0x2007,0x11c7,0x1e47,0x1017,0x1017,0x11f7,0x2007,0x1037,0x1107,0x1f17,0x10d7,0x1017,0x1017,0x1f67,0x1017,0x11c7,0x11c7,0x1017,0x1fd7,0x1f17,0x1107,0xf47,0x1127,0x1037,0x1e47,0x1037,0x1fd7,0x1107,0x1fd7,0x1107,0x2787]
flag = ''for char in enc:flag += chr(dec(char))print(flag)
#flag{67e9a228e45b622c2992fb5174a4f5f5}
2. android_re

jadx看一下,有个长度限制和加密inspect
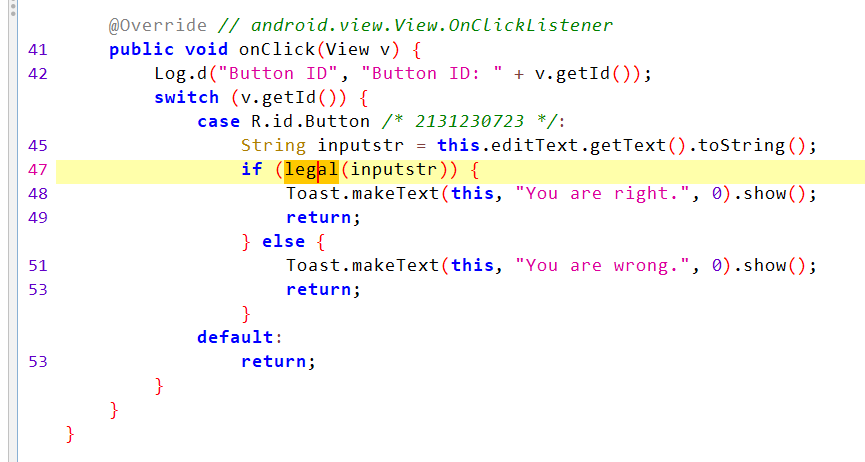
按钮验证flag

加密是DES,需要key和iv

但是应该藏在so文件里了


IDA反汇编逻辑看不懂,动调取key和iv比较好。但这个题很伞兵ida跑不起来

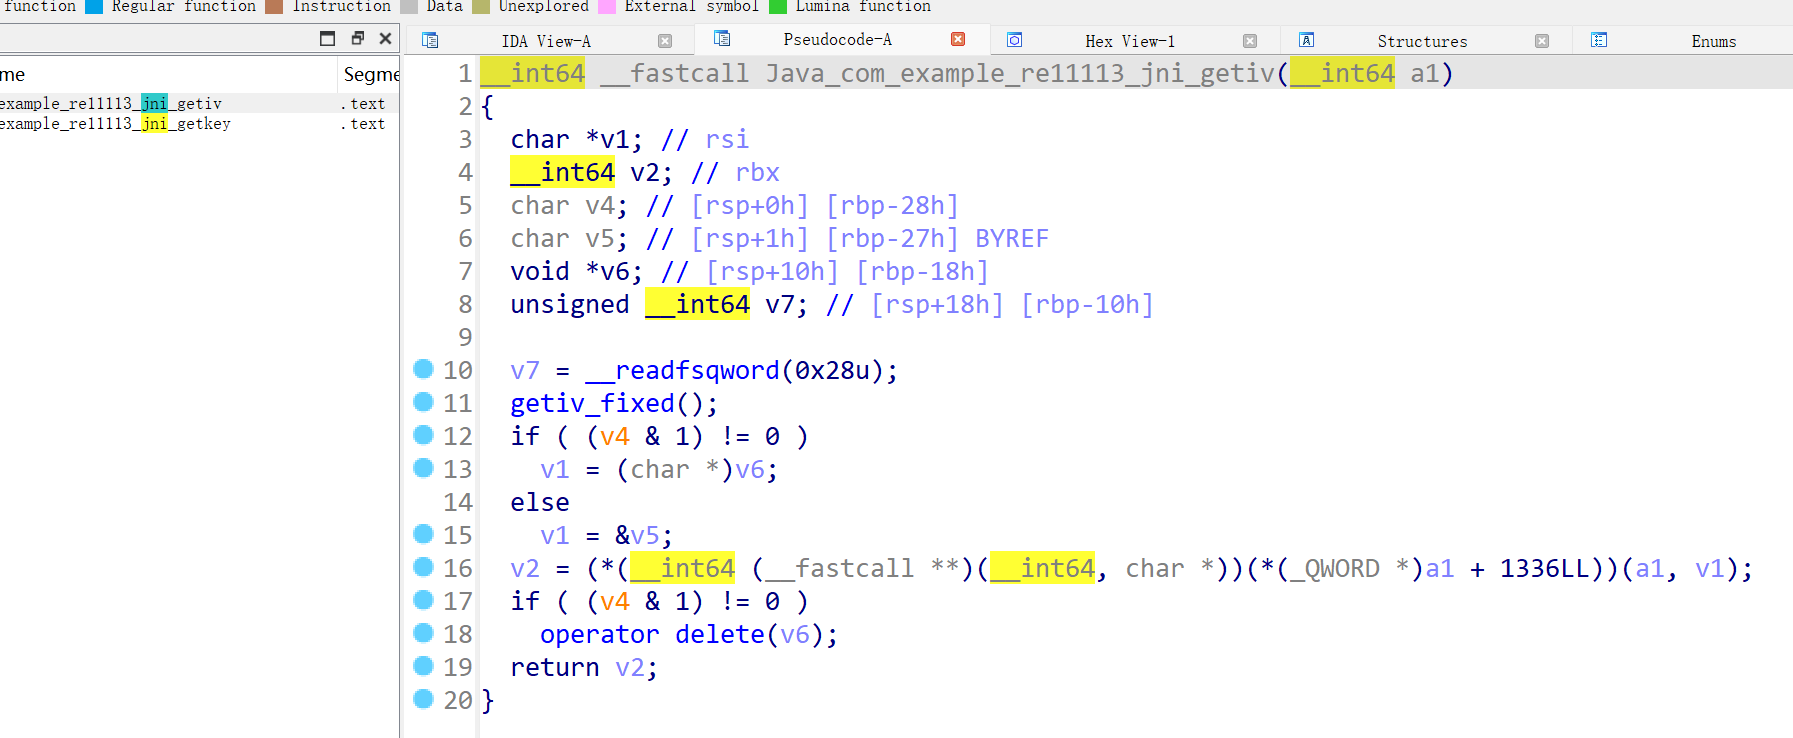
可以先考虑objection hook,unitdbg也可以
法一:Objection

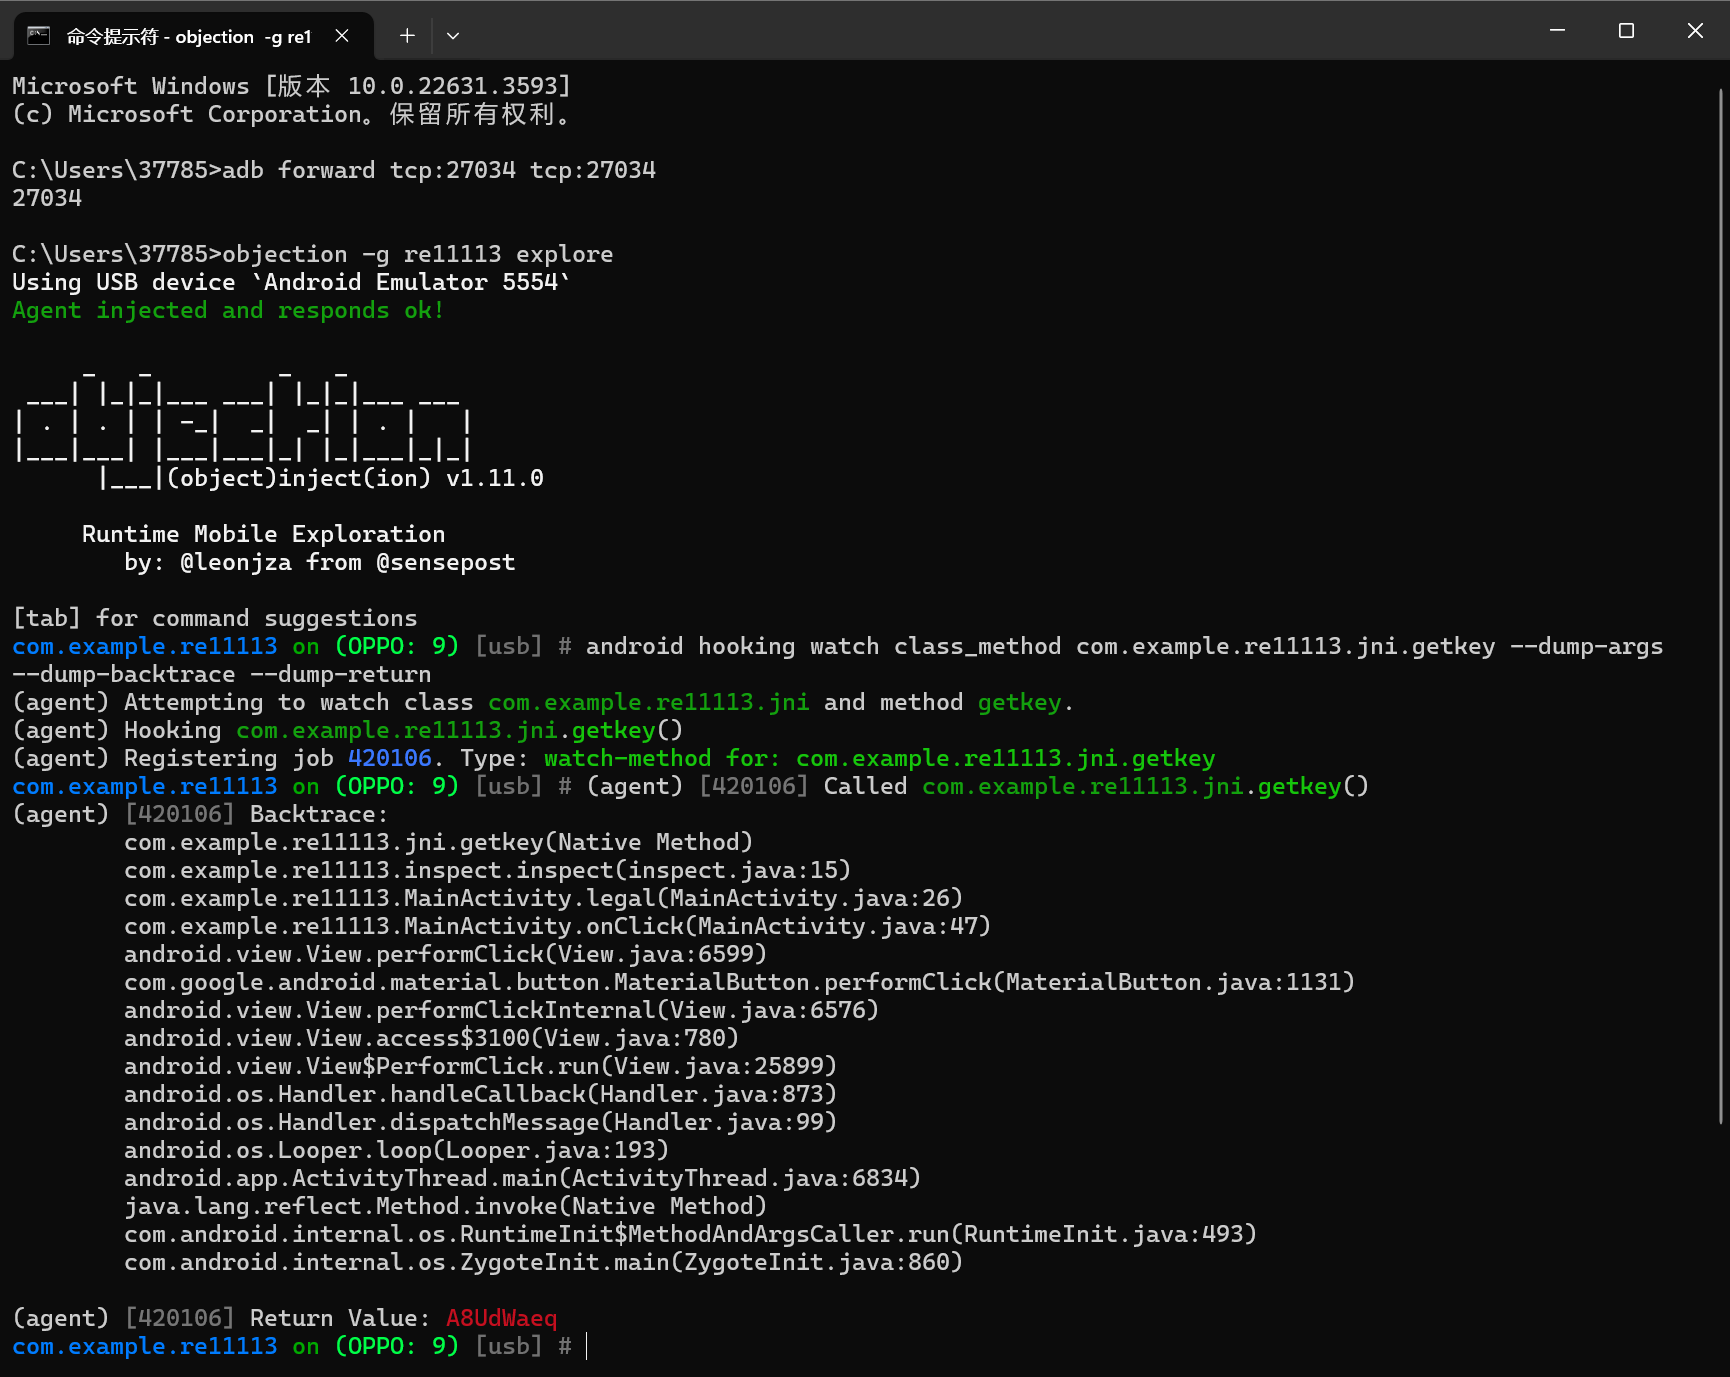
成功率比较玄学,有的版本就不行,我用nexus5x真机也是会崩溃,这里是雷电9.0模拟的OPPO 9
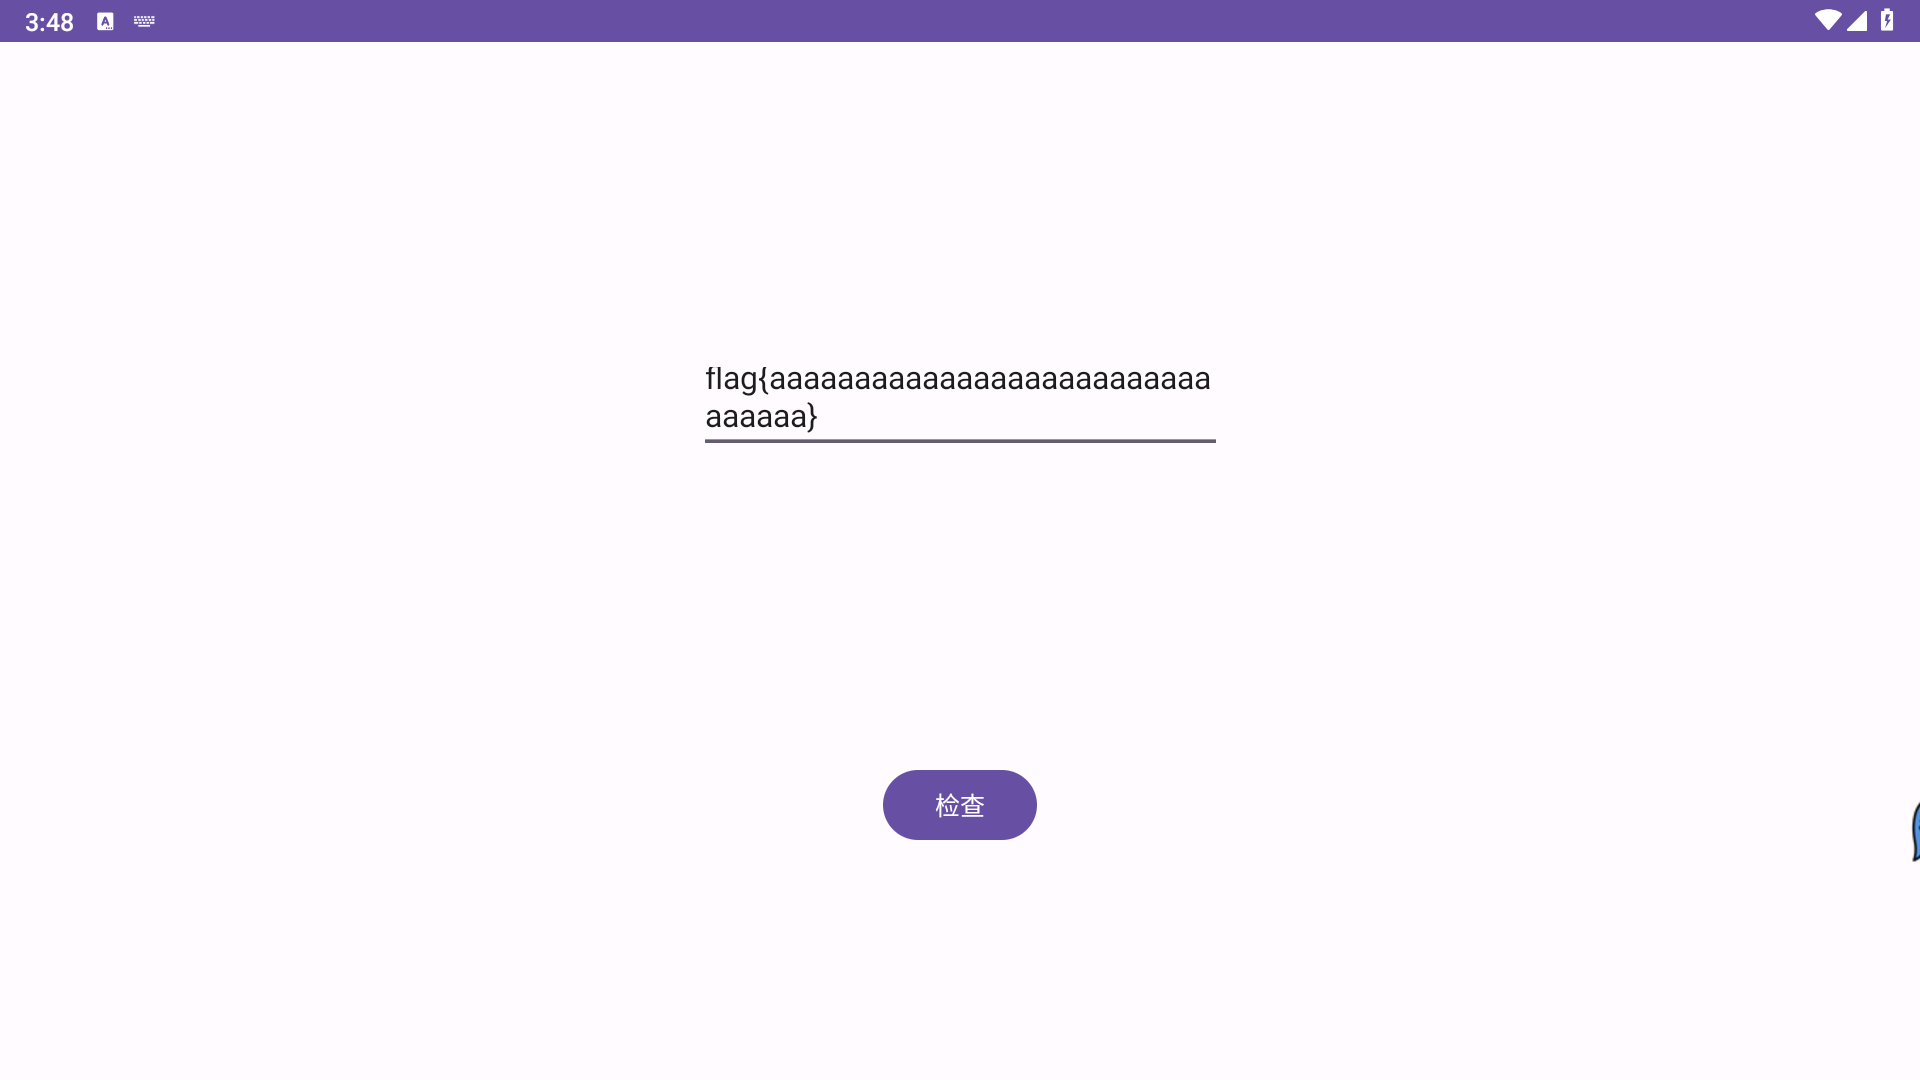
注意flag格式再触发
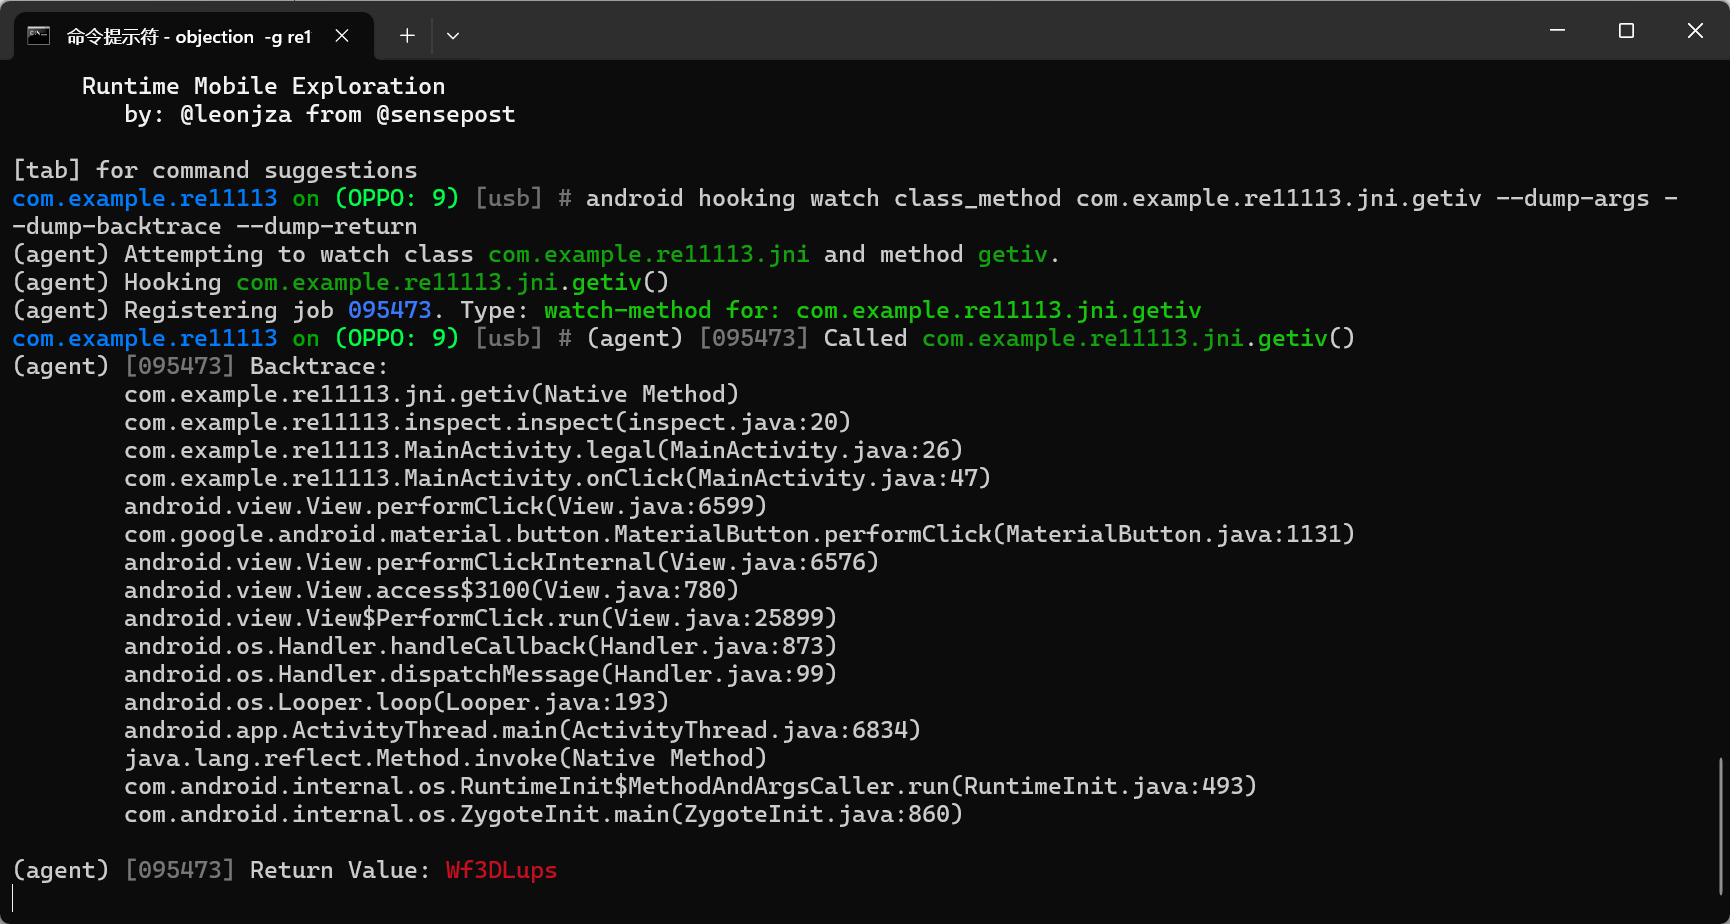
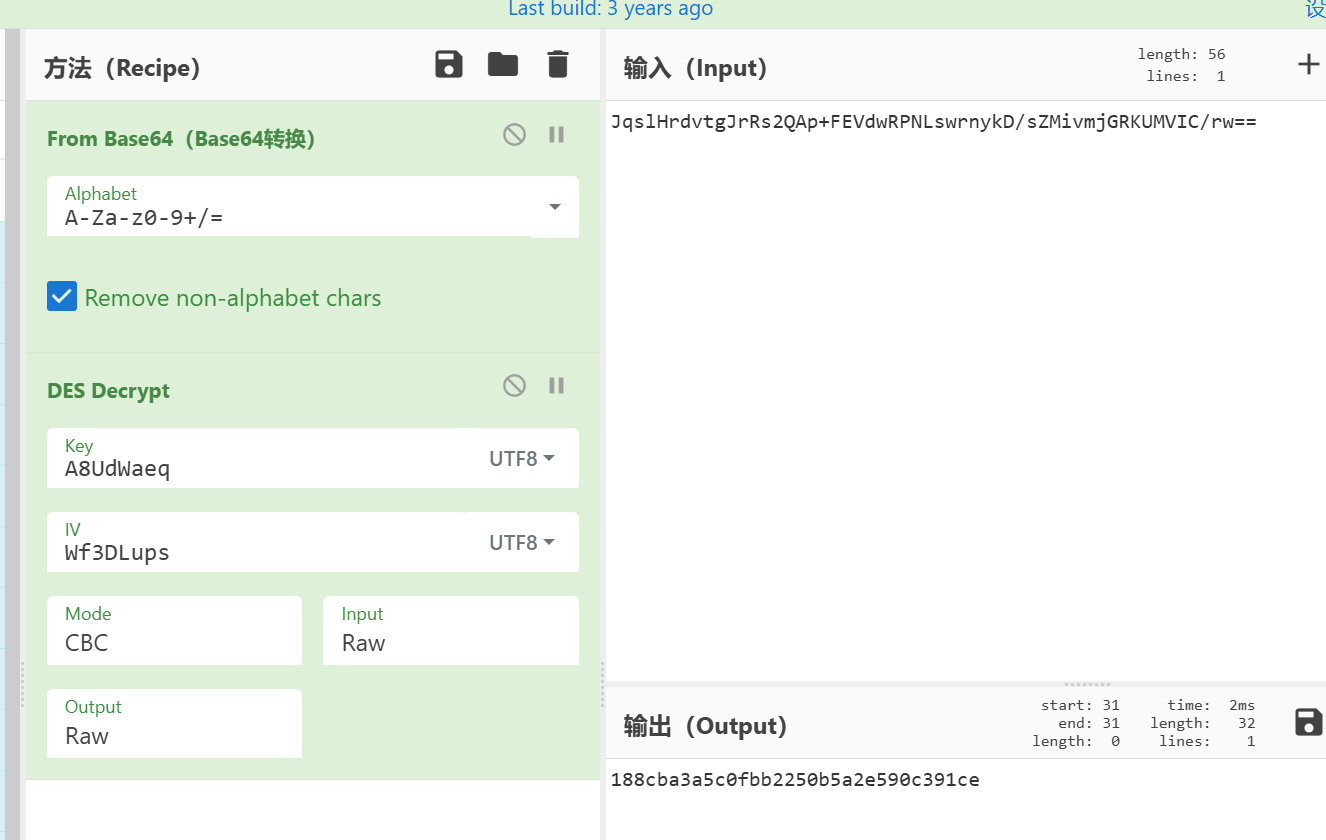
key:A8UdWaeq,iv:Wf3DLups
法二:unidbg
首先是unidbg的环境配置,这个特别麻烦,建议使用r0env集成环境一劳永逸
https://pan.baidu.com/share/init?surl=y6ceiOzWuv0Gl5FNksgciQ 提取码:v8at
在终端输入unidbg会自动打开unidbg的项目界面
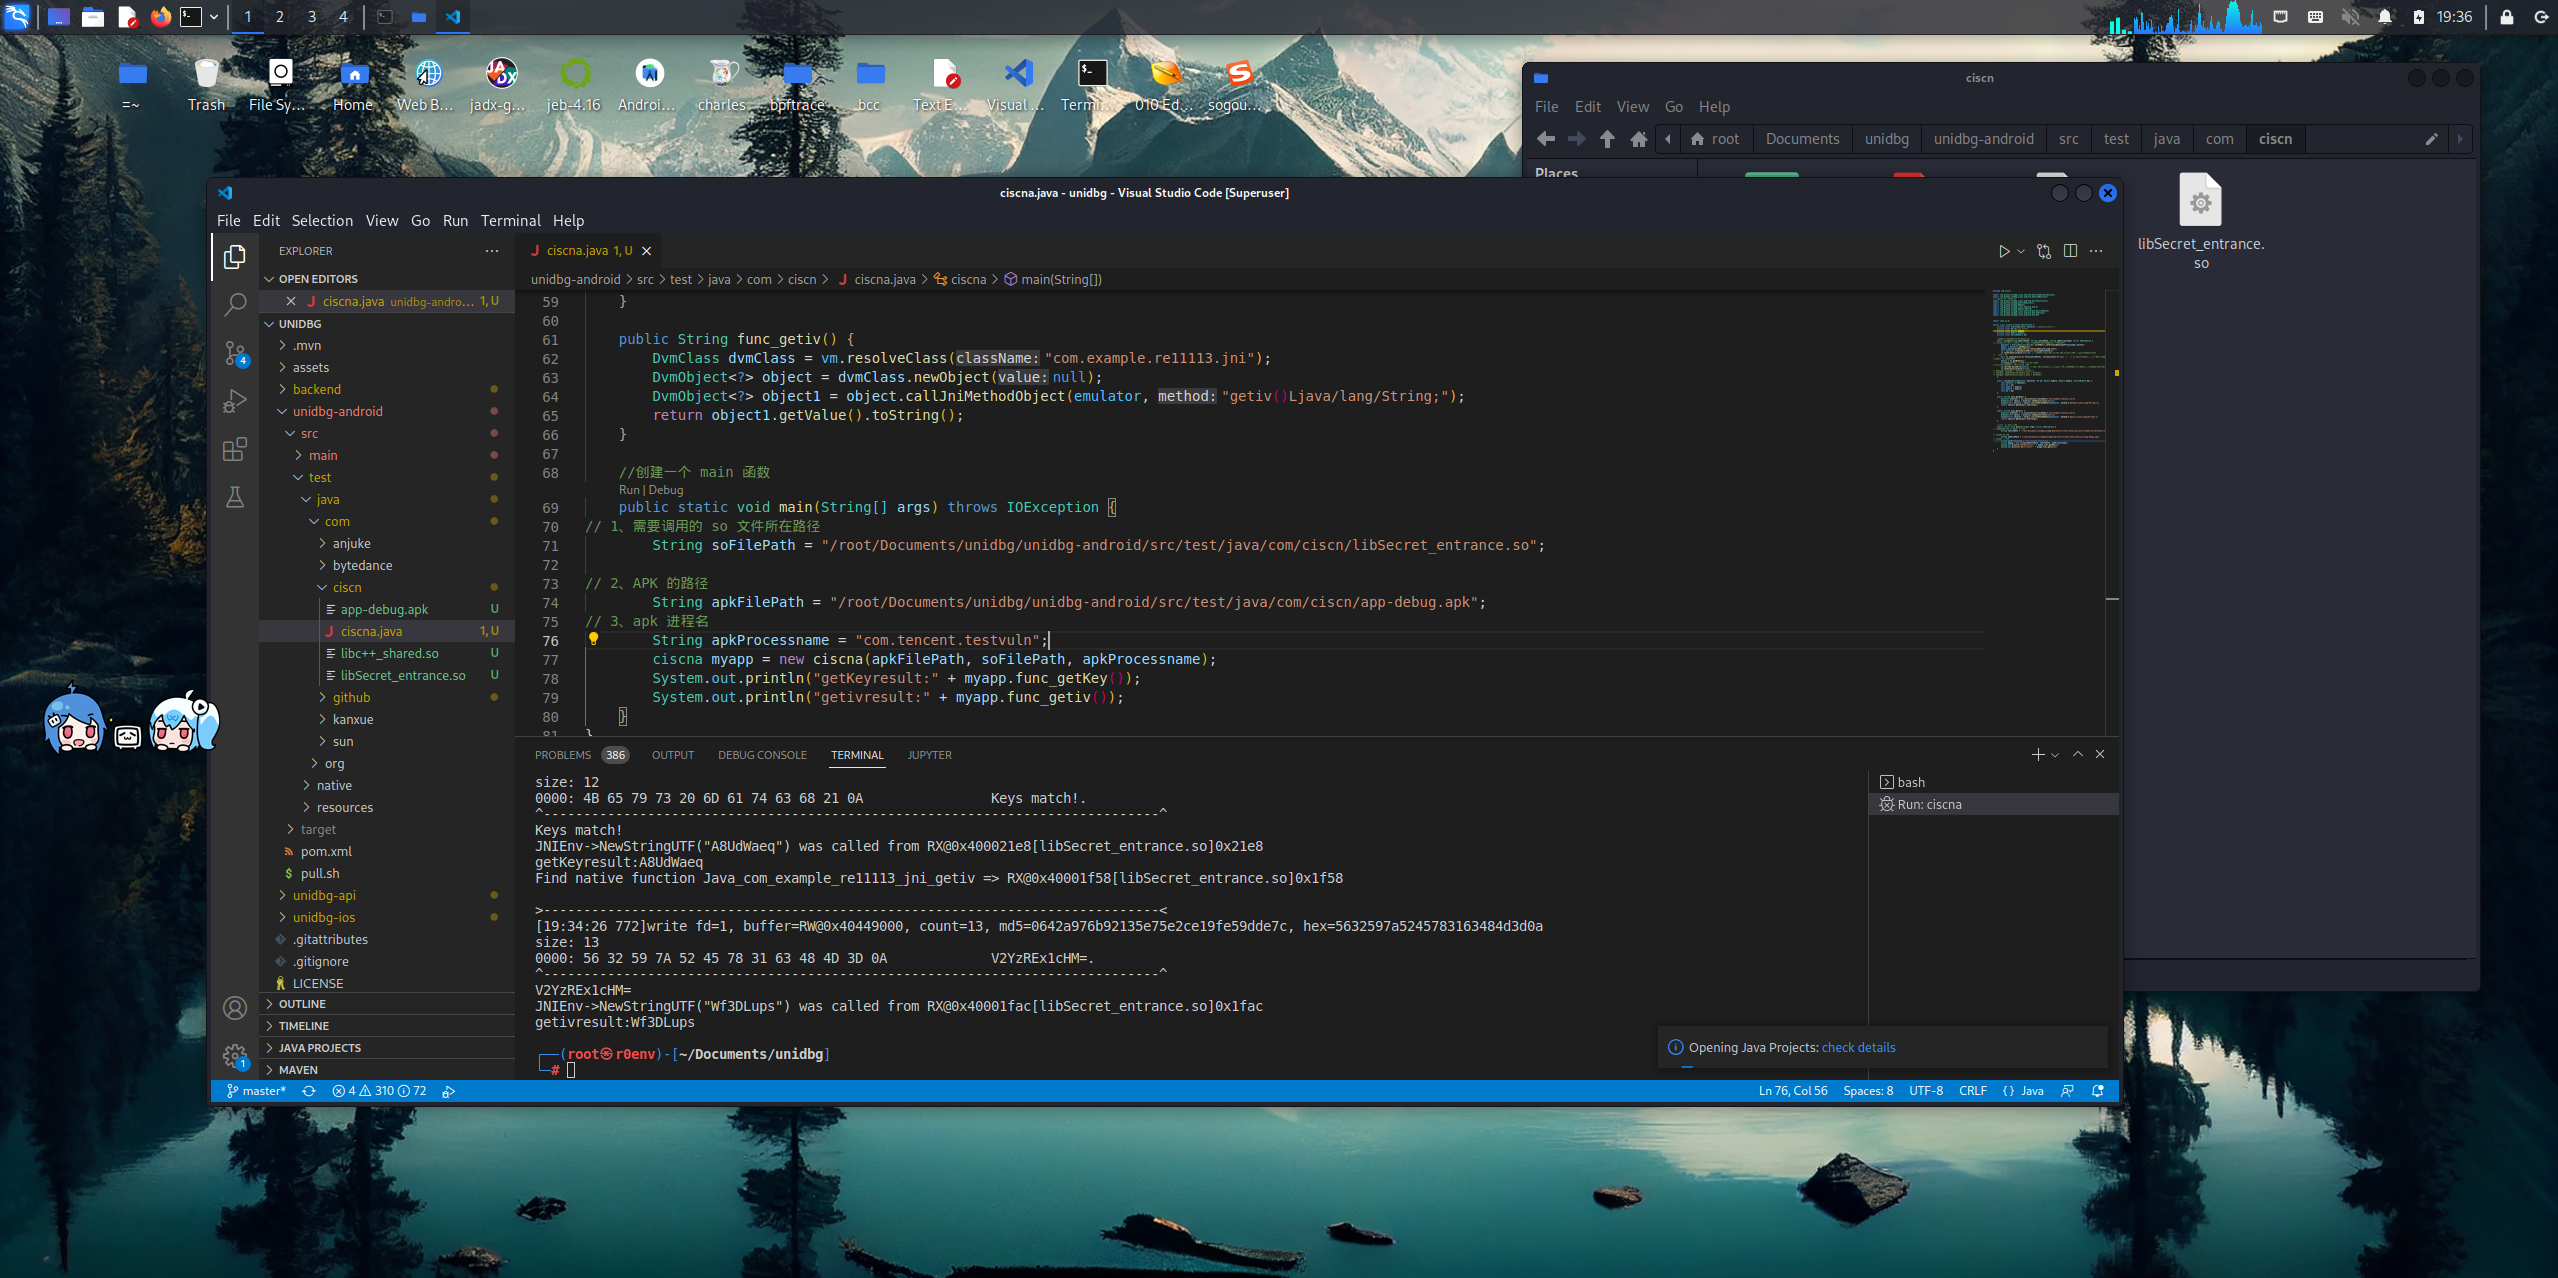
在/root/Documents/unidbg/unidbg-android/src/test/java/com/路径下构建我们的项目文件夹

package com.ciscn;import com.github.unidbg.linux.android.AndroidEmulatorBuilder;
import com.github.unidbg.linux.android.AndroidResolver;
// 导入通用且标准的类库
import com.github.unidbg.linux.android.dvm.AbstractJni;
import com.github.unidbg.AndroidEmulator;
import com.github.unidbg.Module;
import com.github.unidbg.linux.android.dvm.*;
import com.github.unidbg.memory.Memory;
import com.github.unidbg.linux.android.dvm.DalvikModule;
import com.github.unidbg.linux.android.dvm.DvmClass;
import com.github.unidbg.linux.android.dvm.VM;import java.io.*;public class ciscna extends AbstractJni {private final AndroidEmulator emulator; //android 模拟器 aprivate final VM vm;//vm 虚拟机private final Module module;private final Memory memory;private final DalvikModule dm;//将该类封装起来,以后直接套用模板public ciscna(String apkFilePath, String soFilePath, String apkProcessname) throws IOException {// 创建模拟器实例,进程名建议依照实际进程名填写,可以规避针对进程名的校验emulator = AndroidEmulatorBuilder.for64Bit().setProcessName(apkProcessname).build();memory = emulator.getMemory();memory.setLibraryResolver(new AndroidResolver(23));vm = emulator.createDalvikVM(new File(apkFilePath));vm.setVerbose(false); // 打印日志,会在调用初始化 JNI_unload 打印一些信息,默认:false// 加载目标 SOdm = vm.loadLibrary(new File(soFilePath), true); // 加载 so 到虚拟内存,第二个参数:是否需要初始化//获取本 SO 模块的句柄module = dm.getModule();vm.setJni(this); //设置 Jni,防止报错//创建完后,需要调用 JNI_onload 函数dm.callJNI_OnLoad(emulator); // 调用 JNI OnLoad,进行动态注册某些函数。如果都是静态注册,那就不用调用这个函数vm.setVerbose(true);// Debugger debugger = emulator.attach();// debugger.addBreakPoint(module.base + 0x1924C);// debugger.addBreakPoint(module.base + 0x19240);}public ciscna(AndroidEmulator emulator, VM vm, Module module, Memory memory, DalvikModule dm) {this.emulator = emulator;this.vm = vm;this.module = module;this.memory = memory;this.dm = dm;}public String func_getKey() {DvmClass dvmClass = vm.resolveClass("com.example.re11113.jni");DvmObject<?> object = dvmClass.newObject(null);DvmObject<?> object1 = object.callJniMethodObject(emulator, "getkey()Ljava/lang/String;");return object1.getValue().toString();}public String func_getiv() {DvmClass dvmClass = vm.resolveClass("com.example.re11113.jni");DvmObject<?> object = dvmClass.newObject(null);DvmObject<?> object1 = object.callJniMethodObject(emulator, "getiv()Ljava/lang/String;");return object1.getValue().toString();}//创建一个 main 函数public static void main(String[] args) throws IOException {// 1、需要调用的 so 文件所在路径String soFilePath = "/root/Documents/unidbg/unidbg-android/src/test/java/com/ciscn/libSecret_entrance.so";// 2、APK 的路径String apkFilePath = "/root/Documents/unidbg/unidbg-android/src/test/java/com/ciscn/app-debug.apk";// 3、apk 进程名String apkProcessname = "com.tencent.testvuln";ciscna myapp = new ciscna(apkFilePath, soFilePath, apkProcessname);System.out.println("getKeyresult:" + myapp.func_getKey());System.out.println("getivresult:" + myapp.func_getiv());}
}
看起来很复杂,不过大部分内容是模版改一改参数

key、iv也都可以得到
法三:雷电APP分析frida脚本一把梭(需要真机)

3. rust_baby
字符串可以定位到一段类似主逻辑的函数处
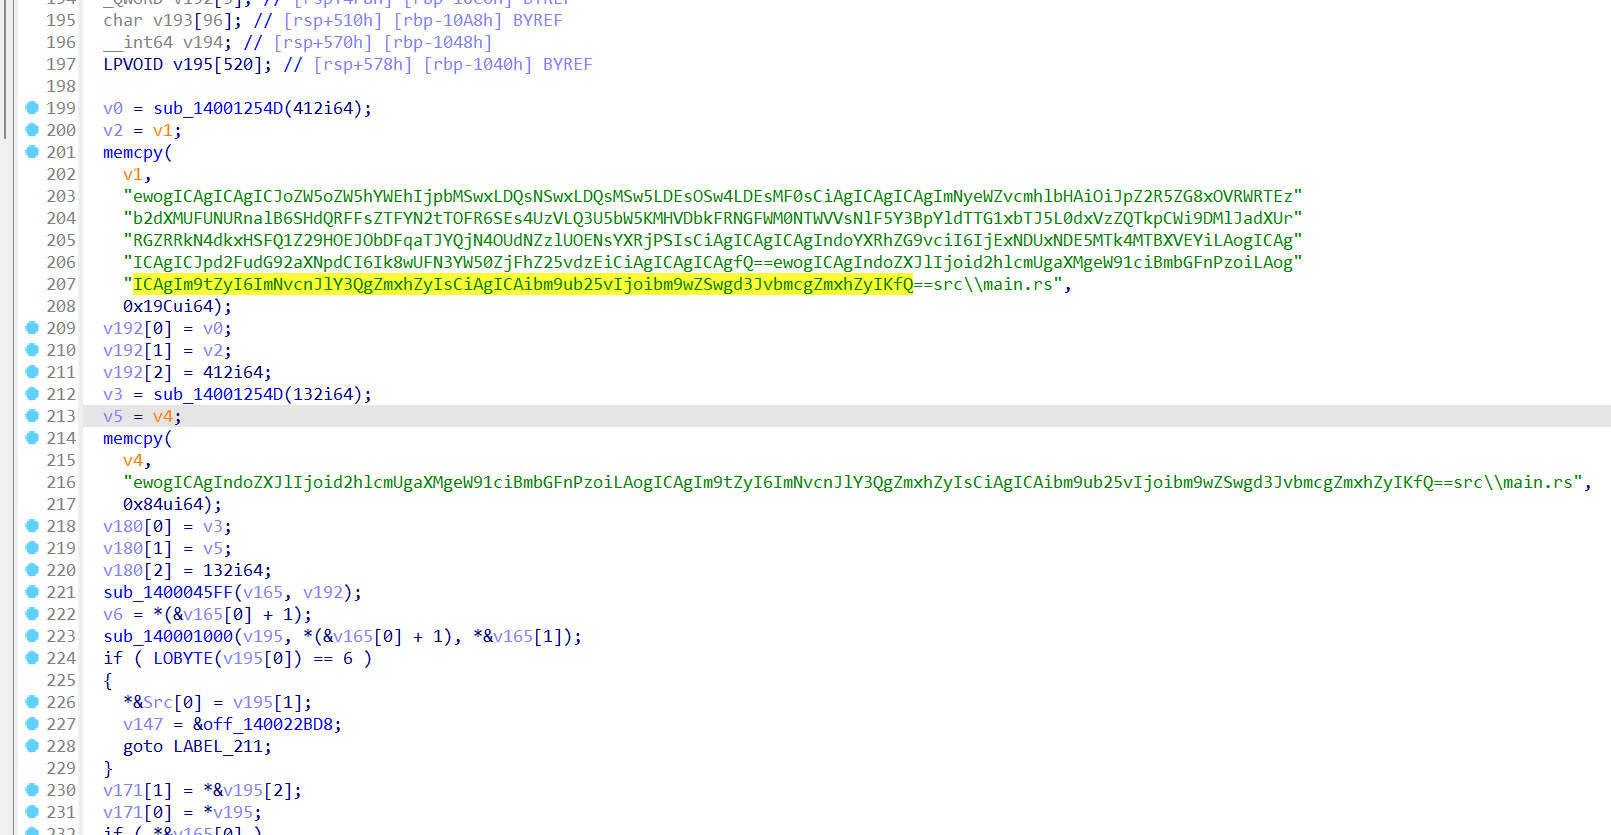
动调可以找到输入和判断等特殊位置


法一:双字节爆破

var number = 0function main()
{var base =  Module.findBaseAddress("./rust_baby.exe")if(base){Interceptor.attach(base.add(0x3EA8), {//序号加1的位置onEnter: function(args) {// console.log("成功!");number+=1;send(number);// 延迟 10 秒钟var delay = 0x4;// console.log("Program is ending, delaying for " + (delay / 1000) + " seconds...");var start = new Date().getTime();while (new Date().getTime() < start + delay);// console.log("Delay complete.");}});}
}
setImmediate(main);
#rust_exp
import subprocess
import fridafilename = "rust_baby.exe"
cmd = ["D:/下载/CTF附件/ciscn2024 初赛/rust_baby.exe"]
jscode = open("D:/fridafile/rust_hook.js", "rb").read().decode()class SUCCESSFLAG(Exception):"""这是一个自定义异常类"""passdef brute(F):  #程序插桩知道checkflag位置被运行了多少次def on_message(message, data): #定义了一个名为 on_message 的内部函数,用于处理从 Frida 脚本返回的消息global result  #声明了一个全局变量 result,用于存储 Frida 脚本返回的结果if message['type'] == 'send':result = message['payload']else:print(message)process = subprocess.Popen(cmd, stdin=subprocess.PIPE,stdout=subprocess.PIPE,stderr=subprocess.PIPE,universal_newlines=True)#使用 subprocess 模块启动了一个外部进程session = frida.attach(filename) #通过 Frida 模块的 attach 方法附加到目标进程script = session.create_script(jscode) #在目标进程中创建了一个 Frida 脚本,脚本内容由 jscode 变量指定script.on('message', on_message) #置了一个事件监听器,当 Frida 脚本发送消息时,会调用 on_message 函数进行处理script.load() #加载了 Frida 脚本process.stdin.write(F.decode()) #将待破解的字符串写入了外部进程的标准输入output, error = process.communicate()if "correct flag" in output:print("正确的flag是:",F.decode())raise SUCCESSFLAG("抛出flag成功的异常!!!")process.terminate() #终止外部进程的执行return resultdef bp(startflag,old_number1,tag1): #回溯函数global temptagglobal maxnumberidx = 0temp = old_number1targetidx = -1table = "-0123456789abcdefghijklmnopqrstuvwxyz}"for ch in table:startflag.append(ord(ch))startflag.append(10) #将当前字符的 ASCII 码和换行符添加到 startflag 中,用于构建待破解的字符串my_bytearray = bytearray(startflag)new_number = brute(my_bytearray) #调用 brute 函数,获取当前字符串的破解次数# print(ch,new_number,ord(ch))# print(my_bytearray.decode())if(new_number>old_number1 ): #如果当前字符串的破解次数大于旧的破解次数:if tag1 == 0 : #如果 tag1 为 0,说明是第一次发现更高破解次数的字符串,则更新 old_number1 和 targetidxold_number1 = new_numbertargetidx = idxif(tag1 > 0): #如果 tag1 大于 0,说明已经回溯过一次,需要继续回溯,此时减少 tag1。tag1 -= 1# if(new_number == old_number1):#     print(ch)idx += 1startflag = startflag[:-2] #更新 idx 并删除 startflag 中添加的字符和换行符。# print(targetidx)if(targetidx == -1):  #如果 targetidx 仍然为 -1,则表示在两个字节爆破时出现错误,需要进行回溯print("错误的:")my_bytearray = bytearray(startflag)print(my_bytearray.decode())print("去除错误字符!")startflag = startflag[:-1]print("magic:",temp-1)temptag = temptag + 1print("magictag:",temptag+1)return startflag,temp-1,temptagbpret = table[targetidx:targetidx+1]print("目标数据:",bpret,ord(bpret))startflag.append(ord(bpret)) #如果 targetidx 不为 -1,则说明找到了下一个正确的字符,添加到 startflag 中my_bytearray = bytearray(startflag)print(my_bytearray.decode())return startflag,old_number1,0#1.一开始爆破的固定5个字符
startflag1 = [102, 108, 97, 103, 123] #flag的格式是固定的所以是,flag{
#2.爆破到一半突然开始回溯,非常不理解直接手动添加前爆破出来的flag数据,大概是因为程序插桩的问题,js和python通信有误差还得手动添加数组
#手动添加刚刚爆破出来的flag:"flag{6e2480b3-4f02-4cf",[102, 108, 97, 103, 123, 54, 101, 50, 52, 56, 48, 98, 51, 45, 52, 102, 48, 50, 45, 52, 99, 102]
startflag = [102, 108, 97, 103, 123, 54, 101, 50, 52, 56, 48, 98, 51, 45, 52, 102, 48, 50, 45, 52, 99, 102]
startflag.append(10)
my_bytearray = bytearray(startflag)old_number = brute(my_bytearray) #获取初始的爆破次数 old_number
# print(old_number)
startflag = startflag[:-1] #去除一个回车
temptag = 0
tag = 0
idx = 0
temp = len(startflag) #计算一下初始长度cleartag = 5
while True:startflag,old_number,tag = bp(startflag,old_number,tag) #计算爆破if(temp < len(startflag)): #如果爆破出来的字节数增加,更新temptemp = len(startflag)print("----->",temp-5)if((temp-cleartag)%3 == 0):  #两个两个的字节爆破!!print("》》》》清理temptag")temptag = 0cleartag += 2
来自CISCN2024-re3-rust_baby(Frida多字节程序插桩爆破)_ciscn2024初赛 rust-CSDN博客的脚本
法二:硬逆
https://player.bilibili.com/player.html?bvid=BV1Zr421j7pr&autoplay=0
讲的蛮好的,就是挺麻烦,基本功要求高
4. whereThel1b

可以看到引用了whereThel1b动态链接库进行加密
Cpython打包的so文件没有什么反编译方法,只能IDA硬看
代码一坨看不懂

翻字符串能找到一个base64
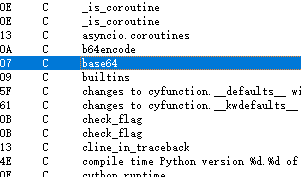

密文长度是56,base64是3->4,转回来flag是42个字符(猜测)
法一:爆破
那就可以三字节爆破
参考自https://blog.csdn.net/wcj126/article/details/139065037
import string
import whereThel1b
# 初始化flag模板
flag_template = 'flag{aaaaaaaaaaaaaaaaaaaaaaaaaaaaaaaaaaaa}'
flag_bytes = flag_template.encode()# 给定的加密向量
encryption_vector = [108, 117, 72, 80, 64, 49, 99, 19, 69, 115, 94, 93, 94, 115, 71, 95,84, 89, 56, 101, 70, 2, 84, 75, 127, 68, 103, 85, 105, 113, 80, 103,95, 67, 81, 7, 113, 70, 47, 73, 92, 124, 93, 120, 104, 108, 106, 17,80, 102, 101, 75, 93, 68, 121, 26
]# 初始化匹配起始位置和步长
start_pos = 0
step = 3
match_start = 0# 解码循环
for i in range(start_pos, 41, step):temp_flag = flag_bytes  # 保存当前flag副本用于尝试修改found_match = False  # 添加标志位判断本轮是否找到匹配for x in string.printable:for y in string.printable:for z in string.printable:temp_flag = temp_flag[:i] + bytes([ord(x), ord(y), ord(z)]) + temp_flag[i + 3:]whereThel1b.whereistheflag(temp_flag)temp_result = whereThel1b.trytry(temp_flag)match = all(encryption_vector[j] == (temp_result[j]) for j in range(match_start, match_start + 4))if match:flag_bytes = temp_flag  # 更新flag字节found_match = True  # 设置找到匹配标志break  # 匹配成功,跳出yz循环if found_match:break  # 如果匹配成功,也跳出x循环if found_match:break  # 直接进行下一轮,无需执行else部分print(flag_bytes.decode())match_start += 4  # 更新匹配起始索引# 输出最终解码的flag
print(flag_bytes.decode())
中间加密部分照抄就行

法二:硬逆
import whereThel1b
flag = input("where is my flag:")
flag = flag.encode()
print("input: ",flag)
encry = [108, 117, 72, 80, 64, 49, 99, 19, 69, 115, 94, 93, 94, 115, 71, 95, 84, 89, 56, 101, 70, 2, 84, 75, 127, 68, 103, 85, 105, 113, 80, 103, 95, 67, 81, 7, 113, 70, 47, 73, 92, 124, 93, 120, 104, 108, 106, 17, 80, 102, 101, 75, 93, 68, 121, 26]ret0 = whereThel1b.whereistheflag(flag)
print("whereistheflag ret: ",ret0)
print("after whereistheflag: ",flag)ret = whereThel1b.trytry(flag)print("ret: ",ret)
for i in ret:print(chr(i),end='')
print("\n")
print("encry: ", encry)
for i in encry:print(chr(i),end='')
print("\n")if ret == encry:print("rrrrrrrrrrrright")
else:print("wwwwwwwwwwwwwwwrong")
直接hook一下返回值

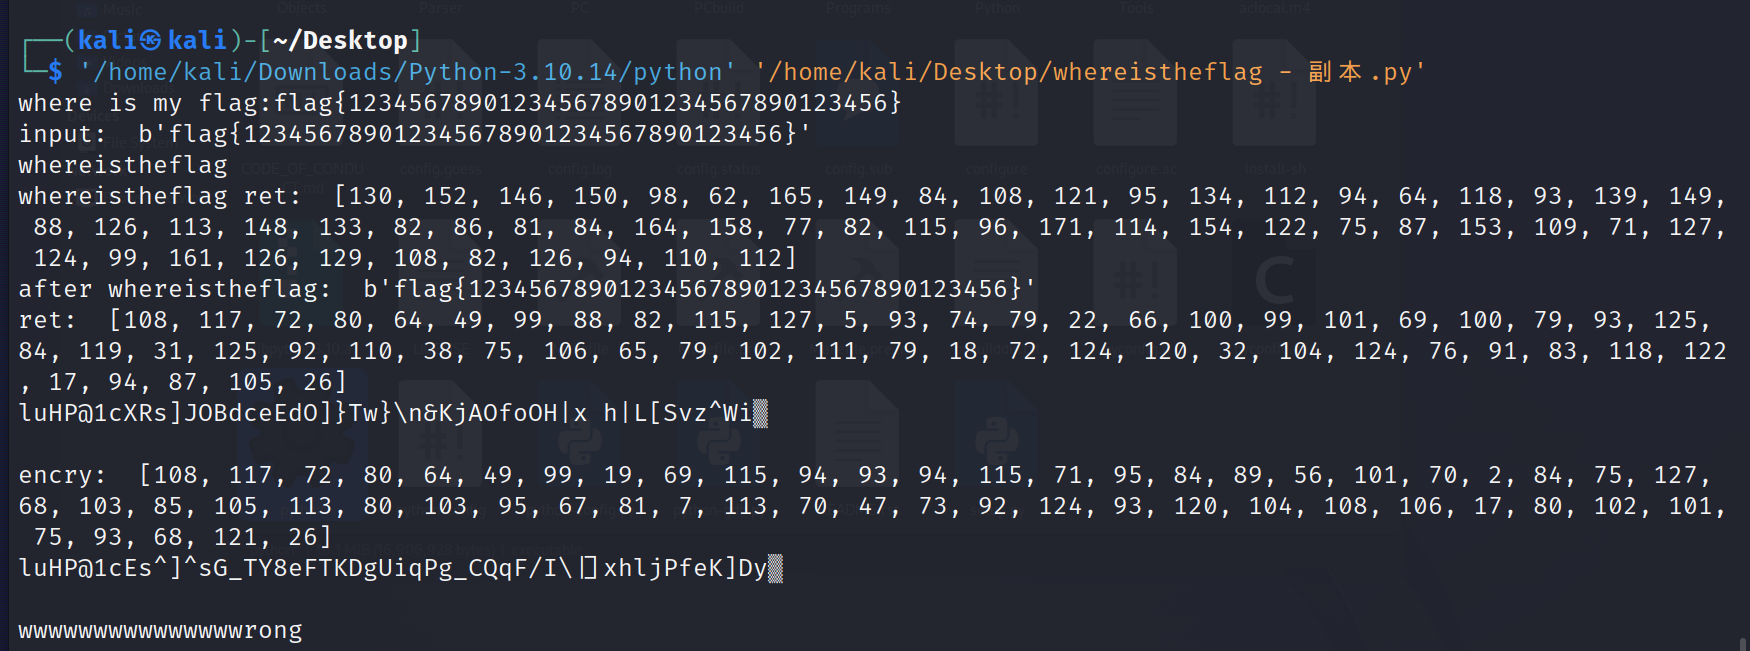

会发现whereThel1b.whereistheflag(flag)返回了一堆随机数,对flag似乎没有影响
最后的encry应该是flag加密后的base64


字符串收集信息,可以猜测是利用seed生成randint、random之类的随机数进行了处理
借助GPT对几个关键函数进行分析,忽略一些异常处理,看一下主要的逻辑
def trytry(*args, **kwargs):# Attempt to access 'random.seed' from the builtins or module globalstry:import randomseed = random.seedexcept AttributeError:raise ImportError("Cannot import 'random.seed'")# Call the seed methodtry:seed(0)except Exception as e:raise RuntimeError(f"Error calling 'random.seed': {str(e)}")# Attempt to access 'whereistheflag1' from the builtins or module globalstry:whereistheflag1 = globals().get('whereistheflag1', __builtins__.get('whereistheflag1'))except AttributeError:raise ImportError("Cannot import 'whereistheflag1'")# Call the whereistheflag1 method with platry:result = whereistheflag1(pla)except Exception as e:raise RuntimeError(f"Error calling 'whereistheflag1': {str(e)}")return result
看到trytry函数调用了whereistheflag1函数,设置了随机数种子0
import base64
import randomdef whereistheflag1(pla):# Encode input using base64encoded = base64.b64encode(pla.encode())# Convert encoded bytes to list of integersencoded_list = list(encoded)# Create an empty list to store resultsresult_list = []# Iterate over the encoded listfor i in range(len(encoded_list)):# Generate a random integer in the range [0, length of the list]rand_int = random.randint(0, len(encoded_list))# Fetch an item from the list based on the current indexitem = encoded_list[i]# Perform XOR operationxor_result = item ^ rand_int# Append the result to the result listresult_list.append(xor_result)# Return the result listreturn result_list
输入的内容base64编码之后,与通过randint生成的随机数异或
参考https://blog.csdn.net/qq_65474192/article/details/139089468?spm=1001.2014.3001.5502
import random
import base64encry = [108, 117, 72, 80, 64, 49, 99, 19, 69, 115, 94, 93, 94, 115, 71, 95, 84, 89, 56, 101, 70, 2, 84, 75, 127, 68, 103, 85, 105, 113, 80, 103, 95, 67, 81, 7, 113, 70, 47, 73, 92, 124, 93, 120, 104, 108, 106, 17, 80, 102, 101, 75, 93, 68, 121, 26]
key = []
random.seed(0)
for ch in range(len(encry)):key.append(random.randint(0, len(encry)))
flag = []
for i in range(len(encry)):flag.append(key[i] ^ encry[i])# 将 flag 转换为字符列表并连接成字符串
flag_str = ''.join(map(chr, flag))# 将生成的字符串编码为字节
flag_bytes = flag_str.encode()# 使用 Base64 解码字节并打印
decoded = base64.b64decode(flag_bytes)
print(decoded)
#b'flag{7f9a2d3c-07de-11ef-be5e-cf1e88674c0b}'
这篇关于CISCN2024 初赛 wp 部分复现(Re)的文章就介绍到这儿,希望我们推荐的文章对编程师们有所帮助!


