本文主要是介绍Qml 中实现对原始视频图像格式( YUV / RGB )支持,希望对大家解决编程问题提供一定的参考价值,需要的开发者们随着小编来一起学习吧!
【写在前面】
之前一直在学着视频相关的知识,然后工作也正好是监控相关的。
并且界面部分用 Qml 开发的 ( 相当舒服,是我擅长且喜欢的 )。
一开始,我觉得相当容易,只是显示解码好的图像而已,没什么难度。
记得前面写过一篇在 Qml 中使用 QImage:Qml中实现多视图,多图像源(QImage / QPixmap)_梦起丶的博客-CSDN博客。
然后通过使用 QQmlImageProvider 来对 QImage / QPixmap / QQuickTextureFactory 实现支持。
实际上,QImage 支持绝大多数 RGB 格式,所以即便是 YUV 格式,也可以通过转换为 RGB 来实现,然而转换所带来的性能损失也是必须考虑的。
另一方面, QQuickTextureFactory 是其中最强大的,但遗憾的是没有任何相关的资料 ( 就很烦,因为很明显,这个就是我所需要的,以后会尝试 )。
并且,使用 QQmlImageProvider 导致底层设计比较丑陋,所以我还是舍弃了这个方法。
最终,我的方案是使用 Qt MutiMedia 模块中的 QAbstractVideoSurface 和 VideoOutput 来完成。
本篇主要内容:
1、QML 中的 VideoOutput: source;
2、如何使用 YUV 数据创建 QVideoFrame;
3、在 VideoOutput 上呈现视频帧;
【正文开始】
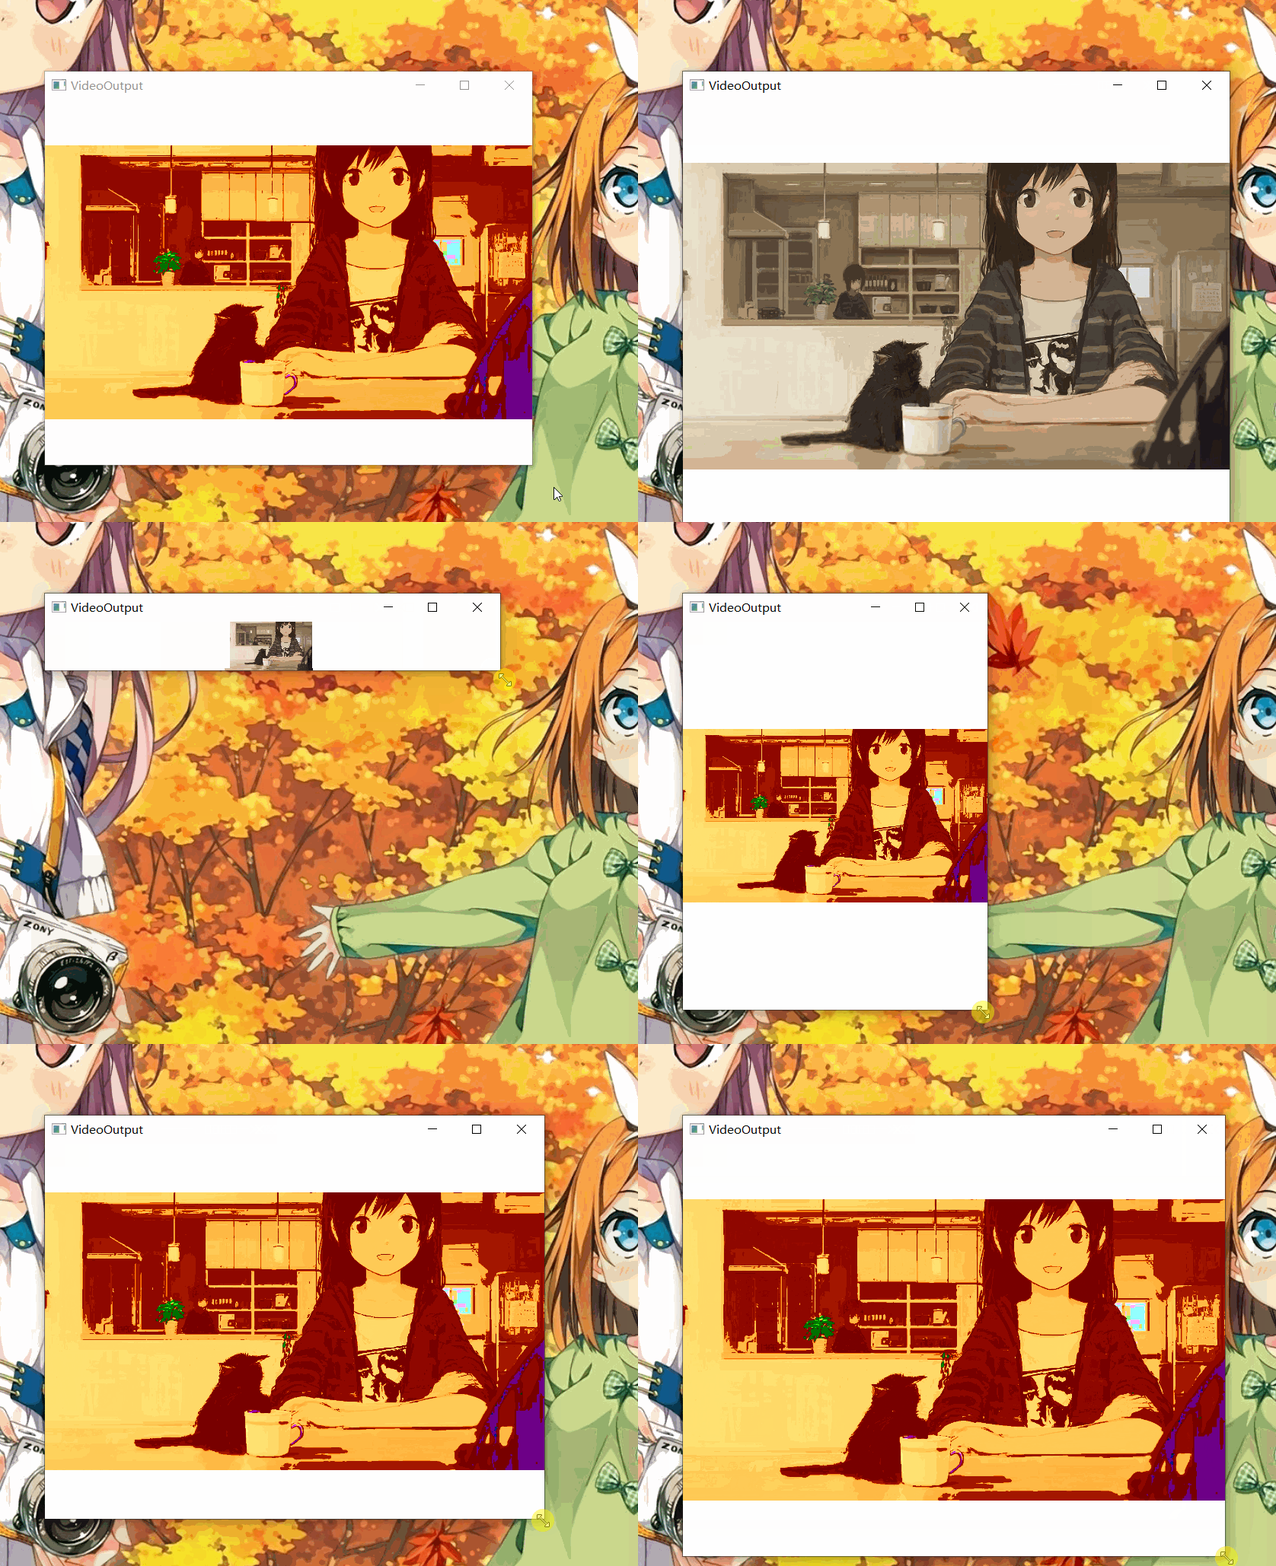
先来看看效果图:

其中,视频源来自一张 YUV 图像 ( 这里是 NV12 ),然后定时变化来模拟视频效果:
//读入一张yuv图像QFile file("./test.yuv");file.open(QIODevice::ReadOnly);QByteArray data = file.readAll();d->m_testData.resize(data.size());memcpy(d->m_testData.data(), data.constData(), size_t(data.size()));file.close();首先,说明一下 VideoOutput: source 属性:
source: Variant
此属性保存提供视频帧( 例如 MediaPlayer 或 Camera )的源项目。
如果要扩展自己的 C++ 类以与 VideoOutput 互操作,则可以为基于 QObject 的类提供 mediaObject 属性,该属性公开具有可用 QVideoRendererControl 的 QMediaObject 派生类。
也可以为基于 QObject 的类提供可写 videoSurface 属性,可以接受基于 QAbstractVideoSurface 的类,并且可以遵循正确的协议将 QVideoFrame 传递给它。
可以看出,在 VideoOutput 中,想要使用自己的视频源,有两种方法:
1、提供 QMediaObject 派生类属性,该属性需要具有可用的 QVideoRenderControl ,类似于下面:
class MyMedia : QObject {
public:
QMediaObject *mediaObject();
};
其中,Qt 本身已经实现了一些 QMediaObject 派生类,例如:QAudioDecoder, QCamera, QMediaPlayer, 和 QRadioTuner,因此,这些类能够直接提供给 VideoOutput: source。
2、基于 QObject 的类提供可写 videoSurface 属性,可以接受基于 QAbstractVideoSurface 的类,然后传递自己的 QVideoFrame 即可,这也正是本篇所使用的方法:
#ifndef VIDEOFRAMEPROVIDER_H
#define VIDEOFRAMEPROVIDER_H#include <QObject>
#include <QAbstractVideoSurface>
#include <QVideoSurfaceFormat>QT_FORWARD_DECLARE_CLASS(VideoFrameProviderPrivate);class VideoFrameProvider : public QObject
{Q_OBJECTQ_PROPERTY(QAbstractVideoSurface *videoSurface READ videoSurface WRITE setVideoSurface)Q_PROPERTY(QString videoUrl READ videoUrl WRITE setVideoUrl NOTIFY videoUrlChanged)public:VideoFrameProvider(QObject *parent = nullptr);~VideoFrameProvider();QAbstractVideoSurface *videoSurface();void setVideoSurface(QAbstractVideoSurface *surface);QString videoUrl() const;void setVideoUrl(const QString &url);void setFormat(int width, int heigth, QVideoFrame::PixelFormat pixFormat);signals:/*** @brief newVideoFrame 有新的视频帧* @param frame 视频帧*/void newVideoFrame(const QVideoFrame &frame);void videoUrlChanged();public slots:void onNewVideoFrameReceived(const QVideoFrame &frame);private:VideoFrameProviderPrivate *d = nullptr;
};#endif // VIDEOFRAMEPROVIDER_H
全部实现如下:
#include "videoframeprovider.h"#include <QFile>
#include <QFileInfo>
#include <QSharedPointer>
#include <QTimer>class VideoFrameProviderPrivate
{
public:QAbstractVideoSurface *m_surface = nullptr;QVideoSurfaceFormat m_format;QString m_videoUrl;QSharedPointer<QVideoFrame> m_frame = nullptr;/*** 以下代码仅供示例使用* 实际上,此处应放你的视频源,它可以来自你自己的解码器*/QVector<char> m_testData;QTimer *m_testTimer = nullptr;
};VideoFrameProvider::VideoFrameProvider(QObject *parent): QObject(parent)
{d = new VideoFrameProviderPrivate;int width = 1280;int height = 720;int size = width * height * 3 / 2;setFormat(width, height, QVideoFrame::Format_NV12);d->m_frame.reset(new QVideoFrame(size, QSize(width, height), width, QVideoFrame::Format_NV12));d->m_testTimer = new QTimer(this);//读入一张yuv图像QFile file("./test.yuv");file.open(QIODevice::ReadOnly);QByteArray data = file.readAll();d->m_testData.resize(data.size());memcpy(d->m_testData.data(), data.constData(), size_t(data.size()));file.close();connect(d->m_testTimer, &QTimer::timeout, this, [=]{static int count = 0;//简单变化一下,模拟视频帧if (++count & 0x1) {for (auto &it : d->m_testData) {it *= 0.5;}} else {for (auto &it : d->m_testData) {it *= 2.0;}}if (d->m_frame->map(QAbstractVideoBuffer::WriteOnly)) {memcpy(d->m_frame->bits(), d->m_testData.data(), size_t(d->m_testData.size()));d->m_frame->unmap();emit newVideoFrame(*d->m_frame.get());};});connect(this, &VideoFrameProvider::newVideoFrame, this, &VideoFrameProvider::onNewVideoFrameReceived);d->m_testTimer->start(200);
}VideoFrameProvider::~VideoFrameProvider()
{if (d) delete d;
}QAbstractVideoSurface *VideoFrameProvider::videoSurface()
{return d->m_surface;
}void VideoFrameProvider::setVideoSurface(QAbstractVideoSurface *surface)
{if (d->m_surface && d->m_surface != surface && d->m_surface->isActive()) {d->m_surface->stop();}d->m_surface = surface;if (d->m_surface && d->m_format.isValid()) {d->m_format = d->m_surface->nearestFormat(d->m_format);d->m_surface->start(d->m_format);}
}QString VideoFrameProvider::videoUrl() const
{return d->m_videoUrl;
}void VideoFrameProvider::setVideoUrl(const QString &url)
{if (d->m_videoUrl != url) {d->m_videoUrl = url;emit videoUrlChanged();}
}void VideoFrameProvider::setFormat(int width, int heigth, QVideoFrame::PixelFormat pixFormat)
{QVideoSurfaceFormat format(QSize(width, heigth), pixFormat);d->m_format = format;if (d->m_surface) {if (d->m_surface->isActive()) {d->m_surface->stop();}d->m_format = d->m_surface->nearestFormat(format);d->m_surface->start(d->m_format);}
}void VideoFrameProvider::onNewVideoFrameReceived(const QVideoFrame &frame)
{if (d->m_surface)d->m_surface->present(frame);
}
实际上,关键的地方在于能够提供正确的 QVideoFrame,并设置正确的 Format,
而 QVideoFrame 支持的格式相当多,例如 NV12、NV21、YUYV 等等,然后使用 QAbstractVideoSurface::present(const QVideoFrame &frame) 传递给 VideoOutput 即可呈现。
另外需要注意的一点的是 QVideoFrame 的数据填充方式:
if (d->m_frame->map(QAbstractVideoBuffer::WriteOnly)) {memcpy(d->m_frame->bits(), d->m_testData.data(), size_t(d->m_testData.size()));d->m_frame->unmap();emit newVideoFrame(*d->m_frame.get());};最后的使用就相当简单了:
import QtQuick 2.12
import QtQuick.Window 2.12
import QtMultimedia 5.8
import an.video 1.0Window {visible: truewidth: 640height: 480title: qsTr("VideoOutput")VideoFrameProvider {id: providervideoUrl: "rtsp://xxx.xxx.xxx/channel=1"}VideoOutput {anchors.fill: parentsource: provider}
}
videoUrl 则是为了实现多路流视频的播放,这样在 QML 中相当简单和直观。
【结语】
呼~总算写完了,我的 VideoFrameProvider 实现已经非常不错了。
当然,如果要自己使用的话,只需把提供数据的部分改下即可。
最后,附上项目链接(多多star呀..⭐_⭐):
CSDN的:Qml中实现对原始视频图像格式(YUV/RGB)支持_VideoFrameProvider-C++文档类资源-CSDN下载
Github的:GitHub - mengps/QmlControls: Qt / Qml 控件
这篇关于Qml 中实现对原始视频图像格式( YUV / RGB )支持的文章就介绍到这儿,希望我们推荐的文章对编程师们有所帮助!


