本文主要是介绍封装一个websocket,支持断网重连、心跳检测,拿来开箱即用,希望对大家解决编程问题提供一定的参考价值,需要的开发者们随着小编来一起学习吧!
封装一个websocket,支持断网重连、心跳检测
代码封装
编写 WebSocketClient.js
import { EventDispatcher } from './dispatcher'export class WebSocketClient extends EventDispatcher {constructor(url) {console.log(url, 'urlurl')super()this.url = url}// #socket实例socket = null// #重连次数reconnectAttempts = 0// #最大重连数maxReconnectAttempts = 5// #重连间隔reconnectInterval = 10000 // 10 seconds// #发送心跳数据间隔heartbeatInterval = 1000 * 30// #计时器idheartbeatTimer = undefined// #彻底终止wsstopWs = false// >生命周期钩子onopen(callBack) {this.addEventListener('open', callBack)}onmessage(callBack) {this.addEventListener('message', callBack)}onclose(callBack) {this.addEventListener('close', callBack)}onerror(callBack) {this.addEventListener('error', callBack)}// >消息发送send(message) {if (this.socket && this.socket.readyState === WebSocket.OPEN) {this.socket.send(message)} else {console.error('[WebSocket] 未连接')}}// !初始化连接connect() {if (this.reconnectAttempts === 0) {this.log('WebSocket', `初始化连接中...          ${this.url}`)}if (this.socket && this.socket.readyState === WebSocket.OPEN) {return}this.socket = new WebSocket(this.url)// !websocket连接成功this.socket.onopen = (event) => {this.stopWs = false// 重置重连尝试成功连接this.reconnectAttempts = 0// 在连接成功时停止当前的心跳检测并重新启动this.startHeartbeat()this.log('WebSocket', `连接成功,等待服务端数据推送[onopen]...     ${this.url}`)this.dispatchEvent('open', event)}this.socket.onmessage = (event) => {this.dispatchEvent('message', event)this.startHeartbeat()}this.socket.onclose = (event) => {if (this.reconnectAttempts === 0) {this.log('WebSocket', `连接断开[onclose]...    ${this.url}`)}if (!this.stopWs) {this.handleReconnect()}this.dispatchEvent('close', event)}this.socket.onerror = (event) => {if (this.reconnectAttempts === 0) {this.log('WebSocket', `连接异常[onerror]...    ${this.url}`)}this.closeHeartbeat()this.dispatchEvent('error', event)}}// > 断网重连逻辑handleReconnect() {if (this.reconnectAttempts < this.maxReconnectAttempts) {this.reconnectAttempts++this.log('WebSocket',`尝试重连... (${this.reconnectAttempts}/${this.maxReconnectAttempts})       ${this.url}`)setTimeout(() => {this.connect()}, this.reconnectInterval)} else {this.closeHeartbeat()this.log('WebSocket', `最大重连失败,终止重连: ${this.url}`)}}// >关闭连接close() {if (this.socket) {this.stopWs = truethis.socket.close()this.socket = nullthis.removeEventListener('open')this.removeEventListener('message')this.removeEventListener('close')this.removeEventListener('error')}this.closeHeartbeat()}// >开始心跳检测 -> 定时发送心跳消息startHeartbeat() {if (this.stopWs) returnif (this.heartbeatTimer) {this.closeHeartbeat()}this.heartbeatTimer = setInterval(() => {if (this.socket) {this.socket.send(JSON.stringify({ type: 'heartBeat', data: {} }))this.log('WebSocket', '送心跳数据...')} else {console.error('[WebSocket] 未连接')}}, this.heartbeatInterval)}// >关闭心跳closeHeartbeat() {clearInterval(this.heartbeatTimer)this.heartbeatTimer = undefined}
}
引用的 dispatcher.js 源码
import { Log } from './log'export class EventDispatcher extends Log {constructor() {super()this.listeners = {}}addEventListener(type, listener) {if (!this.listeners[type]) {this.listeners[type] = []}if (this.listeners[type].indexOf(listener) === -1) {this.listeners[type].push(listener)}}removeEventListener(type) {this.listeners[type] = []}dispatchEvent(type, data) {const listenerArray = this.listeners[type] || []if (listenerArray.length === 0) returnlistenerArray.forEach((listener) => {listener.call(this, data)})}
}
上面还用到了一个 log.js ,用于美化控制台打印的,这个文件在其他地方也通用
export class Log {static console = truelog(title, text) {if (!Log.console) returnconst color = '#09c'console.log(`%c ${title} %c ${text} %c`,`background:${color};border:1px solid ${color}; padding: 1px; border-radius: 2px 0 0 2px; color: #fff;`,`border:1px solid ${color}; padding: 1px; border-radius: 0 2px 2px 0; color: ${color};`,'background:transparent')}closeConsole() {Log.console = false}
}
至此一个 WebSocket 就封装好了
使用方法
首先使用node编写一个后端服务,用于 WebSocket 连接
需要安装一下 ws
npm install ws
const WebSocket = require("ws");const wss = new WebSocket.Server({port: 3200});console.log("服务运行在http://localhost:3200/");wss.on("connection", (ws) => {console.log("[服务器]:连接成功");ws.send(`[websocket云端]您已经连接云端!等待数据推送~`);ws.on("message", (res) => {ws.send(`[websocket云端]收到消息:${res.toString()}`);});ws.on("close", () => {console.log("[服务器]:连接已关闭~");});
});
然后我这里编写了一个简单的demo页面
<template><div><el-button type="primary" @click="connection">创建连接</el-button><el-button type="danger" @click="close">关闭连接</el-button><el-input v-model="message" placeholder="placeholder"></el-input><el-button type="primary" @click="send">发送消息</el-button><ul><li v-for="(item, index) in messageList" :key="index">{{ item }}</li></ul></div>
</template><script>
import { WebSocketClient } from '@/utils/WebSocketClient'export default {data() {return {message: '',messageList: [],ws: null,}},methods: {connection() {if (this.ws) {this.close()}this.ws = new WebSocketClient('ws://localhost:3200')this.setupWebSocketListeners()this.ws.connect()},close() {if (this.ws) {this.ws.close()this.ws = null}},send() {if (this.ws) {this.ws.send(this.message)}},setupWebSocketListeners() {this.ws.onmessage((msg) => {this.ws.log('WebSocketClient', msg.data)this.messageList.push(msg.data)})this.ws.onopen(() => {this.ws.log('WebSocketClient', '连接已打开')})this.ws.onclose(() => {this.ws.log('WebSocketClient', '连接已关闭')})this.ws.onerror((error) => {this.ws.log('WebSocketClient', '连接错误')console.error(error)})},},mounted() {this.connection()},
}
</script>
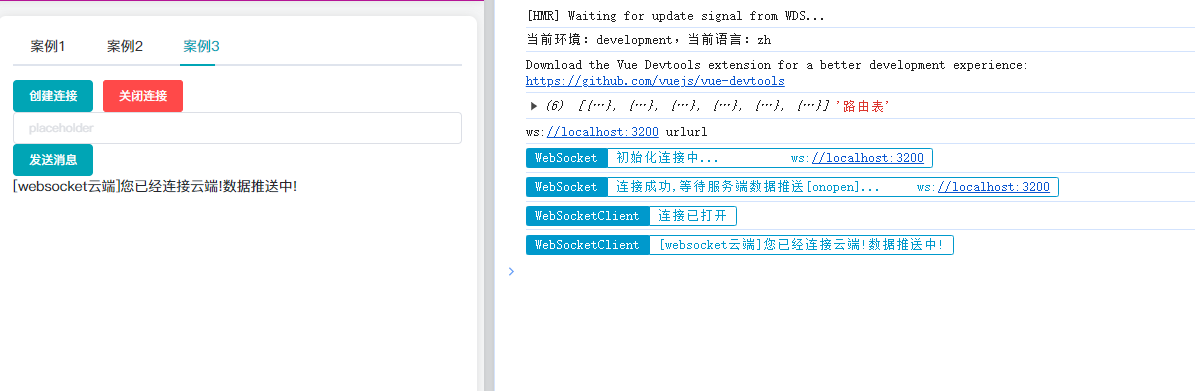
初次连接
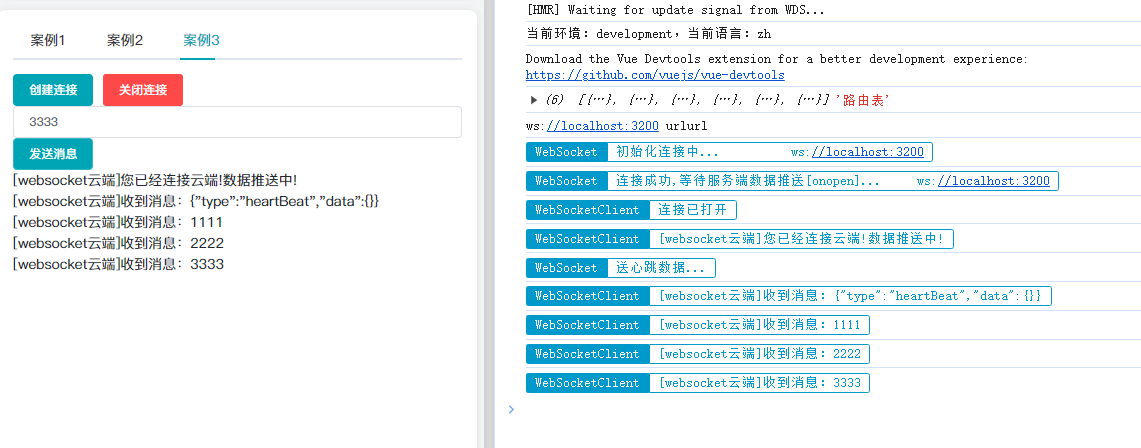
消息发送
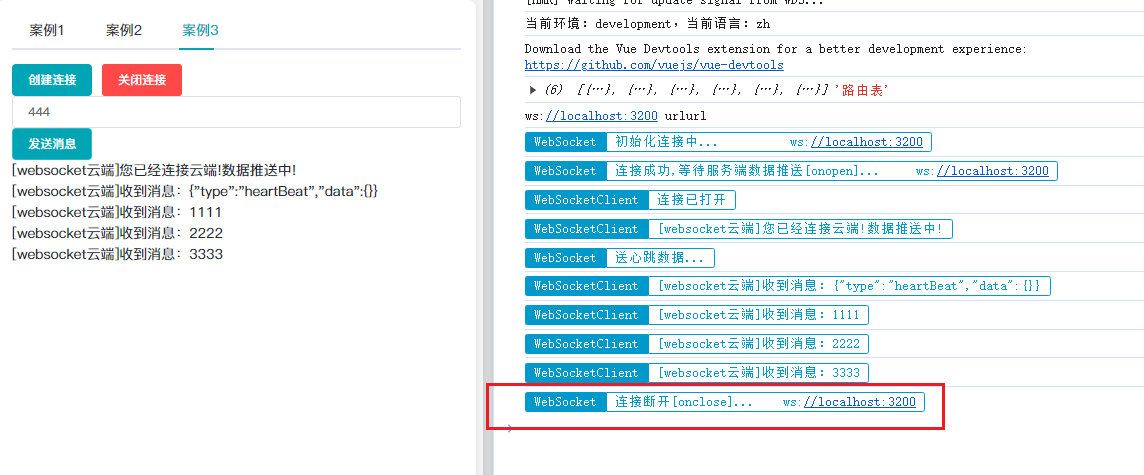
关闭连接后,消息就无法发送了
再次连接

这篇关于封装一个websocket,支持断网重连、心跳检测,拿来开箱即用的文章就介绍到这儿,希望我们推荐的文章对编程师们有所帮助!


