本文主要是介绍Ubuntu Nerfstudio安装,希望对大家解决编程问题提供一定的参考价值,需要的开发者们随着小编来一起学习吧!
https://blog.csdn.net/qq_30565883/article/details/133778529
https://blog.csdn.net/weixin_52581013/article/details/137982846
https://zhuanlan.zhihu.com/p/654394767
1. 结论
因为需要安装tiny-cuda-nn,然而

所以我之前的在笔记本上安装就白费了,只好换在服务器上
2.环境
conda create --name nerfstudio -y python=3.8
conda activate nerfstudio
pip install --upgrade pip
pip install torch==2.1.2+cu118 torchvision==0.16.2+cu118 --extra-index-url https://download.pytorch.org/whl/cu118conda install -c "nvidia/label/cuda-11.8.0" cuda-toolkit
pip install ninja
安装tiny-cuda-nn最好还是源码安装
git clone --recursive https://github.com/nvlabs/tiny-cuda-nn
cd tiny-cuda-nn
cmake . -B build -DCMAKE_BUILD_TYPE=RelWithDebInfo
cmake --build build --config RelWithDebInfo -j
3.安装nerfstudio
git clone https://github.com/nerfstudio-project/nerfstudio.git
cd nerfstudio
pip install --upgrade pip setuptools
pip install -e .
4.安装colmap
训练自己数据集时,需要经过colmap处理以解算相机位姿以供nerf使用
sudo apt-get install \git \cmake \ninja-build \build-essential \libboost-program-options-dev \libboost-filesystem-dev \libboost-graph-dev \libboost-system-dev \libeigen3-dev \libflann-dev \libfreeimage-dev \libmetis-dev \libgoogle-glog-dev \libgtest-dev \libsqlite3-dev \libglew-dev \qtbase5-dev \libqt5opengl5-dev \libcgal-dev \libceres-dev
git clone https://github.com/colmap/colmap.git
cd colmap
apt-get install libatlas-base-dev libsuitesparse-dev
下载Ceres Solver文件,放在colmap文件夹下
# CMake
sudo apt-get install cmake
# google-glog + gflags
sudo apt-get install libgoogle-glog-dev libgflags-dev
# Use ATLAS for BLAS & LAPACK
sudo apt-get install libatlas-base-dev
# Eigen3
sudo apt-get install libeigen3-dev
# SuiteSparse (optional)
sudo apt-get install libsuitesparse-dev
tar zxf ceres-solver-2.2.0.tar.gz
mkdir ceres-bin
cd ceres-bin
cmake ../ceres-solver-2.2.0
make -j3
make test
# Optionally install Ceres, it can also be exported using CMake which
# allows Ceres to be used without requiring installation, see the documentation
# for the EXPORT_BUILD_DIR option for more information.
sudo make install
cd ..
mkdir build
cd build
cmake .. -GNinja
ninja
ninja install
5.报错
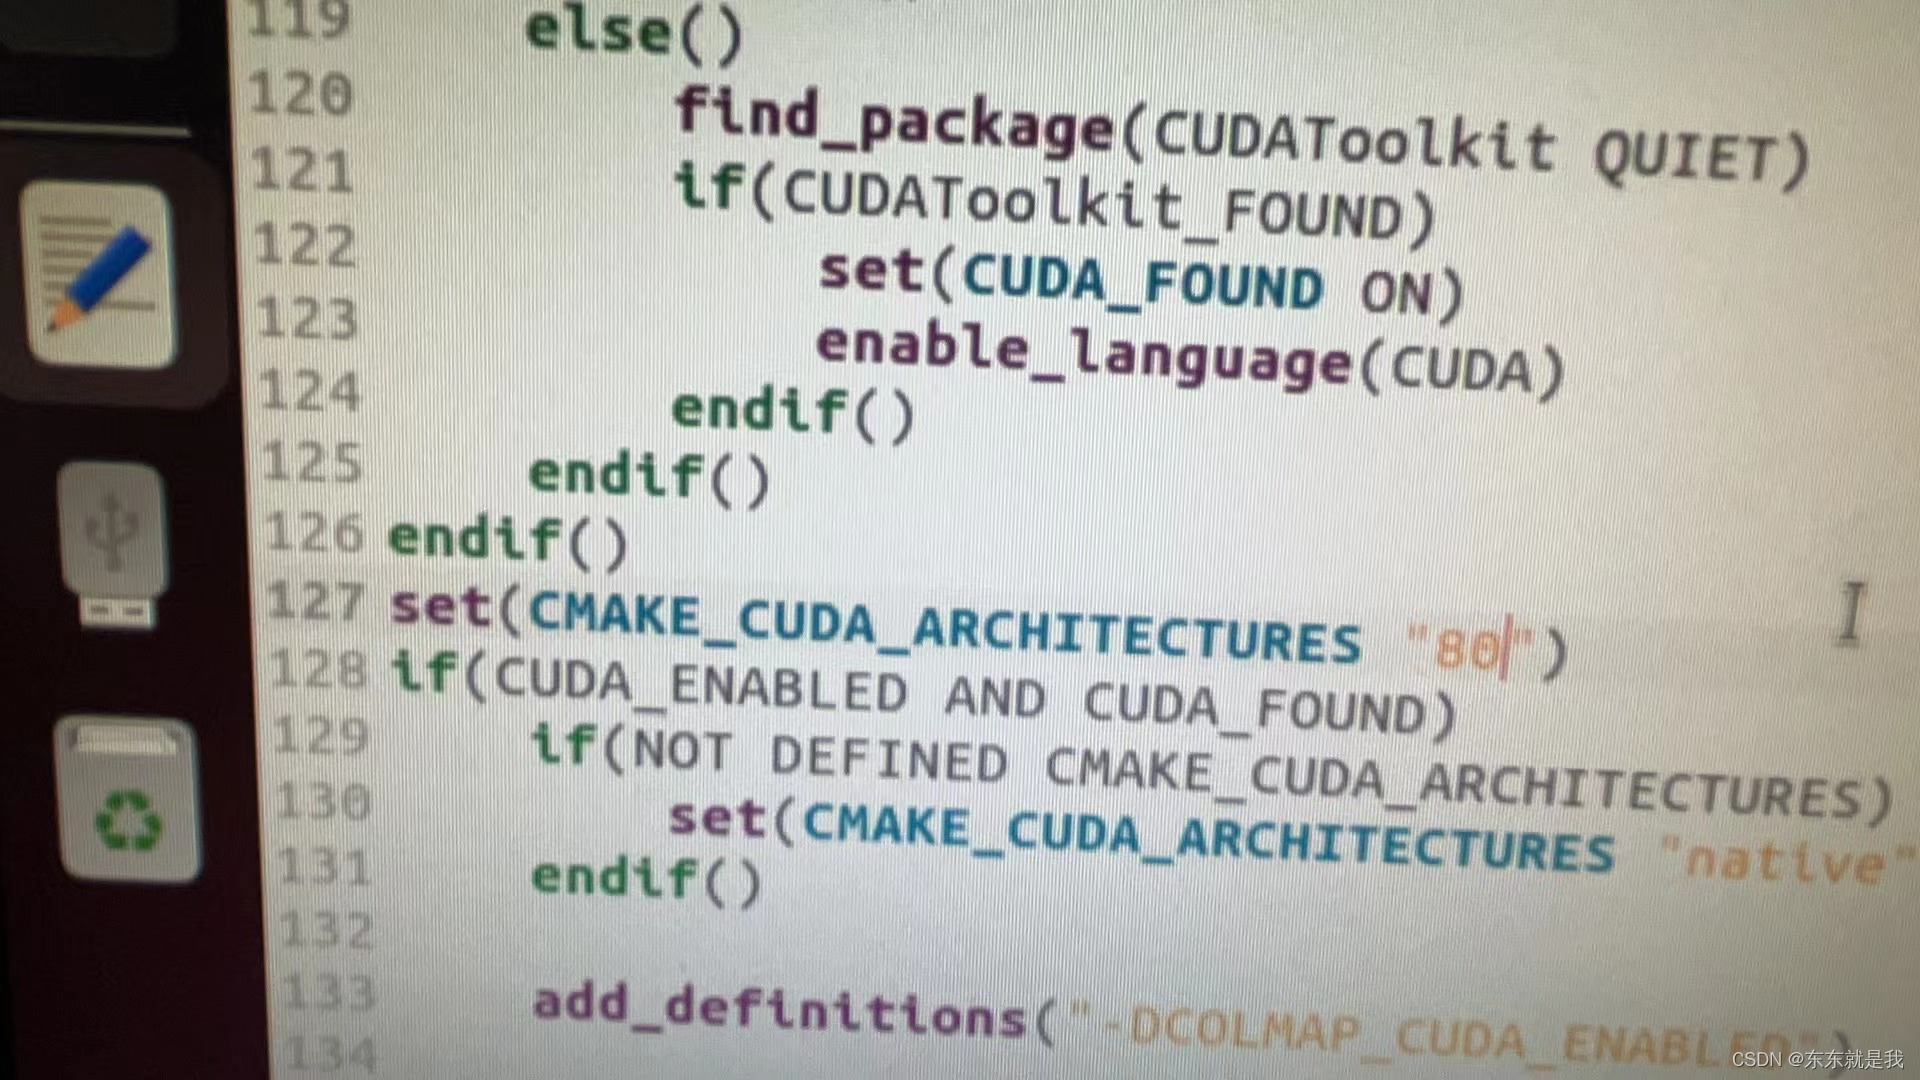
ninja报错:nvcc fatal : unsupported gpu architecture ‘compute_native’
修改colmap/cmake/FindDependencies.cmake 127行增加这一句

6.安装FFmpeg
apt update
apt install ffmpeg
#如果你的ffmpeg应该已经在/usr/bin/ffmpeg中,那么就把这个路径添加到环境中
nano ~/.bashrc
export PATH="/usr/bin:$PATH"
source ~/.bashrc
7.训练数据
# Download some test data:
ns-download-data nerfstudio --capture-name=poster
# Train model
ns-train nerfacto --data data/nerfstudio/poster
如果数据下载不下来,这里有说下载路径在哪
https://github.com/nerfstudio-project/nerfstudio/issues/2544
比如说person
下载后解压放在data/nerfstudio路径下
在提供一个百度网盘的(链接:https://pan.baidu.com/s/1_R6r5t_7eFxK4OzNTVAxbg
提取码:3q23
–来自百度网盘超级会员V6的分享)
这篇关于Ubuntu Nerfstudio安装的文章就介绍到这儿,希望我们推荐的文章对编程师们有所帮助!


