本文主要是介绍luceda ipkiss教程 67:修改器件端口名,希望对大家解决编程问题提供一定的参考价值,需要的开发者们随着小编来一起学习吧!
如果要替换线路中的器件,但是要替换的器件端口名称又不一样,那该怎么办呢?去对应改线路中端口的名称太过繁琐,这就需要需要器件的端口名,如:
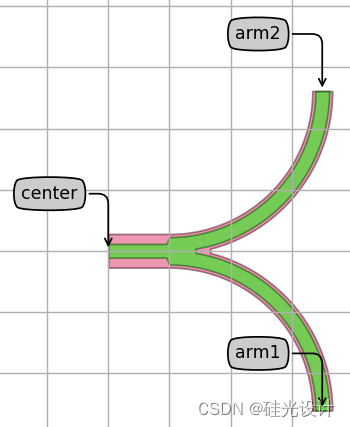
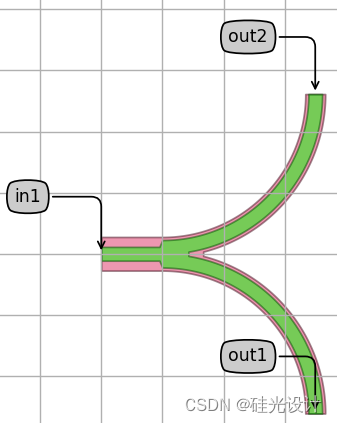
改y分束器的端口名
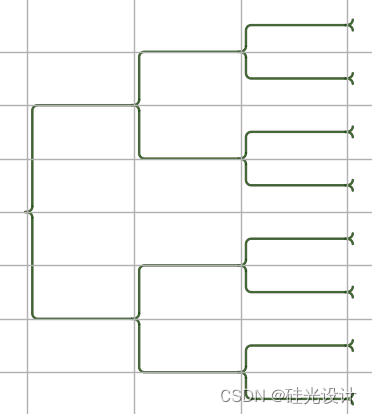
改了端口名称,线路中的器件就可以直接替换了:
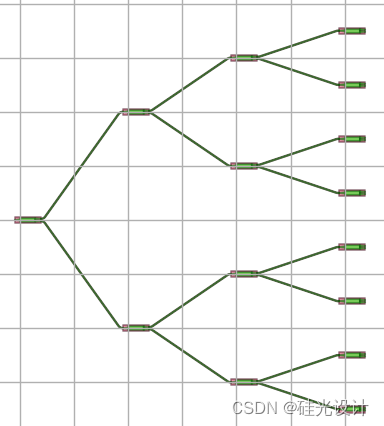
将线路中的mmi替换为y分束器:
所有代码如下:
# Copyright (C) 2020 Luceda Photonicsfrom si_fab import all as pdk
from ipkiss3 import all as i3class GeneralizedSplitterTree(i3.Circuit):splitter = i3.ChildCellProperty(doc="Splitter used.")n_levels = i3.PositiveIntProperty(default=3, doc="Number of tree levels.")spacing_x = i3.PositiveNumberProperty(default=100.0, doc="Horizontal spacing between the splitter levels.")spacing_y = i3.PositiveNumberProperty(default=50.0, doc="Vertical spacing between the splitters in the last level.")def _default_splitter(self):return pdk.MMI1x2Optimized1550()  # try changing this to the y-junction in the si_fab PDKdef _default_insts(self):insts = {}# 1.  Using nested for loops we can add all the splitters we need for the circuit, as well as name them# according to their position (level) in the circuit. Also note that the splitter is a parameter, so we could# easily replace all the MMIs with different MMIs or a y-splitter with just one change to the code.for level in range(self.n_levels):for splitter_no in range(2 ** level):insts[f"sp_{level}_{splitter_no}"] = self.splitterreturn instsdef _default_specs(self):specs = []# 2. Placing the MMIs is fairly straight forward, using local variables of x and y coordinates to help improve# the readability of the code. The "y-coord" in particular is not obvious, however the coordinate is derived# from the level and number in each level due to the relationship between each MMI. Again we use nested for# loops to achieve this.for level in range(self.n_levels):for splitter in range(2 ** level):x_coord = level * self.spacing_xy_coord = self.spacing_y * (-0.5 * 2 ** (self.n_levels - 1) + ((splitter + 0.5) * 2 ** (self.n_levels - level - 1)))specs.append(i3.Place(f"sp_{level}_{splitter}", (x_coord, y_coord)))# 3. For each MMI there are two output ports that need connecting. We decide how best to do this, using# "splitter % 2" which returns the remainder from dividing by 2. This will be 0 for even numbers and non-zero# for odd numbers. In this way we can separate the two outputs correctly.# In the level loop we start at 1, but then subtract 1 during the naming as the final level will not have any# connections.for level in range(1, self.n_levels):for splitter in range(2 ** level):if splitter % 2 == 0:in_port = f"sp_{level - 1}_{int(splitter / 2)}:out1"else:in_port = f"sp_{level - 1}_{int(splitter / 2)}:out2"out_port = f"sp_{level}_{splitter}:in1"specs.append(i3.ConnectBend(in_port, out_port))return specsdef _default_exposed_ports(self):# 4. In the same way we can expose the ports in the circuit. By default, all unconnected ports would be exposed,# but we want to rename them for simplicity.exposed_ports = {"sp_0_0:in1": "in"}  # adding the input portcnt = 1  # we use a local variable to keep track of how many output we have labeledlevel = self.n_levels - 1n_splitters = 2 ** levelfor splitter in range(n_splitters):  # looping over the output portsexposed_ports[f"sp_{level}_{splitter}:out1"] = f"out{cnt}"cnt += 1exposed_ports[f"sp_{level}_{splitter}:out2"] = f"out{cnt}"cnt += 1return exposed_portsif __name__ == "__main__":pdk.MMI1x2Optimized1550().Layout().visualize(annotate=True)splitter_tree1 = GeneralizedSplitterTree(n_levels=4, splitter=pdk.MMI1x2Optimized1550())splitter_tree1_layout = splitter_tree1.Layout()splitter_tree1_layout.visualize()pdk.WgY90Splitter().Layout().visualize(annotate=True)Y_splitter = i3.Circuit(name="Y_splitter",insts={"sp": pdk.WgY90Splitter()},exposed_ports={"sp:center": "in1", "sp:arm2": "out2", "sp:arm1": "out1"})Y_splitter.Layout().visualize(annotate=True)splitter_tree2 = GeneralizedSplitterTree(n_levels=4, splitter=Y_splitter)splitter_tree2_layout = splitter_tree2.Layout()splitter_tree2_layout.visualize()
替换端口的代码:
Y_splitter = i3.Circuit(name="Y_splitter",insts={"sp": pdk.WgY90Splitter()},exposed_ports={"sp:center": "in1", "sp:arm2": "out2", "sp:arm1": "out1"})
这篇关于luceda ipkiss教程 67:修改器件端口名的文章就介绍到这儿,希望我们推荐的文章对编程师们有所帮助!


