本文主要是介绍vue+ant-design+formBuiler表单构建器——技能提升——form design——亲测有效,希望对大家解决编程问题提供一定的参考价值,需要的开发者们随着小编来一起学习吧!
最近看到后端同事在弄一个后台管理系统,额,前端真的是夹缝中生存啊,AI抢饭碗,后端也想干前端的活儿。。。
他用到了表单构建器,具体效果如下:
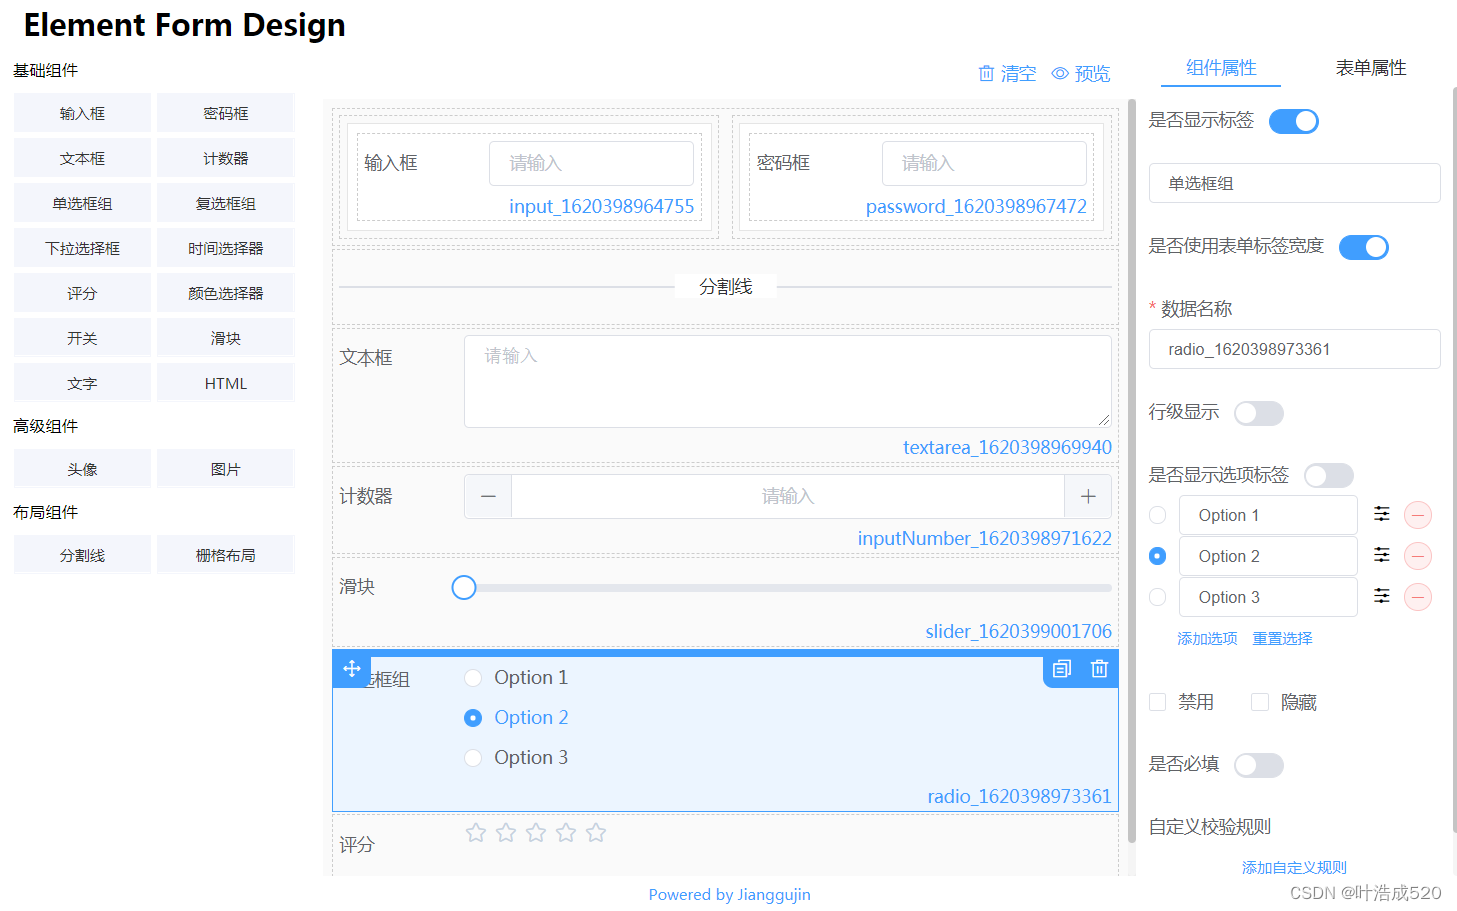
网上有很多适用于ElementUi和ant-design的form design插件,下面介绍一套完整的适用于ant-design的使用方法
步骤1:form-builder组件封装
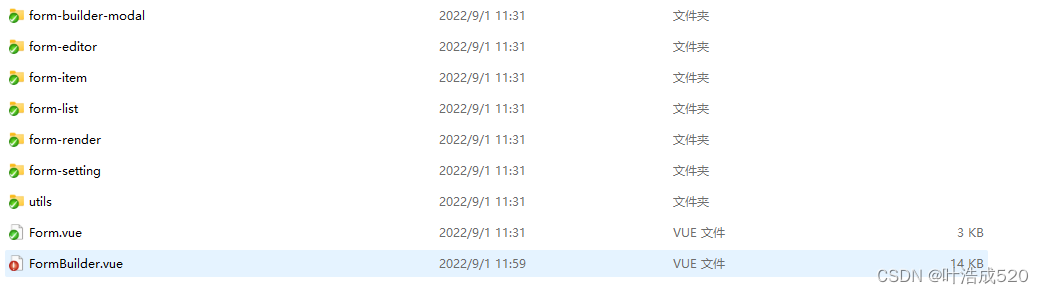
在components中添加form-builder文件夹
文件夹内容如下:
稍后我会把整个文件夹压缩上传到资源中,有需要的可自行下载。
步骤2:在页面中使用
我这边是在个弹窗中使用的,所以需要在弹窗中引入
<template><a-modalwidth="100%":title="title":visible="visible":confirm-loading="confirmLoading":footer="null"@cancel="handleCancel"><div style="height: 600px;overflow-y:auto;"><FormBuilder v-model="data" :gateway="gateway" :userModel="{}" @getData="saveData" /></div></a-modal>
</template>
对应的script中的代码:
<script>
import FormBuilder from '@/components/form-builder/FormBuilder';
import { addProp, updateProp, getPropDetail } from '@/services/project/propTemplate';//这个是接口,具体得让后端同事处理了。
export default {components: {FormBuilder},data() {return {title: '新增属性',visible: false,confirmLoading: false,data: {propName: '',list: [],config: {}},gateway: this.$store.state.setting.gateway,//gateway: "http://192.168.16.100:9001",也是后端同事提供templateId: '',id: ''}},methods: {showModal(templateId, record) {this.templateId = templateId;if (record) {this.title = '编辑属性';this.id = record.id;this.getDetail();} else {this.title = '新增属性';this.id = '';this.data = {propName: '',list: [],config: {}}}this.visible = true;},getDetail() {getPropDetail({propertyTemplateId: this.templateId,templateId: this.id}).then(res => {this.data = {propName: res.data.name,list: res.data.templateFiled && JSON.parse(res.data.templateFiled),config: res.data.templateText && JSON.parse(res.data.templateText)}})},saveData(v) {this.visible = false;if (this.id) {updateProp({propertyTemplateId: this.templateId,templateId: this.id,//模板属性id}, {name: v.propName,templateText: JSON.stringify(v.config),templateFiled: JSON.stringify(v.data)}).then(res => {this.$message.success('保存成功');this.$emit('ok');})} else {addProp(this.templateId, {name: v.propName,templateText: JSON.stringify(v.config),templateFiled: JSON.stringify(v.data)}).then(res => {this.$message.success('保存成功');this.$emit('ok');})}},handleCancel() {this.visible = false;}}
}
</script>
步骤3:步骤2弹窗的使用
import PropEdit from './PropEdit';
export default {components: {PropEdit},
}
页面使用
<a-button type="primary" @click="$refs.propEdit.showModal(templateId)">新增</a-button>
<PropEdit ref="propEdit" @ok="getPropList"></PropEdit>
这篇关于vue+ant-design+formBuiler表单构建器——技能提升——form design——亲测有效的文章就介绍到这儿,希望我们推荐的文章对编程师们有所帮助!


