本文主要是介绍vue快速入门(五十三)使用js进行路由跳转,希望对大家解决编程问题提供一定的参考价值,需要的开发者们随着小编来一起学习吧!
注释很详细,直接上代码
上一篇
新增内容
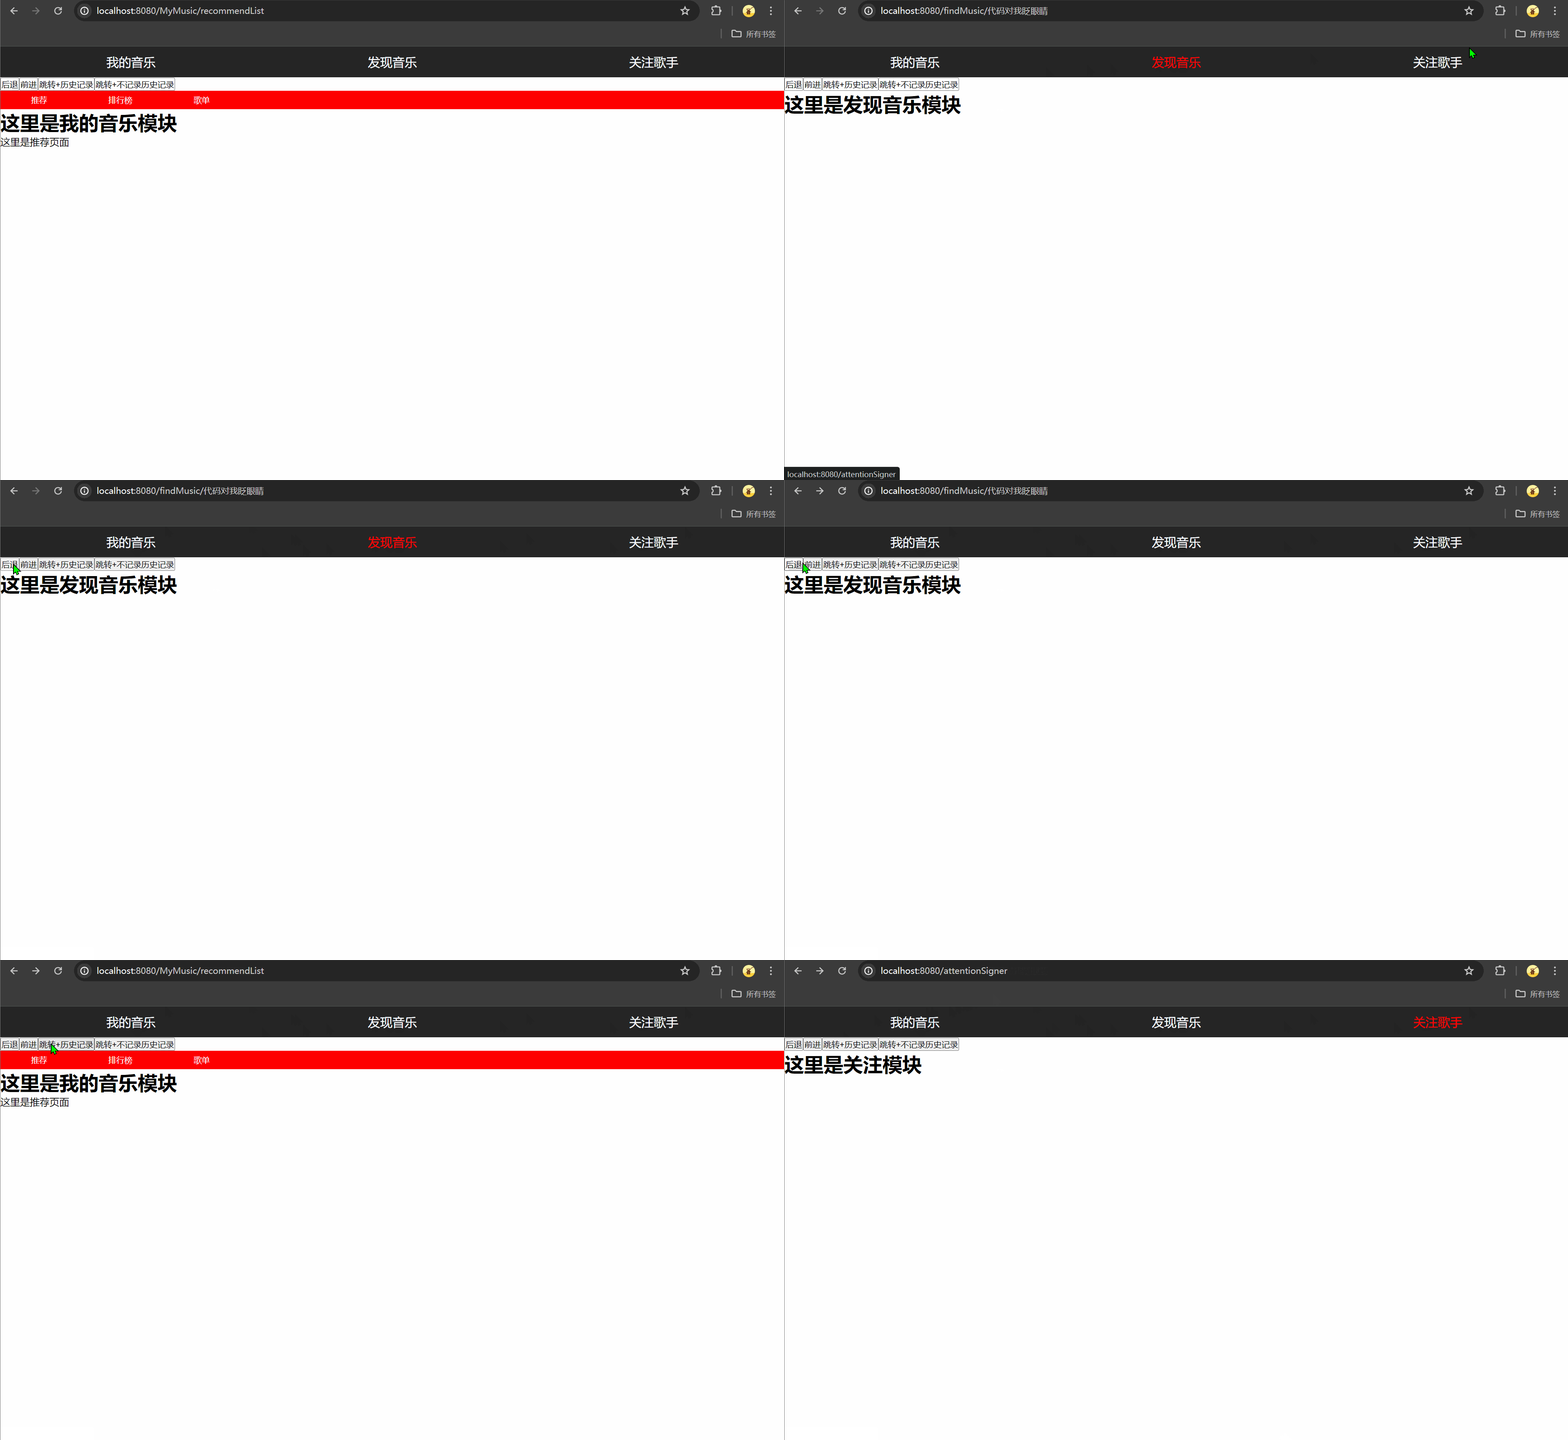
几种常用的路由跳转方式演示
源码
App.vue
<template><div id="app"><div class="nav"><!-- router-link 自带两个高亮样式类 router-link-exact-active和router-link-active区别:router-link-active为模糊类(大多数时候用这个),只要是以/myMusic开头的都可以被匹配到router-link-exact-active为精确类,只有/myMusic才能被匹配到当然这两个类名也是可以自定义的,具体详见index.js文件的创建路由实例部分--><router-link to="/myMusic" class="router-link-normal">我的音乐</router-link><!-- 动态传参方法 --><router-link :to="`/findMusic/${this.name}`" class="router-link-normal">发现音乐</router-link><router-link to="/attentionSigner" class="router-link-normal">关注歌手</router-link></div><button @click="backslove">后退</button><button @click="nextslove">前进</button><button @click="pushslove">跳转+历史记录</button><button @click="replaceslove">跳转+不记录历史记录</button><div class="content"><router-view></router-view></div></div>
</template>
<script>export default {name: "App",components: {},data() {return {name:'代码对我眨眼睛'};},methods: {//处理方法backslove(){this.$router.back();},nextslove(){this.$router.forward();},pushslove(){this.$router.push({//可以写成对象形式传参name:'ats',//名字在路由配置时可以起query:{//查询参数传参name:this.name},params:{//动态路由传参(记得在路由配置中配置接受参数)name:this.name}});},replaceslove(){this.$router.replace('/attentionSigner');}},/*当然还有一种方法,就是使用this.$router.go()方法,参数为-1、1、2,分别代表后退、前进、前进页面次数但一般情况下,前面的方法已经够用了*/
};
</script>
<style lang="less">
*{margin: 0;padding: 0;
}/*清除下划线和修改未被选择的文字颜色*/
a {text-decoration: none;color: aliceblue;
}
.router-link-active{color: red;
}
.nav{display: flex;justify-content: space-around;background-color: #242424;height: 50px;
}
.router-link-normal{height: 50px;line-height: 50px;font-size: 20px;
}
</style>
src/router/index.js
//导入所需模块
import Vue from "vue";
import VueRouter from "vue-router";
import myMusic from "@/views/myMusic.vue";
import findMusic from "@/views/findMusic.vue";
import attentionSigner from "@/views/attentionSigner.vue";
import recommendList from "@/views/recommendList.vue";
import rankingList from "@/views/rankingList.vue";
import songList from "@/views/songList.vue";
import notFound from "@/views/notFound.vue";
//调用函数将VueRouter插件安装为Vue的插件
Vue.use(VueRouter);//配置路由规则
const routes = [//重定向{ path: "/", redirect: "/MyMusic/recommendList" },{path: "/myMusic",component: myMusic,// 二级路由无需写'/'children: [{path: "recommendList",component: recommendList,},{path: "rankingList",component: rankingList,},{path: "songList",component: songList,},],},{// 动态路由接受参数(后面加问号表示为可选参数)path: "/findMusic/:name?",component: findMusic,},{path: "/attentionSigner",component: attentionSigner,},{path: "/songList/",component: songList,},{path: "/rankingList/",component: rankingList,},{path: "/recommendList/",component: recommendList,},{path: "/attentionSigner/:name?",name:"ats",//起个名字,方便跳转component: attentionSigner,},// 404的情况(*通配符,放在最后匹配其他所有情况){path:"*",component:notFound}
];//创建路由实例
const router = new VueRouter({// 路由配置routes,//历史模式mode: 'history'//这里可以修改router-link的默认类名/*linkActiveClass:'my-active-class',linkExactActiveClass:'my-exact-active-class'*/
});
//导出路由实例
export default router;
效果演示

这篇关于vue快速入门(五十三)使用js进行路由跳转的文章就介绍到这儿,希望我们推荐的文章对编程师们有所帮助!


