本文主要是介绍tomcat 配置支持 ssl 附效果图,希望对大家解决编程问题提供一定的参考价值,需要的开发者们随着小编来一起学习吧!
1、修改tomcat配置文件server.xml:
vim ./conf/server.xml把配置文件:
<Connector port="8088" Server=" " protocol="HTTP/1.1"connectionTimeout="20000"redirectPort="8443" URIEncoding="UTF-8" maxHttpHeaderSize="65536" maxPostSize="4194304"compression="on" noCompressionUserAgents="gozilla,traviata" compressibleMimeType="text/html,text/xml,text/plain,text/css,text/javascript,application/x-javascript,application/xml,application/javascript,application/xhtml+xml,x-font/otf,application/x-font-woff,x-font/ttf,x-font/eot"/>禁用:
<!--<Connector port="8088" Server=" "  protocol="HTTP/1.1"connectionTimeout="20000"redirectPort="8443" URIEncoding="UTF-8" maxHttpHeaderSize="65536" maxPostSize="4194304"compression="on" noCompressionUserAgents="gozilla,traviata"                          compressibleMimeType="text/html,text/xml,text/plain,text/css,text/javascript,application/x-javascript,application/xml,application/javascript,application/xhtml+xml,x-font/otf,application/x-font-woff,x-font/ttf,x-font/eot"/>
-->
2、server.xml单独开放一个端口,原来注释的,改造一下,并放出来:
<Connector port="8088" protocol="org.apache.coyote.http11.Http11NioProtocol"maxThreads="150" SSLEnabled="true"><SSLHostConfig><Certificate certificateKeystoreFile="conf/youdomainfile.com.jks"type="RSA" certificateKeystorePassword="asdf2024" /></SSLHostConfig></Connector>3、server.xml中 AJP 1.3 Connector on port 8009相关
原来是注释的,我把他打开:
<!-- Define an AJP 1.3 Connector on port 8009 --><Connector protocol="AJP/1.3"address="::1"port="8009"redirectPort="8088" />4、web.xml文件中:
原来末尾是:
    <welcome-file-list><welcome-file>index.html</welcome-file><welcome-file>index.htm</welcome-file><welcome-file>index.jsp</welcome-file></welcome-file-list><security-constraint><web-resource-collection><web-resource-name>fortune</web-resource-name><url-pattern>/*</url-pattern><http-method>PUT</http-method><http-method>DELETE</http-method><http-method>HEAD</http-method><http-method>OPTIONS</http-method><http-method>TRACE</http-method></web-resource-collection><auth-constraint></auth-constraint></security-constraint><login-config><auth-method>BASIC</auth-method></login-config>
</web-app>
改成这样子:
    <welcome-file-list><welcome-file>index.html</welcome-file><welcome-file>index.htm</welcome-file><welcome-file>index.jsp</welcome-file></welcome-file-list><security-constraint><web-resource-collection><web-resource-name>fortune</web-resource-name><url-pattern>/*</url-pattern><http-method>PUT</http-method><http-method>DELETE</http-method><http-method>HEAD</http-method><http-method>OPTIONS</http-method><http-method>TRACE</http-method><web-resource-name >SSL</web-resource-name><url-pattern>/*</url-pattern></web-resource-collection><user-data-constraint><transport-guarantee>CONFIDENTIAL</transport-guarantee></user-data-constraint><auth-constraint></auth-constraint></security-constraint><login-config><!--	<auth-method>BASIC</auth-method> --><!-- Authorization setting for SSL --><auth-method>CLIENT-CERT</auth-method><realm-name>Client Cert Users-only Area</realm-name></login-config>
</web-app>
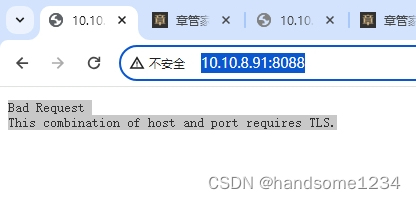
上述即可实现用Ip的访问:http://10.10.8.91:8088/
如果出现提示,

Bad Request
This combination of host and port requires TLS.
则用https访问即可,但是仍然有“不安全”的提示,

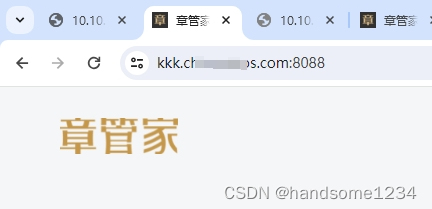
5、设置用域名即可完美实现安全访问:
5.1服务器端:
之前tomcat\conf\server.xml
<Engine name="Catalina" defaultHost="localhost"><!--For clustering, please take a look at documentation at:/docs/cluster-howto.html (simple how to)/docs/config/cluster.html (reference documentation) --><!--<Cluster className="org.apache.catalina.ha.tcp.SimpleTcpCluster"/>--><!-- Use the LockOutRealm to prevent attempts to guess user passwordsvia a brute-force attack --><Realm className="org.apache.catalina.realm.LockOutRealm"><!-- This Realm uses the UserDatabase configured in the global JNDIresources under the key "UserDatabase". Any editsthat are performed against this UserDatabase are immediatelyavailable for use by the Realm. --><Realm className="org.apache.catalina.realm.UserDatabaseRealm"resourceName="UserDatabase"/></Realm><Host name="localhost" appBase="webapps"unpackWARs="true" autoDeploy="true">改成:
<Engine name="Catalina" defaultHost="kkk.yourdomain.com"><!--For clustering, please take a look at documentation at:/docs/cluster-howto.html (simple how to)/docs/config/cluster.html (reference documentation) --><!--<Cluster className="org.apache.catalina.ha.tcp.SimpleTcpCluster"/>--><!-- Use the LockOutRealm to prevent attempts to guess user passwordsvia a brute-force attack --><Realm className="org.apache.catalina.realm.LockOutRealm"><!-- This Realm uses the UserDatabase configured in the global JNDIresources under the key "UserDatabase". Any editsthat are performed against this UserDatabase are immediatelyavailable for use by the Realm. --><Realm className="org.apache.catalina.realm.UserDatabaseRealm"resourceName="UserDatabase"/></Realm><Host name="kkk.yourdomain.com" appBase="webapps"unpackWARs="true" autoDeploy="true">5.2客户端dns配置:
另我在本机的C:\Windows\System32\drivers\etc\hosts
10.10.8.91 kkk.yourdomain.com
最终:可实现完美安全访问:
https://kkk.yourdomain.com:8088

后经朋友提醒,web.xml不改也行,我就没继续测试了,大家可酌情考虑。
这篇关于tomcat 配置支持 ssl 附效果图的文章就介绍到这儿,希望我们推荐的文章对编程师们有所帮助!


