本文主要是介绍关于Linux nanosleep函数时间(时钟)精度的测试,希望对大家解决编程问题提供一定的参考价值,需要的开发者们随着小编来一起学习吧!
时钟机制是驱动Linux内核运转的核心组件,他的工作方式有两种,periodic(周期性的)和NO_HZ_FULL(IDLE).在不同的模式下,时钟周期的精度是不同的,下面做实验验证一下.
测试用例如下,pselect不传入文件列表参数,将导致等待超时返回,行为上和一个定时器没有任何区别。
#include<stdio.h>
#include<stdlib.h>
#include<time.h>
#include<sys/time.h>
#include<errno.h>
#include<string.h>
#include<unistd.h>
#include<sys/types.h>
#include<sys/select.h>int main(int argc, char **argv)
{unsigned int nTimeTestSec = 0;unsigned int nTimeTest = 0;struct timeval tvBegin;struct timeval tvNow;int ret = 0;unsigned int nDelay = 0;struct timeval tv;int fd = 1;int i = 0;struct timespec req;unsigned int delay[20] = {500000, 100000, 50000, 10000, 1000, 900, 500, 100, 10, 1, 0};int nReduce = 0; //误差fprintf(stderr, "%19s%12s%12s%12s\n", "fuction", "time(usec)", "realtime", "reduce");fprintf(stderr, "----------------------------------------------------\n");for (i = 0; i < 20; i++){if (delay[i] <= 0)break;nDelay = delay[i];//test sleepgettimeofday(&tvBegin, NULL);ret = usleep(nDelay);if(ret == -1){fprintf(stderr, "usleep error, errno=%d [%s]\n", errno, strerror(errno));}gettimeofday(&tvNow, NULL);nTimeTest = (tvNow.tv_sec - tvBegin.tv_sec) * 1000000 + tvNow.tv_usec - tvBegin.tv_usec;nReduce = nTimeTest - nDelay;fprintf (stderr, "\t usleep       %8u   %8u   %8d\n", nDelay, nTimeTest,nReduce);//test nanosleepreq.tv_sec = nDelay/1000000;req.tv_nsec = (nDelay%1000000) * 1000;gettimeofday(&tvBegin, NULL);ret = nanosleep(&req, NULL);if (-1 == ret){fprintf (stderr, "\t nanousleep   %8u   not support\n", nDelay);}gettimeofday(&tvNow, NULL);nTimeTest = (tvNow.tv_sec - tvBegin.tv_sec) * 1000000 + tvNow.tv_usec - tvBegin.tv_usec;nReduce = nTimeTest - nDelay;fprintf (stderr, "\t nanosleep    %8u   %8u   %8d\n", nDelay, nTimeTest,nReduce);//test selecttv.tv_sec = 0;tv.tv_usec = nDelay;gettimeofday(&tvBegin, NULL);ret = select(0, NULL, NULL, NULL, &tv);if (-1 == ret){fprintf(stderr, "select error. errno = %d [%s]\n", errno, strerror(errno));}gettimeofday(&tvNow, NULL);nTimeTest = (tvNow.tv_sec - tvBegin.tv_sec) * 1000000 + tvNow.tv_usec - tvBegin.tv_usec;nReduce = nTimeTest - nDelay;fprintf (stderr, "\t select       %8u   %8u   %8d\n", nDelay, nTimeTest,nReduce);//pselcetreq.tv_sec = nDelay/1000000;req.tv_nsec = (nDelay%1000000) * 1000;gettimeofday(&tvBegin, NULL);ret = pselect(0, NULL, NULL, NULL, &req, NULL);if (-1 == ret){fprintf(stderr, "select error. errno = %d [%s]\n", errno, strerror(errno));}gettimeofday(&tvNow, NULL);nTimeTest = (tvNow.tv_sec - tvBegin.tv_sec) * 1000000 + tvNow.tv_usec - tvBegin.tv_usec;nReduce = nTimeTest - nDelay;fprintf (stderr, "\t pselect      %8u   %8u   %8d\n", nDelay, nTimeTest,nReduce);fprintf (stderr, "--------------------------------\n");}return 0;
}
在使用高精度定时器的情况下测试开关PREEMPT的情况:
关闭CONFIG_PREEMPT的情况下


打开CONFIG_PREEMPT

重新编译和安装内核:

貌似改善不多,可以得出CONFIG_PREEMPT和精度关系不大的结论,我们继续.打开周期定时器:

关闭高精度定时器:

运行用例验证,可以明显发现,由于时钟模式变为periodic的了,时钟粒度瞬间缩减为4ms=4000us,所以例子中即便睡眠1个us,也需要等到4ms后才会被唤醒,和没有打开periodic的模式有显著区别.超时时间将ceiling到系统时钟粒度。


CONFIG_HZ修改为100,看有没有变化:

重新编译内核,发现时钟粒度再次变大,CONFIG_HZ从250变为100. 时钟粒度则从4ms变为10ms成反比关系.

打开CONFIG_HIGH_RES_TIMERS

重新编译,运行用例:

可以看到,打开高精度定时器,时间精度恢复了原始的比较精确的误差范围.
关闭CONFIG_NO_HZ

发现时间精度仍然是高精度的范围

所以看起来,控制高精度定时器的是CONFIG_HIGH_RES_TIMERS.
线程优先级对于时钟精度的影响
测试代码:
#include <iostream>
#include <chrono>
#include<thread>
#include <pthread.h>
using namespace std;int get_thread_info(void)
{pthread_t self = pthread_self();int policy;struct sched_param param;if (pthread_getschedparam(self, &policy, ¶m) != 0) {printf("%s line %d, pthread_getschedparam error.\n",__func__, __LINE__);return -1;}switch (policy) {case SCHED_FIFO:printf("SCHED_FIFO\n");break;case SCHED_RR:printf("SCHED_RR\n");break;case SCHED_OTHER:printf("SCHED_OTHER\n");break;default:printf("unknown.\n");break;}printf("current thread priority:%d\n", param.sched_priority);return 0;
}void adjust_priority(void)
{struct sched_param params;params.sched_priority = 50; // 50是优先级值,可以根据需求设置if(pthread_setschedparam(pthread_self(), SCHED_RR, ¶ms) != 0) {printf("%s line %d, error, failure.\n", __func__, __LINE__);} else {printf("%s line %d, set priority success.\n", __func__, __LINE__);}get_thread_info();return;
}int main(void)
{int nTimerValue = 100; //wait for 100 msadjust_priority();for (int i = 0; /*i < 500*/; ++i) {auto start = std::chrono::steady_clock::now();std::this_thread::sleep_for(std::chrono::microseconds(nTimerValue));auto clock_end = std::chrono::steady_clock::now();long lElapsetimeMs = std::chrono::duration_cast<std::chrono::microseconds>(clock_end - start).count();char szBuff[255];sprintf(szBuff, "[%d] slept Time: %ld MiroSec\n", i, lElapsetimeMs);cout << szBuff;}cout << "system clock : ";cout << chrono::system_clock::period::num << "/" << chrono::system_clock::period::den << "s" << endl;cout << "steady clock : ";cout << chrono::steady_clock::period::num << "/" << chrono::steady_clock::period::den << "s" << endl;cout << "high resolution clock : ";cout << chrono::high_resolution_clock::period::num << "/" << chrono::high_resolution_clock::period::den << "s" << endl;system("pause");return 0;
}编译代码:
g++ xxx.c -lpthread
在CFS调度器的情况下,睡眠100微妙,实际上的睡眠事件可能在150+

设置RR优先级,用SUDO模式运行,时间精度缩小到如下值:


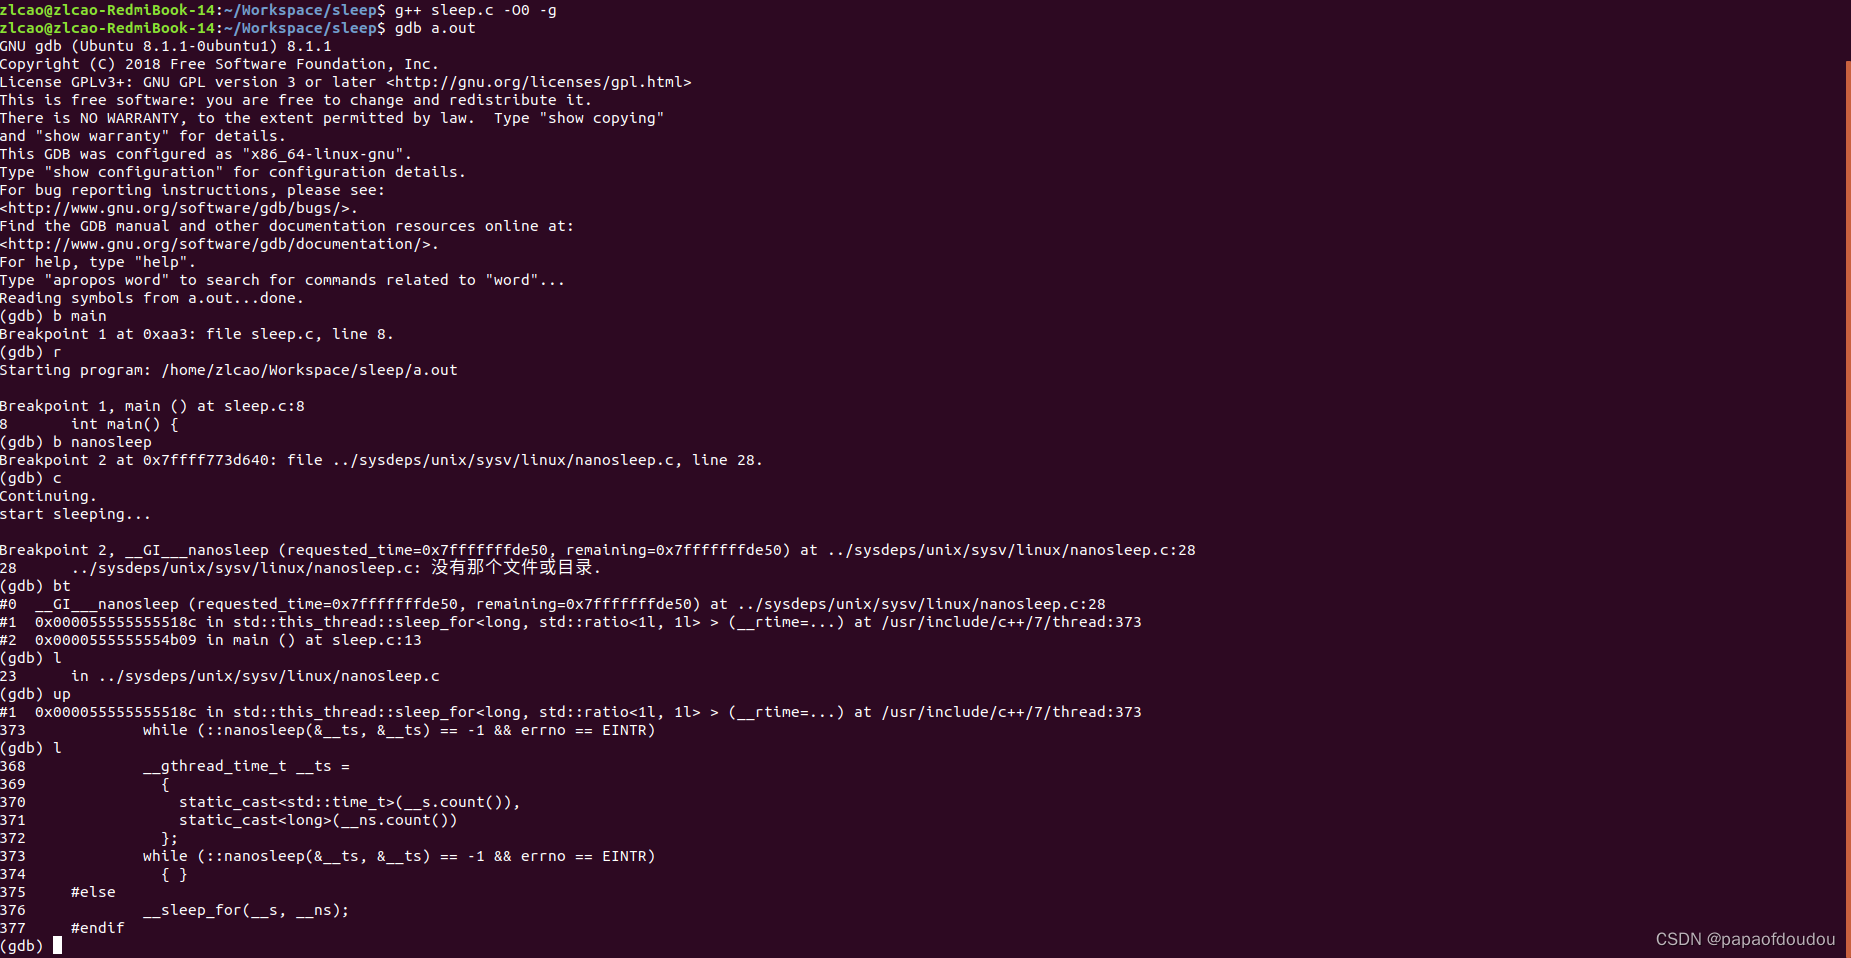
c++标准中的sleep_for用的就是nanosleep:

在musl中,usleep就是用nanosleep实现的:

打开CONFIG_HIGH_RES_TIMERS和关闭下,HRTIMER唤醒的区别
CONFIG_HIGH_RES_TIMERS打开:

CONFIG_HZ_PERIODIC打开,CONFIG_HIGH_RES_TIMERS关闭,则hrtimer_wakeup在周期中断下调度:

CONFIG_HZ_PERIODIC关闭,CONFIG_HIGH_RES_TIMERS关闭,CONFIG_NO_HZ_FULL关闭,CONFIG_NO_HZ_IDLE=y。

CONFIG_NO_HZ_FULL=y,CONFIG_HZ_PERIODIC关闭,CONFIG_NO_HZ_IDLE关闭,CONFIG_HIGH_RES_TIMERS关闭。

CONFIG_NO_HZ_FULL/CONFIG_NO_HZ_IDLE/CONFIG_HZ_PERIODIC 是互斥关系,只能三选1。

CONFIG_HZ配置
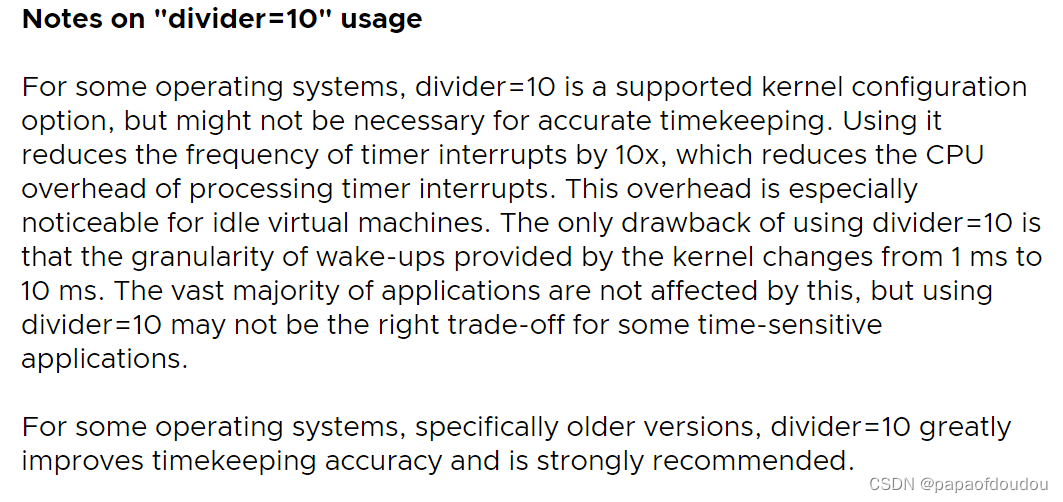
关于CONFIG_HZ的影响,以REDHAT企业版为例,RH企业版的CONFIG_HZ参数设置为1000,而其他服务器发行版,比如UBUNTU是250,这样运行RH的系统会有比较大的系统时钟负荷,在某些场景下,会影响场景的效率,一种解决方案是在启动参数中设置divider=xx,意思是1/XX的CONFIG_HZ 频率,详细解释如下:

参考文档
【Linux C/C++ 延时(延迟)函数比较】介绍Linux系统中常用的延时函数sleep、usleep、nanosleep、select和std::sleep_for()的区别和使用场景-CSDN博客
结束!
这篇关于关于Linux nanosleep函数时间(时钟)精度的测试的文章就介绍到这儿,希望我们推荐的文章对编程师们有所帮助!


