本文主要是介绍实战项目——智慧社区(二)之 物业管理,希望对大家解决编程问题提供一定的参考价值,需要的开发者们随着小编来一起学习吧!
分页
用于分页封装的实体类
@Data
public class PageVO {private Long totalCount;private Long pageSize;private Long totalPage;private Long currPage;private List list;
}
分页的相关配置
package com.qcby.community.configuration;import com.baomidou.mybatisplus.extension.plugins.PaginationInterceptor;
import org.springframework.context.annotation.Bean;
import org.springframework.context.annotation.Configuration;@Configuration
public class PageConfiguration {@Beanpublic PaginationInterceptor paginationInterceptor(){return new PaginationInterceptor();}
}
增删改查的实现思路
对于传入参数,如果有,但是参数不多,只有一个,直接接收;如果参数较多,应将其传入字段封装在一个实体类中。对于get请求,用@PathVariable接收,对于非get请求,用@RequestBody接收。
对于返回参数,如果与数据单表中的字段可以进行一一映射,不需要考虑封装,直接返回;如果无法在单表中进行一一映射,则需要根据返回参数进行实体类封装。
对于单表的增删改查,mybatiaPlus提供了相应的操作,对于多表则需要手写sql语句
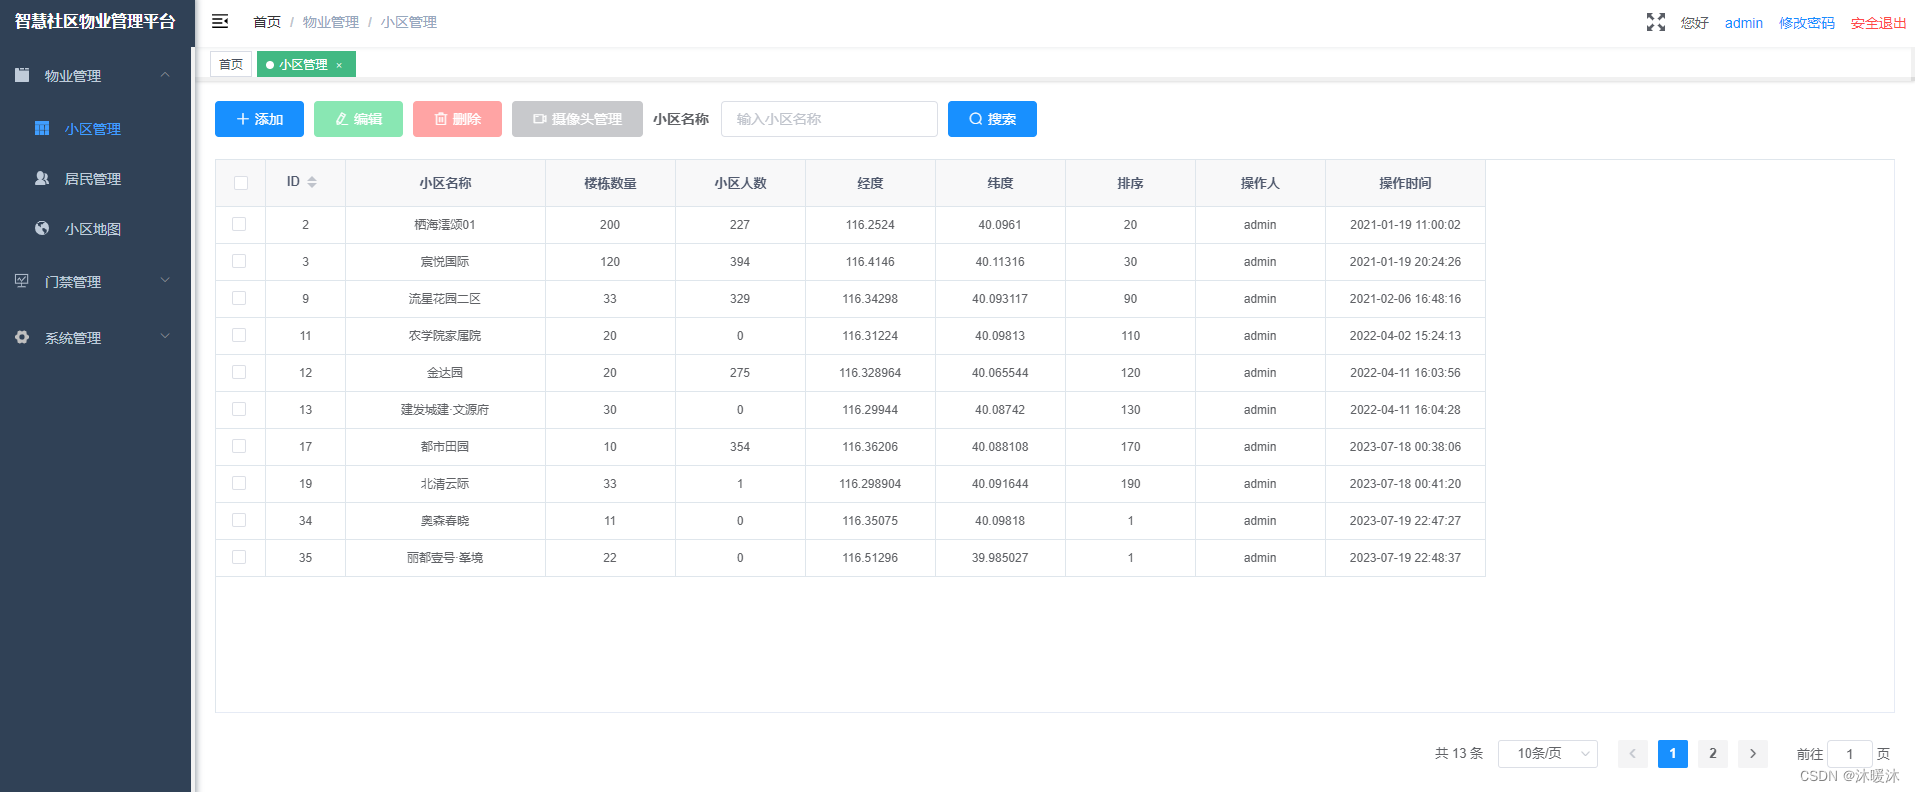
1、小区管理
①小区搜索和查询
传入参数
{
"page": 1,
"limit": 10,
"communityId": "",
"communityName": ""
}
返回参数
{
"msg": "操作成功",
"code": 200,
"data": {
"totalCount": 8,
"pageSize": 10,
"totalPage": 1,
"currPage": 1,
"list": [
{
"communityId": 19,
"communityName": "北清云际",
"termCount": 33,
"seq": 190,
"creater": "admin",
"createTime": "2023-07-18 00:41:20",
"lng": 116.298904,
"lat": 40.091644,
"personCnt": 1
},
{
"communityId": 17,
"communityName": "天龙苑",
"termCount": 10,
"seq": 170,
"creater": "admin",
"createTime": "2023-07-18 00:38:06",
"lng": 116.36206,
"lat": 40.088108,
"personCnt": 0
}
]
}
}
实现思路:由于返回list中在community表中没有personCnt字段,因此需要封装一个CommunityVO类用于数据的返回。同时由于mybtisPlus中并没有现成的sql用于根据community_id查询相应的居民人数,因此需要编写sql用来查询每个community对于的人数personCnt
CommunityVO类
@Data
public class CommunityVO {private Integer communityId;private String communityName;private Integer termCount;private Integer seq;private String creater;private Date createTime;private Float lng;private Float lat;private Integer personCnt;
}
controller
/*** 获取小区的所有信息,分页条件查询* @return*/@GetMapping("/list")public Result getList(CommunityListForm communityListForm){PageVO pageVO = this.communityService.communityList(communityListForm);return Result.ok().put("data", pageVO);}service
@Overridepublic PageVO communityList(CommunityListForm communityListForm) {Page<Community> page = new Page<>(communityListForm.getPage(), communityListForm.getLimit());QueryWrapper<Community> queryWrapper = new QueryWrapper<>();queryWrapper.like(StringUtils.isNotBlank(communityListForm.getCommunityName()),"community_name", communityListForm.getCommunityName());Page<Community> resultPage = this.communityMapper.selectPage(page, queryWrapper);PageVO pageVO = new PageVO();List<CommunityVO> list = new ArrayList<>();for (Community record : resultPage.getRecords()) {CommunityVO communityVO = new CommunityVO();BeanUtils.copyProperties(record, communityVO);communityVO.setPersonCnt(this.personMapper.getCountByCommunityId(record.getCommunityId()));list.add(communityVO);}pageVO.setList(list);pageVO.setTotalCount(resultPage.getTotal());pageVO.setPageSize(resultPage.getSize());pageVO.setCurrPage(resultPage.getCurrent());pageVO.setTotalPage(resultPage.getPages());return pageVO;}根据communityId查询居民人数的mapper
@Select({"select count(*) from person where community_id = #{communityId} "})Integer getCountByCommunityId(Integer communityId);界面
②添加小区
传入参数
{
"communityName": "test"
"lat": "1"
"lng": "1"
"seq": 1
"termCount": "1"
}
返回参数
{
"msg": "操作成功",
"code": 200
}
controller
/*** 添加小区* @param community* @param session* @return*/@LogAnnotation("添加小区")@PostMapping("/add")public Result add(@RequestBody Community community, HttpSession session){User user = (User)session.getAttribute("user");community.setCreater(user.getUsername());boolean save = this.communityService.save(community);if(!save) return Result.error("小区添加失败");return Result.ok();}界面

③通过id查询小区
传入参数
1
返回参数
{
"msg": "操作成功",
"code": 200,
"data": {
"communityId": 19,
"communityName": "北清云际",
"termCount": 33,
"seq": 190,
"lng": 116.298904,
"lat": 40.091644
}
}
controller
/*** 修改的回显操作* @param id* @return*/@GetMapping("/info/{id}")public Result info(@PathVariable("id") Integer id){Community community = this.communityService.getById(id);if(community == null) return Result.error("小区不存在");return Result.ok().put("data", community);}
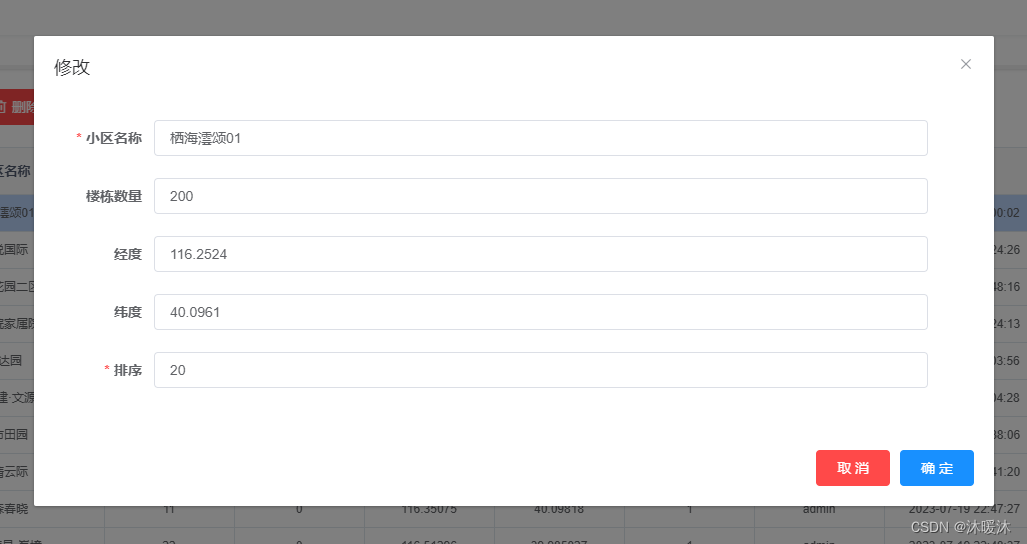
④修改小区
传入参数
{
"communityId": 21,
"communityName": "1",
"termCount": "12",
"lng": "12",
"lat": "12",
"seq": 210
}
返回参数
{
"msg": "操作成功",
"code": 200
}
controller
/*** 修改小区信息* @param community* @return*/@LogAnnotation("编辑小区")@PutMapping("/edit")public Result edit(@RequestBody Community community){boolean updateById = this.communityService.updateById(community);if(!updateById) return Result.error("编辑小区失败");return Result.ok();}界面
⑤删除小区
传入参数
[
21,
20
]
返回参数
{
"msg": "操作成功",
"code": 200
}
controller
 /*** 删除小区,同时删除相关表中的信息* @param ids* @return*/@LogAnnotation("删除小区")@DeleteMapping("/del")@Transactional    //事务管理public Result del(@RequestBody Integer[] ids){try{QueryWrapper<Camera> cameraQueryWrapper = new QueryWrapper<>();cameraQueryWrapper.in("community_id", ids);boolean remove1 = this.cameraService.remove(cameraQueryWrapper);
//            if(!remove1) return Result.error("小区摄像头删除失败");QueryWrapper<InOutRecord> inOutRecordQueryWrapper = new QueryWrapper<>();inOutRecordQueryWrapper.in("community_id", ids);boolean remove2 = this.inOutRecordService.remove(inOutRecordQueryWrapper);
//            if(!remove2) return Result.error("小区出入记录删除失败");QueryWrapper<ManualRecord> manualRecordQueryWrapper = new QueryWrapper<>();manualRecordQueryWrapper.in("community_id", ids);boolean remove3 = this.manualRecordService.remove(manualRecordQueryWrapper);
//            if(!remove3) return Result.error("小区访客记录删除失败");QueryWrapper<Person> personQueryWrapper = new QueryWrapper<>();personQueryWrapper.in("community_id", ids);boolean remove4 = this.personService.remove(personQueryWrapper);
//            if(!remove4) return Result.error("小区居民删除失败");boolean remove5 = this.communityService.removeByIds(Arrays.asList(ids));
//            if(!remove5) return Result.error("小区删除失败");}catch(Exception e){e.printStackTrace();return Result.error("小区删除失败");}return Result.ok();}
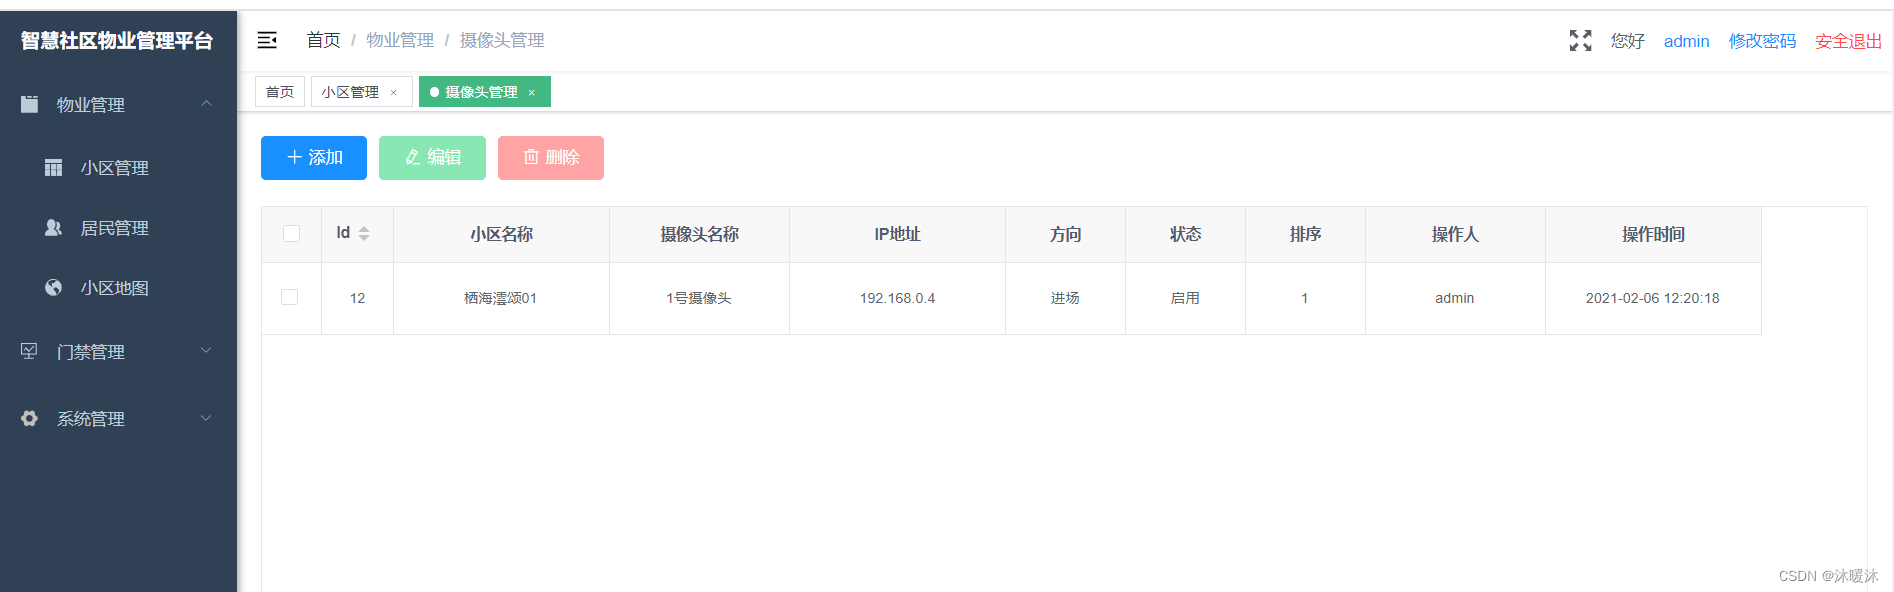
⑥摄像头管理
查询摄像头、添加摄像头、通过id查询摄像头、修改摄像头、删除摄像头,其操作和上述的小区操作相似,这里不再举例
摄像头(camera)表设计

界面
2、居民管理
查询和搜索居民、查询小区列表、添加居民、修改居民、删除居民,其操作和上述的小区操作相似,这里不再详写
①人脸采集
这里选择调用腾讯人脸识别的API接口进行人脸检测与上传,因此在人脸采集之前需要做一些准备工作。
腾讯人脸识别API接口申请
登录腾讯云,搜索访问管理,创建密钥

对应 application.yml 中的
secretId: AKID3CXqCeGxiOE1snomp9ThopkZIyXypZEl
secretKey: c7awCRbecXL0b9e4Sk2HVyfVONVk4VvF
搜索人脸识别,创建人员库
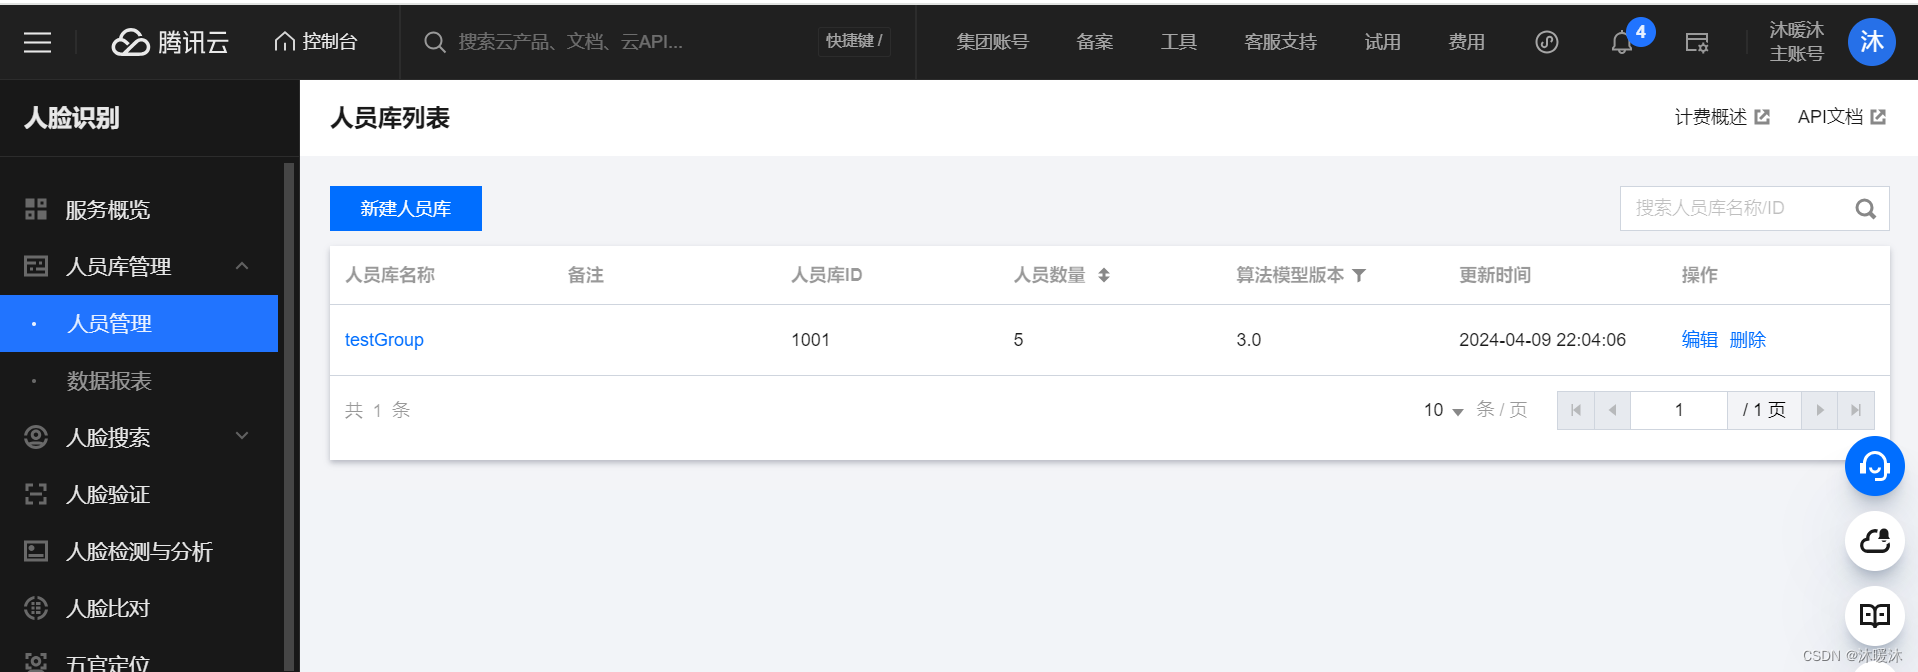
对应 application.yml 中的
groupId: 1001
相关配置
引入依赖
<dependency><groupId>com.tencentcloudapi</groupId><artifactId>tencentcloud-sdk-java</artifactId><version>3.1.62</version></dependency>配置文件
upload:face: D:/community/upload/face/excel: D:/community/upload/excel/urlPrefix: http://localhost:8282/
plateocr:secretId: AKID3CXqCeGxiOE1snomp9ThopkZIyXypZElsecretKey: c7awCRbecXL0b9e4Sk2HVyfVONVk4VvFserverIp: iai.tencentcloudapi.comarea: ap-guangzhougroupId: 1001used: truepassPercent: 80
serverIp 和 area 不需要修改,used 表示启用,passPercent 表示识别率,比如 80 表示图片相似度 80即认为通过 ;同时配置人脸图片上传的在本地的位置
人脸识别参数配置
package com.qcby.community.configuration;import io.swagger.annotations.ApiModel;
import io.swagger.annotations.ApiModelProperty;
import lombok.Data;
import org.springframework.boot.context.properties.ConfigurationProperties;
import org.springframework.stereotype.Component;@ConfigurationProperties(value="plateocr")
@Component
@Data
@ApiModel(value = "ApiConfiguration",description = "人脸识别参数描述")
public class ApiConfiguration {@ApiModelProperty("人脸识别secretId")private String secretId;@ApiModelProperty("人脸识别secretKey")private String secretKey;//	服务器ip@ApiModelProperty("人脸识别服务器ip")private String serverIp;//	服务器区域@ApiModelProperty("人脸识别服务器区域")private String area;//	默认分组@ApiModelProperty("人脸识别默认分组")private String groupId;//	用户id前缀@ApiModelProperty("人脸识别用户id前缀")private String personIdPre;//	随机数@ApiModelProperty("人脸识别随机数")private String nonceStr;//	是否使用@ApiModelProperty("人脸识别,是否启用人脸识别功能")private boolean used = false;//	识别准确率@ApiModelProperty("人脸识别比对准确度,如符合80%就识别通过")private float passPercent;}
文件映射的配置
package com.qcby.community.configuration;import org.springframework.beans.factory.annotation.Value;
import org.springframework.context.annotation.Configuration;
import org.springframework.web.servlet.config.annotation.ResourceHandlerRegistry;
import org.springframework.web.servlet.config.annotation.WebMvcConfigurer;@Configuration
public class WebMvcConfiguration implements WebMvcConfigurer {@Value("${upload.face}")String face;@Value("${upload.excel}")String excel;@Overridepublic void addResourceHandlers(ResourceHandlerRegistry registry) {registry.addResourceHandler("/community/upload/face/**").addResourceLocations("file:"+face);registry.addResourceHandler("/community/upload/excel/**").addResourceLocations("file:"+excel);}
}
传入参数
{
"personId": 98,
"extName": "png",
"fileBase64": "iVBORw0KGgoAAAANSUhEUgAAAJsAAAC4CAYAAAD0WZ4UAAAAAXNSR0IArs4c6QAAAARnQU1BAACxjwv8YQUAAAAJ8pt02jBn6wUmcy/39/xgi2nSFeQGzAAAAAElFTkSuQmCC"
}
返回参数
{
"msg": "操作成功",
"code": 200
}
实现思路
①进行程序严谨性判断:根据personId查询person信息,首先判断居民存在与否,然后判断居民是否已经录入了人脸,最后判断居民上传的图片是否为Base64编码的图片,有一个不符合都不进行人脸的录入
②调用腾讯API接口进行人脸检测,判断上传的图片是否为一张人脸
③将人脸图片上传到服务器,并且更新person表中人脸图片的地址以及识别状态
人脸识别的实现
    @Autowiredprivate ApiConfiguration apiConfiguration;@Value("${upload.face}")private String face;@Value("${upload.urlPrefix}")private String urlPrefix;/*** 录入人脸信息* @param personFaceForm* @return*/@LogAnnotation("人脸采集")@PostMapping("/addPerson")public Result addPerson(@RequestBody PersonFaceForm personFaceForm){Person person = this.personService.getById(personFaceForm.getPersonId());//程序严谨性判断if(person == null){return Result.error("居民不存在");}if(person.getState() == 2){return Result.error("人脸识别已通过,不需要重复识别");}if(personFaceForm.getFileBase64() == null || personFaceForm.getFileBase64().equals("")){return Result.error("请上传Base64编码的图片");}//人脸检测if(apiConfiguration.isUsed()){//调用腾讯API人脸识别String faceId = newPerson(personFaceForm,person.getUserName());if(faceId == null){return Result.error("人脸识别失败");}if (faceId != null) {//生成头像访问路径String filename = faceId + "." + personFaceForm.getExtName();String faceUrl = urlPrefix + "community/upload/face/" + filename;person.setFaceUrl(faceUrl);person.setState(2);//更新人脸识别状态及图片地址this.personService.updateById(person);return Result.ok();}//            //模拟人脸识别
//            //生成模拟id
//            String faceId = RandomUtil.getBitRandom();
//            String faceBase = personFaceForm.getFileBase64().substring(0, 60);
//            // 如果不是头像
//            if(faceBase.equals("iVBORw0KGgoAAAANSUhEUgAAAoAAAAHgCAYAAAA10dzkAAAAAXNSR0IArs4c")) {
//                return Result.error("人脸识别失败");
//            }
//            //存储头像
//            String filename = faceId + "." + personFaceForm.getExtName();
//            String savePath = face + filename;
//            try {
//                Base64Util.decoderBase64File(personFaceForm.getFileBase64(), savePath);
//            } catch (Exception e) {
//                e.printStackTrace();
//            }
//            //生成头像访问路径
//            String faceUrl = urlPrefix + "community/upload/face/" + filename;
//            person.setFaceUrl(faceUrl);
//            person.setState(2);
//            person.setFaceBase(faceBase);
//            //更新人脸识别状态及图片地址
//            this.personService.updateById(person);
//            return Result.ok();}return Result.error("未开启人脸识别");}private String newPerson(PersonFaceForm vo,String personName) {String faceId = null;String faceBase64 = vo.getFileBase64();String extname = vo.getExtName();String personId = vo.getPersonId()+"";String savePath = face;if (faceBase64!=null && !faceBase64.equals("")) {FaceApi faceApi = new FaceApi();RootResp resp = faceApi.newperson(apiConfiguration, personId, personName, faceBase64);if(resp.getRet()==0) {JSONObject data = JSON.parseObject(resp.getData().toString());faceId = data.getString("FaceId");if(faceId!=null) {String filename = faceId + "." + extname;savePath += filename;try {Base64Util.decoderBase64File(faceBase64, savePath);} catch (Exception e) {e.printStackTrace();}}}else {return faceId;}}return faceId;}
FaceApi人脸识别工具类
package com.qcby.community.util;import com.alibaba.fastjson.JSONArray;
import com.alibaba.fastjson.JSONObject;
import com.qcby.community.configuration.ApiConfiguration;
import com.tencentcloudapi.common.Credential;
import com.tencentcloudapi.common.exception.TencentCloudSDKException;
import com.tencentcloudapi.common.profile.ClientProfile;
import com.tencentcloudapi.common.profile.HttpProfile;
import com.tencentcloudapi.iai.v20180301.IaiClient;
import com.tencentcloudapi.iai.v20180301.models.*;
import org.apache.log4j.Logger;public class FaceApi {private Logger logger = Logger.getLogger(FaceApi.class);//人脸分析public RootResp detectFace(ApiConfiguration config, String url) {RootResp result = new RootResp();try{Credential cred = new Credential(config.getSecretId(), config.getSecretKey());HttpProfile httpProfile = new HttpProfile();httpProfile.setEndpoint(config.getServerIp());ClientProfile clientProfile = new ClientProfile();clientProfile.setHttpProfile(httpProfile);IaiClient client = new IaiClient(cred, config.getArea(), clientProfile);JSONObject paramObj = new JSONObject();paramObj.put("Url", url);paramObj.put("MaxFaceNum",1);paramObj.put("MinFaceSize",34);paramObj.put("NeedFaceAttributes",0);paramObj.put("NeedQualityDetection",1);DetectFaceRequest req = DetectFaceRequest.fromJsonString(paramObj.toJSONString(),DetectFaceRequest.class);DetectFaceResponse resp = client.DetectFace(req);result.setData(DetectFaceResponse.toJsonString(resp));} catch (TencentCloudSDKException e) {result.setRet(-1);result.setMsg(e.toString());logger.error(e.toString());}logger.info(result);return result;}//添加个体public RootResp newperson(ApiConfiguration config, String personId, String personName, String image) {RootResp result = new RootResp();try{//设置凭证和连接信息// 实例化一个认证对象,入参需要传入腾讯云账户 SecretId 和 SecretKey,此处还需注意密钥对的保密Credential cred = new Credential(config.getSecretId(), config.getSecretKey());HttpProfile httpProfile = new HttpProfile();// 实例化一个http选项,可选的,没有特殊需求可以跳过//httpProfile.setEndpoint("iai.tencentcloudapi.com");httpProfile.setEndpoint(config.getServerIp());// 实例化一个client选项,可选的,没有特殊需求可以跳过ClientProfile clientProfile = new ClientProfile();clientProfile.setHttpProfile(httpProfile);// 实例化要请求产品的client对象,clientProfile是可选的IaiClient client = new IaiClient(cred, config.getArea(), clientProfile);JSONObject paramObj = new JSONObject();paramObj.put("GroupId", config.getGroupId());paramObj.put("PersonId", config.getPersonIdPre() + personId);paramObj.put("PersonName", personName);paramObj.put("Image", image);//发送请求并获取响应CreatePersonRequest req = CreatePersonRequest.fromJsonString(paramObj.toJSONString(), CreatePersonRequest.class);CreatePersonResponse resp = client.CreatePerson(req);result.setData(CreatePersonResponse.toJsonString(resp));} catch (TencentCloudSDKException e) {result.setRet(-1);result.setMsg(e.toString());logger.error(e.toString());}logger.info(result);return result;}//删除个体public RootResp delperson(ApiConfiguration config, String personId) {RootResp result = new RootResp();try{Credential cred = new Credential(config.getSecretId(), config.getSecretKey());HttpProfile httpProfile = new HttpProfile();httpProfile.setEndpoint(config.getServerIp());ClientProfile clientProfile = new ClientProfile();clientProfile.setHttpProfile(httpProfile);IaiClient client = new IaiClient(cred, config.getArea(), clientProfile);JSONObject paramObj = new JSONObject();paramObj.put("PersonId", config.getPersonIdPre() + personId);DeletePersonRequest req = DeletePersonRequest.fromJsonString(paramObj.toJSONString(), DeletePersonRequest.class);DeletePersonResponse resp = client.DeletePerson(req);result.setData(DeletePersonResponse.toJsonString(resp));} catch (TencentCloudSDKException e) {result.setRet(-1);result.setMsg(e.toString());logger.error(e.toString());}logger.info(result);return result;}//增加人脸public RootResp addface(ApiConfiguration config, String personId, String image) {RootResp result = new RootResp();try{Credential cred = new Credential(config.getSecretId(), config.getSecretKey());HttpProfile httpProfile = new HttpProfile();httpProfile.setEndpoint(config.getServerIp());ClientProfile clientProfile = new ClientProfile();clientProfile.setHttpProfile(httpProfile);IaiClient client = new IaiClient(cred, config.getArea(), clientProfile);JSONObject paramObj = new JSONObject();JSONArray images = new JSONArray();images.add(image);paramObj.put("PersonId", config.getPersonIdPre() + personId);paramObj.put("Images", images);CreateFaceRequest req = CreateFaceRequest.fromJsonString(paramObj.toJSONString(), CreateFaceRequest.class);CreateFaceResponse resp = client.CreateFace(req);result.setData(CreateFaceResponse.toJsonString(resp));} catch (TencentCloudSDKException e) {result.setRet(-1);result.setMsg(e.toString());logger.error(e.toString());}logger.info(result);return result;}//删除人脸public RootResp delface(ApiConfiguration config, String personId, String faceId) {RootResp result = new RootResp();try{Credential cred = new Credential(config.getSecretId(), config.getSecretKey());HttpProfile httpProfile = new HttpProfile();httpProfile.setEndpoint(config.getServerIp());ClientProfile clientProfile = new ClientProfile();clientProfile.setHttpProfile(httpProfile);IaiClient client = new IaiClient(cred, config.getArea(), clientProfile);JSONObject paramObj = new JSONObject();JSONArray faces = new JSONArray();faces.add(faceId);paramObj.put("PersonId", config.getPersonIdPre() + personId);paramObj.put("FaceIds", faces);DeleteFaceRequest req = DeleteFaceRequest.fromJsonString(paramObj.toJSONString(), DeleteFaceRequest.class);DeleteFaceResponse resp = client.DeleteFace(req);result.setData(DeleteFaceResponse.toJsonString(resp));} catch (TencentCloudSDKException e) {result.setRet(-1);result.setMsg(e.toString());logger.error(e.toString());}logger.info(result);return result;}//人脸验证public RootResp faceVerify(ApiConfiguration config, String personId, String image) {RootResp result = new RootResp();try{Credential cred = new Credential(config.getSecretId(), config.getSecretKey());HttpProfile httpProfile = new HttpProfile();httpProfile.setEndpoint(config.getServerIp());ClientProfile clientProfile = new ClientProfile();clientProfile.setHttpProfile(httpProfile);IaiClient client = new IaiClient(cred, config.getArea(), clientProfile);JSONObject paramObj = new JSONObject();paramObj.put("PersonId", config.getPersonIdPre() + personId);paramObj.put("Image", image);VerifyFaceRequest req = VerifyFaceRequest.fromJsonString(paramObj.toJSONString(), VerifyFaceRequest.class);VerifyFaceResponse resp = client.VerifyFace(req);result.setData(VerifyFaceResponse.toJsonString(resp));} catch (TencentCloudSDKException e) {result.setRet(-1);result.setMsg(e.toString());logger.error(e.toString());}logger.info(result);return result;}//人员搜索按库返回public RootResp searchPersonsReturnsByGroup(ApiConfiguration config, String image) {RootResp result = new RootResp();try{Credential cred = new Credential(config.getSecretId(), config.getSecretKey());HttpProfile httpProfile = new HttpProfile();httpProfile.setEndpoint(config.getServerIp());ClientProfile clientProfile = new ClientProfile();clientProfile.setHttpProfile(httpProfile);IaiClient client = new IaiClient(cred, config.getArea(), clientProfile);JSONObject paramObj = new JSONObject();paramObj.put("GroupIds", new String[] {config.getGroupId()});paramObj.put("Image", image);//最多返回的最相似人员数目paramObj.put("MaxPersonNumPerGroup", 5);//返回人员具体信息paramObj.put("NeedPersonInfo", 1);//最多识别的人脸数目paramObj.put("MaxFaceNum", 1);SearchFacesReturnsByGroupRequest req = SearchFacesReturnsByGroupRequest.fromJsonString(paramObj.toJSONString(), SearchFacesReturnsByGroupRequest.class);SearchFacesReturnsByGroupResponse resp = client.SearchFacesReturnsByGroup(req);result.setData(VerifyFaceResponse.toJsonString(resp));} catch (TencentCloudSDKException e) {result.setRet(-1);result.setMsg(e.toString());logger.error(e.toString());}logger.info(result);return result;}
}
RootResp人脸识别响应类
package com.qcby.community.util;import com.alibaba.fastjson.JSON;public class RootResp {private int ret = 0;public int getRet() {return this.ret;}public void setRet(int ret) {this.ret = ret;}private String msg;public String getMsg() {return this.msg;}public void setMsg(String msg) {this.msg = msg;}private Object data;public Object getData() {return this.data;}public void setData(Object data) {this.data = data;}@Overridepublic String toString() {return JSON.toJSONString(this);}
}
Base64Util编码转换工具类
package com.qcby.community.util;import org.apache.commons.codec.binary.Base64;import java.io.*;
import java.net.HttpURLConnection;
import java.net.URL;public class Base64Util {/*** 将二进制数据编码为BASE64字符串** @param binaryData* @return*/public static String encode(byte[] binaryData) {try {return new String(Base64.encodeBase64(binaryData), "UTF-8");} catch (UnsupportedEncodingException e) {return null;}}/*** 将BASE64字符串恢复为二进制数据** @param base64String* @return*/public static byte[] decode(String base64String) {try {return Base64.decodeBase64(base64String.getBytes("UTF-8"));} catch (UnsupportedEncodingException e) {return null;}}/*** 将文件转成base64 字符串**  path文件路径* @return ** @throws Exception*/public static String encodeBase64File(String path) throws Exception {File file = new File(path);FileInputStream inputFile = new FileInputStream(file);byte[] buffer = new byte[(int) file.length()];inputFile.read(buffer);inputFile.close();return encode(buffer);}//读取网络图片public static String encodeBase64URLFile(String path) throws Exception {URL url = new URL(path);HttpURLConnection conn = (HttpURLConnection)url.openConnection();conn.setRequestMethod("GET");conn.setConnectTimeout(5*1000);InputStream is = conn.getInputStream();byte[] data = readInputStream(is);is.close();conn.disconnect();return encode(data);}public static byte[] readInputStream(InputStream inStream) throws Exception{ByteArrayOutputStream outStream = new ByteArrayOutputStream();//创建一个Buffer字符串byte[] buffer = new byte[1024];//每次读取的字符串长度,如果为-1,代表全部读取完毕int len = 0;//使用一个输入流从buffer里把数据读取出来while( (len=inStream.read(buffer)) != -1 ){//用输出流往buffer里写入数据,中间参数代表从哪个位置开始读,len代表读取的长度outStream.write(buffer, 0, len);}//关闭输入流inStream.close();//把outStream里的数据写入内存return outStream.toByteArray();}/*** 将base64字符解码保存文件** @param base64Code* @param targetPath* @throws Exception*/public static void decoderBase64File(String base64Code, String targetPath) throws Exception {byte[] buffer = decode(base64Code);FileOutputStream out = new FileOutputStream(targetPath);out.write(buffer);out.close();}/*** 将base64字符保存文本文件** @param base64Code* @param targetPath* @throws Exception*/public static void toFile(String base64Code, String targetPath) throws Exception {byte[] buffer = base64Code.getBytes();FileOutputStream out = new FileOutputStream(targetPath);out.write(buffer);out.close();}
}
②excel导出
传入参数
{
"page": 1,
"limit": 10,
"userName": "",
"communityId": "",
"mobile": ""
}
返回参数
{
"msg": "操作成功",
"code": 200,
"data": "20230719185659.xls"
}
实现思路
①根据传入参数,查询居民信息
②将居民信息写入excel文件,并导出。
具体而言:
-
准备Excel模板:
- 创建一个Excel模板文件,该文件包含所需的表头和其他固定内容。
- 在代码中指定模板文件的路径。
-
复制模板文件:
- 为了避免直接修改原始模板文件,先复制一份模板文件。
- 在复制的文件名中添加时间戳或其他唯一标识,确保每次导出的文件都是新的。
-
读取数据:
- 获取需要导出的数据,并将其存储在一个列表中。
-
操作Excel文件:
- 使用Apache POI库来操作Excel文件。
- 读取复制后的Excel文件,获取工作簿和工作表。
-
写入数据到Excel:
- 遍历数据列表,为每条数据创建一个新的行。
- 在每行中创建单元格,并将数据写入到对应的单元格中。
- 可以根据需要设置单元格的样式、格式等。
-
保存Excel文件:将修改后的Excel文件保存到指定的路径。
-
将文件名返回
引入依赖
<dependency><groupId>cn.afterturn</groupId><artifactId>easypoi-spring-boot-starter</artifactId><version>4.2.0</version></dependency>controller
/*** 文件导出* @param personListForm* @return*/@GetMapping("/exportExcel")public Result exportExcel(PersonListForm personListForm){PageVO pageVO = this.personService.personList(personListForm);List list = pageVO.getList();String path = excel;path = ExcelUtil.ExpPersonInfo(list,path);return Result.ok().put("data", path);}ExcelUtil文件导出工具类
package com.qcby.community.util;import com.qcby.community.vo.PersonVO;
import org.apache.poi.hssf.usermodel.*;
import org.apache.poi.poifs.filesystem.POIFSFileSystem;
import org.apache.poi.ss.usermodel.BorderStyle;import java.io.FileInputStream;
import java.io.FileOutputStream;
import java.text.SimpleDateFormat;
import java.util.Date;
import java.util.List;public class ExcelUtil {public static String ExpPersonInfo(List<PersonVO> info, String path){POIFSFileSystem fs = null;int headRow = 2;String descfile = null;try {//复制文件String srcfile = path + "personInfo.xls";Date date = new Date();SimpleDateFormat format = new SimpleDateFormat("yyyyMMddHHmmss");String dateStr = format.format(date);descfile = dateStr + ".xls";try {FileInputStream fis = new FileInputStream(srcfile);FileOutputStream fos = new FileOutputStream(path+descfile);byte [] buffer = new byte[1024*4];while(fis.read(buffer) != -1){fos.write(buffer);}fis.close();fos.close();} catch (Exception e) {e.printStackTrace();}//写数据fs = new POIFSFileSystem(new FileInputStream(path + descfile));FileOutputStream fos = new FileOutputStream(path + descfile);HSSFWorkbook wb1 = new HSSFWorkbook(fs);HSSFSheet sheet = wb1.getSheetAt(0);int size = info.size();int col = 0;HSSFCellStyle style = wb1.createCellStyle();style.setBorderLeft(BorderStyle.THIN);style.setBorderRight(BorderStyle.THIN);style.setBorderTop(BorderStyle.THIN);style.setBorderBottom(BorderStyle.THIN);for(int i = 0;i < size;i++){col = 0;PersonVO p = info.get(i);HSSFRow row = sheet.createRow(i+headRow);HSSFCell cell = null;cell = row.createCell(col++);cell.setCellStyle(style);cell.setCellValue(p.getPersonId());cell = row.createCell(col++);cell.setCellStyle(style);cell.setCellValue(p.getCommunityName());cell = row.createCell(col++);cell.setCellStyle(style);cell.setCellValue(p.getTermName());cell = row.createCell(col++);cell.setCellStyle(style);cell.setCellValue(p.getHouseNo());cell = row.createCell(col++);cell.setCellStyle(style);cell.setCellValue(p.getUserName());cell = row.createCell(col++);cell.setCellStyle(style);cell.setCellValue(p.getSex());cell = row.createCell(col++);cell.setCellStyle(style);cell.setCellValue(p.getMobile());cell = row.createCell(col++);cell.setCellStyle(style);cell.setCellValue(p.getPersonType());cell = row.createCell(col++);cell.setCellStyle(style);cell.setCellValue(p.getRemark());}wb1.write(fos);fos.close();} catch (Exception e) {e.printStackTrace();}return descfile;}}
③excel上传
实现思路
①指定文件上传位置
②获取上传的文件
③通过UUID生成新的文件名
④文件上传
⑤返回上传的文件名
实现的controller
/*** 数据上传* @param file* @return* @throws Exception*/@PostMapping("/excelUpload")public Result excelUpload(@RequestParam("uploadExcel") MultipartFile file) throws Exception {if(file.getOriginalFilename().equals("")){return Result.error("没有选中要上传的文件");}else {String picName = UUID.randomUUID().toString();String oriName = file.getOriginalFilename();String extName = oriName.substring(oriName.lastIndexOf("."));String newFileName = picName + extName;File targetFile = new File(excel, newFileName);// 保存文件file.transferTo(targetFile);return Result.ok().put("data",newFileName);}}④数据导入
实现思路
文件导入的实现思路主要涉及以下几个步骤:
- 获取用户信息:
- 通过
HttpSession对象从会话中获取当前登录的用户信息,用于存储到数据表person中creater的字段
- 通过
- 读取文件:
- 根据传入的文件名和预设的文件路径,构建完整的文件路径。
- 使用Apache POI库的
POIFSFileSystem和HSSFWorkbook类来读取Excel文件。POIFSFileSystem用于处理Office文档的底层文件系统,而HSSFWorkbook则代表一个Excel工作簿。
- 处理异常:
- 在读取文件的过程中,可能会遇到文件不存在、文件损坏或读取错误等异常。使用
try-catch块来捕获这些异常,并打印堆栈跟踪以便于调试和错误处理。
- 在读取文件的过程中,可能会遇到文件不存在、文件损坏或读取错误等异常。使用
- 获取工作表内容:
- 从工作簿中获取第一个工作表(或根据需求获取特定的工作表)。
- 获取工作表的总行数和总列数,以确定数据范围。
- 数据提取:
- 根据需要,跳过表头行。
- 遍历工作表的每一行和每一列,使用
HSSFRow和HSSFCell类获取单元格数据。 - 使用
DataFormatter类将单元格数据格式化为字符串,以便于后续处理。
- 存储数据:
- 创建一个二维对象数组,用于存储从Excel文件中提取的数据。
- 将格式化后的单元格数据按行和列的顺序存入二维数组中。
- 写入数据:
- 将二维对象数组中的数据逐条保存到数据库中。
- 返回响应:
- 返回响应给前端,前端可以根据响应中的信息进行相应的处理(如显示导入成功提示、刷新页面等)。
实现的controller
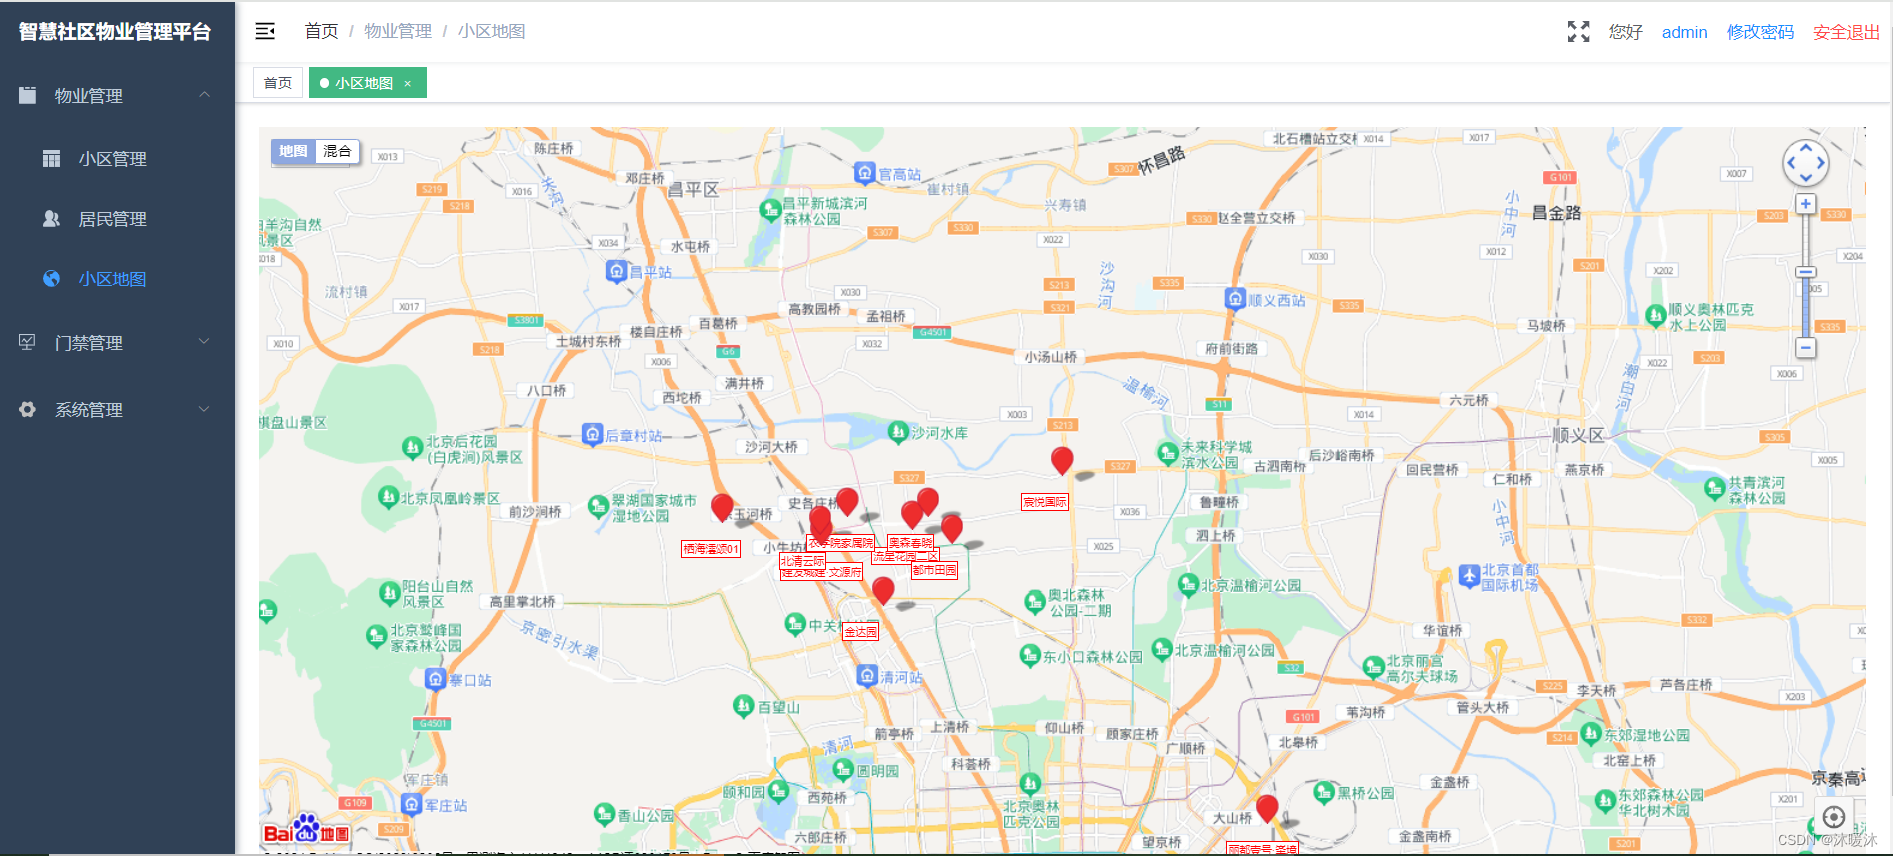
/*** 数据导入* @param fileName* @param session* @return*/@LogAnnotation("导入数据")@PostMapping("/parsefile/{fileName}")public Result parsefile(@PathVariable("fileName") String fileName,HttpSession session){User user = (User) session.getAttribute("user");// POIFSFileSystem是Apache POI库中用于处理Office文档的底层文件系统API。// 它代表了一个OLE 2复合文档,这是一个包含多个流(stream)和存储(storage)的单一文件POIFSFileSystem fs = null;// HSSFWorkbook类代表一个Excel工作簿,即一个.xls文件。// 通过这个类,你可以创建新的Excel文件,或者读取现有的Excel文件。// HSSFWorkbook提供了操作工作簿内容的方法,如添加、删除或修改工作表(HSSFSheet),以及设置工作簿的属性等HSSFWorkbook wb = null;try {String basePath = excel + fileName;//读取指定路径的Excel文件,放入fs输入流中fs = new POIFSFileSystem(new FileInputStream(basePath));//wb代表了这个Excel工作簿,你可以使用它来读取或修改Excel文件的内容wb = new HSSFWorkbook(fs);} catch (Exception e) {e.printStackTrace();}//获取第一个工作表HSSFSheet sheet = wb.getSheetAt(0);Object[][] data = null;//获取总行数int r = sheet.getLastRowNum()+1;//获取总列数int c = sheet.getRow(0).getLastCellNum();int headRow = 2;//将表格中的数据存入二维对象data中data = new Object[r - headRow][c];for (int i = headRow; i < r; i++) {//获取行HSSFRow row = sheet.getRow(i);for (int j = 0; j < c; j++) {//获取列HSSFCell cell = null;try {cell = row.getCell(j);try {cell = row.getCell(j);DataFormatter dataFormater = new DataFormatter();String a = dataFormater.formatCellValue(cell);data[i - headRow][j] = a;} catch (Exception e) {data[i-headRow][j] = "";if(j==0){try {double d = cell.getNumericCellValue();data[i - headRow][j] = (int)d + "";}catch(Exception ex){data[i-headRow][j] = "";}}}} catch (Exception e) {System.out.println("i="+i+";j="+j+":"+e.getMessage());}}}int row = data.length;int col = 0;String errinfo = "";headRow = 3;String[] stitle={"ID","小区名称","所属楼栋","房号","姓名","性别","手机号码","居住性质","状态","备注"};errinfo = "";for (int i = 0; i < row; i++) {Person single = new Person();single.setPersonId(0);single.setState(1);single.setFaceUrl("");try {col=1;String communityName = data[i][col++].toString();QueryWrapper<Community> queryWrapper = new QueryWrapper<>();queryWrapper.eq("community_name", communityName);Community community = this.communityService.getOne(queryWrapper);if( community == null){errinfo += "Excel文件第" + (i + headRow) + "行小区名称不存在!";return Result.ok().put("status", "fail").put("data", errinfo);}single.setCommunityId(community.getCommunityId());single.setTermName(data[i][col++].toString());single.setHouseNo(data[i][col++].toString());single.setUserName(data[i][col++].toString());single.setSex(data[i][col++].toString());single.setMobile(data[i][col++].toString());single.setPersonType(data[i][col++].toString());single.setRemark(data[i][col++].toString());single.setCreater(user.getUsername());this.personService.save(single);} catch (Exception e) {e.printStackTrace();}}return Result.ok().put("status", "success").put("data","数据导入完成!");}3、小区地图
获取地图数据
前端
vue安装依赖
cnpm i --save vue-baidu-map
配置申请密钥
Vue.use(BaiduMap, {// ak 是在百度地图开发者平台申请的密钥ak: '7eTaUxl9NY8RCMxCPm3oc8m2snTBOgbt'
})
后端
传入参数
无
返回参数
{
"msg": "操作成功",
"code": 200,
"data": [
{
"communityId": 2,
"communityName": "栖海澐颂",
"termCount": 0,
"seq": 0,
"creater": "",
"createTime": "",
"lng": 116.2524,
"lat": 40.0961,
}
]
}
实现controller
/*** 获取小区地图* @return*/@GetMapping("/getCommunityMap")public Result getCommunityMap(){List<Community> data = communityService.list();if(data == null) return Result.error("没有小区数据");return Result.ok().put("data", data);}界面
这篇关于实战项目——智慧社区(二)之 物业管理的文章就介绍到这儿,希望我们推荐的文章对编程师们有所帮助!


