本文主要是介绍Rust egui(4) 增加自己的tab页面,希望对大家解决编程问题提供一定的参考价值,需要的开发者们随着小编来一起学习吧!
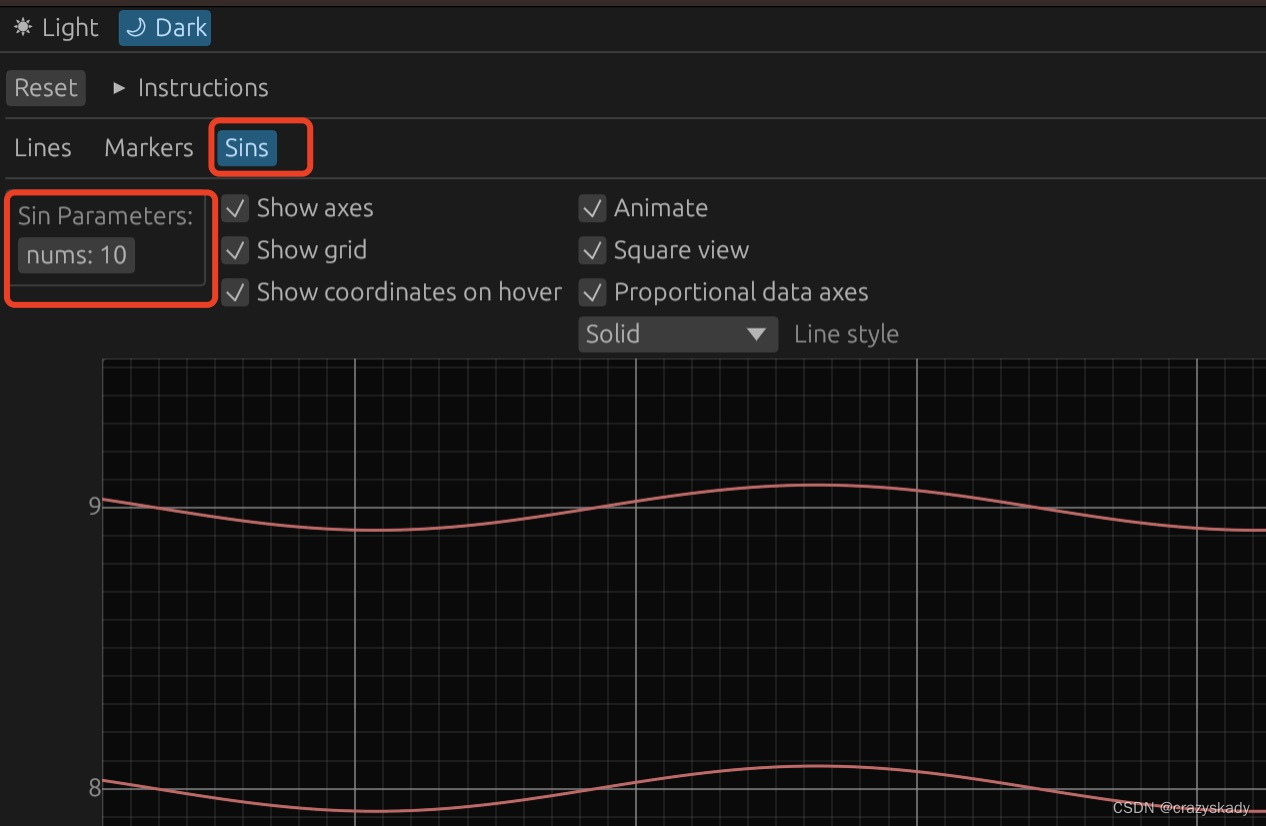
如下图,增加一个Sins也面,里面添加一个配置组为Sin Paraemters,里面包含一个nums的参数,范围是1-1024,根据nums的数量,在Panel中画sin函数的line。
demo见:https://crazyskady.github.io/index.html
代码见:https://github.com/crazyskady/egui_study/
怎么说呢,越来越懒,还是直接上增加注释的diff吧:
---eframe_test/src/app.rs | 139 +++++++++++++++++++++++++++++++++++++++++1 file changed, 139 insertions(+)diff --git a/eframe_test/src/app.rs b/eframe_test/src/app.rs
index 57d8107..669ef7f 100644
--- a/eframe_test/src/app.rs
+++ b/eframe_test/src/app.rs
@@ -11,6 +11,7 @@ use egui_plot::{enum Panel {Lines,Markers,
+    Sins,    // 添加一个自定义的Panel类型,命名为Sins}impl Default for Panel {
@@ -23,6 +24,7 @@ impl Default for Panel {pub struct PlotDemo {line_demo: LineDemo,marker_demo: MarkerDemo,
+    sin_demo: SinDemo,    // 实例化一个demo,类型为SinDemoopen_panel: Panel,}@@ -48,6 +50,7 @@ impl PlotDemo {ui.horizontal(|ui| {ui.selectable_value(&mut self.open_panel, Panel::Lines, "Lines");ui.selectable_value(&mut self.open_panel, Panel::Markers, "Markers");
+            ui.selectable_value(&mut self.open_panel, Panel::Sins, "Sins");});  // 当选中Sins的Panel的时候,open_panel被赋值为Panel::Sinsui.separator();@@ -58,6 +61,9 @@ impl PlotDemo {Panel::Markers => {self.marker_demo.ui(ui);}
+            Panel::Sins => {
+                self.sin_demo.ui(ui);  //如果选中的是Sins,那么调用实例的ui函数来画ui
+            }}}}
@@ -425,3 +431,136 @@ impl MarkerDemo {.response}}
+
+
+#[derive(Copy, Clone, PartialEq)]
+struct SinDemo {
+    animate: bool,
+    time: f64,
+    sin_nums: u32,  // 抄的原来的linedemo,主要增加了一个sin_nums用于描述当前要画几条sin
+    square: bool,
+    proportional: bool,
+    coordinates: bool,
+    show_axes: bool,
+    show_grid: bool,
+    line_style: LineStyle,
+}
+
+impl Default for SinDemo {
+    fn default() -> Self {
+        Self {
+            animate: !cfg!(debug_assertions),
+            time: 0.0,
+            sin_nums: 1, // 默认为1条
+            square: false,
+            proportional: true,
+            coordinates: true,
+            show_axes: true,
+            show_grid: true,
+            line_style: LineStyle::Solid,
+        }
+    }
+}
+
+impl SinDemo {
+    fn options_ui(&mut self, ui: &mut Ui) {
+        let Self {
+            animate,
+            time: _,
+            sin_nums,
+            square,
+            proportional,
+            coordinates,
+            show_axes,
+            show_grid,
+            line_style,
+        } = self;
+
+        ui.horizontal(|ui| {
+            ui.group(|ui| {
+                ui.vertical(|ui| {
+                    ui.label("Sin Parameters:");
+                    ui.add(
+                        egui::DragValue::new(sin_nums)
+                            .speed(0.1)
+                            .clamp_range(1..=1024) //限定为1-1024条
+                            .prefix("nums: "),
+                    );
+                });
+            });
+
+            ui.vertical(|ui| {
+                ui.checkbox(show_axes, "Show axes");
+                ui.checkbox(show_grid, "Show grid");
+                ui.checkbox(coordinates, "Show coordinates on hover")
+                    .on_hover_text("Can take a custom formatting function.");
+            });
+
+            ui.vertical(|ui| {
+                ui.style_mut().wrap = Some(false);
+                ui.checkbox(animate, "Animate");
+                ui.checkbox(square, "Square view")
+                    .on_hover_text("Always keep the viewport square.");
+                ui.checkbox(proportional, "Proportional data axes")
+                    .on_hover_text("Tick are the same size on both axes.");
+
+                ComboBox::from_label("Line style")
+                    .selected_text(line_style.to_string())
+                    .show_ui(ui, |ui| {
+                        for style in &[
+                            LineStyle::Solid,
+                            LineStyle::dashed_dense(),
+                            LineStyle::dashed_loose(),
+                            LineStyle::dotted_dense(),
+                            LineStyle::dotted_loose(),
+                        ] {
+                            ui.selectable_value(line_style, *style, style.to_string());
+                        }
+                    });
+            });
+        });
+    }
+    // 增加了一个idx入参,当idx不同的时候,sin的y值不同
+    fn sin(&self, idx: u32) -> Line {
+        let time = self.time;
+        Line::new(PlotPoints::from_explicit_callback(
+            // 这里用idx加上原来的sin值,将每条sin根据其idx进行y轴平移
+            move |x| 0.5 * (2.0 * x).sin() * time.sin() + idx as f64,
+            ..,
+            512,
+        ))
+        .color(Color32::from_rgb(200, 100, 100))
+        .style(self.line_style)
+        .name("wave")
+    }
+}
+
+impl SinDemo {
+    fn ui(&mut self, ui: &mut Ui) -> Response {
+        self.options_ui(ui);
+
+        if self.animate {
+            ui.ctx().request_repaint();
+            self.time += ui.input(|i| i.unstable_dt).at_most(1.0 / 30.0) as f64;
+        };
+        let mut plot = Plot::new("lines_demo")
+            .legend(Legend::default())
+            .y_axis_width(4)
+            .show_axes(self.show_axes)
+            .show_grid(self.show_grid);
+        if self.square {
+            plot = plot.view_aspect(1.0);
+        }
+        if self.proportional {
+            plot = plot.data_aspect(1.0);
+        }
+        if self.coordinates {
+            plot = plot.coordinates_formatter(Corner::LeftBottom, CoordinatesFormatter::default());
+        }
+        plot.show(ui, |plot_ui| {
+            // 根据sin_nums,画出不同条数的sin
+            for i in 0..self.sin_nums {
+                plot_ui.line(self.sin(i));
+            }
+        })
+        .response
+    }
+}
\ No newline at end of file
--
2.42.0
Hmmm…越来越懒~~~~~~~~~~ >_<
这篇关于Rust egui(4) 增加自己的tab页面的文章就介绍到这儿,希望我们推荐的文章对编程师们有所帮助!


