本文主要是介绍【playbook剧本批量创建用户,密码】【playbook剧本同时安装nginx,httpd能启动】【批量部署Jdk+Tomcat+Jenkins剧本】,希望对大家解决编程问题提供一定的参考价值,需要的开发者们随着小编来一起学习吧!
文章目录
- 创建10个用户分别是user1--user10,并设置密码为123456789要求playbook剧本编写
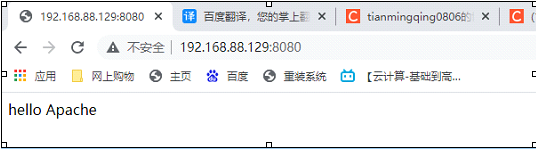
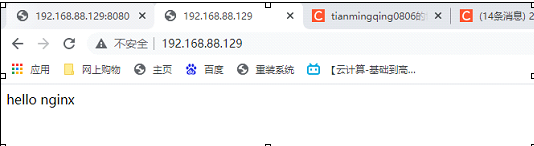
- 安装httpd与nginx服务,要求httpd与nginx均可同时开启,访问nginx的页面是“hello nginx”、访问httpd的页面是“hello Apache”。
- 在测试安装 nginx 80 端口
- 重点结合到一个剧本里面
- 批量部署Jdk+Tomcat+Jenkins
- 下面是剧本
- 安装tomcat
- 安装jenkins
创建10个用户分别是user1–user10,并设置密码为123456789要求playbook剧本编写
步骤语法;
- hosts: web2
user: root
tasks:- name: 创建10个用户
user: name={{ item.name }} password={{ item.chpass | password_hash(‘sha512’) }} update_password=always
with_items:- { name: ‘test’,chpass: ‘123456789’}
- { name: ‘test2’,chpass: ‘123456789’}
- { name: ‘test3’,chpass: ‘123456789’}
- { name: ‘test4’,chpass: ‘123456789’}
- { name: ‘test5’,chpass: ‘123456789’}
- { name: ‘test6’,chpass: ‘123456789’}
- { name: ‘test7’,chpass: ‘123456789’}
- { name: ‘test8’,chpass: ‘123456789’}
- { name: ‘test9’,chpass: ‘123456789’}
- { name: ‘test10’,chpass: ‘123456789’}
- name: 创建10个用户
在这里插入图片描述

脚本检测

安装httpd与nginx服务,要求httpd与nginx均可同时开启,访问nginx的页面是“hello nginx”、访问httpd的页面是“hello Apache”。
步骤1,;先测试 httpd 修改城端口8080 测试查看
先编写 httpd 的主配置文件 修改端口号 保存成文件


进行剧本 编写
- hosts: web3
user: root
vars_files:- /root/httpd.yml
tasks: - name: 安装apache
yum: name=httpd state=latest - name: 在默认发布目录输入内容
shell: echo " hello Apache" >> /var/www/html/index.html - name: 拷贝修改端口文件
copy: src={{ src_path }} dest={{ dest_path }} - name: 启动 httpd
service: name=httpd state=started

查看测试成功
- /root/httpd.yml
在测试安装 nginx 80 端口
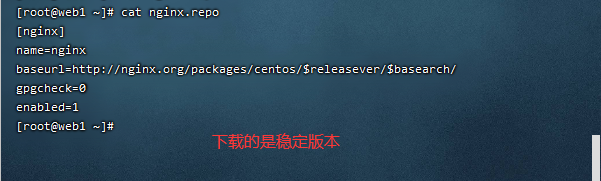
我这里采用yum 安装的需要编写yum.repo文件
第一步重点 下载的是稳定版本
[nginx]
name=nginx
baseurl=http://nginx.org/packages/centos/ r e l e a s e v e r / releasever/ releasever/basearch/
gpgcheck=0
enabled=1
编写的变量文件

进行剧本编写
- hosts: web3
user: root
vars_files:- /root/yum-utils9.yml
tasks: - name: 安装yum-utils
yum: name=yum-utils state=latest - name: 拷贝nginx.repo文件
copy: src={{ src_pat }} dest={{ dest_pat }} - name: 安装nginx
yum: name=nginx state=latest - name: 输入一句话
shell: echo “hello nginx” > /usr/share/nginx/html/index.html
notify: start nginx
handlers: - name: start nginx
service: name=nginx state=started

进行测试
- /root/yum-utils9.yml
重点结合到一个剧本里面
语法;
-
hosts: web3
user: root
vars_files:- /root/httpd.yml
tasks: - name: 安装apache
yum: name=httpd state=latest - name: 在默认发布目录输入内容
shell: echo " hello Apache" >> /var/www/html/index.html - name: 拷贝修改端口文件
copy: src={{ src_path }} dest={{ dest_path }} - name: 启动 httpd
service: name=httpd state=started
- /root/httpd.yml
-
hosts: web3
user: root
vars_files:- /root/yum-utils9.yml
tasks: - name: 安装yum-utils
yum: name=yum-utils state=latest - name: 拷贝nginx.repo文件
copy: src={{ src_path }} dest={{ dest_path }} - name: 安装nginx
yum: name=nginx state=latest - name: 输入一句话
shell: echo “hello nginx” > /usr/share/nginx/html/index.html - name: 启动 nginx
service: name=nginx state=started

查看检测端口

- /root/yum-utils9.yml
批量部署Jdk+Tomcat+Jenkins
步骤 1;
将Jdk、Tomcat、Jenkins的安装包上传到ansbile控制节点的/root下
[root@ansible ansible]# ls

步骤2;
[root@java-server ansible]# head -2 /root/startup.sh //startup.sh是tomcat的启动脚本
#!/bin/sh
source /etc/profile #加上此行,是为了启动加载到环境变量
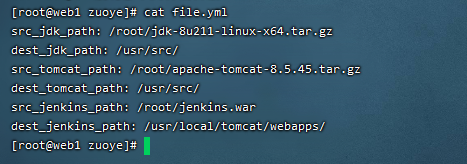
步骤3;编写一个变量文件
变量文件
[root@ansible ansible]# cat /root/file.yml
下面是剧本
语法;
- hosts: web2
user: root
vars_files:- /root/zuoye/file.yml
tasks:
##配置JDK,上传jdk、tomcat的安装包到/usr/src - name: 传送jdk
copy: src={{ src_jdk_path }} dest={{ dest_jdk_path }} - name: 解压jdk
shell: tar -xvzf /usr/src/jdk-8u211-linux-x64.tar.gz -C /usr/local - name: 移动改名 java
shell: mv /usr/local/jdk1.8.0_211 /usr/local/java - name: 加入环境变量
shell: echo “JAVA_HOME=/usr/local/java” >> /etc/profile - name: 加入环境变量2
shell: echo ‘PATH= J A V A H O M E / b i n : JAVA_HOME/bin: JAVAHOME/bin:PATH’ >> /etc/profile
- /root/zuoye/file.yml
安装tomcat
- name: 拷贝 tomcat
copy: src={{ src_tomcat_path }} dest={{ dest_tomcat_path }} - name: 解压 tomcat
shell: tar -xvzf /usr/src/apache-tomcat-8.5.45.tar.gz -C /usr/local - name: 移动改名 tomcat
shell: mv /usr/local/apache-tomcat-8.5.45 /usr/local/tomcat - name: 加入变量文件 file
copy: src=/root/startup.sh dest=/usr/local/tomcat/bin
安装jenkins
- name: 拷贝 jenkins
copy: src=/root/jenkins.war dest=/usr/local/tomcat/webapps/
notify: start jenkins
handlers: - name: start jenkins
语法检测


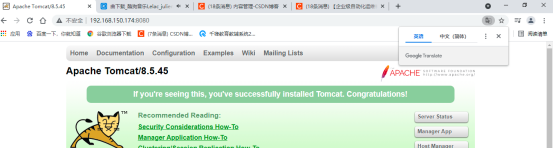
测试 节点 8080端口 192.168.150.174:8080
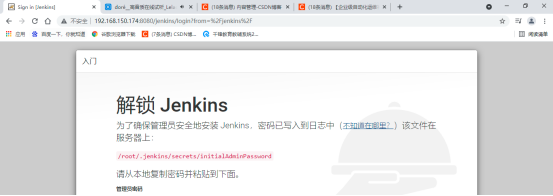
测试 jenkins 192.168.150.174:8080/jenkins
这篇关于【playbook剧本批量创建用户,密码】【playbook剧本同时安装nginx,httpd能启动】【批量部署Jdk+Tomcat+Jenkins剧本】的文章就介绍到这儿,希望我们推荐的文章对编程师们有所帮助!


