本文主要是介绍基于Arduino IDE 野火ESP8266模块 定时器 的开发,希望对大家解决编程问题提供一定的参考价值,需要的开发者们随着小编来一起学习吧!
一、delay函数实现定时
如果不需要精确到微秒级别的控制,可以使用Arduino的内置函数 millis()和delay() 来创建简单的定时器。millis()函数返回Arduino板启动后的毫秒数,而delay()函数会暂停程序的执行一段时间。
示例代码如下:
delay()函数
#include <Arduino.h>unsigned long currentTestTime;void setup(){Serial.begin(115200);
}
void loop(){Serial.print("Arduino has been running this sketch for ");currentTestTime = millis();//输出程序运行时间Serial.print(currentTestTime);Serial.println(" milliseconds.");delay(1000);currentTestTime = millis();//输出程序运行时间Serial.print(currentTestTime);Serial.println(" milliseconds.");delay(1000);
}
运行效果

二、millis函数实现定时
millis()函数
#include <Arduino.h>
unsigned long previousMillis = 0;
const long interval = 1000; // 间隔1秒(1000毫秒)void setup() {  Serial.begin(115200);
}  void loop() {  unsigned long currentMillis = millis();  if (currentMillis - previousMillis >= interval) {  previousMillis = currentMillis;  // 更新上一次的时间  Serial.println("1 second has passed");  // 在这里执行你的定时任务  }  // 其他代码...
}
#include <Arduino.h>int testInterval = 1000; //时间间隔
unsigned long previousTestTime;void setup() {Serial.begin(115200);
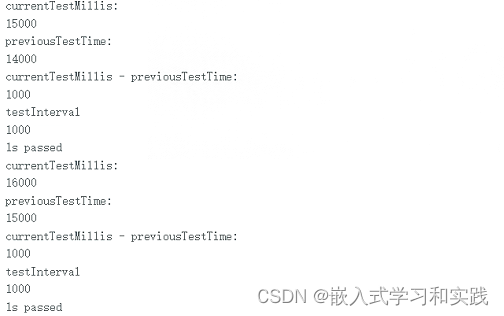
}void loop() { unsigned long currentTestMillis = millis(); // 获取当前时间//检查是否到达时间间隔if (currentTestMillis - previousTestTime >= testInterval ) { //如果时间间隔达到了Serial.println("currentTestMillis:"); Serial.println(currentTestMillis);Serial.println("previousTestTime:"); Serial.println(previousTestTime); Serial.println("currentTestMillis - previousTestTime:"); Serial.println(currentTestMillis - previousTestTime); Serial.println("testInterval"); Serial.println(testInterval); Serial.println("1s passed");previousTestTime= currentTestMillis; } else if (currentTestMillis - previousTestTime <= 0) { // 如果millis时间溢出}}
运行效果
三、Ticker函数
测试程序
/*Basic Ticker usageTicker is an object that will call a given function with a certain period.Each Ticker calls one function. You can have as many Tickers as you like,memory being the only limitation.A function may be attached to a ticker and detached from the ticker.There are two variants of the attach function: attach and attach_ms.The first one takes period in seconds, the second one in milliseconds.The built-in LED will be blinking.
*/#include <Ticker.h>Ticker flipper;int count = 0;void flip() {//int state = digitalRead(LED_BUILTIN); // get the current state of GPIO1 pin//digitalWrite(LED_BUILTIN, !state); // set pin to the opposite statestatic int state =0;state=!state;Serial.println(state);++count;// when the counter reaches a certain value, start blinking like crazyif (count == 20) { flipper.attach(0.1, flip); }// when the counter reaches yet another value, stop blinkingelse if (count == 120) {flipper.detach();}
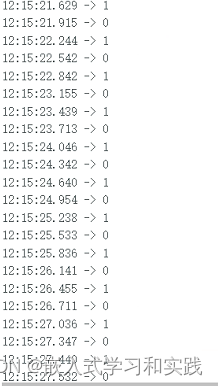
}void setup() {// pinMode(LED_BUILTIN, OUTPUT);// digitalWrite(LED_BUILTIN, LOW);Serial.begin(115200);Serial.println();// flip the pin every 0.3sflipper.attach(0.3, flip);
}void loop() {}运行效果
四、ESP8266硬件定时器
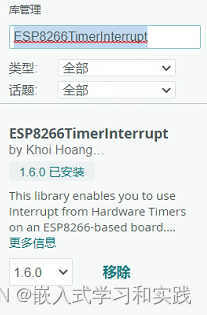
安装库文件 ESP8266TimerInterrupt。
测试代码:
/****************************************************************************************************************************Argument_None.inoFor ESP8266 boardsWritten by Khoi HoangBuilt by Khoi Hoang https://github.com/khoih-prog/ESP8266TimerInterruptLicensed under MIT licenseThe ESP8266 timers are badly designed, using only 23-bit counter along with maximum 256 prescaler. They're only better than UNO / Mega.The ESP8266 has two hardware timers, but timer0 has been used for WiFi and it's not advisable to use. Only timer1 is available.The timer1's 23-bit counter terribly can count only up to 8,388,607. So the timer1 maximum interval is very short.Using 256 prescaler, maximum timer1 interval is only 26.843542 seconds !!!Now with these new 16 ISR-based timers, the maximum interval is practically unlimited (limited only by unsigned long milliseconds)The accuracy is nearly perfect compared to software timers. The most important feature is they're ISR-based timersTherefore, their executions are not blocked by bad-behaving functions / tasks.This important feature is absolutely necessary for mission-critical tasks.
*****************************************************************************************************************************//* Notes:Special design is necessary to share data between interrupt code and the rest of your program.Variables usually need to be "volatile" types. Volatile tells the compiler to avoid optimizations that assumevariable can not spontaneously change. Because your function may change variables while your program is using them,the compiler needs this hint. But volatile alone is often not enough.When accessing shared variables, usually interrupts must be disabled. Even with volatile,if the interrupt changes a multi-byte variable between a sequence of instructions, it can be read incorrectly.If your data is multiple variables, such as an array and a count, usually interrupts need to be disabledor the entire sequence of your code which accesses the data.
*/#if !defined(ESP8266)#error This code is designed to run on ESP8266 and ESP8266-based boards! Please check your Tools->Board setting.
#endif// These define's must be placed at the beginning before #include "ESP8266TimerInterrupt.h"
// _TIMERINTERRUPT_LOGLEVEL_ from 0 to 4
// Don't define _TIMERINTERRUPT_LOGLEVEL_ > 0. Only for special ISR debugging only. Can hang the system.
#define TIMER_INTERRUPT_DEBUG 0
#define _TIMERINTERRUPT_LOGLEVEL_ 0// Select a Timer Clock
#define USING_TIM_DIV1 false // for shortest and most accurate timer
#define USING_TIM_DIV16 false // for medium time and medium accurate timer
#define USING_TIM_DIV256 true // for longest timer but least accurate. Default#include "ESP8266TimerInterrupt.h"#ifndef LED_BUILTIN#define LED_BUILTIN 2 // Pin D4 mapped to pin GPIO2/TXD1 of ESP8266, NodeMCU and WeMoS, control on-board LED
#endifvolatile uint32_t lastMillis = 0;void IRAM_ATTR TimerHandler()
{static bool toggle = false;static bool started = false;if (!started){started = true;//pinMode(LED_BUILTIN, OUTPUT);Serial.println(started);}#if (TIMER_INTERRUPT_DEBUG > 0)Serial.print("Delta ms = ");Serial.println(millis() - lastMillis);lastMillis = millis();
#endif//timer interrupt toggles pin LED_BUILTIN//digitalWrite(LED_BUILTIN, toggle);toggle = !toggle;Serial.println(toggle);
}#define TIMER_INTERVAL_MS 1000// Init ESP8266 timer 1
ESP8266Timer ITimer;void setup()
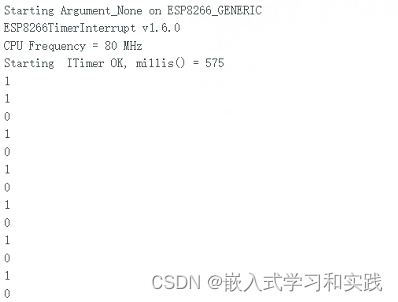
{Serial.begin(115200);while (!Serial && millis() < 5000);delay(500);Serial.print(F("\nStarting Argument_None on "));Serial.println(ARDUINO_BOARD);Serial.println(ESP8266_TIMER_INTERRUPT_VERSION);Serial.print(F("CPU Frequency = "));Serial.print(F_CPU / 1000000);Serial.println(F(" MHz"));// Interval in microsecsif (ITimer.attachInterruptInterval(TIMER_INTERVAL_MS * 1000, TimerHandler)){lastMillis = millis();Serial.print(F("Starting ITimer OK, millis() = "));Serial.println(lastMillis);}elseSerial.println(F("Can't set ITimer correctly. Select another freq. or interval"));
}void loop()
{}
运行效果
参考:
https://arduino-esp8266.readthedocs.io/en/2.4.2/reference.html#timing-and-delays
https://arduino-esp8266.readthedocs.io/en/2.4.2/
https://arduino-esp8266.readthedocs.io/en/2.4.2/libraries.html#ticker
https://github.com/esp8266/Arduino/tree/master/libraries/Ticker/examples
这篇关于基于Arduino IDE 野火ESP8266模块 定时器 的开发的文章就介绍到这儿,希望我们推荐的文章对编程师们有所帮助!


