本文主要是介绍Linux开发环境配置详细过程--正点原子阿尔法开发板,希望对大家解决编程问题提供一定的参考价值,需要的开发者们随着小编来一起学习吧!
Linux开发环境配置–正点原子阿尔法开发板
文章目录
- Linux开发环境配置--正点原子阿尔法开发板
- 1.网络环境设置
- 1.1添加网络适配器
- 1.2虚拟网络编辑器设置
- 1.3Ubuntu和Windows网络信息设置
- Ubuntu网络信息配置方式:
- 1.系统设置->网络->选项
- 2.配置网络文件
- 2源码准备
- 2.1编译内核源码
- 2.2编译uboot源码
- 3uboot配置
1.网络环境设置
开发环境,电脑使用无线网卡为开发板提供网络
1.1添加网络适配器
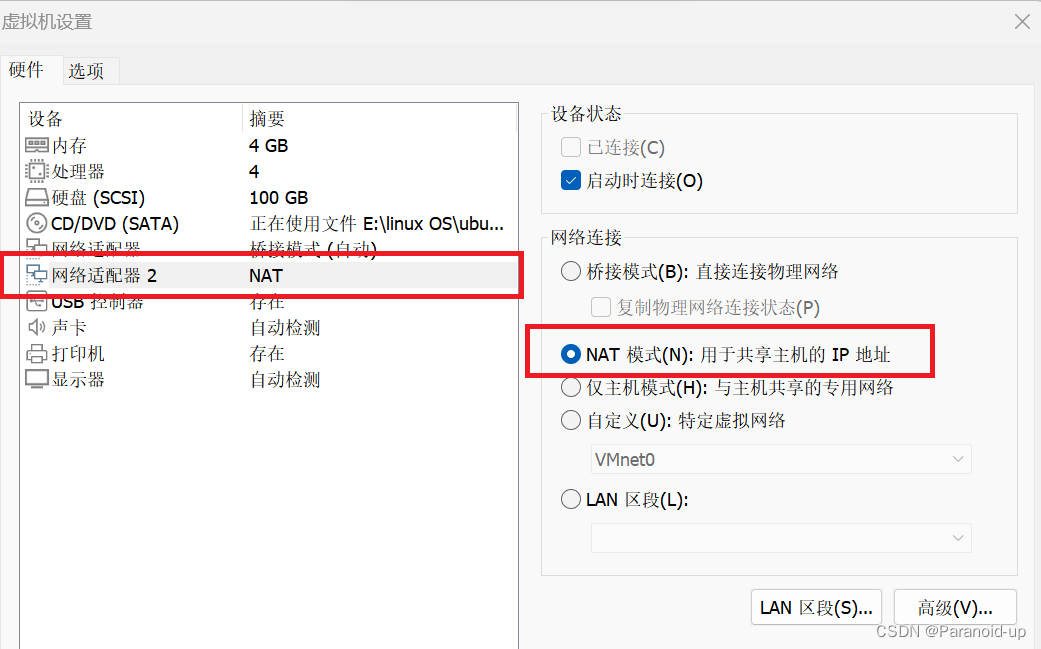
编辑虚拟机设置->添加->网络适配器->设置添加的网络适配器为NAT模式
1.2虚拟网络编辑器设置
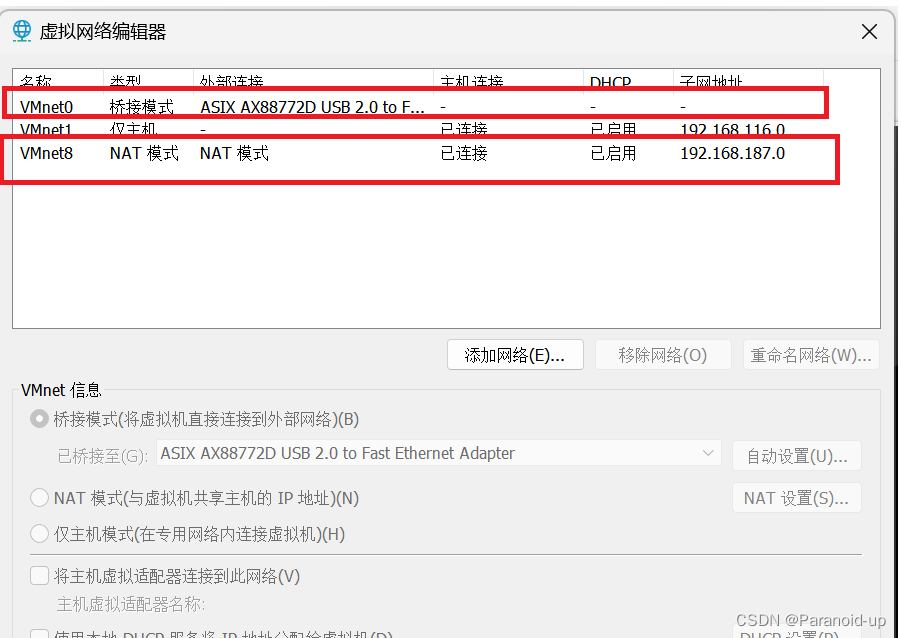
编辑->虚拟网络编辑器设置->更改设置->添加网络VMnet0并设置为桥接模式->保存后还原默认设置
1.3Ubuntu和Windows网络信息设置
上述设置后Ubuntu中会有两个网卡的信息,一个用来让Ubuntu上网,另一个用于为开发板提供网络。
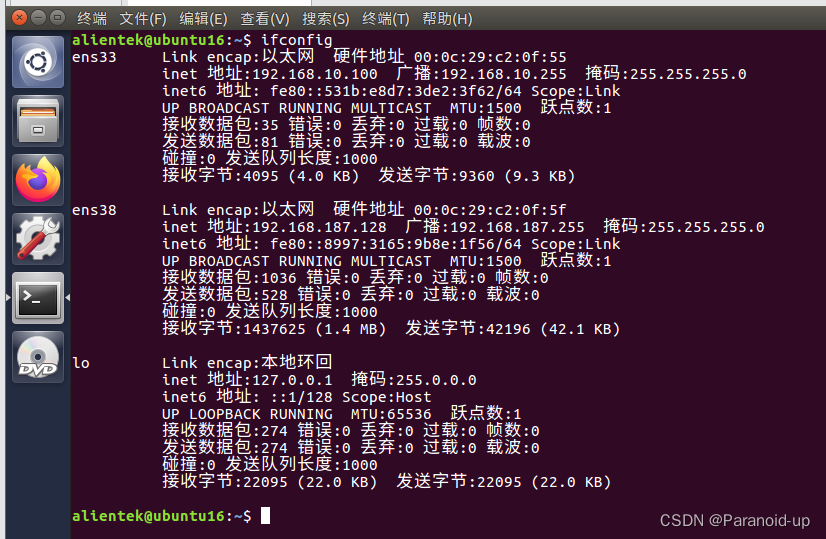
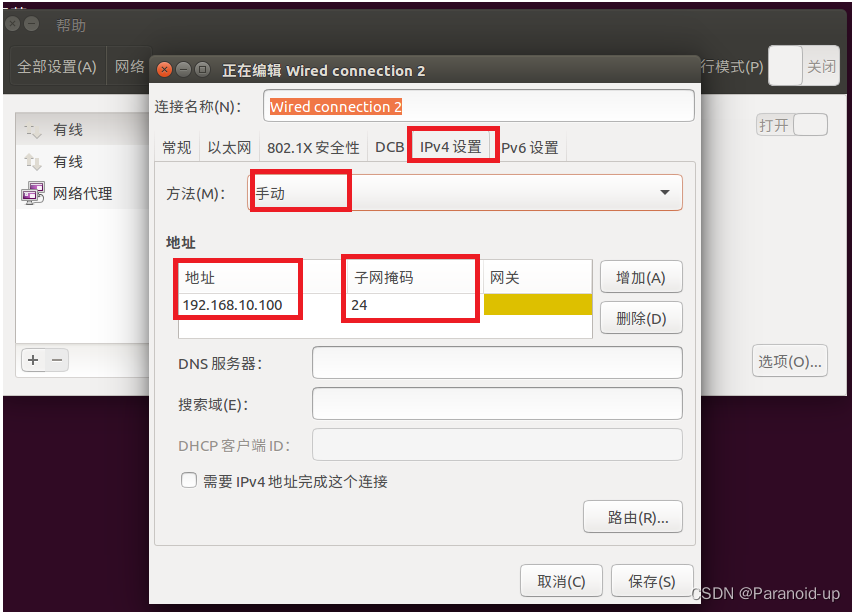
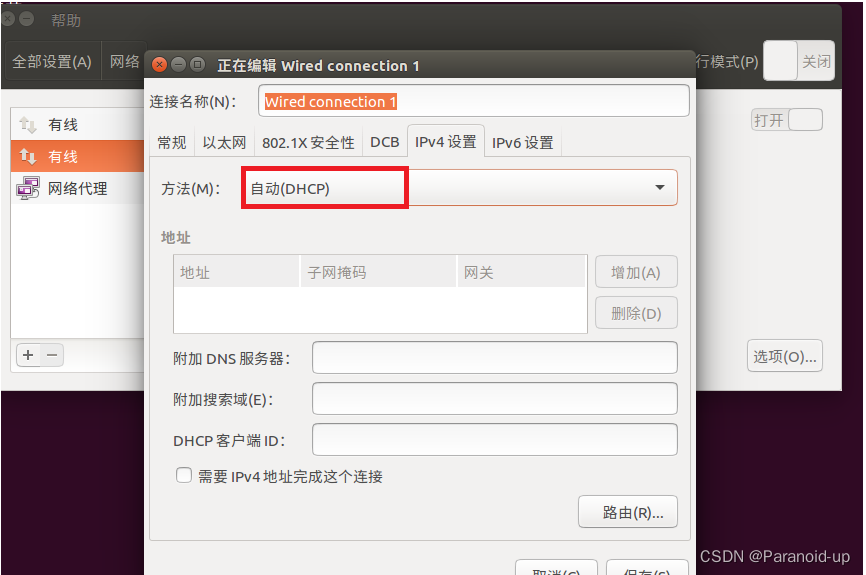
如图所示,网卡ens38让虚拟机上网,ens33为开发板提供网络
配置ens38网卡信息与前面虚拟网络编辑器中NAT模式的网卡信息在同一子网下
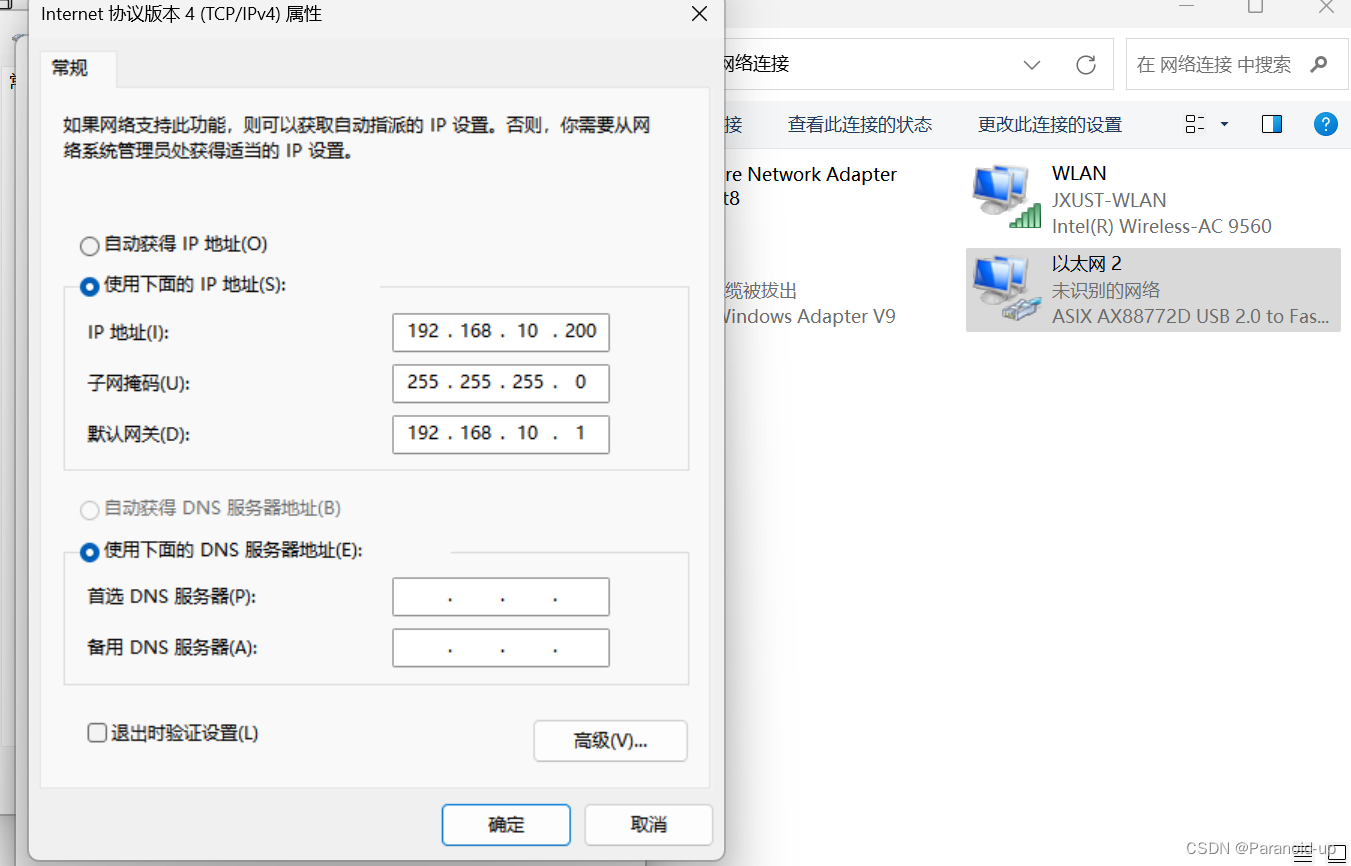
配置ens33网卡信息与usb转网口的网卡信息一致
Ubuntu网络信息配置方式:
1.系统设置->网络->选项
ens33
ens38
2.配置网络文件
编辑网络文件
sudo vim /etc/network/interfaces
eg:
auto lo
iface lo inet loopbackauto ens33
iface ens33 inet static
address 192.168.10.100
gateway 192.168.10.1
netmask 255.255.255.0
#network 192.168.10.225
#broadcast 192.168.10.255auto ens38
iface ens38 inet static
address 192.168.187.128
gateway 192.168.187.1
netmask 255.255.255.0
#network 192.168.187.0
#broadcast 192.168.187.255dns-nameserver 8.8.8.8
重新加载网络配置文件
sudo /etc/init.d/networking force-reload
重启网络服务
sudo /etc/init.d/networking restart
重启
reboot
2源码准备
获取正点原子提供的Linux内核源码及其uboot源码
2.1编译内核源码
解压内核
tar -vxjf linux-imx-xxxxx
编译内核
make ARCH=arm CROSS_COMPILE=arm-linux-gnueabihf- distclean
make ARCH=arm CROSS_COMPILE=arm-linux-gnueabihf- imx_v7_defconfig
make ARCH=arm CROSS_COMPILE=arm-linux-gnueabihf- menuconfig
make ARCH=arm CROSS_COMPILE=arm-linux-gnueabihf- all -j16
将开发板对应的设备树文件和镜像文件拷贝到tftp目录下
cp arch/arm/boot/zImage /home/alientek/linux/tftp -f
cp arch/arm/boot/dts/imx6ull-14x14-evk.dtb /home/alientek/linux/tftp -f
2.2编译uboot源码
解压uboot
tar -vxjf uboot-im-xxxxxxxxx
编译uboot
make ARCH=arm CROSS_COMPILE=arm-linux-gnueabihf- distclean
make ARCH=arm CROSS_COMPILE=arm-linux-gnueabihf- mx6ull_14x14_ddr512_emmc_defconfig
make V=1 ARCH=arm CROSS_COMPILE=arm-linux-gnueabihf- -j12
编译成功:

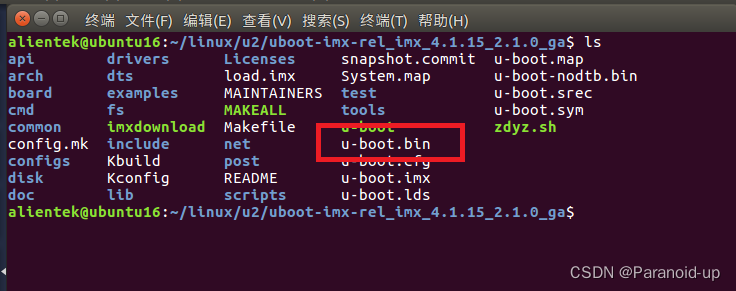
将编译出来的u-boot.bin文件下载到tf卡中,使用 imxdownload 软件烧写,
chmod 777 imxdownload
./imxdownload u-boot.bin /dev/sdd
注意:
1.tf卡在下载前必须格式化干净
2.使用imxdownload下载
tf卡格式化不干净后果,启动uboot时始终卡在:
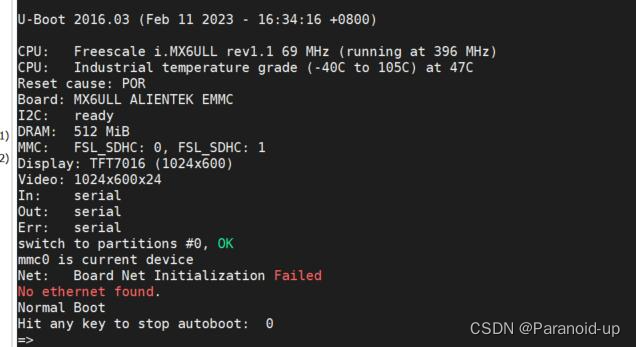
3uboot配置
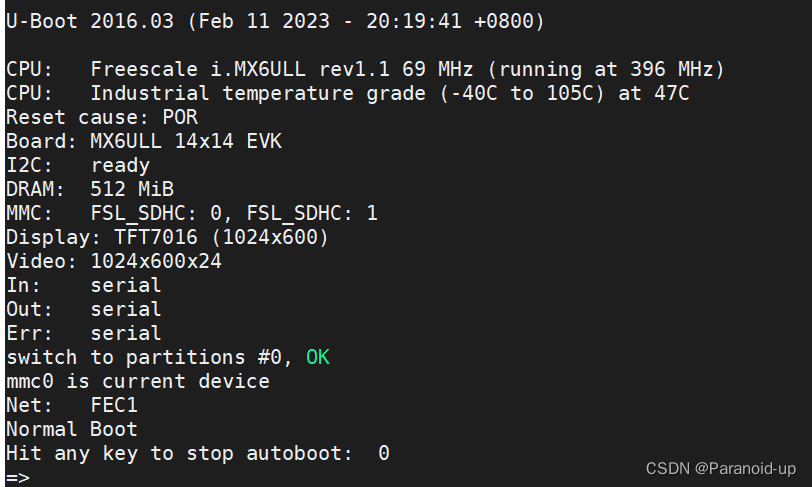
设置开发板为sd卡启动,上电启动uboot,进入uboot命令模式
配置uboot网络信息
setenv ipaddr 192.168.10.101
setenv ethaddr b8:ae:1d:01:00:00
setenv gatewayip 192.168.10.1
setenv netmask 255.255.255.0
setenv serverip 192.168.10.100
saveenv

配置后使用开发板ping serverip,ping通即配置成功
配置环境变量和根文件系统目录
setenv bootargs 'console=tty1 console=ttymxc0,115200 root=/dev/nfs nfsroot=192.168.10.100:/home/alientek/linux/nfs/rootfs,proto=tcp rw ip=192.168.19.101:192.168.19.100:192.168.19.1:255.255.255.0::eth0:off'
saveenv
格式参考:
setenv bootargs ‘console=开发板串口,波特率 root=挂载方式 \nfsroot=虚拟机 IP
地址:文件系统路径,proto=传输协议 读写权限 \ip=开发板 IP 地址:虚拟机 IP
地址:网关地址:子网掩码::开发板网口:off’
注意:
文件系统路径不要错
IP地址等信息不要错
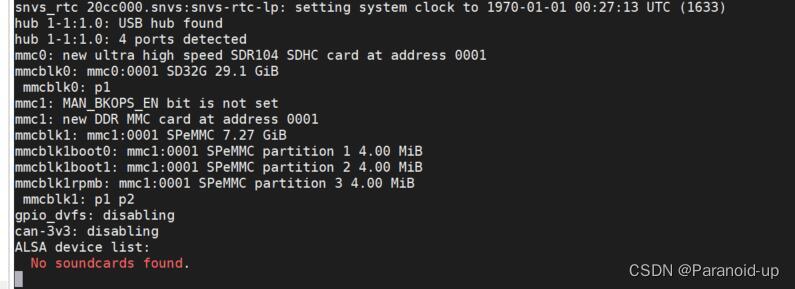
根文件系统路径错误或IP信息填错可能的结果:
设置环境变量 bootcmd 来挂载 tftp 目录下的内核、设备树文件到开发板内存中。
setenv bootcmd 'tftp 80800000 zImage; tftp 83000000 imx6ull-14x14-evk-emmc.dtb; bootz 80800000 - 83000000'
saveenv
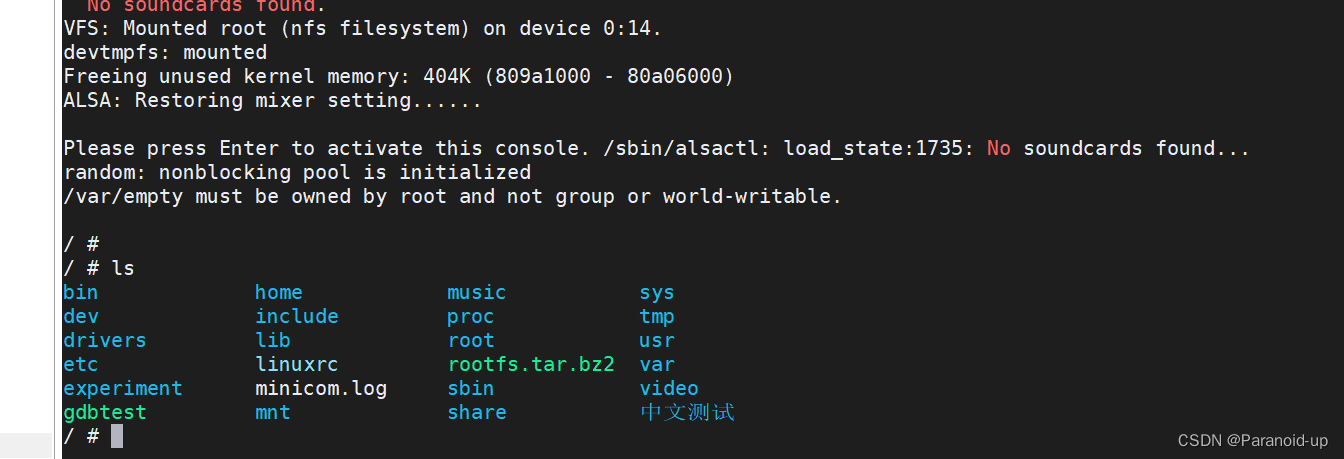
重启开发板即可启动内核:
这篇关于Linux开发环境配置详细过程--正点原子阿尔法开发板的文章就介绍到这儿,希望我们推荐的文章对编程师们有所帮助!


