本文主要是介绍devc++8x8取模软件,希望对大家解决编程问题提供一定的参考价值,需要的开发者们随着小编来一起学习吧!
这几天在搞arduino nano和单个max7219模块,涉及到16进制的取模,在网上转了一圈,没找到合适的取模软件,于是自己做了一个,试过,可以用,按esc退出并生成16进制的取模结果
源代码:
#include<bits/stdc++.h>
#include<windows.h>
#include<conio.h>
using namespace std;
#define KEY_DOWN(VK_NONAME) ((GetAsyncKeyState(VK_NONAME)&0x8000)?true:false)
#define Esc 27
#define NC 14
#define BC 240
bool a[8][8]={false};
struct gqhs
{	void ycksbj();void ycgb();void ys(int n);void ydgb(int x,int y);bool pdgbwz(long x,long y,long w,long hi);bool pdsbzt();bool anniu(long x,long y,long w,long hi,const string world,int oldcolor,int newcolor);
};
void gqhs::ycksbj()
{HANDLE hStdin=GetStdHandle(STD_INPUT_HANDLE);DWORD mode; GetConsoleMode(hStdin,&mode);mode&=~ENABLE_QUICK_EDIT_MODE; //移除快速编辑模式mode&=~ENABLE_INSERT_MODE; //移除插入模式mode&=~ENABLE_MOUSE_INPUT;SetConsoleMode(hStdin, mode);return;
}
void gqhs::ycgb()
{HANDLE handle=GetStdHandle(STD_OUTPUT_HANDLE);CONSOLE_CURSOR_INFO CursorInfo;GetConsoleCursorInfo(handle,&CursorInfo);//获取控制台光标信息CursorInfo.bVisible=false; //隐藏控制台光标SetConsoleCursorInfo(handle,&CursorInfo);//设置控制台光标状态return;
}
void gqhs::ys(int n)
{SetConsoleTextAttribute(GetStdHandle(STD_OUTPUT_HANDLE),n);    //n代表的是第几号颜色 前面的GetStdHandle(STD_OUTPUT_HANDLE)是获取当前窗口权柄,简单来说就是让这个颜色加在这个页面return;
}
void gqhs::ydgb(int x,int y)  //光标移动到x,y
{HANDLE handle=GetStdHandle(STD_OUTPUT_HANDLE);COORD pos;pos.X=x;pos.Y=y;SetConsoleCursorPosition(handle,pos);return;
}
bool gqhs::pdgbwz(long x,long y,long w,long hi)
{HANDLE hOutput=GetStdHandle(STD_OUTPUT_HANDLE);HWND h=GetForegroundWindow();CONSOLE_FONT_INFO consoleCurrentFont;POINT p;GetCursorPos(&p);ScreenToClient(h,&p);GetCurrentConsoleFont(hOutput,FALSE,&consoleCurrentFont);p.x/=consoleCurrentFont.dwFontSize.X;p.y/=consoleCurrentFont.dwFontSize.Y;return p.x>=x&&p.x<=x+w&&p.y>=y&&p.y<=y+hi;
}
bool gqhs::pdsbzt()
{return KEY_DOWN(VK_LBUTTON);
}
bool gqhs::anniu(long x,long y,long w,long hi,const string world,int oldcolor,int newcolor)
{bool pd=false;if(pdgbwz(x,y,w,hi)){ydgb(x,y);ys(newcolor);cout<<world;ys(oldcolor);if(pdsbzt()&&pdgbwz(x,y,w,hi)){pd=true;}}else{ydgb(x,y);ys(oldcolor);cout<<world;}return pd;
}
gqhs qumo;
bool hs(int x,int y)
{qumo.ydgb(x,y);qumo.ys(NC);cout<<"■";qumo.ys(BC);return true;
}
int main()
{qumo.ycgb();qumo.ycksbj();for(;;){if(kbhit()!=0){char x=getch();if(x==Esc){break;}}for(int i=0;i<8;i++){for(int j=0;j<8;j++){if(!a[j][i]?qumo.anniu(i*2,j,1,0,"■",BC,NC):hs(i*2,j)){a[j][i]=true;}}}}qumo.ys(NC);cout<<endl;for(int i=0;i<8;i++){int x=0;for(int j=0;j<8;j++){x=(x<<1)+int(a[i][j]);}printf("0x%02lx\n",x);}
}
效果:
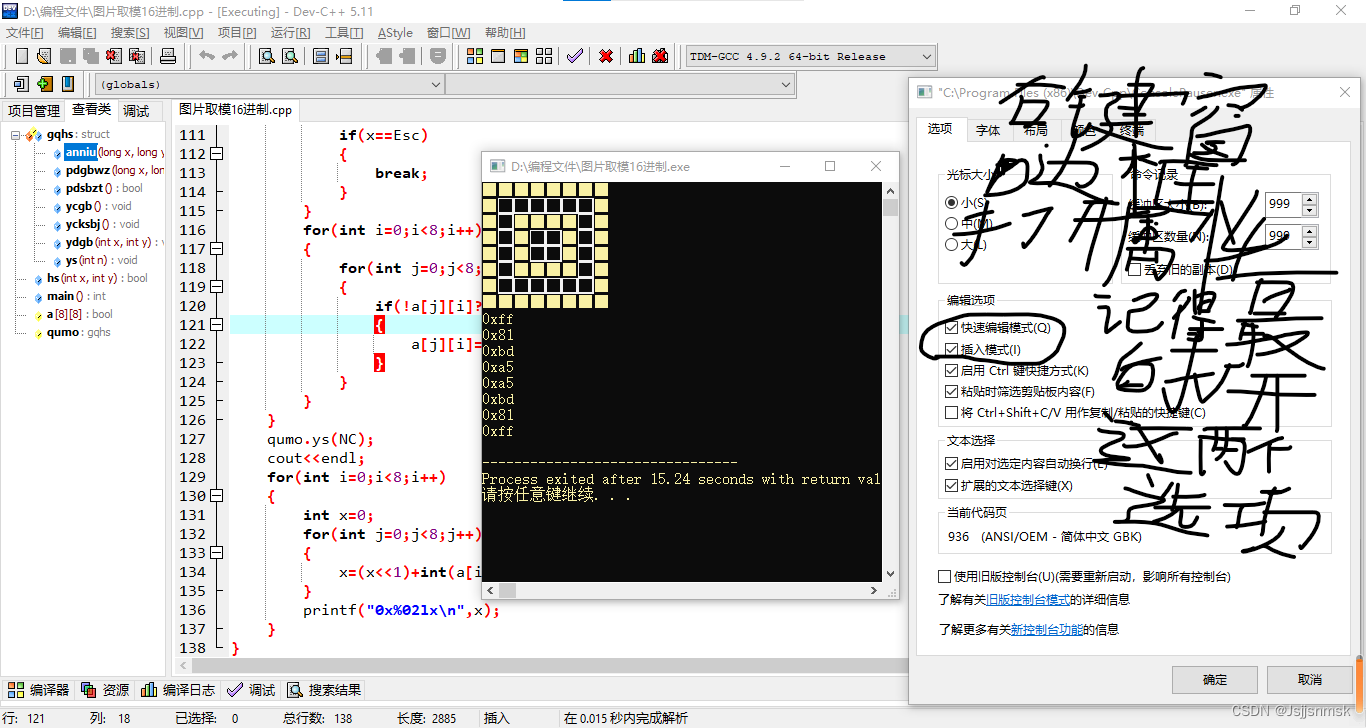
补充:右键窗口边框选择“属性”,打开图中的那两个选项,不让无法复制。
我测试用的代码(arduino ide):
#include<LedControl.h>
const int DIN=11,CS=10,CLK=13;
LedControl max7219=LedControl(DIN,CLK,CS,0);
void setup()
{// put your setup code here, to run once:Serial.begin(9600);max7219.shutdown(0,false);max7219.setIntensity(0,15);max7219.clearDisplay(0);
}
void loop()
{// put your main code here, to run repeatedly:byte xiaolian[8]={0xff,0x81,0xbd,0xa5,0xa5,0xbd,0x81,0xff}; //16进制取模for(int i=0;i<8;i++){max7219.setRow(0,i,xiaolian[i]);}delay(1000);
}
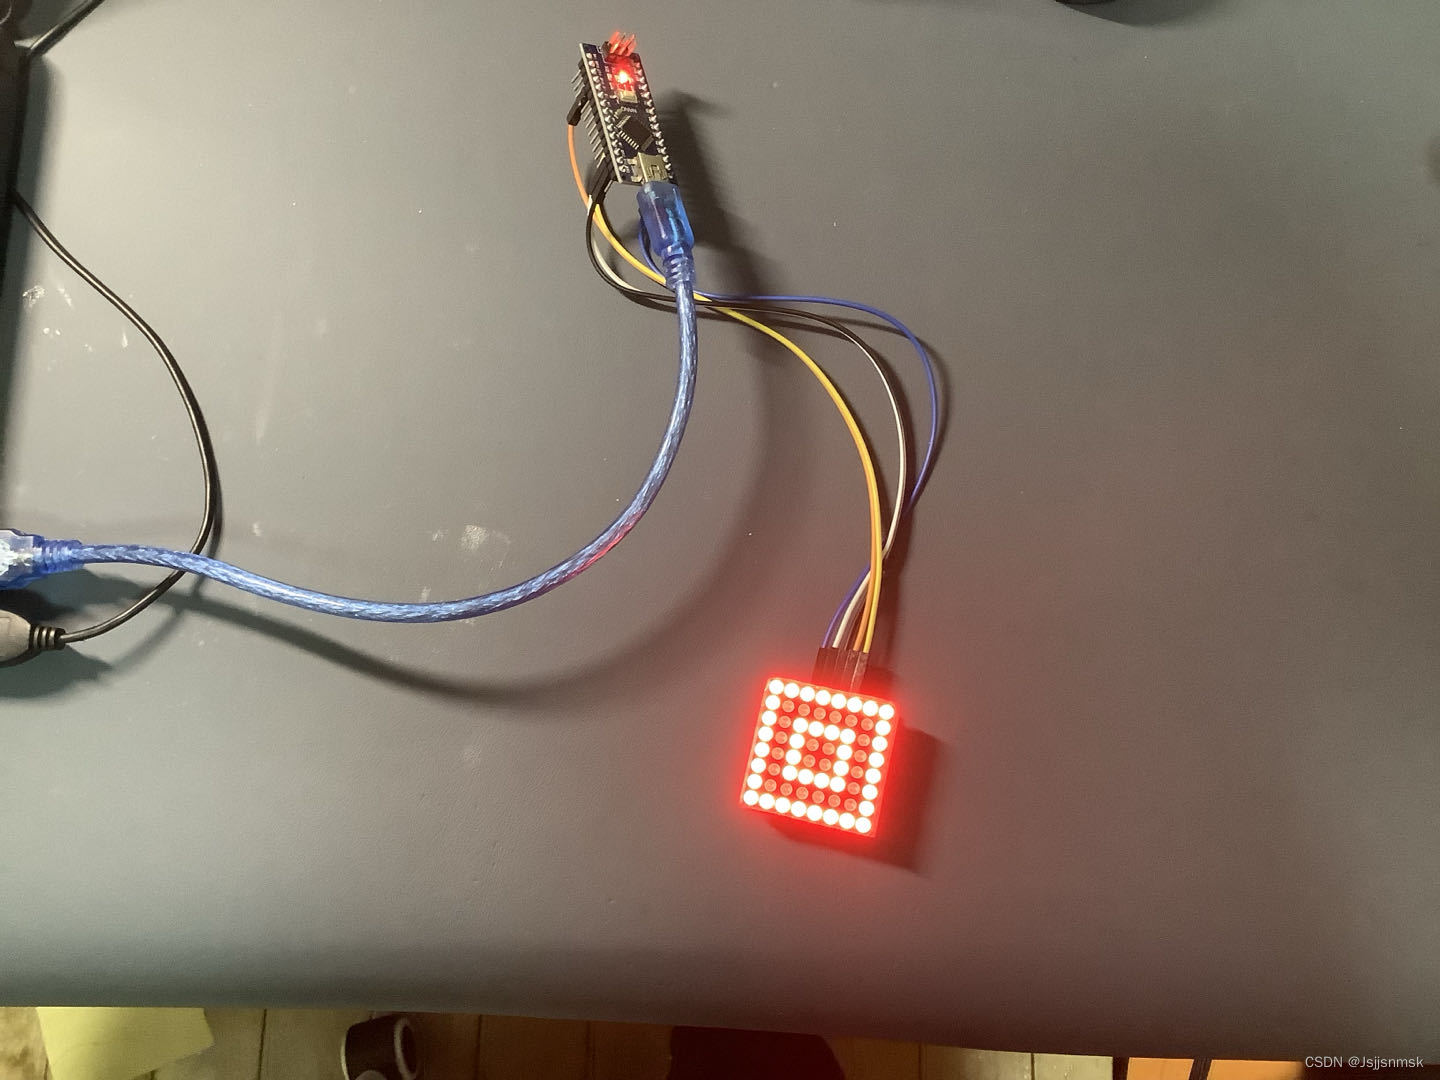
补充:din接D11,cs接D10,clk接D13。
最后效果:
这篇关于devc++8x8取模软件的文章就介绍到这儿,希望我们推荐的文章对编程师们有所帮助!


