本文主要是介绍spring boot学习第十三篇:使用spring security控制权限,希望对大家解决编程问题提供一定的参考价值,需要的开发者们随着小编来一起学习吧!
该文章同时也讲到了如何使用swagger。
1、pom.xml文件内容如下:
<?xml version="1.0" encoding="UTF-8"?>
<project xmlns="http://maven.apache.org/POM/4.0.0" xmlns:xsi="http://www.w3.org/2001/XMLSchema-instance"xsi:schemaLocation="http://maven.apache.org/POM/4.0.0 https://maven.apache.org/xsd/maven-4.0.0.xsd"><modelVersion>4.0.0</modelVersion><parent><groupId>org.springframework.boot</groupId><artifactId>spring-boot-starter-parent</artifactId><version>2.3.5.RELEASE</version><relativePath/> <!-- lookup parent from repository --></parent><groupId>com.hmblogs</groupId><artifactId>springboot-security-demo</artifactId><version>0.0.1-SNAPSHOT</version><name>springboot-security-demo</name><description>Demo project for Spring Boot</description><properties><java.version>1.8</java.version></properties><dependencies><!--devtools热部署--><dependency><groupId>org.springframework.boot</groupId><artifactId>spring-boot-devtools</artifactId><optional>true</optional><scope>true</scope></dependency><!--  springboor--><dependency><groupId>org.springframework.boot</groupId><artifactId>spring-boot-starter-web</artifactId></dependency><dependency><groupId>org.springframework.boot</groupId><artifactId>spring-boot-starter</artifactId></dependency><dependency><groupId>org.springframework.boot</groupId><artifactId>spring-boot-starter-security</artifactId></dependency><dependency><groupId>org.springframework.boot</groupId><artifactId>spring-boot-actuator</artifactId></dependency><dependency><groupId>org.springframework.boot</groupId><artifactId>spring-boot-starter-test</artifactId><scope>test</scope></dependency><dependency><groupId>io.jsonwebtoken</groupId><artifactId>jjwt</artifactId><version>0.7.0</version></dependency><!-- swagger --><dependency><groupId>io.springfox</groupId><artifactId>springfox-swagger2</artifactId><version>2.9.2</version></dependency><dependency><groupId>io.springfox</groupId><artifactId>springfox-swagger-ui</artifactId><version>2.9.2</version></dependency><dependency><groupId>org.projectlombok</groupId><artifactId>lombok</artifactId></dependency></dependencies><build><plugins><plugin><groupId>org.springframework.boot</groupId><artifactId>spring-boot-maven-plugin</artifactId></plugin></plugins></build></project>
2、application.yml文件内容如下:
server:port: 8088servlet:context-path: /springboot-security-demospring:security:user:name: userpassword: 1234563、SpringbootSecurityDemoApplication文件内容如下:
package com.hmblogs;import org.springframework.boot.SpringApplication;
import org.springframework.boot.autoconfigure.SpringBootApplication;@SpringBootApplication
public class SpringbootSecurityDemoApplication {public static void main(String[] args) {SpringApplication.run(SpringbootSecurityDemoApplication.class, args);}}
4、UserDetailsServiceImpl代码如下:
package com.hmblogs.service.impl;import java.util.ArrayList;
import java.util.List;import com.hmblogs.pojo.Admin;
import org.springframework.security.core.GrantedAuthority;
import org.springframework.security.core.authority.SimpleGrantedAuthority;
import org.springframework.security.core.userdetails.User;
import org.springframework.security.core.userdetails.UserDetails;
import org.springframework.security.core.userdetails.UserDetailsService;
import org.springframework.security.crypto.bcrypt.BCryptPasswordEncoder;
import org.springframework.stereotype.Service;@Service
public class UserDetailsServiceImpl implements UserDetailsService {@Overridepublic UserDetails loadUserByUsername(String username) {List<GrantedAuthority> grantedAuthorities = new ArrayList<GrantedAuthority>();Admin admin = new Admin();if (username.equals("employee")) {admin.setUsername("employee");admin.setPassword("123456");GrantedAuthority grantedAuthority = new SimpleGrantedAuthority("ROLE_EMPLOYEE");grantedAuthorities.add(grantedAuthority);// 创建用户,用户判断权限return new User(admin.getUsername(), new BCryptPasswordEncoder().encode(admin.getPassword()), grantedAuthorities);} if (username.equals("admin")) {admin.setUsername("admin");admin.setPassword("123456");GrantedAuthority grantedAuthority = new SimpleGrantedAuthority("ROLE_ADMIN");grantedAuthorities.add(grantedAuthority);// 创建用户,用户判断权限return new User(admin.getUsername(), new BCryptPasswordEncoder().encode(admin.getPassword()), grantedAuthorities);}return null;}}
5、Admin这一个对象类代码如下:
package com.hmblogs.pojo;public class Admin {private String username;private String password;public Admin() {super();}public Admin(String username, String password) {super();this.username = username;this.password = password;}public String getUsername() {return username;}public void setUsername(String username) {this.username = username;}public String getPassword() {return password;}public void setPassword(String password) {this.password = password;}@Overridepublic String toString() {return "Admin [username=" + username + ", password=" + password + "]";}}
6、TestController测试接口类代码如下所示:
package com.hmblogs.controller;import org.springframework.web.bind.annotation.RequestMapping;
import org.springframework.web.bind.annotation.RequestMethod;
import org.springframework.web.bind.annotation.RestController;@RestController
@RequestMapping("/test/")
public class TestController {@RequestMapping(value = "get", method = RequestMethod.GET)public String get() {return "success";}}
7、EmployeeController员工权限的员工接口类代码如下所示:
package com.hmblogs.controller;import org.springframework.web.bind.annotation.RequestMapping;
import org.springframework.web.bind.annotation.RequestMethod;
import org.springframework.web.bind.annotation.RestController;@RestController
@RequestMapping("/employee/")
public class EmployeeController {@RequestMapping(value = "greeting", method = RequestMethod.GET)public String greeting() {return "hello world";}@RequestMapping(value = "login", method = RequestMethod.GET)public String login() {return "login success";}}
8、AdminController管理员接口类的代码如下所示:
package com.hmblogs.controller;import org.springframework.web.bind.annotation.RequestMapping;
import org.springframework.web.bind.annotation.RequestMethod;
import org.springframework.web.bind.annotation.RestController;@RestController
@RequestMapping("/admin/")
public class AdminController {@RequestMapping(value = "greeting", method = RequestMethod.GET)public String greeting() {return "hello world";}@RequestMapping(value = "login", method = RequestMethod.GET)public String login() {return "login success";}}
9、SwaggerConfig代码如下:配置swagger
package com.hmblogs.config;import org.springframework.context.annotation.Bean;
import org.springframework.context.annotation.Configuration;
import springfox.documentation.builders.ApiInfoBuilder;
import springfox.documentation.builders.PathSelectors;
import springfox.documentation.builders.RequestHandlerSelectors;
import springfox.documentation.service.ApiInfo;
import springfox.documentation.spi.DocumentationType;
import springfox.documentation.spring.web.plugins.Docket;
import springfox.documentation.swagger2.annotations.EnableSwagger2;@Configuration
@EnableSwagger2
public class SwaggerConfig {@Beanpublic Docket createRestApi(){// 添加请求参数,我们这里把token作为请求头部参数传入后端return new Docket(DocumentationType.SWAGGER_2).apiInfo(apiInfo()).select().apis(RequestHandlerSelectors.any()).paths(PathSelectors.any()).build();}private ApiInfo apiInfo(){return new ApiInfoBuilder().title("SpringBoot API Doc").description("This is a restful api document of Spring Boot.").version("1.0").build();}}
10、SecurityConfig代码如下:
package com.hmblogs.config;import org.springframework.beans.factory.annotation.Autowired;
import org.springframework.context.annotation.Bean;
import org.springframework.context.annotation.Configuration;
import org.springframework.security.config.annotation.authentication.builders.AuthenticationManagerBuilder;
import org.springframework.security.config.annotation.web.builders.HttpSecurity;
import org.springframework.security.config.annotation.web.builders.WebSecurity;
import org.springframework.security.config.annotation.web.configuration.EnableWebSecurity;
import org.springframework.security.config.annotation.web.configuration.WebSecurityConfigurerAdapter;
import org.springframework.security.core.userdetails.UserDetailsService;
import org.springframework.security.crypto.bcrypt.BCryptPasswordEncoder;
import org.springframework.security.crypto.password.PasswordEncoder;@Configuration
@EnableWebSecurity
public class SecurityConfig extends WebSecurityConfigurerAdapter {@Autowiredprivate UserDetailsService userDetailsService;@Beanpublic PasswordEncoder passwordEncoder() {return new BCryptPasswordEncoder();}@Overridepublic void configure(WebSecurity web) throws Exception {super.configure(web);}@Overridepublic void configure(AuthenticationManagerBuilder auth) throws Exception {auth.userDetailsService(userDetailsService).passwordEncoder(passwordEncoder());//passwoldEncoder是对密码的加密处理,如果user中密码没有加密,则可以不加此方法。注意加密请使用security自带的加密方式。}@Overrideprotected void configure(HttpSecurity http) throws Exception {http.csrf().disable()//禁用了 csrf 功能.authorizeRequests()//限定签名成功的请求.antMatchers("/decision/**","/govern/**","/employee/*").hasAnyRole("EMPLOYEE","ADMIN")//对decision和govern 下的接口 需要 EMPLOYEE 或者 ADMIN 权限.antMatchers("/employee/login").permitAll()///employee/login 不限定.antMatchers("/admin/**").hasRole("ADMIN")//对admin下的接口 需要ADMIN权限.antMatchers("/oauth/**").permitAll()//不拦截 oauth 开放的资源.anyRequest().permitAll()//其他没有限定的请求,允许访问.and().anonymous()//对于没有配置权限的其他请求允许匿名访问.and().formLogin()//使用 spring security 默认登录页面.and().httpBasic();//启用http 基础验证}}
11.CorsConfig文件代码如下:
package com.hmblogs.config;import org.springframework.context.annotation.Configuration;
import org.springframework.web.servlet.config.annotation.CorsRegistry;
import org.springframework.web.servlet.config.annotation.WebMvcConfigurer;@Configuration
public class CorsConfig implements WebMvcConfigurer{@Overridepublic void addCorsMappings(CorsRegistry registry) {registry.addMapping("/**")    // 允许跨域访问的路径.allowedOrigins("*")    // 允许跨域访问的源.allowedMethods("POST", "GET", "PUT", "OPTIONS", "DELETE")    // 允许请求方法.maxAge(168000)    // 预检间隔时间.allowedHeaders("*")  // 允许头部设置.allowCredentials(true);    // 是否发送cookie}}
12、启动该微服务,验证。

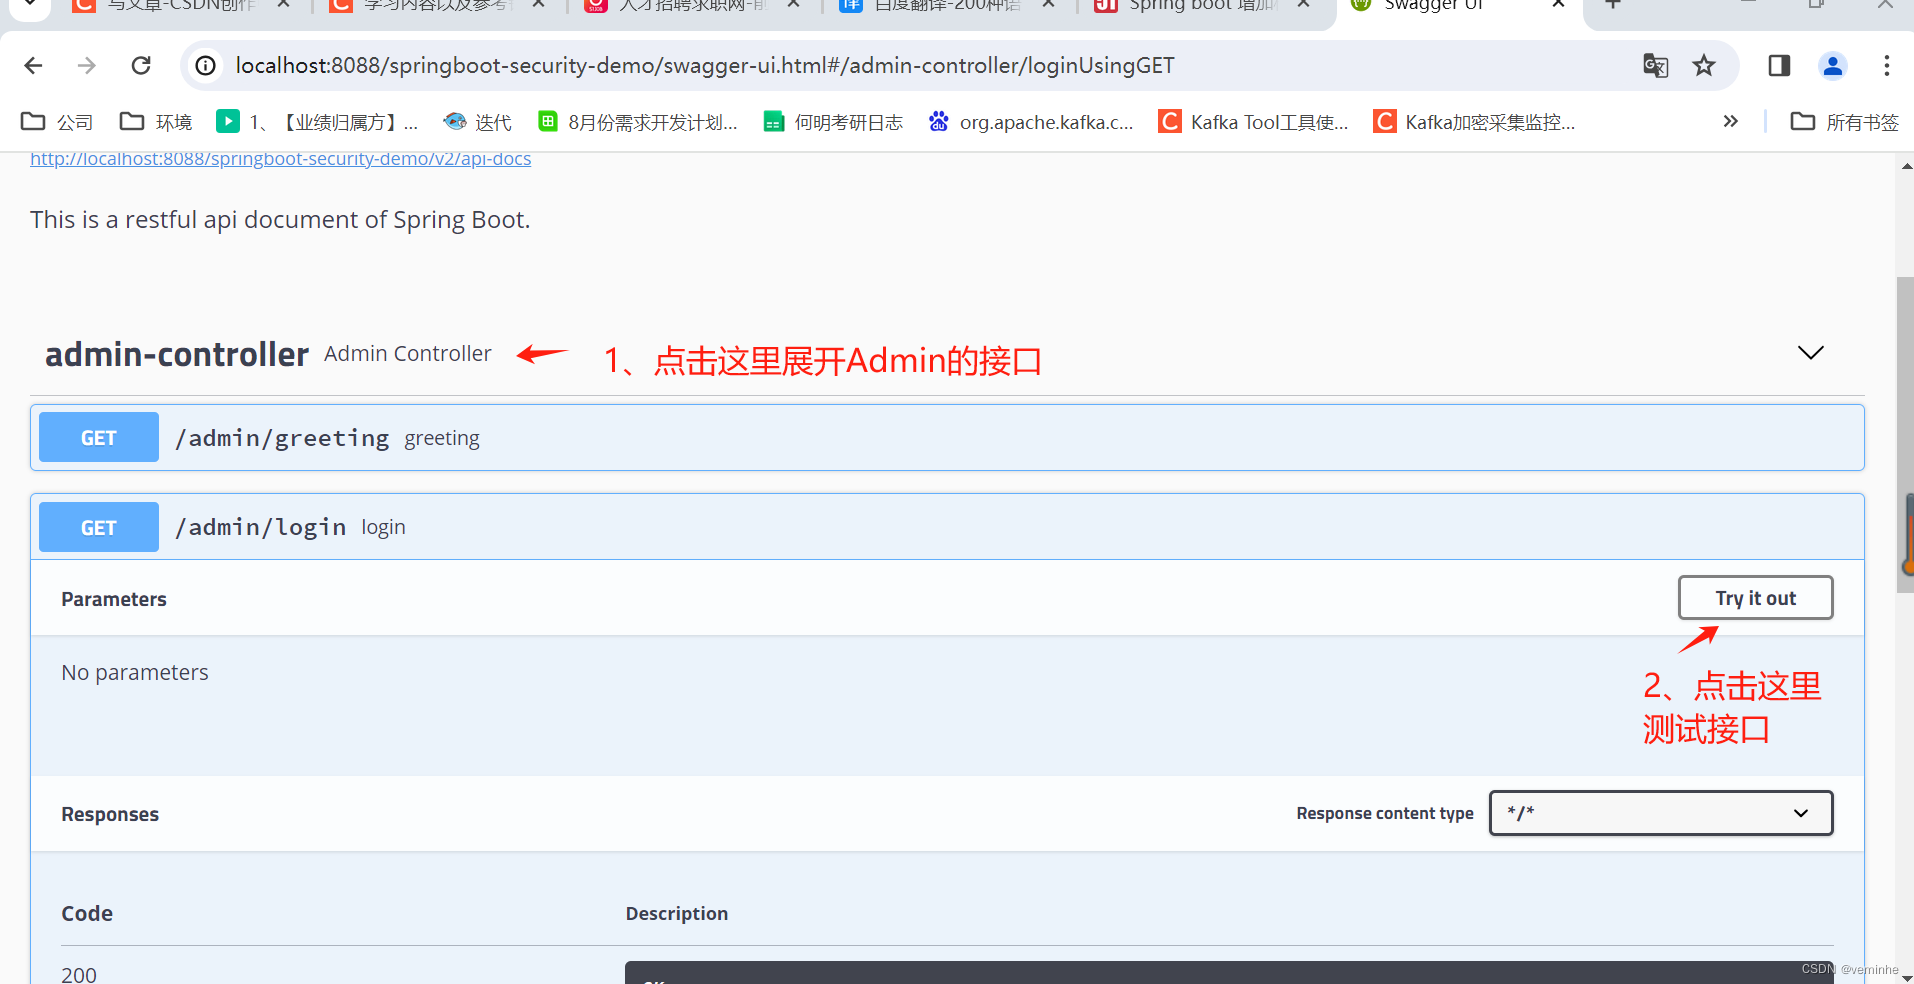
12.1访问http://localhost:8088/springboot-security-demo/swagger-ui.html


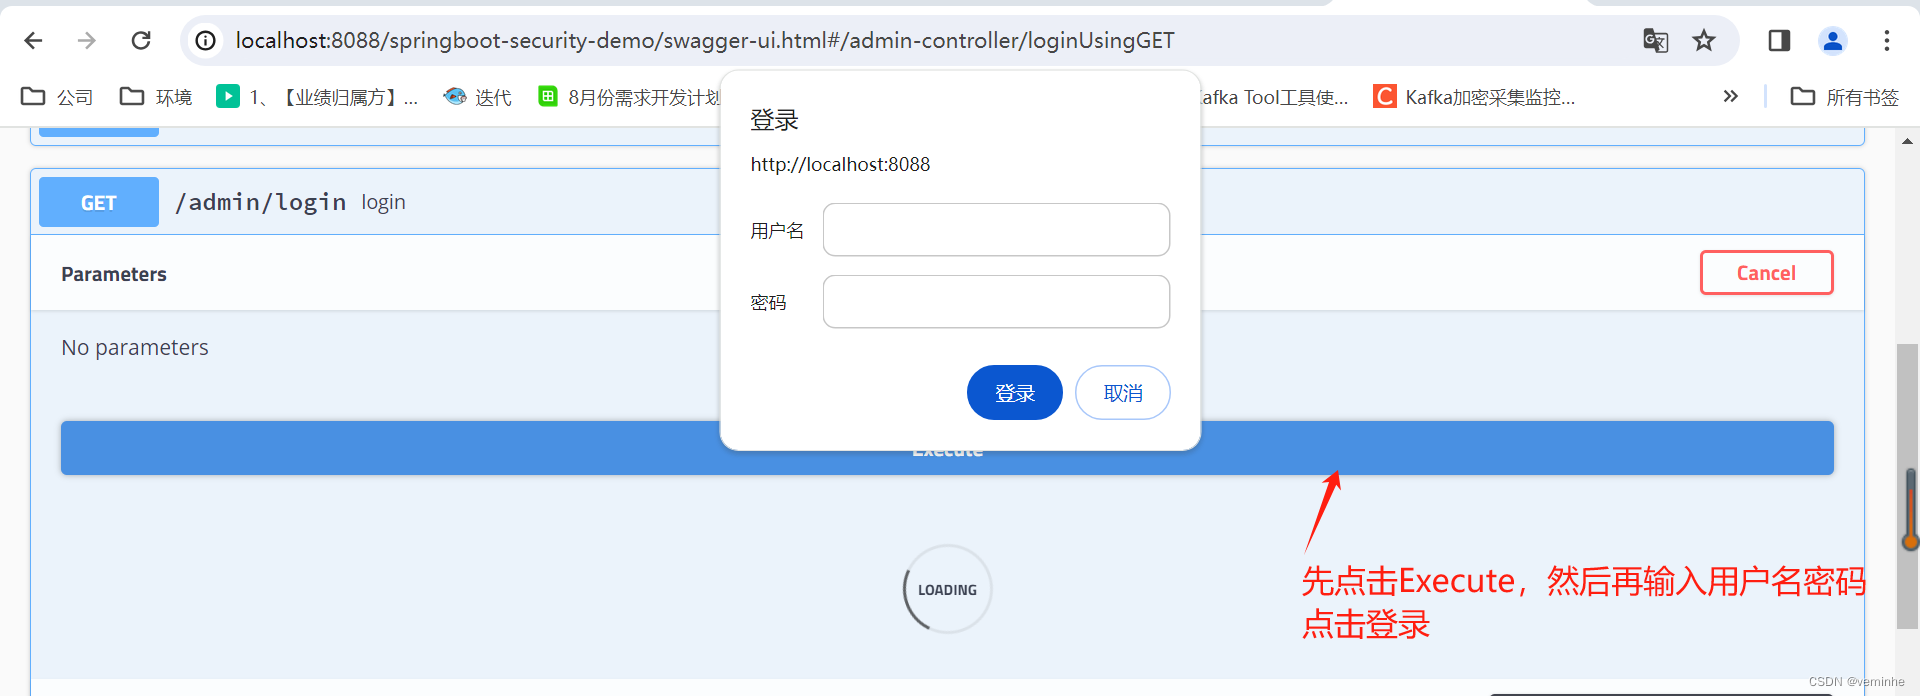
这里我如果用户名输入admin,密码输入123456,点击登录

清除浏览器缓存后,再使用employee和123456登录,则会报401
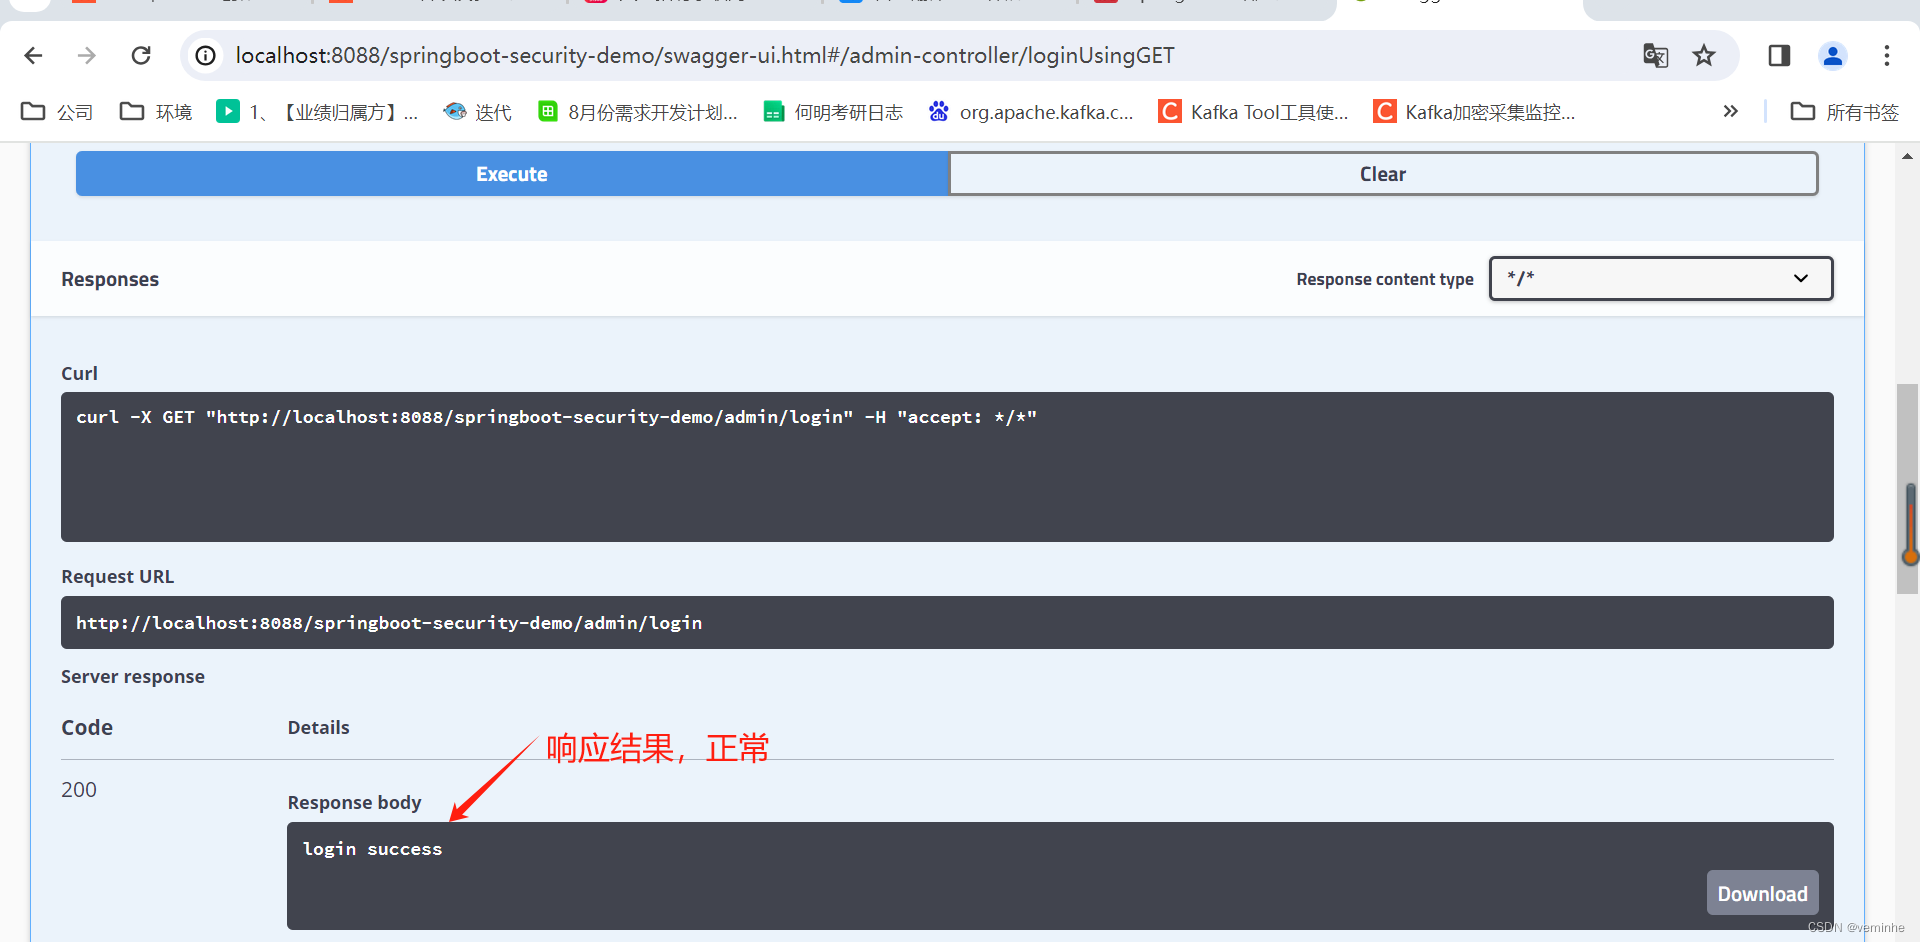
admin账号能使用admin接口,但是employee账号不能使用admin接口。
12.2使用admin账号密码和empoyee账号密码尝试employee接口,
先试用admin账号密码登录

清除浏览器缓存,再使用employee账号密码登录
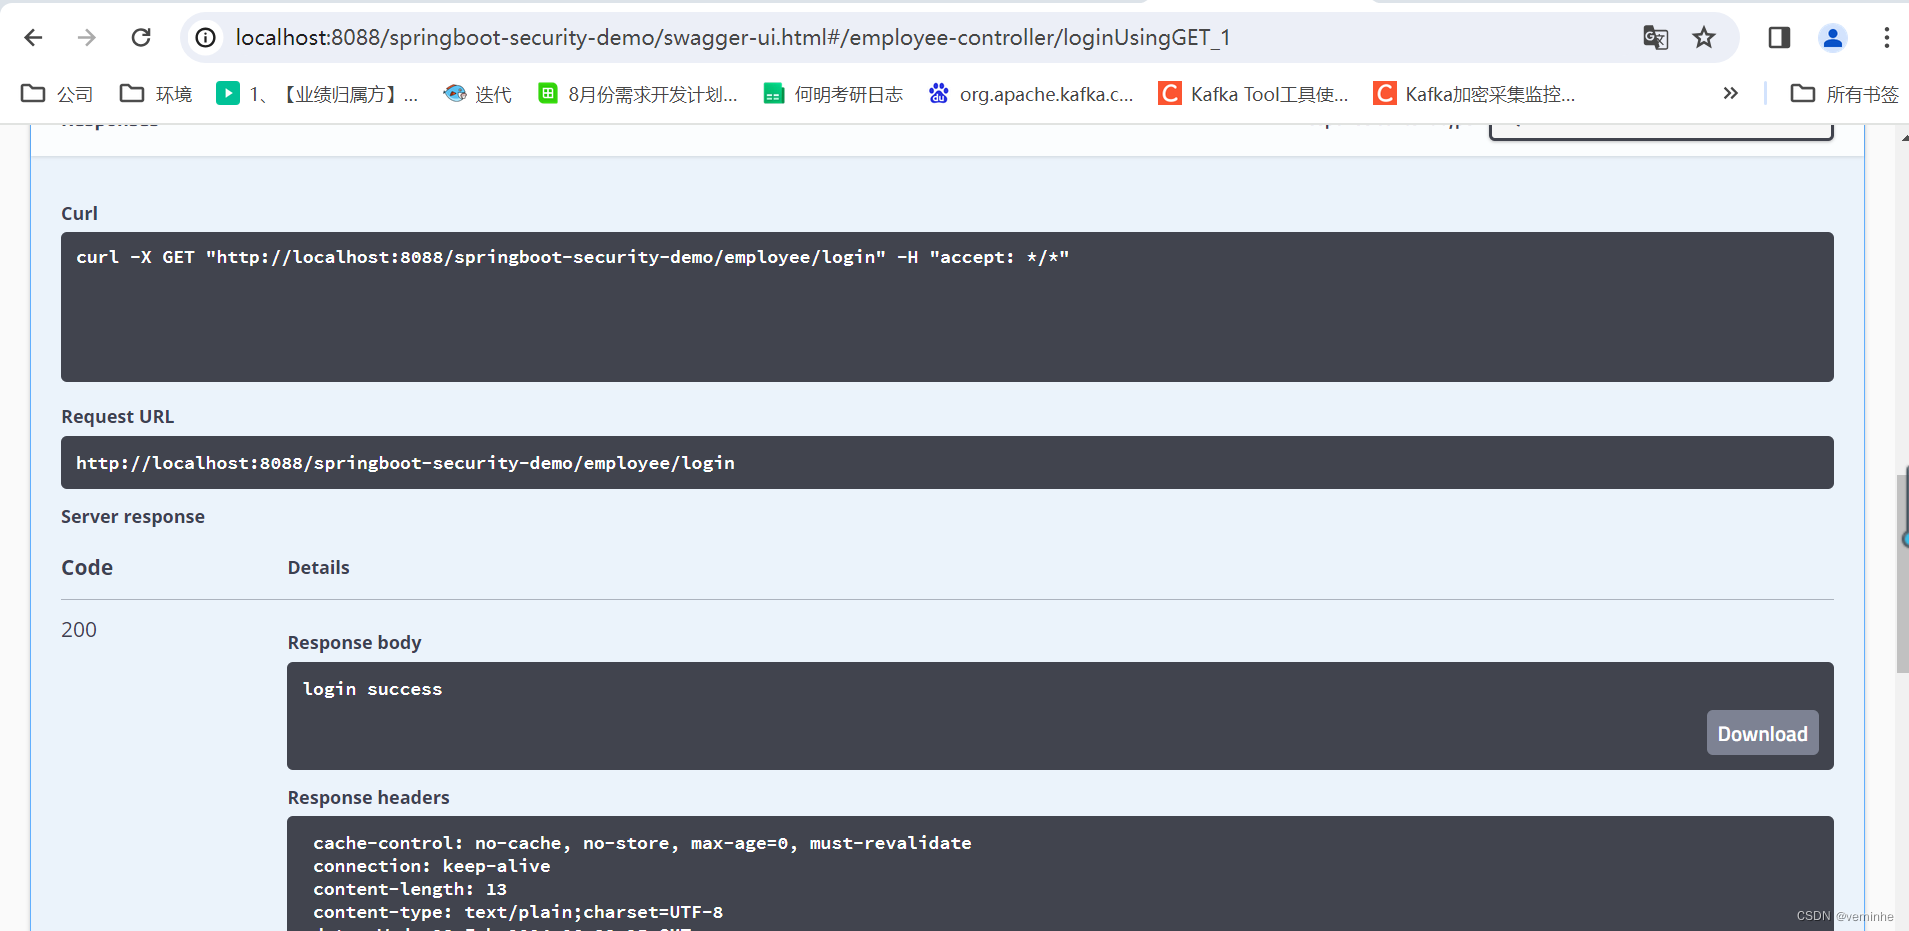
点击登录后,查看响应,如下:

admin和employee账号都能正常访问employee接口
达到了预期目的。
代码参考:https://github.com/veminhe/spring-security-demo
这篇关于spring boot学习第十三篇:使用spring security控制权限的文章就介绍到这儿,希望我们推荐的文章对编程师们有所帮助!


