本文主要是介绍Android调用相机拍照,压缩图片后保存SD卡中,希望对大家解决编程问题提供一定的参考价值,需要的开发者们随着小编来一起学习吧!
最近在搞一个项目,需求是调用系统相机拍完照片后保存本地,再上传至后台服务器,但为了节省流量需要压缩上传,将图片压缩至100K以内。这个是在特定机器上运行,类似于手持POS机,但是它的相机几乎没有优化,对焦慢,而且拍照也不清晰,使用自己的手机调用系统相机拍照后图片大概有300K左右,自动已经压缩了,但这个机器没有优化,调用相机拍照后的图片和原图一样2M左右,太大了,必须要压缩!
网上找了些资料,也作为参考:Android图片压缩 质量压缩和尺寸压缩;安卓相机拍摄照片,压缩后存储于SD卡
项目需要的效果为:

上代码:
import java.io.BufferedOutputStream;
import java.io.File;
import java.io.FileInputStream;
import java.io.FileNotFoundException;
import java.io.FileOutputStream;
import java.io.IOException;import android.app.Activity;
import android.content.Intent;
import android.graphics.Bitmap;
import android.graphics.BitmapFactory;
import android.net.Uri;
import android.os.Bundle;
import android.os.Environment;
import android.provider.MediaStore;
import android.view.View;
import android.view.View.OnClickListener;
import android.widget.Button;
import android.widget.ImageView;
import android.widget.Toast;public class MainActivity extends Activity implements OnClickListener{private Button openCamera,openCamera2;private ImageView showImgView;Uri photoUri;String filePath;  //图片路径@Overrideprotected void onCreate(Bundle savedInstanceState) {super.onCreate(savedInstanceState);setContentView(R.layout.activity_main);findView();}private void findView() {// TODO Auto-generated method stubopenCamera = (Button) findViewById(R.id.openCamera);openCamera2 = (Button) findViewById(R.id.openCamera2);showImgView = (ImageView) findViewById(R.id.showImgView);openCamera.setOnClickListener(this);openCamera2.setOnClickListener(this);}@Overridepublic void onClick(View v) {// TODO Auto-generated method stubswitch (v.getId()){case R.id.openCamera://打卡相机前先检测SD卡是否可以用if(Environment.getExternalStorageState().equals(Environment.MEDIA_MOUNTED)){photoUri = patrUri("file1");startCamera(1001,photoUri);}else{Toast.makeText(MainActivity.this, "SD卡不可用", Toast.LENGTH_SHORT).show();}break;case R.id.openCamera2:if(Environment.getExternalStorageState().equals(Environment.MEDIA_MOUNTED)){photoUri = patrUri("file2");startCamera(1002,photoUri);}else{Toast.makeText(MainActivity.this, "SD卡不可用", Toast.LENGTH_SHORT).show();}break;}}@Overrideprotected void onActivityResult(int requestCode, int resultCode, Intent data) {// TODO Auto-generated method stubsuper.onActivityResult(requestCode, resultCode, data);if(requestCode == 1001){if(resultCode == RESULT_OK){FileInputStream is = null;try {is = new FileInputStream(filePath);Bitmap bitmap = BitmapFactory.decodeStream(is);showImgView.setImageBitmap(bitmap);} catch (FileNotFoundException e) {// TODO Auto-generated catch blocke.printStackTrace();}finally{try {is.close();} catch (IOException e) {// TODO Auto-generated catch blocke.printStackTrace();}}}}if(requestCode == 1002){if(resultCode == RESULT_OK){try {Bitmap bitmap = compressBySize(filePath,480,800);  //设置压缩后图片的高度和宽度saveFile(bitmap,filePath);showImgView.setImageBitmap(bitmap);} catch (IOException e) {// TODO Auto-generated catch blocke.printStackTrace();}}}}// 压缩图片尺寸private static Bitmap compressBySize(String pathName, int targetWidth,int targetHeight) {BitmapFactory.Options opts = new BitmapFactory.Options();opts.inJustDecodeBounds = true;// 不去真的解析图片,只是获取图片的头部信息,包含宽高等;Bitmap bitmap = BitmapFactory.decodeFile(pathName, opts);// 得到图片的宽度、高度;float imgWidth = opts.outWidth;float imgHeight = opts.outHeight;// 分别计算图片宽度、高度与目标宽度、高度的比例;取大于等于该比例的最小整数;int widthRatio = (int) Math.ceil(imgWidth / (float) targetWidth);int heightRatio = (int) Math.ceil(imgHeight / (float) targetHeight);opts.inSampleSize = 1;if (widthRatio > 1 || widthRatio > 1) {if (widthRatio > heightRatio) {opts.inSampleSize = widthRatio;} else {opts.inSampleSize = heightRatio;}}// 设置好缩放比例后,加载图片进内容;opts.inJustDecodeBounds = false;bitmap = BitmapFactory.decodeFile(pathName, opts);return bitmap;}//保存压缩后的图片private void saveFile(Bitmap bitmap, String filePath2) throws IOException {// TODO Auto-generated method stubFile testFile = new File(filePath2);if (testFile.exists()) {testFile.delete();}File myCaptureFile = new File(filePath2);System.out.println("------filePath2==" + filePath2);BufferedOutputStream bos = new BufferedOutputStream(new FileOutputStream(myCaptureFile));// 100表示不进行压缩,70表示压缩率为30%bitmap.compress(Bitmap.CompressFormat.JPEG, 90, bos);bos.flush();bos.close();}//打开相机private void startCamera(int requestCode, Uri photoUri) {// TODO Auto-generated method stubIntent intent = new Intent(MediaStore.ACTION_IMAGE_CAPTURE);intent.putExtra(MediaStore.EXTRA_OUTPUT,photoUri);startActivityForResult(intent, requestCode);}/*** 图片保存路径  这里是在SD卡目录下创建了MyPhoto文件夹* @param fileName* @return*/private Uri patrUri(String fileName) {  //指定了图片的名字,可以使用时间来命名// TODO Auto-generated method stubString strPhotoName = fileName+".jpg";              String savePath = Environment.getExternalStorageDirectory().getPath()+ "/MyPhoto/";File dir = new File(savePath);if (!dir.exists()) {dir.mkdirs();}filePath = savePath + strPhotoName;return Uri.fromFile(new File(dir, strPhotoName));}
}
页面布局很简单,就两个Button跟一个ImageView,这里就不贴代码了。
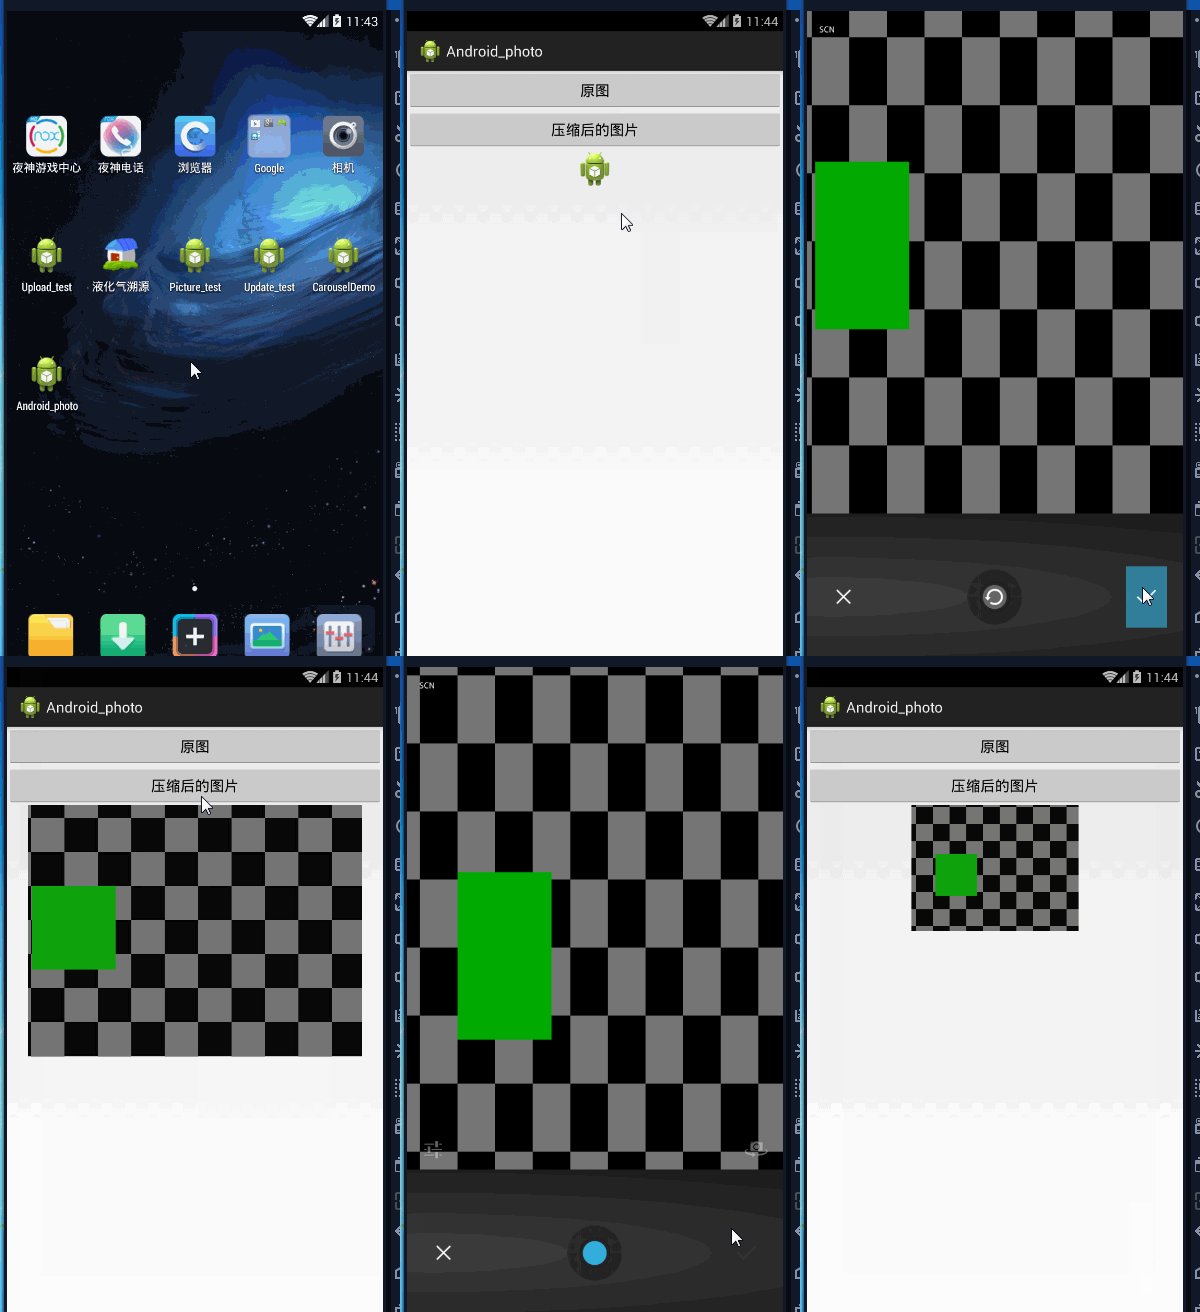
效果图片:

SD卡中的图片:

可以看到,file2.jpg是压缩过的,file1.jpg是原图,因为是模拟器,效果不太明显,在真机上压缩后的图片在100K之内。
要调用相机和读写SD卡,最后不要忘了加权限。
代码下载
因为工作的原因,这里使用的是Myeclipse不过Eclipse也可以用。
这篇关于Android调用相机拍照,压缩图片后保存SD卡中的文章就介绍到这儿,希望我们推荐的文章对编程师们有所帮助!


