本文主要是介绍(一)MMDetection3D环境配置,希望对大家解决编程问题提供一定的参考价值,需要的开发者们随着小编来一起学习吧!
(一)MMDetection3D环境配置
官方文档:MMDetection3D官方文档
推荐教程:通用视觉框架 OpenMMLab 系列课程之 MMDetection3D
项目地址:https://github.com/open-mmlab/mmdetection3d
第一步:Pytorch环境搭建
1.1 安装pytorch环境
conda create -n pytorch-mmdet3d python=3.8
conda activate pytorch-mmdet3d
conda install pytorch==1.10.1 torchvision==0.11.2 torchaudio==0.10.1 cudatoolkit=11.3 -c pytorch
1.2 验证pytorch环境
python                     # 3.8.16
import torch
torch.__version__          # 1.10.1
torch.version.cuda         # 11.3
torch.cuda.is_available()  # True
exit()
第二步:安装MMDetection3D
2.1 安装其它包
pip install openmim          # 下载的时候容易报错,多多尝试几次
mim install mmcv-full
mim install mmdet            # 下载的时候容易报错,多多尝试几次
mim install mmsegmentation
2.2 克隆编译MMDetection3D
git clone https://github.com/open-mmlab/mmdetection3d.git
cd mmdetection3d
pip install -e .
2.3 验证MMDetection3D环境
python                     # 3.8.16
import open3d
import mmcv
import mmdet
import mmdet3d
mmdet3d.__version__        # 1.0.0
exit()
第三步:使用demo程序
因为在Xshell的命令端直接运行demo程序不方便进行可视化展示,这里推荐使用MobaXterm的命令端进行可视化展示,在这里可以找到软件安装包的地址。
3.1 使用点云3D目标检测的测试demo
在/mmdetection3d/configs/second中下载预训练模型并保存到/mmdetection/checkpoint文件夹,这里下载的是SECOND模型:

## 测试second模型
python demo/pcd_demo.py demo/data/kitti/000008.bin \configs/second/second_hv_secfpn_8xb6-80e_kitti-3d-3class.py \checkpoints/hv_second_secfpn_6x8_80e_kitti-3d-3class.pth \--show
show:表示是否对测试结果进行可视化,需要安装open3d库(没有的话,直接pip install open3d安装一下即可)。
原图如下:

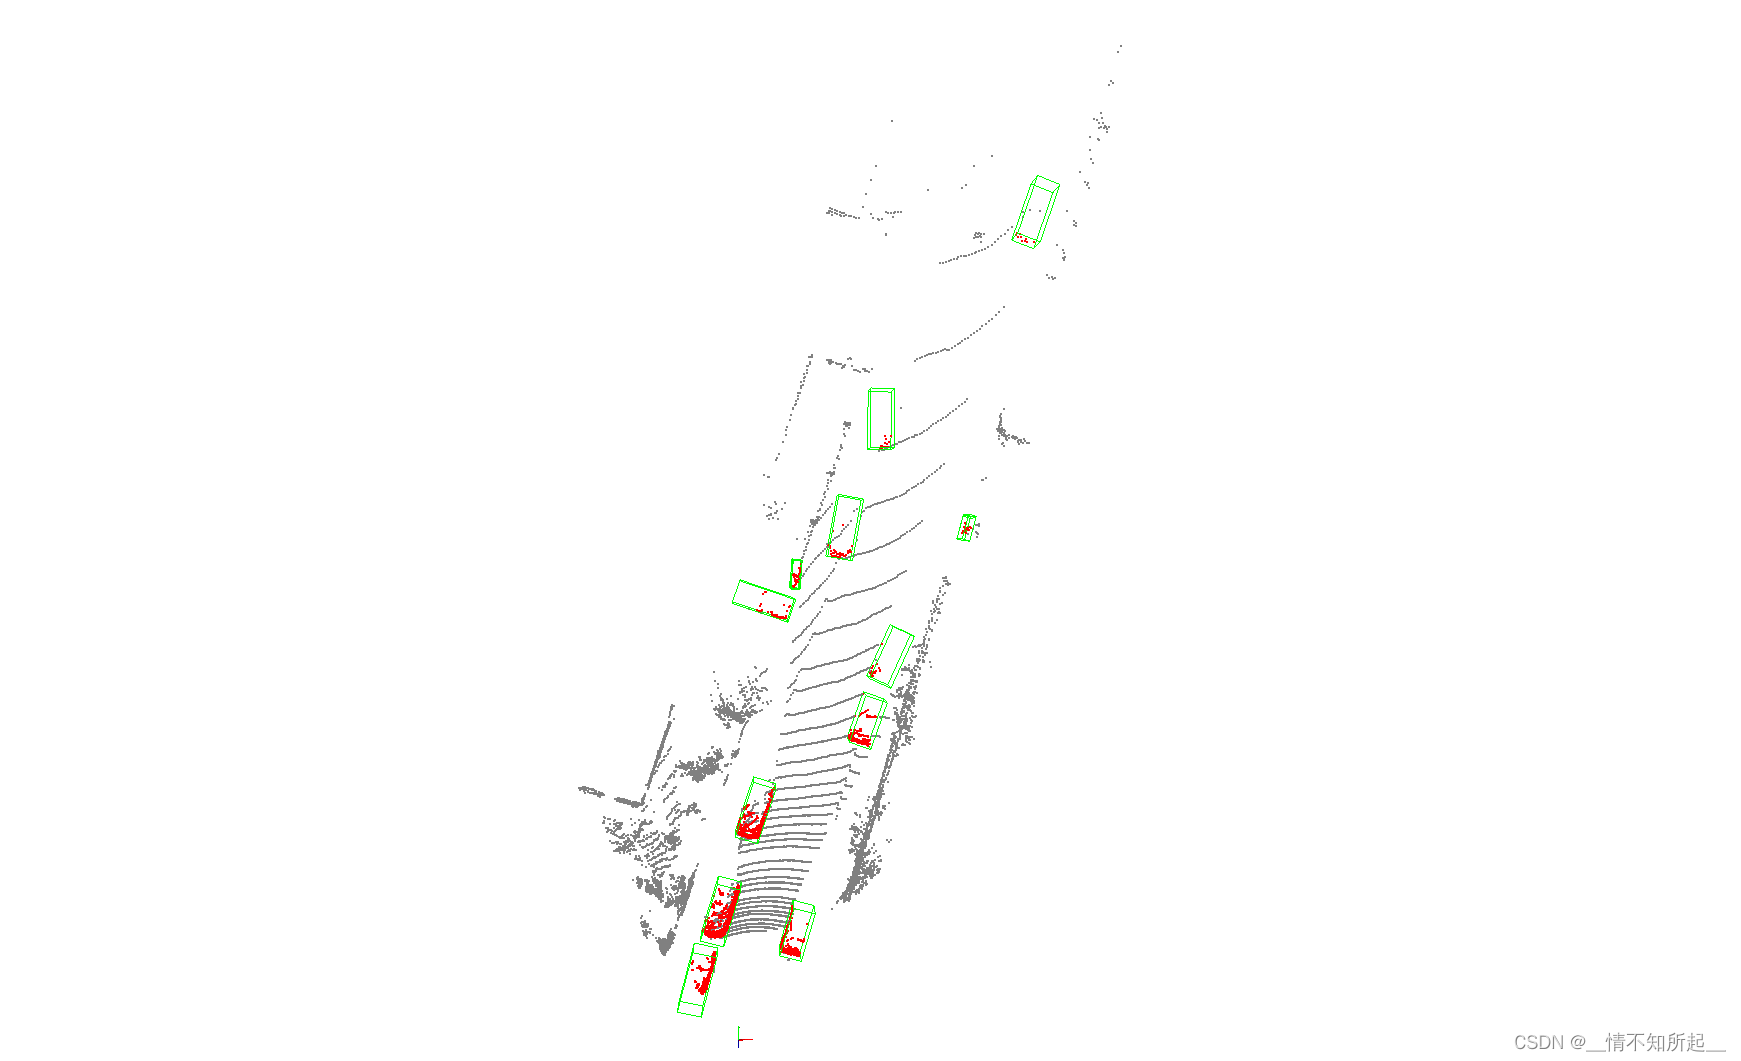
可视化的结果展示如下:
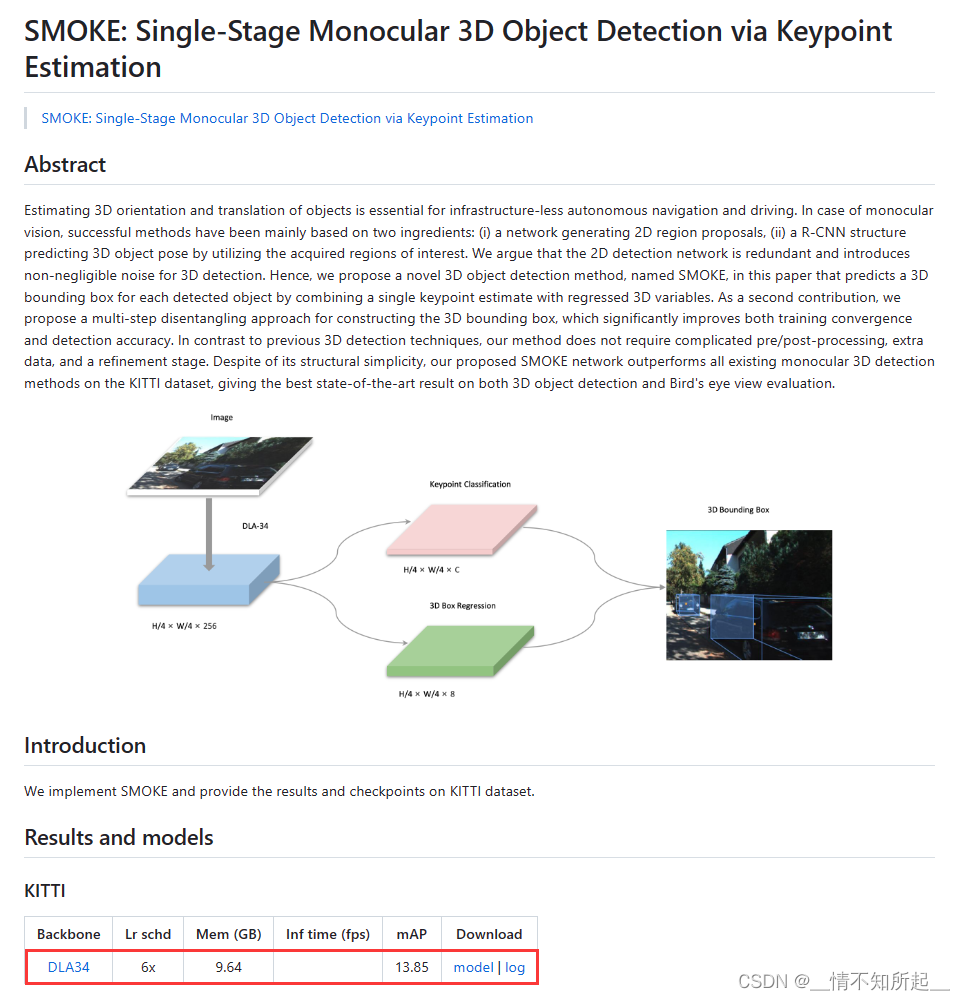
3.2 使用图像3D目标检测的测试demo(最新的代码存在bug,还在修复)
在/mmdetection3d/configs/smoke中下载预训练模型并保存到/mmdetection/checkpoint文件夹,这里下载的是SMOKE模型:
## 测试smoke模型
python demo/mono_det_demo.py \demo/data/nuscenes/n015-2018-07-24-11-22-45+0800__CAM_BACK__1532402927637525.jpg \configs/smoke/smoke_dla34_dlaneck_gn-all_4xb8-6x_kitti-mono3d.pkl \checkpoints/smoke_dla34_pytorch_dlaneck_gn-all_8x4_6x_kitti-mono3d.pth \--show
show:表示是否对测试结果进行可视化,需要安装open3d库(没有的话,直接pip install open3d安装一下即可)。
原图如下:

可视化结果如下:
第四步:准备数据集
4.1 KITTI数据集
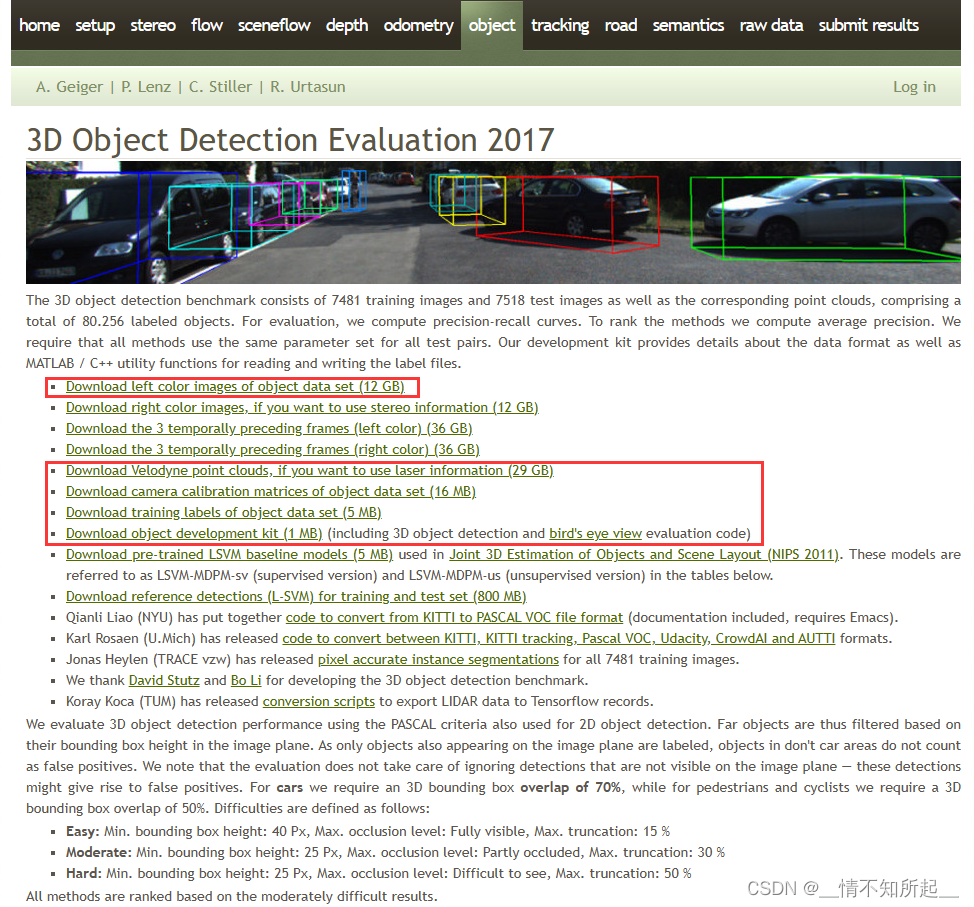
4.1.1 官网下载KITTI数据集
在KITTI 3D object detection dataset下载KITTI数据集安装包。
当然,如果在官网下载麻烦的话,我已经下载好了,使用百度网盘可以直接进行下载。
百度网盘链接:https://pan.baidu.com/s/1K-UaIFUt_bibjC6ZtLUKYA
提取码:7jq1
道路平面信息是由 AVOD 生成的,其在训练过程中作为一个可选项,用来提高模型的性能,点击下载道路平面信息。
4.1.2 官网下载KITTI数据集后的组织结构
在官网下载KITTI数据集后,并在mmdetection3d文件夹下组织成以下所示的结构。
mmdetection3d
├── configs
├── mmdet3d
├── tools
├── data
│   ├── kitti
│   │   ├── ImageSets
│   │   ├── testing
│   │   │   ├── calib
│   │   │   ├── image_2
│   │   │   ├── velodyne
│   │   ├── training
│   │   │   ├── calib
│   │   │   ├── image_2
│   │   │   ├── label_2
│   │   │   ├── velodyne
│   │   │   ├── planes
4.1.3 数据预处理
项目的数据预处理需要使用tools/create_data.py重新处理一次。
cd mmdetection3d
mkdir ./data/kitti/ && mkdir ./data/kitti/ImageSets# Download data split
wget -c  https://raw.githubusercontent.com/traveller59/second.pytorch/master/second/data/ImageSets/test.txt --no-check-certificate --content-disposition -O ./data/kitti/ImageSets/test.txt
wget -c  https://raw.githubusercontent.com/traveller59/second.pytorch/master/second/data/ImageSets/train.txt --no-check-certificate --content-disposition -O ./data/kitti/ImageSets/train.txt
wget -c  https://raw.githubusercontent.com/traveller59/second.pytorch/master/second/data/ImageSets/val.txt --no-check-certificate --content-disposition -O ./data/kitti/ImageSets/val.txt
wget -c  https://raw.githubusercontent.com/traveller59/second.pytorch/master/second/data/ImageSets/trainval.txt --no-check-certificate --content-disposition -O ./data/kitti/ImageSets/trainval.txt# Data preprocessing
python tools/create_data.py kitti --root-path ./data/kitti --out-dir ./data/kitti --extra-tag kitti --with-plane
4.1.4 数据预处理后的组织结构
项目的数据预处理后,在mmdetection3d文件夹下将会组织成以下所示的结构。
mmdetection3d
├── configs
├── mmdet3d
├── tools
├── data
│   ├── kitti
│   │   ├── ImageSets
│   │   │   ├── test.txt
│   │   │   ├── train.txt
│   │   │   ├── trainval.txt
│   │   │   ├── val.txt
│   │   ├── testing
│   │   │   ├── calib
│   │   │   ├── image_2
│   │   │   ├── velodyne
│   │   │   ├── velodyne_reduced
│   │   ├── training
│   │   │   ├── calib
│   │   │   ├── image_2
│   │   │   ├── label_2
│   │   │   ├── velodyne
│   │   │   ├── velodyne_reduced
│   │   │   ├── planes
│   │   ├── kitti_gt_database
│   │   │   ├── xxxxx.bin
│   │   ├── kitti_infos_test.pkl
│   │   ├── kitti_infos_train.pkl
│   │   ├── kitti_infos_trainval.pkl
│   │   ├── kitti_infos_val.pkl
│   │   ├── kitti_dbinfos_train.pkl
│   │   ├── kitti_infos_test_mono3d.coco.json
│   │   ├── kitti_infos_train_mono3d.coco.json
│   │   ├── kitti_infos_trainval_mono3d.coco.json
│   │   ├── kitti_infos_val_mono3d.coco.json
4.2 Nuscenes数据集
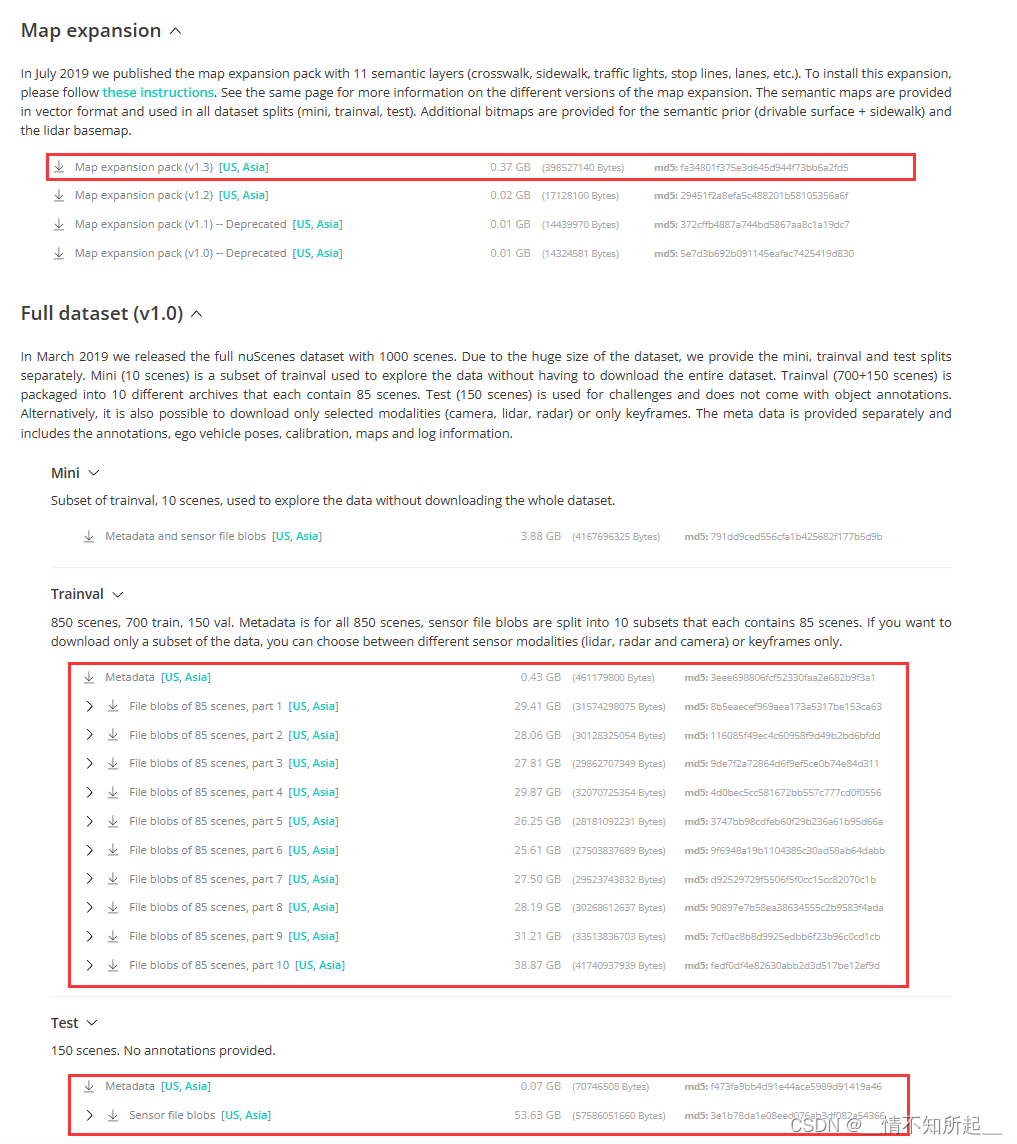
4.2.1 官网下载Nuscenes数据集
在NuScenes 3D object detection dataset下载nuscenes数据集安装包,请记住下载检测数据集和地图扩展(用于BEV地图分割)。
当然,如果在官网下载麻烦的话,可以参考这篇博客使用百度网盘或者迅雷网盘进行下载。
4.2.2 官网下载Nuscenes数据集后的组织结构
在官网下载nuscenes数据集后,并在mmdetection3d文件夹下组织成以下所示的结构。
bevfusion
├── assets
├── configs
├── mmdet3d
├── tools
├── data
│   ├── nuscenes
│   │   ├── maps
│   │   │   ├── basemap
│   │   │   ├── expansion
│   │   │   ├── prediction
│   │   ├── samples
│   │   ├── sweeps
│   │   ├── v1.0-test
│   │   ├── v1.0-trainval
4.2.3 数据预处理
项目的数据预处理需要使用tools/create_data.py重新处理一次。
cd mmdetection3d
python tools/create_data.py nuscenes --root-path ./data/nuscenes --out-dir ./data/nuscenes --extra-tag nuscenes
4.2.4 数据预处理后的组织结构
项目的数据预处理后,在mmdetection3d文件夹下将会组织成以下所示的结构。
mmdetection3d
├── assets
├── configs
├── mmdet3d
├── tools
├── data
│   ├── nuscenes
│   │   ├── maps
│   │   │   ├── basemap
│   │   │   ├── expansion
│   │   │   ├── prediction
│   │   ├── samples
│   │   ├── sweeps
│   │   ├── v1.0-test
│   │   ├── v1.0-trainval
│   │   ├── nuscenes_database
│   │   ├── nuscenes_infos_test.pkl
│   │   ├── nuscenes_infos_train.pkl
│   │   ├── nuscenes_infos_val.pkl
│   │   ├── nuscenes_dbinfos_train.pkl
│   │   ├── nuscenes_infos_test_mono3d.coco.json
│   │   ├── nuscenes_infos_train_mono3d.coco.json
│   │   ├── nuscenes_infos_trainval_mono3d.coco.json
│   │   ├── nuscenes_infos_val_mono3d.coco.json
第五步:训练和测试
5.1 使用已有模型在标准数据集上进行训练
5.1.1 在KITTI数据集上训练pointpillars
这里我们以在KITTI数据集上训练pointpillars为例,修改配置文件:
- 修改epoch:打开
/mmdetection3d/configs/pointpillars/pointpillars_hv_secfpn_8xb6-160e_kitti-3d-3class.py文件,修改文件中的epoch_num = 80中的epoch_num参数。 - 修改batch_size:打开
/mmdetection3d/configs/_base_/datasets/kitti-3d-3class.py文件,修改文件中的batch_size=6中的batch_size参数,大家根据自己显卡的显存进行修改。
我们设置好参数后就可以直接执行命令进行训练了,修改配置文件:
## 单卡训练
python tools/train.py configs/pointpillars/pointpillars_hv_secfpn_8xb6-160e_kitti-3d-3class.py## 多卡训练
CUDA_VISIBLE_DEVICES=0,1,2,3 tools/dist_train.sh configs/pointpillars/pointpillars_hv_secfpn_8xb6-160e_kitti-3d-3class.py 4
训练结束后,我们可以在/mmdetection3d/work-dirs/pointpillars_hv_secfpn_8xb6-160e_kitti-3d-3class文件夹中看到训练结果,包括日志文件(.log)、权重文件(.pth)以及模型配置文件(.py)等。
注意:训练的时候如果报 AttributeError: module ‘numpy’ has no attribute ‘long’ 的错误,请使用命令pip install numpy==1.23.0重装numpy,我原先的版本是1.24.3,重装后的版本是1.23.0。
5.1.2 在NuScenes数据集上训练pointpillars
这里我们以在NuScenes数据集上训练pointpillars为例,修改配置文件:
- 修改epoch:打开
/mmdetection3d/configs/_base_/schedules/schedule-2x.py文件,修改文件中的max_epochs=24中的max_epochs参数。 - 修改batch_size:打开
/mmdetection3d/configs/_base_/datasets/nus-3d.py文件,修改文件中的batch_size=4中的batch_size参数。
我们设置好参数后就可以直接执行命令进行训练了:
## 单卡训练
python tools/train.py configs/pointpillars/pointpillars_hv_fpn_sbn-all_8xb4_2x_nus-3d.py## 多卡训练
CUDA_VISIBLE_DEVICES=0,1,2,3 tools/dist_train.sh configs/pointpillars/pointpillars_hv_fpn_sbn-all_8xb4_2x_nus-3d.py 4
训练结束后,我们可以在/mmdetection3d/work-dirs/pointpillars_hv_secfpn_sbn-all_8xb4-2x_nus-3d文件夹中看到训练结果,包括日志文件(.log)、权重文件(.pth)以及模型配置文件(.py)等。
5.2 使用已有模型在标准数据集上进行测试
在/mmdetection3d/configs/pointpillars中下载预训练模型并保存到/mmdetection/checkpoint文件夹,这里下载的是PointPillars模型:
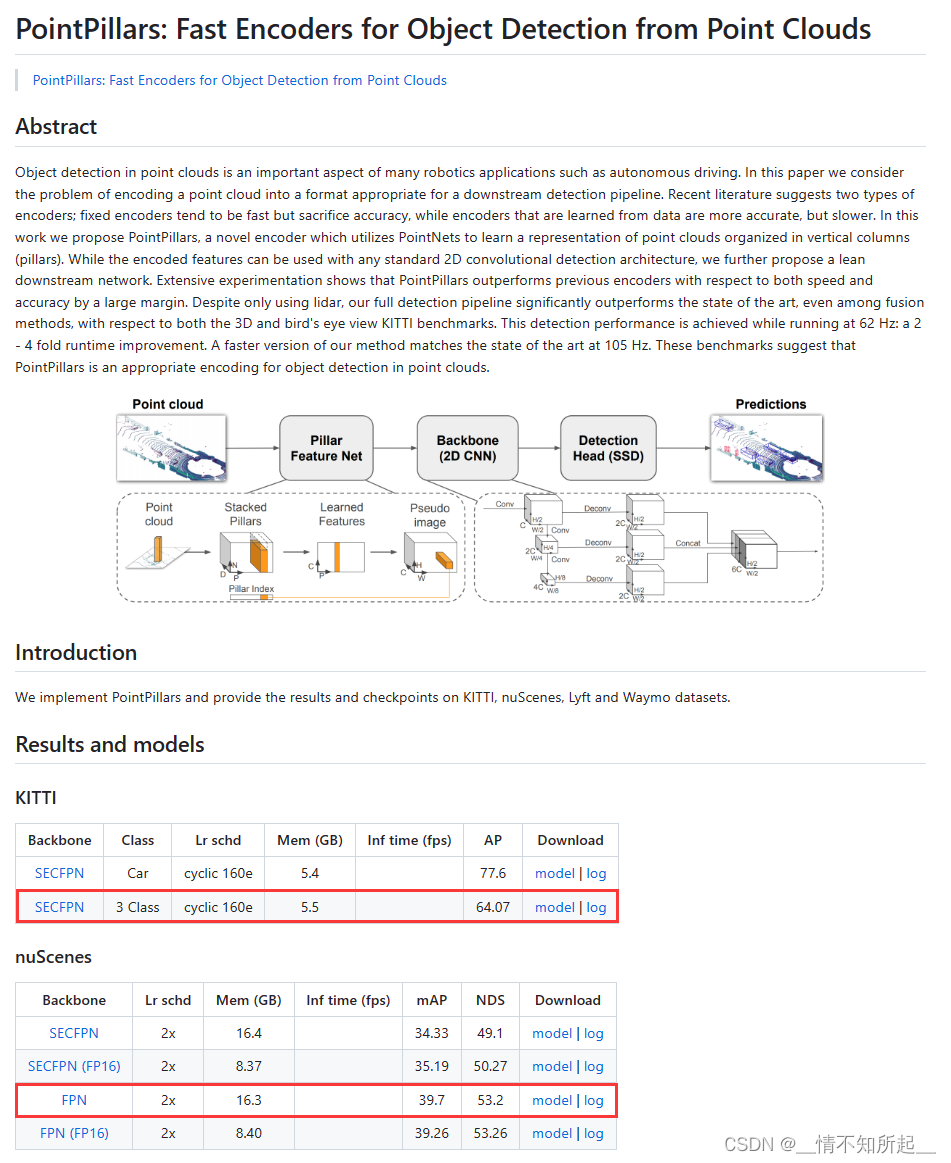
5.2.1 在KITTI数据集上测试pointpillars
这里我们以在KITTI数据集上测试pointpillars为例:
测试文件tools/test.py有两个必选参数config和checkpoint,分别为模型配置文件和训练生成的权重文件,其他几个比较重要的参数:
eval:使用的评价指标,取决于数据集(“bbox”, “segm”, “proposal” for COCO, and “mAP”, “recall” for PASCAL VOC),这里直接沿用了2D检测中常用的几个评价标准。show:是否对测试结果进行可视化,需要安装open3d库(没有的话,直接pip install open3d安装一下即可)。show_dir:测试结果的保存目录。
## 单卡测试
python tools/test.py configs/pointpillars/pointpillars_hv_secfpn_8xb6-160e_kitti-3d-3class.py \checkpoints/hv_pointpillars_secfpn_6x8_160e_kitti-3d-3class.pth
5.2.2 在NuScenes数据集上测试pointpillars
这里我们以在NuScenes数据集上测试pointpillars为例:
## 单卡测试
python tools/test.py configs/pointpillars/pointpillars_hv_fpn_sbn-all_8xb4_2x_nus-3d.py \checkpoints/hv_pointpillars_fpn_sbn-all_4x8_2x_nus-3d.pth
至此,MMDetection3d的环境配置到此结束!感谢大家的观看!
后续我也将为大家继续带来一些经典3D目标检测网络的代码解读,希望大家多多支持和关注!
这篇关于(一)MMDetection3D环境配置的文章就介绍到这儿,希望我们推荐的文章对编程师们有所帮助!


