本文主要是介绍【vue3】实现筛选页组件(深层嵌套循环数据切换)的封装和调用,希望对大家解决编程问题提供一定的参考价值,需要的开发者们随着小编来一起学习吧!
一、页面布局截图
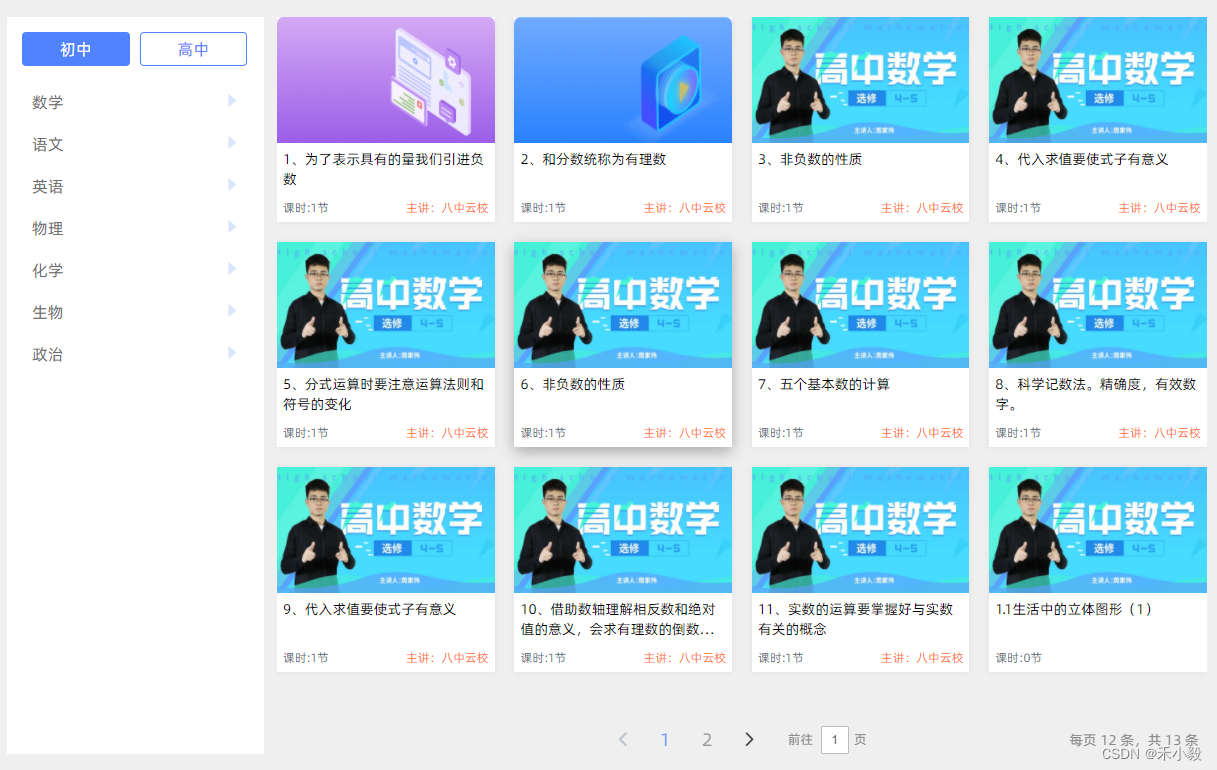
1、首次进入该页面,默认选中初中项,并加载右侧初中相关的课程列表
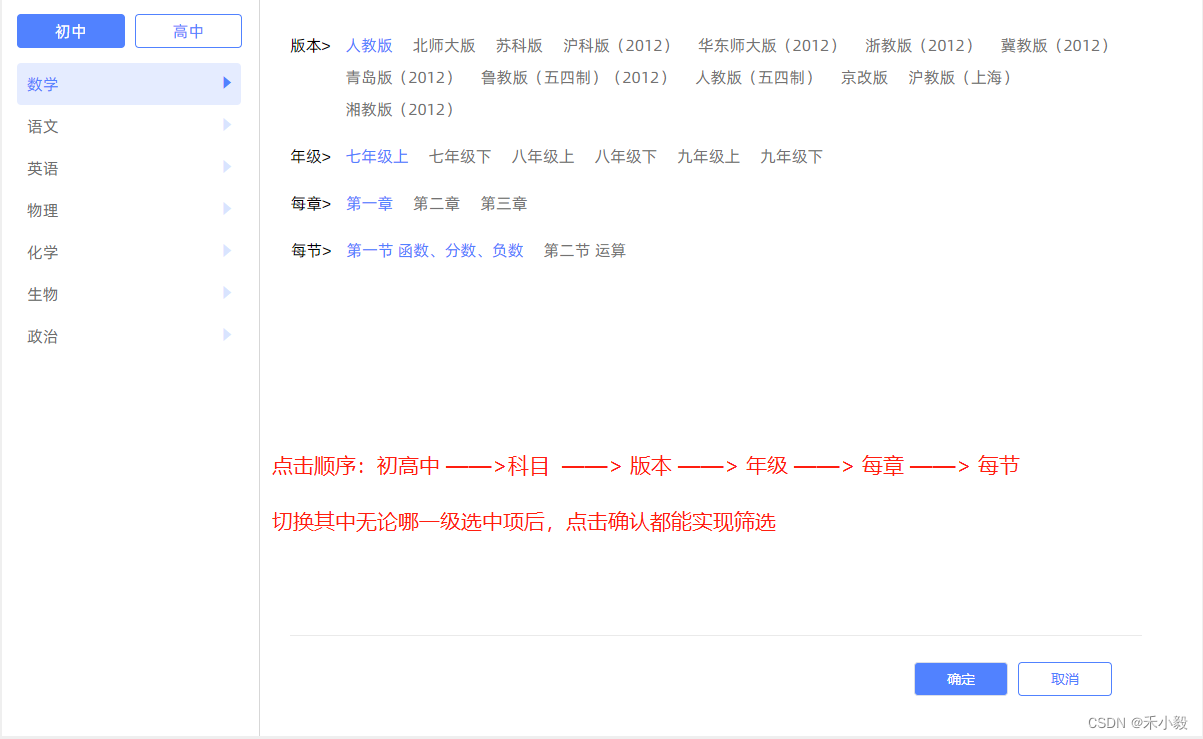
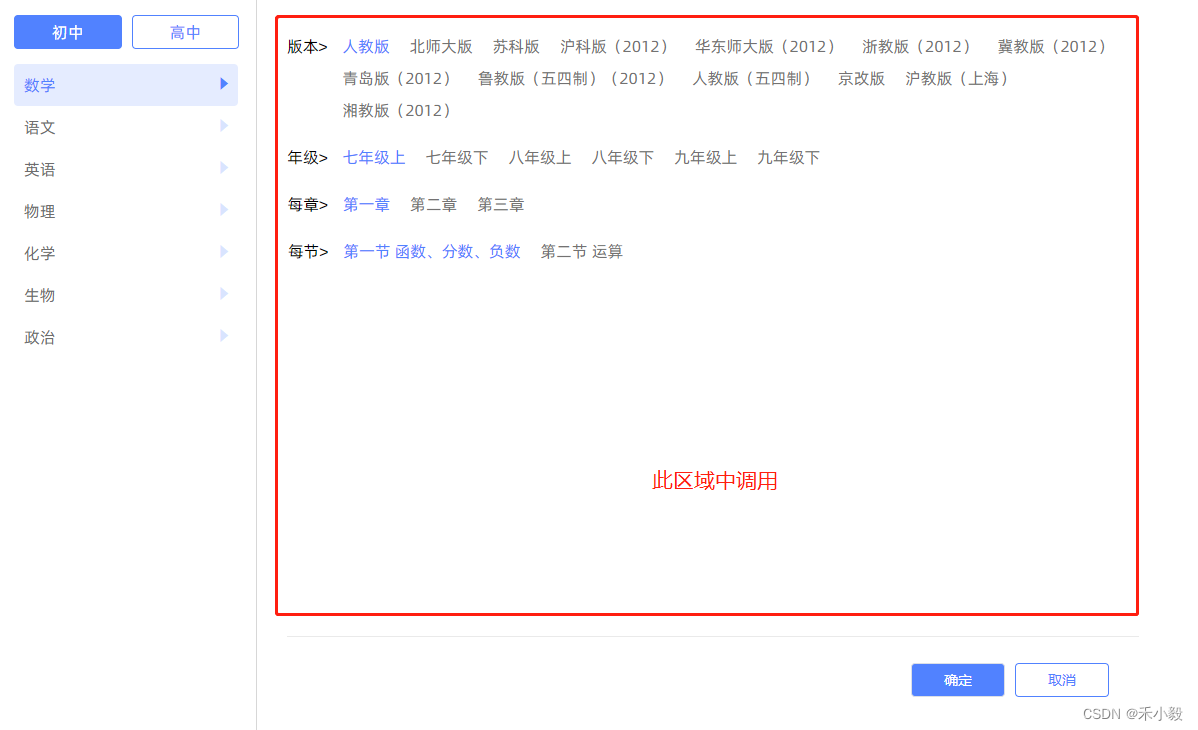
2、筛选页(当点击初中项下的科目项,展示右侧筛选弹窗)
3、切换无内容项展示

图例1:无科目以及无课程列表的截图
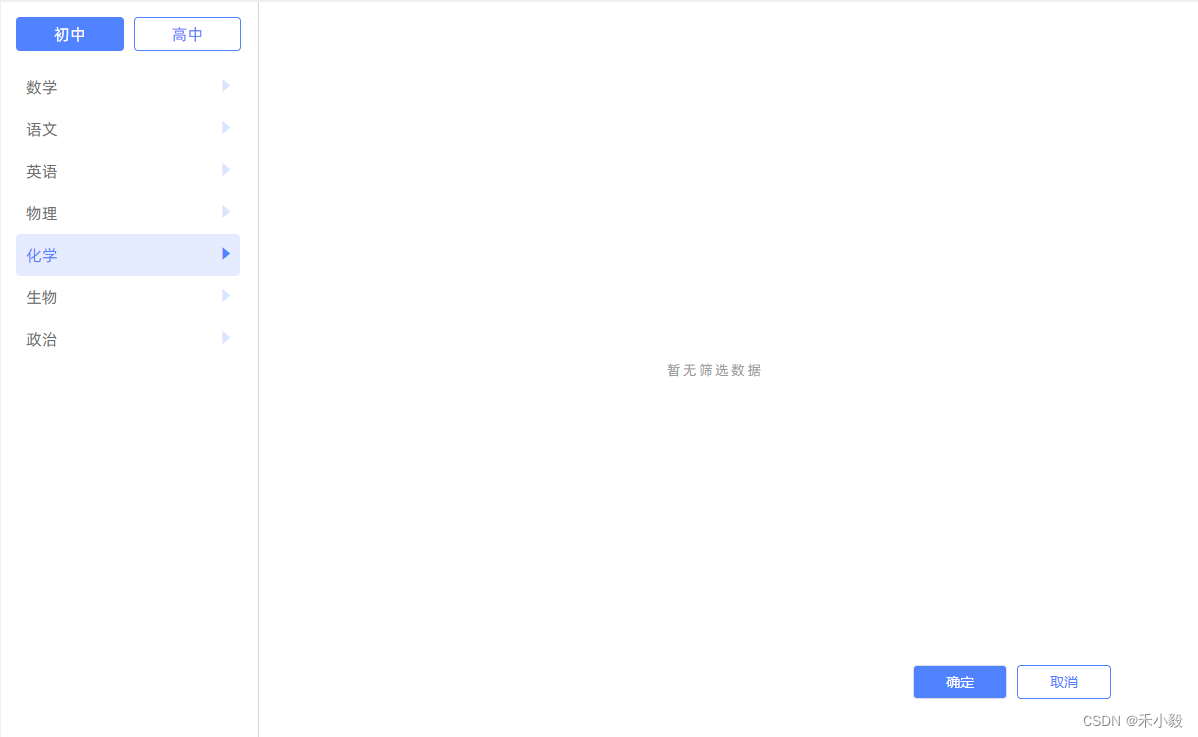
图例2:有科目无右侧筛选弹窗内容截图
二、筛选展示的数据结构如下(数据内容仅供参考)
let data=[{"Id": 48,"Name": "初中","AliasName": "","ParentId": 5,"CoverUrl": null,"Children": [{"Id": 50,"Name": "数学","AliasName": "","ParentId": 48,"CoverUrl": null,"Children": [{"Id": 134,"Name": "版本","AliasName": "","ParentId": 50,"CoverUrl": null,"Children": [{"Id": 135,"Name": "人教版","AliasName": "","ParentId": 134,"CoverUrl": null,"Children": [{"Id": 141,"Name": "年级","AliasName": "","ParentId": 135,"CoverUrl": null,"Children": [{"Id": 142,"Name": "七年级上","AliasName": "","ParentId": 141,"CoverUrl": null,"Children": [{"Id": 148,"Name": "每章","AliasName": "","ParentId": 142,"CoverUrl": null,"Children": [{"Id": 149,"Name": "第一章","AliasName": "","ParentId": 148,"CoverUrl": null,"Children": [{"Id": 152,"Name": "每节","AliasName": "","ParentId": 149,"CoverUrl": null,"Children": [{"Id": 181,"Name": "第一节 函数、分数、负数","AliasName": "","ParentId": 152,"CoverUrl": null,"Children": null},{"Id": 182,"Name": "第二节 运算","AliasName": "","ParentId": 152,"CoverUrl": null,"Children": null}]}]},{"Id": 150,"Name": "第二章","AliasName": "","ParentId": 148,"CoverUrl": null,"Children": null},{"Id": 151,"Name": "第三章","AliasName": "","ParentId": 148,"CoverUrl": null,"Children": null}]}]},{"Id": 143,"Name": "七年级下","AliasName": "","ParentId": 141,"CoverUrl": null,"Children": null},{"Id": 144,"Name": "八年级上","AliasName": "","ParentId": 141,"CoverUrl": null,"Children": null},{"Id": 145,"Name": "八年级下","AliasName": "","ParentId": 141,"CoverUrl": null,"Children": null},{"Id": 146,"Name": "九年级上","AliasName": "","ParentId": 141,"CoverUrl": null,"Children": null},{"Id": 147,"Name": "九年级下","AliasName": "","ParentId": 141,"CoverUrl": null,"Children": null}]}]},{"Id": 136,"Name": "北师大版","AliasName": "","ParentId": 134,"CoverUrl": null,"Children": [{"Id": 183,"Name": "年级","AliasName": "","ParentId": 136,"CoverUrl": null,"Children": [{"Id": 162,"Name": "七年级上册","AliasName": "","ParentId": 183,"CoverUrl": null,"Children": [{"Id": 168,"Name": "每章","AliasName": "","ParentId": 162,"CoverUrl": null,"Children": [{"Id": 169,"Name": "第一章 丰富的图形世界","AliasName": "","ParentId": 168,"CoverUrl": null,"Children": [{"Id": 176,"Name": "知识点","AliasName": "","ParentId": 169,"CoverUrl": null,"Children": [{"Id": 177,"Name": "生活中的立体图形","AliasName": "","ParentId": 176,"CoverUrl": null,"Children": null},{"Id": 178,"Name": "展开与折叠","AliasName": "","ParentId": 176,"CoverUrl": null,"Children": null}]}]},{"Id": 170,"Name": "第二章 有理数及其运算","AliasName": "","ParentId": 168,"CoverUrl": null,"Children": null},{"Id": 171,"Name": "第三章 整式及其加减","AliasName": "","ParentId": 168,"CoverUrl": null,"Children": null},{"Id": 172,"Name": "第四章 基本平面图形","AliasName": "","ParentId": 168,"CoverUrl": null,"Children": null},{"Id": 173,"Name": "第五章 一元一次方程","AliasName": "","ParentId": 168,"CoverUrl": null,"Children": null},{"Id": 174,"Name": "第六章 数据的收集与整理","AliasName": "","ParentId": 168,"CoverUrl": null,"Children": null},{"Id": 175,"Name": "综合复习与测试","AliasName": "","ParentId": 168,"CoverUrl": null,"Children": null}]}]},{"Id": 163,"Name": "七年级下册","AliasName": "","ParentId": 183,"CoverUrl": null,"Children": null},{"Id": 164,"Name": "八年级上册","AliasName": "","ParentId": 183,"CoverUrl": null,"Children": null},{"Id": 165,"Name": "八年级下册","AliasName": "","ParentId": 183,"CoverUrl": null,"Children": null},{"Id": 166,"Name": "九年级上册","AliasName": "","ParentId": 183,"CoverUrl": null,"Children": null},{"Id": 167,"Name": "九年级下册","AliasName": "","ParentId": 183,"CoverUrl": null,"Children": null}]}]},{"Id": 137,"Name": "苏科版","AliasName": "","ParentId": 134,"CoverUrl": null,"Children": null},{"Id": 138,"Name": "沪科版(2012)","AliasName": "","ParentId": 134,"CoverUrl": null,"Children": null},{"Id": 139,"Name": "华东师大版(2012)","AliasName": "","ParentId": 134,"CoverUrl": null,"Children": null},{"Id": 140,"Name": "浙教版(2012)","AliasName": "","ParentId": 134,"CoverUrl": null,"Children": null},{"Id": 155,"Name": "冀教版(2012)","AliasName": "","ParentId": 134,"CoverUrl": null,"Children": null},{"Id": 156,"Name": "青岛版(2012)","AliasName": "","ParentId": 134,"CoverUrl": null,"Children": null},{"Id": 157,"Name": "鲁教版(五四制)(2012)","AliasName": "","ParentId": 134,"CoverUrl": null,"Children": null},{"Id": 158,"Name": "人教版(五四制)","AliasName": "","ParentId": 134,"CoverUrl": null,"Children": null},{"Id": 159,"Name": "京改版","AliasName": "","ParentId": 134,"CoverUrl": null,"Children": null},{"Id": 160,"Name": "沪教版(上海)","AliasName": "","ParentId": 134,"CoverUrl": null,"Children": null},{"Id": 161,"Name": "湘教版(2012)","AliasName": "","ParentId": 134,"CoverUrl": null,"Children": null}]}]},{"Id": 51,"Name": "语文","AliasName": "","ParentId": 48,"CoverUrl": null,"Children": null},{"Id": 52,"Name": "英语","AliasName": "","ParentId": 48,"CoverUrl": null,"Children": null},{"Id": 53,"Name": "物理","AliasName": "","ParentId": 48,"CoverUrl": null,"Children": null},{"Id": 54,"Name": "化学","AliasName": "","ParentId": 48,"CoverUrl": null,"Children": null},{"Id": 55,"Name": "生物","AliasName": "","ParentId": 48,"CoverUrl": null,"Children": null},{"Id": 56,"Name": "政治","AliasName": "","ParentId": 48,"CoverUrl": null,"Children": null}]},{"Id": 49,"Name": "高中","AliasName": "","ParentId": 5,"CoverUrl": null,"Children": null}
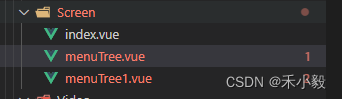
]三、组件的封装,以下三个vue页面文件组件,组合成了筛选页
1、分析
根据设计图需求以及数据结构的结合,返回的数据结构形成的深层嵌套循环与布局不符,其中Children下的数组,数组下的Children是不确定到底有多少层级的,因此
(1)如果直接循环渲染,页面是还原不了设计图的(无论多少层级,都要求左对齐)
(2)如果通过定位的方式布局,就直接写死了(行不通)
2、针对 问题(1) 采取的方法
(1)将右侧筛选弹窗的内容封装成小的组件 menuTree1.vue (也是最里层),如下图

menuTree1.vue
<template><div class="r_item" :style="'width:100%;margin-left:' + (prs.index > 0 ? -prs.width : 0) + 'px'"v-for="(right,riIndex) in menuList" :key="riIndex"><div style="display:flex;" v-if="right.Children &&right.Children.length>0"><div class="r_item_title" :data-index="right.Id">{{ right.Name }}></div><div class="r_nav" v-if="right.Children && right.Children.length > 0"><div class="r_nav_item" v-for="(chi, chiIndex) in right.Children" :key="chiIndex":class="`${person.menuActive == chi.Id ? 'r_nav_item_active' : ''} ${right.Children.length === 1 ?'r_nav2':''}`"@click="goPage(chi.Children, chi.Id, right.Id, chiIndex)">{{ chi.Name }}</div><menuTree v-if="person.isChild && person.isChild[0].ParentId == person.ClickId && right.Id == person.Pid":menuList="person.isChild" :width="person.width" :Id="person.ClickId" :index="1" @MenuTree1="MenuTree1"></menuTree></div></div></div>
</template>
<script setup lang="ts">
import menuTree from './menuTree1.vue';
import { nextTick, onMounted, reactive, ref, toRaw } from 'vue';
let person: any = reactive({IsChild: [],ClickId: 0,Pid: 0,index: 0,width: 0,menuActive:-1,cwidth:0
})
type Menu = {Name: string,Children?: Menu[],ParentId: number,Id: number
}
const isChild = ref()
type Props = {menuList: Menu[],index: number,width:number,Id:number
}
var prop = defineProps<Props>()
let prs = toRaw(prop)const emits = defineEmits(['MenuTree1']);const goPage = (data: Menu[], Id: number, Pid: number,index:number) => {person.menuActive = Idperson.isChild = dataperson.ClickId = Idperson.Pid = Pidperson.index = person.index + 1var a = document.getElementsByClassName('r_item_title')for (let index = 0; index < a.length; index++) {const element = a[index];var di = element.getAttribute('data-index')if (Number(di) === Pid) {// person.width = element.scrollWidth // + 15// 获取元素let secMargin = getComputedStyle(element);person.width = element.scrollWidth + parseFloat(secMargin.marginRight.replace('px', ''))break;}}emits('MenuTree1', Id);
};
const MenuTree1 = (Id: number) => {emits('MenuTree1', Id);
}
onMounted(()=>{nextTick(()=>{person.cwidth = document.body.scrollWidthwindow.onresize=()=>{var a = document.getElementsByClassName('r_item_title')[0]let secMargin = getComputedStyle(a);var w = a.scrollWidth + parseFloat(secMargin.marginRight.replace('px', ''))//获取所有的r_item 元素var r_item = document.getElementsByClassName('r_item')for (let index = 0; index < r_item.length; index++) {const element = r_item[index];//判断是否存在margin-leftlet elementSecMargin = getComputedStyle(element);var i = elementSecMargin.marginLeft.replace('px', '')if (parseInt(i)<0){element.style.marginLeft = -w + "px"}}}})
})
</script>
(2)再将 menuTree1.vue 引入 封装的第二层组件 menuTree.vue 循环调用
menuTree.vue
<template><div class="r_item" :style="'width:100%;'" v-for="(right,riIndex) in menuList" :key="riIndex"><div style="display:flex;"><div class="r_item_title" :data-index="right.Id">{{ right.Name }}></div><div class="r_nav" v-if="right.Children && right.Children.length>0"><div class="r_nav_item" :class="person.menuActive == chi.Id ?'r_nav_item_active':''" v-for="(chi,chiIndex) in right.Children" :key="chiIndex" @click="goPage(chi.Children, chi.Id, right.Id, chiIndex)">{{ chi.Name }}</div><menuTree v-if="person.isChild && person.isChild[0].ParentId == person.ClickId && right.Id==person.Pid" :width="person.width" :menuList="person.isChild" :index="1":Id="0"  @MenuTree1="MenuTree1"></menuTree></div></div></div></template>
<script setup lang="ts">
import menuTree from './menuTree1.vue';
import { reactive, ref, toRaw } from 'vue';
let person: any = reactive({IsChild:[],ClickId:0,Pid:0,index:0,width:0,menuActive:-1
})
type Menu = {Name: string,Children?: Menu[],ParentId: number,Id: number
}
const isChild = ref()
type Props = {menuList: Menu[],index:number
}
var prop= defineProps<Props>()
let prs = toRaw(prop)const emits = defineEmits(['MenuTree']);const goPage = (data:Menu[],Id:number,Pid:number,index:number) => {person.menuActive = Idperson.isChild=dataperson.ClickId=Idperson.Pid=Pidperson.index=person.index+1var a= document.getElementsByClassName('r_item_title')for (let index = 0; index < a.length; index++) {const element = a[index];var di = element.getAttribute('data-index')if (Number(di) === Pid) {// person.width = element.scrollWidth // + 15// 获取元素let secMargin = getComputedStyle(element);// console.log('获取值', secMargin.marginRight);person.width = element.scrollWidth +parseFloat(secMargin.marginRight.replace('px',''))break;}}MenuTree1(person.ClickId)
};
// // 获取里层的方法
const MenuTree1 =(item:any)=>{emits('MenuTree', item);
}
</script>
(3)再将 menuTree.vue 引入 封装的第一层组件 index.vue 调用,如下图
index.vue
/**
*@Author: meihang
*@Date: 2022/10/26
*@Description: 录播筛选组件
*/
<template><div class="screen_page" v-if="person.gradeList && person.gradeList.length>0"><div class="screen_l"><!-- 年级 --><div class="l_nav"><div class="l_nav_item" :class="[person.gradeActive===grIndex?'l_nav_item_active':'']" v-for="(grade,grIndex) in person.gradeList" :key="grIndex" @click="gradeChange(grade, grIndex)">{{ grade.Name }}</div></div><!-- 科目 --><div class="l_nav_panel" v-if="person.gradeList[person.gradeActive].Children && person.gradeList[person.gradeActive].Children.length > 0"><div class="panel_item" :class="[person.subjectActive === chiIndex ?'panel_item_active':'']" v-for="(chi,chiIndex) in person.gradeList[person.gradeActive].Children" :key="chiIndex" @click="subjectChange(chi, chiIndex)"><span>{{ chi.Name }}</span><i class="el-icon-caret-right"></i></div></div><div v-else class="null_box"><p>暂无科目</p></div></div><!-- 右侧 --><div class="screen_r" v-if="person.isShowRight"><div class="r_item_socrll" v-if="person.rightList && person.rightList.length>0"><div class="r_item_box"><menuTree :menuList="person.rightList" @MenuTree="MenuTree" ></menuTree></div></div><div v-else class="null_box"><p>暂无筛选数据</p></div><div class="r_btn"><el-button @click="okClick">确定</el-button><el-button @click="cancelClick">取消</el-button></div></div></div>
</template>
<script lang="ts" setup>
import { reactive, defineExpose, toRaw, ref } from 'vue'
import  menuTree from './menuTree.vue';
let person: any = reactive({gradeList:[], // 年级及以下列表gradeActive: 0, // 年级筛选subjectActive: -1, // 科目筛选isShowRight:false, // 是否显示右侧rightList: [], // 右侧一级列表rightId:0,lastId:0
})type TleftData={AliasName: string,Children: Array<TleftData>CoverUrl: stringId: stringName: string
}type TProps = {leftData: Array<TleftData>
}
let prop = defineProps<TProps>()
let prs = toRaw(prop)
person.gradeList = prs.leftDataconst emit = defineEmits(['gradeMenu', 'okMenu'])// 年级切换
const gradeChange=(item:any,index:number)=>{person.gradeActive = indexemit('gradeMenu', item)
}
// 科目切换
const subjectChange = (item: any, index: number) => {person.subjectActive = indexperson.isShowRight=trueif (item.Children && item.Children.length > 0){person.rightList = item.Childrenperson.rightId=item.Id}else{person.rightList = []}
}
const MenuTree = (Id: number) => {console.log('点击完成后', Id)person.lastId = Id
};// 确认筛选
const okClick=()=>{person.isShowRight = falselet selectId = 0const gradeId = person.gradeList[person.gradeActive].Idconst subjectId = person.gradeList[person.gradeActive].Children[person.subjectActive] && person.gradeList[person.gradeActive].Children[person.subjectActive].Idif (person.lastId>0){selectId = person.lastId} else if (subjectId>0){selectId = subjectId} else if (gradeId > 0) {selectId = gradeId}emit('okMenu', selectId)person.lastId = 0
}
// 取消筛选
const cancelClick = () => {person.isShowRight = false
}
</script>
<style lang="scss">
.r_nav {display: flex;flex-wrap: wrap;color: #737272;font-size: 16px;.r_nav_item {margin-right: 20px;margin-bottom: 10px;}.r_nav_item_active {color: #5182FF;}
}.r_nav1 {white-space: normal !important;display: flex;flex-wrap: wrap;justify-content: start;color: #737272;height: auto !important;.r_nav_item1 {margin-right: 20px;margin-bottom: 15px;}.r_nav_item1_active {color: #5182FF;border: 1px solid #5182FF;}
}.r_nav2{max-width: 450px;min-width: 350px;
}
.r_item {padding: 15px 0;.r_item_title {font-weight: 500;margin-right: 15px;color: #000;font-size: 16px;}
}
</style>
<style lang="scss" scoped >
.screen_page {width: 1200px;height: calc(100vh - 200px);display: flex;position: relative;.screen_l{width: 257px;padding: 15px;font-size: 16px;color: #6D6D6D;background: #fff;.l_nav{display: flex;justify-content: space-between;.l_nav_item{padding: 5px 0px;border: 1px solid #5182FF;border-radius: 4px;color: #5182FF;width: 50%;text-align: center;margin-right: 10px;}.l_nav_item:last-child{margin-right: 2px;}.l_nav_item_active{color: #fff !important;background: #5182FF !important;}}.l_nav_panel::-webkit-scrollbar {width: 4px;}.l_nav_panel::-webkit-scrollbar-thumb{background: #eee;border-radius: 10px;}.l_nav_panel{margin-top: 15px;height: calc(100vh - 290px);overflow-y: scroll;.panel_item{border-radius: 4px;padding: 10px 5px 10px 10px;display: flex;justify-content: space-between;i{color: #D9E4FF;font-size: 20px;}}.panel_item_active{background: rgba(81, 130, 255, 0.15);color: #5182FF;i {color: #5182FF;}}}}.screen_r{border-left: 1px solid #D7D7D7;white-space: nowrap;width: calc(100% - 257px);z-index: 100000;background: #fff;padding: 20px 60px 20px 30px;position: relative;.r_item_socrll::-webkit-scrollbar{width: 0;}.r_item_socrll{border-bottom: 1px solid #EAEAEA;height: calc(100% - 80px);overflow-y: scroll;.r_item_box {border-bottom: 1px solid #EAEAEA;}.r_item_box:last-child {border:0;}.r_item:last-child{border: 0;}}.r_btn{position: absolute;bottom: 40px;right: 90px;.el-button{min-height: inherit;padding: 9px 32px;}.el-button:first-child{background: #5182FF;color: #fff;}.el-button:nth-child(2) {border: 1px solid #5182FF;color:#5182FF;}}}
}
</style>
四、课程列表页中的调用
// 页面使用
<template><div><Screen @gradeMenu="gradeMenu" @okMenu="okMenu" v-if="person.menuList && person.menuList.length > 0" :leftData="person.menuList"></Screen></div>
</template>// 引入组件
<script lang="ts" setup>
import Screen from "@/components/Screen/index.vue";// 年级切换
const gradeMenu = (item: any) => {// 获取传递过来的Idconsole.log(item.Id)
}
// 确认筛选
const okMenu = (lastId: number) => {// 获取筛选后点击确认传递过来的Idconsole.log(lastId)
}
</script>
希望我的愚见能够帮助你哦~,若有不足之处,还望指出,你们有更好的解决方法,欢迎大家在评论区下方留言支持,大家一起相互学习参考呀~
这篇关于【vue3】实现筛选页组件(深层嵌套循环数据切换)的封装和调用的文章就介绍到这儿,希望我们推荐的文章对编程师们有所帮助!


